課題とサブタスクを作成する
The building blocks of any project are issues. Issues act as the packets of work that travel through their respective workflows within their projects until the work is completed.
課題は、個別に割り当ておよび追跡が可能なサブタスクを持つことができます。また、課題レベルのセキュリティを制御して、課題をチームの特定のメンバーに制限することもできます。
On this page, you'll learn more about creating and converting issues and subtasks, and setting issue-level security. You can also import multiple issues and subtasks via the CSV import. Learn how to import multiple issues from a CSV file.
For those just getting started, head over to our admin docs to learn how to configure issue types.
はじめる前に
課題が関連するプロジェクトの課題の作成プロジェクト権限が必要です。
課題の作成
Jira の任意の場所に課題を作成する手順は、次のとおりです:
- Select Create (
 ).
). - 課題の概要を入力します。
- すべての必須フィールドと必要なその他のフィールドを入力します。
- Optional: To change which fields appear when you create another issue, select Configure Fields and select and deselect the fields you want. When you next create an issue, the selected fields will be displayed.
- オプション: 同じプロジェクトおよび課題タイプで他の課題を作成するには、もう1つ作成チェックボックスを選択します。設定と課題作成履歴に応じて、同じフィールドが事前に入力済になっている場合があります。新しい課題を作成する前にこれらを確認します。
- When you're finished, select Create.
When you create an issue using the global navigation bar as above, you can select the roles to which you want to restrict the issue. Learn more about restricting access to an issue.
Your newly created issue will appear at the top of your backlog, unless;
- you've selected an issue in the backlog — your issue will be created right below the selected issue
- you have specified a sprint when creating the issue — your issue will be created at the bottom of the sprint.
You can quickly create issues using the inline issue create in the Backlog (for Scrum boards, backlog, and future sprints only). Just select + Create issue. 
If your board's filter specifies more than one project, you'll still need to complete the full Create issue dialog.
When you use the inline issue create to create issues, your issues won’t be restricted to certain roles in the project. These issues can be accessed by anyone who can see your project. To restrict issues, you can create them using the global navigation bar. Learn more about restricting access to an issue.
You can also create an issue that automatically belongs to a particular epic. If you're using epics, select Configure Fields and add the Epic Link field to the screen. Then, you can add issues to epics as you create them. Learn more about working with epics.
課題を複製する
課題を複製すると、同じプロジェクト内の課題の複製を素早く作成できます。複製された課題は、元の課題とほとんど同じ情報 (概要、影響バージョン、コンポーネントなど) を保持します。ただし、一部の詳細 (例: 作業ログ、コメント、履歴、Confluence ページへのリンクなど) は複製されません。課題ステータスも対応するワークフローの最初のステップに戻り、解決状況はクリアされます。複製された課題を元の課題にリンクすることも可能です。
課題を複製するには:
- 課題を開きます。
- Select more actions (•••) > Clone
- 複製した課題の [概要] を任意で編集します。
- 複製している課題に適用可能な場合、次のオプションも選択できます。
- サブタスクを複製して既存のサブタスクをコピーする
- 添付ファイルを複製して既存の添付ファイルを追加する
- リンクを複製して既存のリンクされた課題を追加する
- スプリント値を複製して課題の現在のスプリント値とクローズ済みのスプリント値全体をコピーする
- Select Create
課題の分割
課題の分割は、課題がとても大きく、2 つ以上に分割して管理しやすくしたいときに便利です。アクティブ スプリントやカンバン ボードではなく、スクラム バックログとカンバン バックログ (有効化されている場合) からのみ課題を分割できます。
- スクラムまたはカンバン ソフトウェア開発プロジェクトのバックログに移動します。
- Right-click an issue and select Split issue.
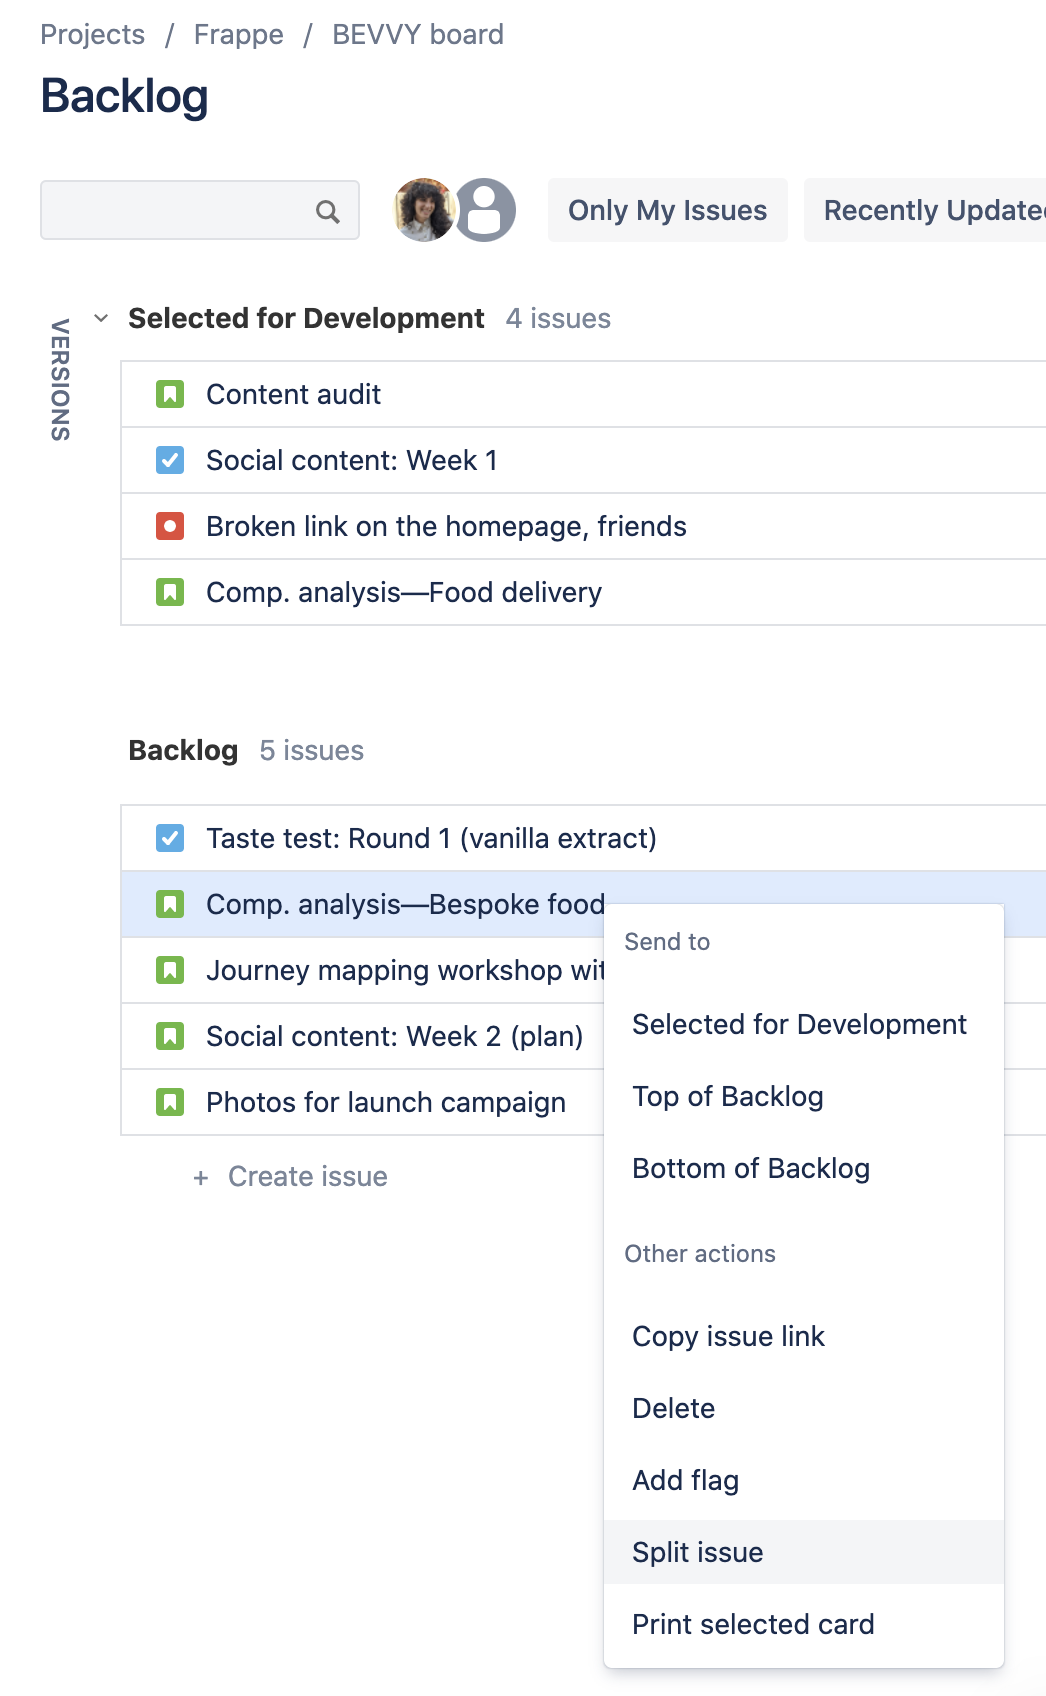
You'll also find the option to split an issue in the sprint or Selected for Development section of your Backlog. Learn more about your Kanban backlog.
サブタスクを作成する
課題のサブタスクを作成することによって、課題を小さなチャンクに分割したり、課題のさまざまな作業を別々の人に割り当てたりすることができます。サブタスクが課題の解決を遅らせているとことがわかった場合、サブタスクを課題に変換して、作業を独立して行うことができます。ある課題が実質的に大きな課題のサブタスクであることがわかった場合、課題をサブタスクに変換することもできます。
サブタスクは、管理者がサブタスクを有効にし、プロジェクトの課題タイプ スキームにサブタスクの課題タイプを追加している場合にのみ作成できます。
- 親課題にする課題を開きます。
- Select Create subtask (
 ) under the issue summary
 - Add an issue summary and select Create
サブタスクを作成する場合、以下の値は親タスクから継承されます。
- プロジェクト
課題セキュリティ レベル
(ある場合は) スプリント値
You can customize the Create subtask screen to show the fields you use most often. To do this, select Configure Fields at the top right corner of the dialog, and use the All and Custom links to switch between the default screen and your custom settings. Your changes are saved for future use.
課題タイプで作業する
Change the issue type in the issue view
課題を作成したあとで課題のタイプを変更し、必要な作業をより良く表すようにすることができます。たとえば、タスクとして起票した課題をバグに変更できます。
- 作業している課題を開きます。
- 左上の、課題キーの横にある課題タイプ アイコンをクリックします。
- 新しい課題タイプを選択します。

新しい課題タイプに別のフィールドがある場合や、別のワークフローがある場合、変更を完了するための [課題の移動] 画面が開かれます。
サブタスクを課題に変換する
- Navigate to the subtask issue you would like to convert.
- Select more (•••) > Convert to Issue.
- In Step 1. Select Issue Type screen, select a new issue type (i.e. a standard issue type) and select Next.
- If the subtask's current status is not an allowed status for the new issue type, Step 2. Select New Status screen is displayed. Select a new status and select Next.
- In Step 3. Update Fields screen, you will be prompted to enter any additional fields if they are required. Otherwise, you will see the message 'All fields will be updated automatically'. Select Next.
- The Step 4. Confirmation screen is displayed. If you are satisfied with the new details for the issue, select Finish.
- 課題が表示されます。親課題の課題キーが画面の上部に表示されなくなり、サブタスクではなくなったことがわかります。
課題をサブタスクに変換する
- Open the issue and select on the issue type icon at the top-left of the issue
- 利用可能な課題タイプの一覧から [サブタスク] を選択します。
- 新しいサブタスクの親課題を選択します。
課題にサブタスクがある場合、その課題をサブタスクに変換することはできません。まず、課題のサブタスクを独立した課題に変換する必要があります。それから必要に応じて、その課題を別の課題のサブタスクに変換できます。サブタスクを1つの課題から別の課題へ直接移動することはできません。独立した課題に変換してから、新しい親課題のサブタスクに変換する必要があります。
課題へのアクセスを制限する
アトラシアンではオープンな作業を推奨していますが、特定の作業を閲覧できる人物を制限したい場合もあります。たとえば、財務的な機密情報、採用情報および他の個人情報、セキュリティ関連のソフトウェア エンジニアリング作業に関するタスクを表示できるユーザーを制限したい場合があります。
企業管理対象プロジェクトとチーム管理対象プロジェクトの両方で課題を表示するユーザーを制限できますが、手順はそれぞれ異なります。
You can't edit project permissions or roles on the Free plan for Jira Software or Jira Work Management, and you can't configure work-level security on any Free plan (including Jira Service Management). Find out more about how project permissions work in Free plans. To take advantage of Jira's powerful project permission management features, upgrade your plan.
企業管理対象プロジェクトで課題へのアクセスを制限する
企業管理対象プロジェクトでは、課題のセキュリティ レベルを設定することでアクセスを制限できます。
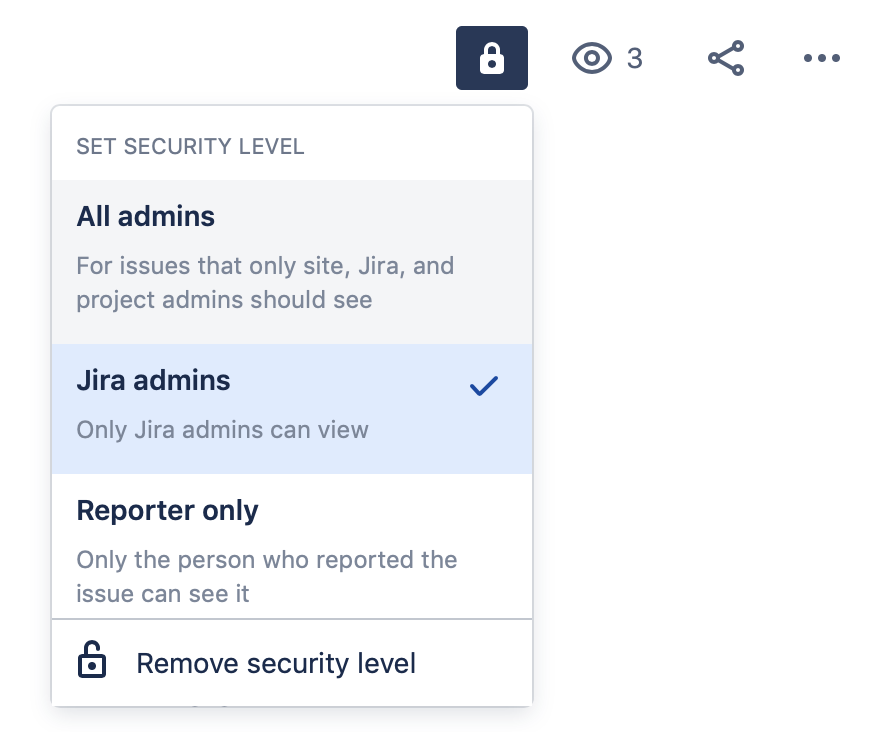
企業管理対象プロジェクトの課題で課題のセキュリティ レベルを設定するには、次の手順に従います。
課題の右上にある鍵のアイコンを選択します。アイコンは、プロジェクトでセキュリティ スキームが設定されている場合にのみ表示されます。
希望するセキュリティ レベルを選択します。
You can also remove an issue's security level by selecting the lock icon and selecting Remove security level.
Jira 管理者は課題セキュリティ スキームを通じて、セキュリティ レベル (およびそれらのメンバーシップ) を追加、編集、または削除できます。課題セキュリティ スキームの詳細をご覧ください。
チーム管理対象ソフトウェア プロジェクトで課題へのアクセスを制限する
チーム管理対象ソフトウェア プロジェクトでは、プロジェクトの特定のロールにアクセスを制限できます。
アクセスを制限するには「すべての課題を制限」権限を持つロールがプロジェクトに必要です。チーム管理対象プロジェクトのロールと権限に関する詳細についてご確認ください。
課題の作成時にアクセスを制限するには、次の手順を実行します。
ナビゲーション バーから [+ 作成] を選択します。
課題の必須フィールドに入力します。
フィールドの課題の一覧リストで [Restrict to] を選択します。
ドロップダウンから課題の表示を許可したいロールを選択します。
[作成] を選択します。
課題を特定のロールに制限するには、上記の手順を使用して課題を作成する必要があります。他の方法で課題を作成した場合、課題は制限されません。
課題の制限がある課題のサブタスクを作成すると、サブタスクは親課題の制限を継承します。サブタスクの課題の制限を個々に変更することはできません。サブタスクの課題の制限を設定するには、親課題の制限を更新する必要があります。
課題の作成後にアクセスを制限するには、次の手順を実行します。
課題の右上にある鍵のアイコンを選択します。
ドロップダウンから課題の表示を許可したいロールを選択します。
[制限] を選択します。
You can also remove roles by selecting the X next to the role’s name in the menu.
Team-managed project admins can add, edit, or remove roles and their membership in the Access page. Go to Project settings > Access. Learn more about roles and permissions in team-managed projects.
企業管理対象プロジェクトからチーム管理対象プロジェクトに課題を一括で移動する場合、課題は制限なしで移動されてオープンになります。
課題の制限が関連付けられているカスタム ロールを削除すると、そのロールは課題にアクセスできなくなります。例えば、カスタム ロール "開発者" があり、課題がそのロールのみに制限されている場合、ロールを削除すると課題にアクセスできなくなります。"開発者" を含む一連のロールに課題が制限されている場合、"開発者" ロールを削除しても他のロールからその課題にアクセスできます。
課題の削除
To delete an issue, you must have the Delete issues permission in the project where the issue was created. Learn more about project permissions.
To delete an issue:
- 課題に移動し、その詳細を表示します。
- Select ... > Delete.