Customize a work item's fields in next-gen projects
このヘルプ ページの内容について
以降の情報は、チーム管理対象プロジェクトにのみ適用されます。
どのタイプのプロジェクトの情報を参照すべきかを確認するには、プロジェクトの左側のサイドバーの下部をご覧ください。
[チーム管理対象プロジェクトをご利用中です] というアイコンに加えて [フィードバックを送信] や [詳細] メニュー項目が表示される場合は、チーム管理対象プロジェクトを利用しています。
そうではない場合は、企業管理対象プロジェクトを利用しています。企業管理対象プロジェクトのドキュメントをご確認ください。
特定のタイプの作業では、チームでタスクを完了するために特定の種類の情報が必要となる場合があります。Jira でこの情報を収集して表示し、作業を完了させるために必要なコンテキストをチームに提供できます。
This extra, customizable information appears in a work item's fields. You can customize each work type to show different fields and collect the exact information your team needs to succeed.
このページに記載されている内容を実行するには、プロジェクトの管理者ロールを持っている必要があります。チーム管理対象プロジェクトのロールに関する詳細をご確認ください。
How fields appear on your work items
When you add fields to your work types, they appear on all work items of that type.
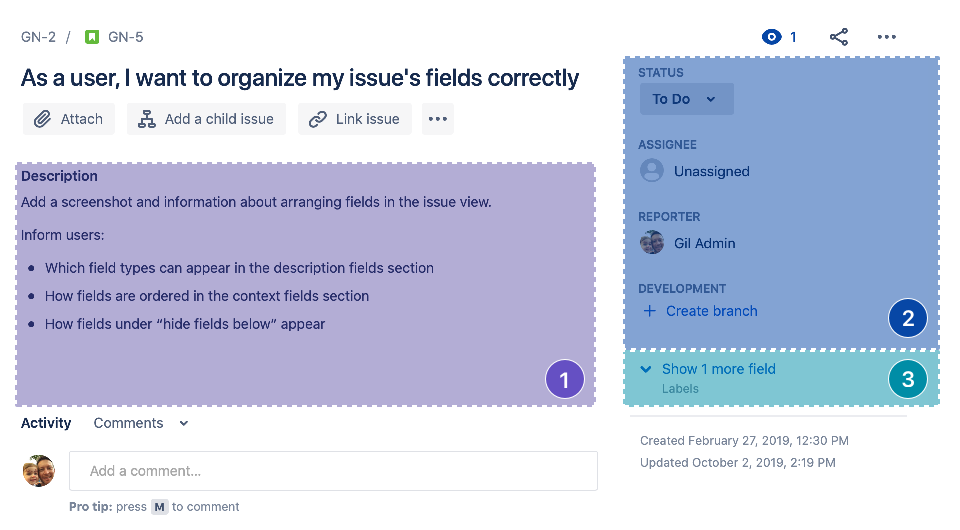
- Fields you add to Description fields in your project's settings appear in the main content area of your work items.
- Fields you add to Context fields in your project's settings appear on the right side of your work items.
- If you drag fields under the Hide fields below dotted line, they appear on your work items when someone completes the field. If the field is empty, it’s hidden. Select Show x more fields when viewing a work item to interact with hidden fields.
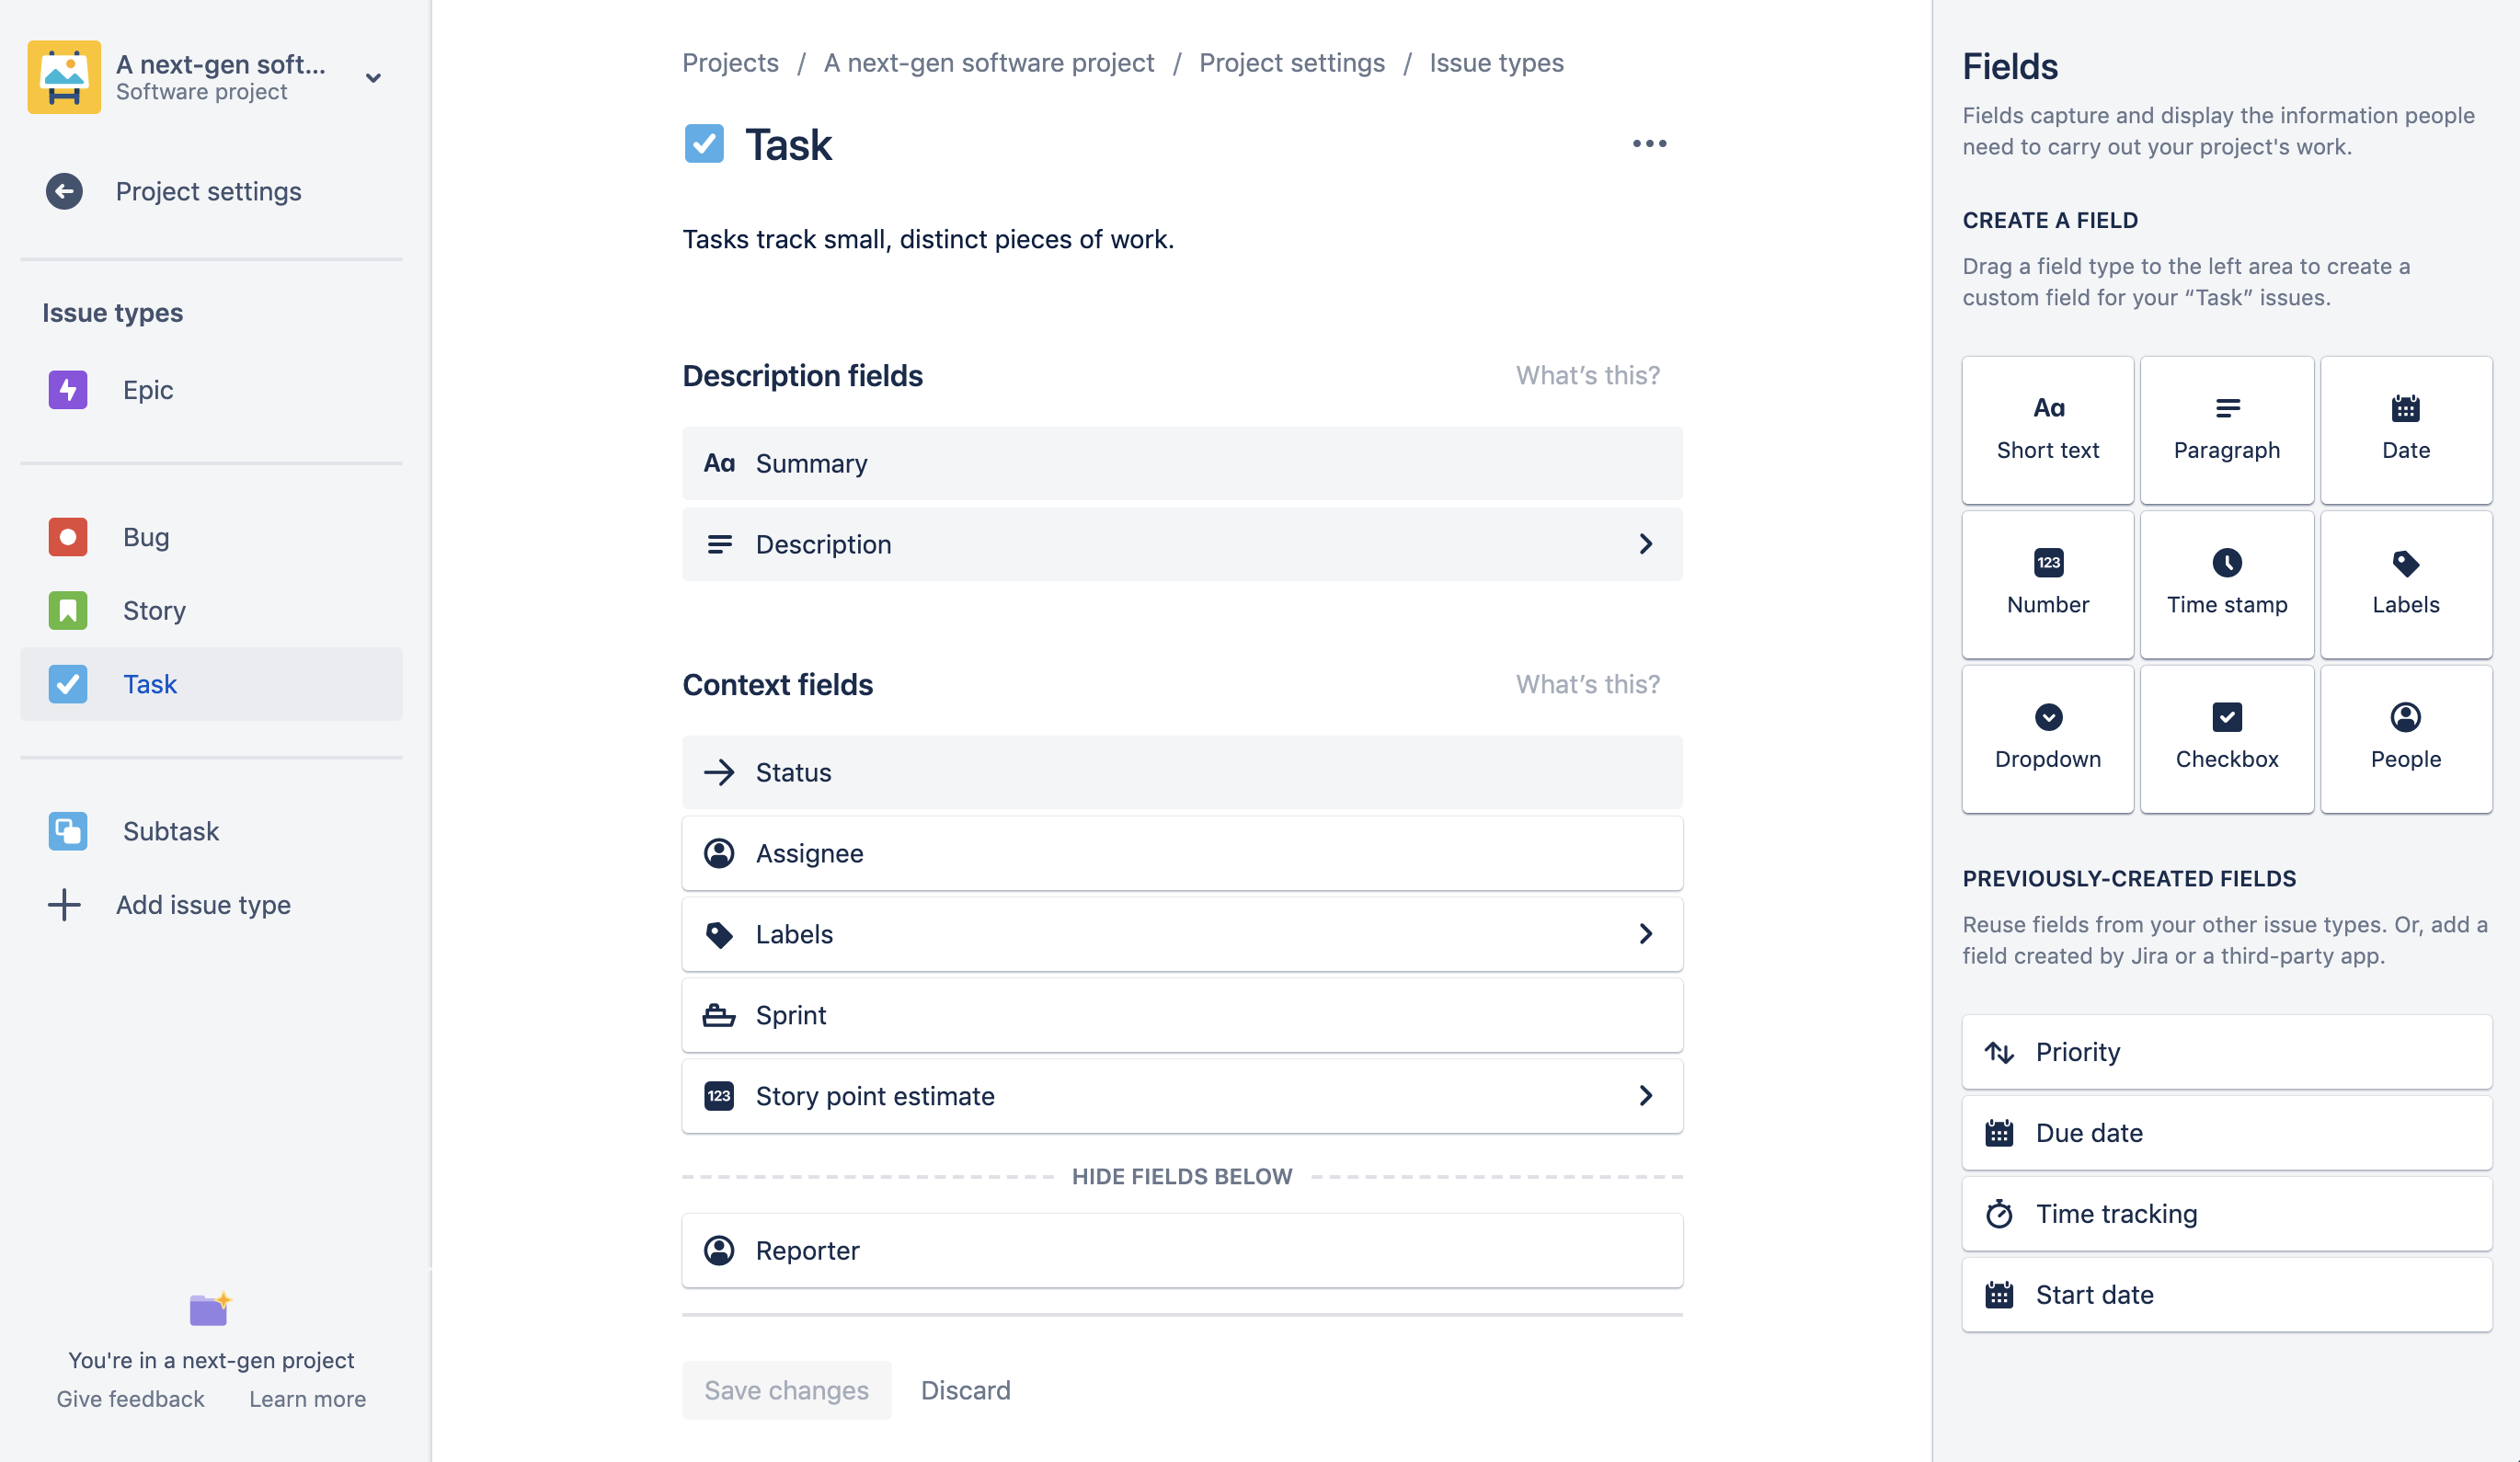
Add fields to your project
To add a field to your work type:
From your project's sidebar, go to Project settings then Fields.
On this page, select Add fields to search for an existing field to add to your project. If you can’t find the one you’re looking for, or want to make a new custom field, use Create field. Once the field is in your project, it’ll appear on the table on the Fields page. See what types of custom fields you can use.
To make it appear on an issue type, go to the Issue types page, select the issue type you want to add the field to, and drag the field from the toolbar into the list of fields. Jira highlights the areas you can drop the field into.
以前作成されたフィールドの一覧に含まれるものは以下のとおりです。
- fields you created on other work types
- fields Jira Software created for you
- サードパーティ製アプリによって作成されたフィールド
You can drag previously-created fields into your work type to reuse them. Using the same field between more than one work type makes it easier to sort, search, and report on those fields.
When a field appears on more than one work type in the same project, the fields share the same name and description. If you change the name in one work type, it will change in the others that use that field. Checkbox and dropdown fields also share their available options. But, the field can have a unique default value on each work type.
Fields in team-managed projects are contained within the project itself. Currently, you can't share a field created in one team-managed project with another team-managed project, or with company-managed project. Similarly, you can't use a custom field created in a company-managed project on your team-managed project work items.
To rearrange the order of fields in the work item, drag and drop the fields into the order you prefer.
フィールドを削除するには、フィールドをフィールド ツールバーにドラッグして戻します。
既定フィールド
By default, Jira adds the following fields to the work types in your software project:
要約 – タスクの一行の短い概要。このフィールドは Jira では常に必要です。
説明 – タスクの完了に必要な作業の詳細。
- Status – the current workflow status and available transitions that move the work item through the workflow.
- 担当者 – タスクに割り当てられたユーザー。
- Labels – tags used to group, filter, or search for work items.
- Reporter – the person who brought up the work item or task. Usually, this is the same as the person who created the work item. Some teams create work items in a working group or using a shared computer. These teams might need to adjust the reporter when creating work items.
Jira には一般的に使用されているフィールドもいくつか用意されており、これらを任意で追加することができます。
- Priority – the importance of the work item or task in relation to others in the project. Only Jira administrators can customize what priority levels are available across their Jira site. Learn more about configuring priorities.
- Due date – the agreed time and date when the work item or task should be resolved.
- 環境 - タスクに関係する特定の技術環境。例: "Chrome 78.0.3904.97、macOS バージョン 10.14.6、javascript V8 7.8.279.23"。
- Time tracking – an interactive field that allows people to log work hours and estimated time remaining on a task. Learn more about logging time on work items.
- Start date – the date when work began on a work item.
スプリントや見積などのプロジェクト機能を有効にすると、他にもいくつかのフィールドが表示される場合があります。
- Sprint – labels the work item or task with the sprint it belongs to. This is useful in filtering, sorting, and reporting. The Sprint field is created automatically when you enable the Sprints feature. Learn more about the sprints feature.
- Story point estimate – the estimated amount of effort that the work item should take, expressed as a numeral (not necessarily equivalent to an amount of time). The Story points field is created automatically when you enable the Estimation feature, and select Story points as your estimation statistic.
Learn more about estimation. Original estimate – the estimated amount of effort that a work item should take equivalent to an amount of time. The Original estimate field is always available. The Original estimate field is created automatically when you enable the Estimation feature and select Time as your estimation statistic. Learn more about estimation.
Required fields
Use required fields to mark a work type’s most important details.
From your project's sidebar, select Project settings > Work types.
Select the work type you want to edit.
必須にしたいすべてのフィールドで [必須] チェックボックスを選択します。
[変更を保存] を選択します。
Once saved, new work items of that type can’t be created unless the required field is filled out.
カスタム フィールドを編集する
カスタム フィールドを編集する方法は以下のとおりです。
From your project's sidebar, go to Project settings then Fields.
Find the field you want to edit on the table, then use the More (•••) menu to select Edit field. To remove a field, select Remove field instead.
Edit any of the field's options like its default description, default values, or other options.
Select Save changes. Once the field is in your project, it’ll appear on the table on the Fields page.
Your changes update across all your work types that use the field in your project.
Reuse custom fields
You can reuse fields from company-managed projects in your team-managed project
You can only reuse fields with global contexts. Learn more about global contexts.
To reuse custom fields:
From your project's sidebar, select Project settings > Work types.
Select the work type you want to add custom fields.
Search for fields using the search bar on the right under Fields. Alternatively, select a field from Suggested fields, which contains a list of all work items that were recently created, or are used in other work types of the project.
Drag and drop fields to move them to a section on the left.
[変更を保存] を選択します。
Some fields have icons next to them to represent the project they were created for, and can be used in other work types of the same project. You can customize these fields for your team’s needs.
Some fields in company-managed projects may have configurations and contexts that make these fields unavailable in the work item, even if you drag the field to one of the sections in the layout. As a result, these fields will not show up on the work item.