プロジェクトの詳細を編集する
Team-managed project settings work differently than what's described here. If you're the project admin for a team-managed project, check out our pages on managing team-managed projects and ignore what's written here.
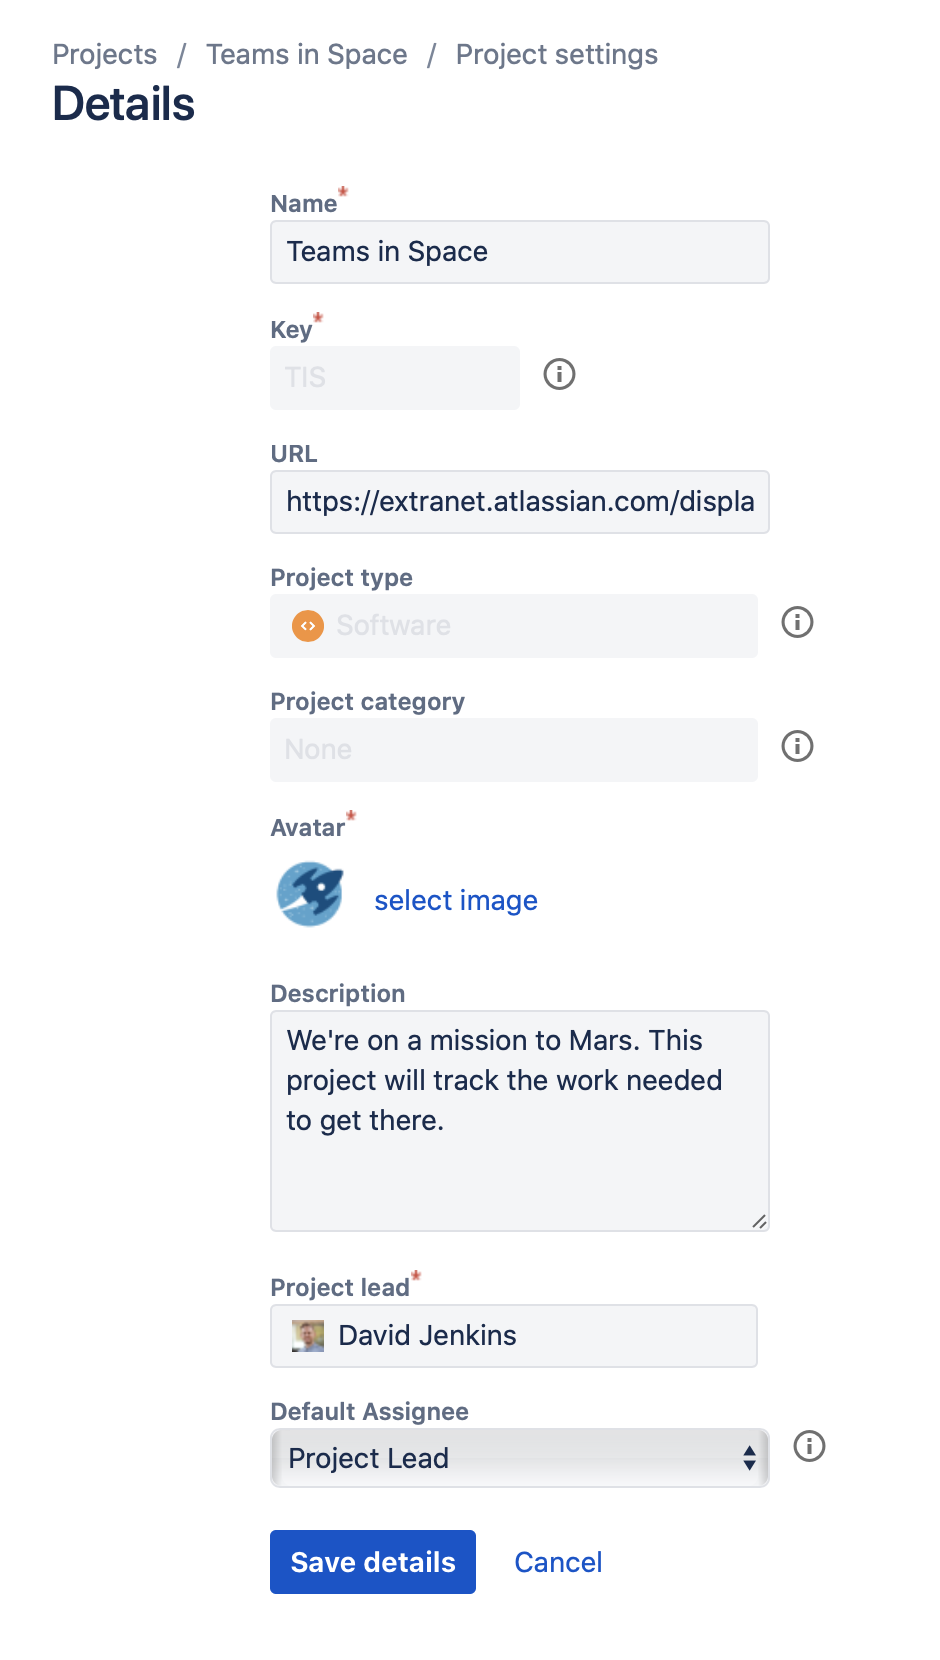
プロジェクト管理者はプロジェクトの次の項目を編集できます。
- 名前
- URL
- アバター
- 説明
- プロジェクトのリーダー
- 既定の担当者
To edit the project key or category, you must be a Jira admin.
プロジェクトの詳細を編集するには:
- 変更したいプロジェクトを開きます。
- プロジェクトのサイドバーから [プロジェクト設定] > [詳細] を選択します。
- 関連する詳細を編集して、[詳細を保存] を選択します。
Changing a project's key
To change your project's key, contact a Jira administrator.
Things to consider before changing a project key
- 古いプロジェクト キーを使用して新しいプロジェクトを作成することはできません。古いプロジェクト キーは、過去に関連付けられたプロジェクトを削除した場合にのみ利用できます。
- If you use Confluence with Jira, the Jira work item macros in Confluence will continue to work. Please note, if you don't see the change straight away, allow some time for the cache to refresh.
- Links containing the old project key will continue to work, as link aliases will not be updated with the new key. For example, if you have a link to a work item 'EXAMPLE-1' in the description of a work item, and you change the project key 'EXAMPLE' to 'DEMO', then the alias 'EXAMPLE-1' will not be updated to 'DEMO-1'. The link will still direct you to DEMO-1.
- キーを変更したら、ユーザーに変更を伝えることをお勧めします。ボード フィルタ、ダッシュボードのフィルタ ガジェット、およびその他のグローバル クエリを新しいキーで更新する必要があります。
プロジェクト URL を使用してプロジェクト詳細へリンクする
プロジェクト URL を追加することで、チーム メンバーや閲覧者を外部のサイトにリンクできます。プロジェクト URL は、ご利用のサイトのプロジェクト ディレクトリに表示されます。
ほとんどのチームは、JIRA サイト外のプロジェクト、ロードマップ、またはその他の重要なコンテンツに関するドキュメントへのアドレスを提供します。コラボレーションのために Confluence を使用する場合、チームのスペースへのリンクを追加することをお勧めします。
プロジェクトの URL を変更するには:
- プロジェクトのサイドバーから [プロジェクト設定] > [詳細] を選択します。
- [URL] フィールドで、リンクを入力します。
- [詳細を保存] を選択します。
プロジェクトの説明を追加する
また、管理者はプロジェクト設定の [概要] セクションで説明を確認できます。
プロジェクトの説明を追加または編集するには:
- プロジェクトのサイドバーから [プロジェクト設定] > [詳細] を選択します。
- [説明] フィールドに、プロジェクトの詳細説明を簡潔に入力します。
- [詳細を保存] を選択します。
プロジェクトのタイプを変更する
You can't directly change your project's type, but you can create a new project of a different type and move all of the work items into it. For example, if you have both Jira Work Management and Jira Software, you can create a software project and move all of the work items over from a business project to get finer control over your project's workflow, board settings and more.
別のプロジェクト タイプを使用すると、そのプロジェクトでのユーザーの作業方法も変更されます。
プロジェクト タイプと各タイプの相違点に関する詳細は、こちらをお読みください。
Editing a project's category
Your Jira admin may add project categories to help manage projects across your Jira site. Contact a Jira admin to assign your project to one of those categories.
プロジェクトのアバターを変更する
アバターはプロジェクトの名前に顔を与えることができます。アバターはプロジェクト サイドバーおよびサイトの全プロジェクト一覧に表示されます。
プロジェクトのアバターを変更するには:
- プロジェクトのサイドバーから [プロジェクト設定] > [詳細] を選択します。
- [アバター] フィールドで、ご使用の現在のアバターを選択します。
- 既定のアイコンから選択するか、独自のものをアップロードします。
- [詳細を保存] を選択します。
プロジェクト リーダーを変更する
通常、プロジェクトのリーダーはプロジェクト管理者で、プロジェクト設定の制御と管理を行います。
長期的なプロジェクトでは、チームのメンバーの移動に応じてプロジェクト リーダーを変更する必要が生じる場合もあります。
プロジェクト リーダーを変更するには:
- プロジェクトのサイドバーから [プロジェクト設定] > [詳細] を選択します。
- [プロジェクト リーダー] フィールドで、新たにプロジェクトを率いるチーム メンバーを設定します。
- [詳細を保存] を選択します。
プロジェクトの既定の担当者を追加または変更する
When work items are created in your project, you can set a default assignee. This is useful for open projects where everyone on the site can report tasks to your project.
The default assignee is typically a team member who prioritizes or validates that reported work items are meant for their team and distributes these tasks to their team members accordingly. By default, they receive a notification when someone creates a work item in the project.
プロジェクトの既定の担当者を変更するには:
- プロジェクトのサイドバーから [プロジェクト設定] > [詳細] を選択します。
- [既定の担当者] フィールドで、プロジェクトの既定の担当者を指名します。
- [詳細を保存] を選択します。
既定の担当者は "未割り当て" または" プロジェクト リード" のいずれかにのみなることにご注意ください。特定の個人を既定の担当者にするには、上記の "プロジェクト リード" を変更する必要があります。