成果物の共有
ジョブ間での成果物の共有
アーティファクトの依存関係を使用して、さまざまなステージのジョブ間でアーティファクトを共有できます。たとえば、ビルドで受け入れテストを実行して、WAR を毎回再構築せずに同じ WAR をジョブ間で共有するとします。
アーティファクトが後続のジョブと共有されるたびに、ジョブのエージェントにコピーされます。
異なるステージにある 2 つのジョブ間でアーティファクトを共有する方法は次のとおりです。
- Navigate to the configuration pages for the job that will produce the artifact, as described in Configuring jobs, and select the Artifacts tab (see Configuring a job's build artifacts).
- Either select Share for an existing artifact, or create a new artifact definition, as described above.
Navigate to the job in a subsequent stage that will consume the artifact, and select the Artifacts tab.
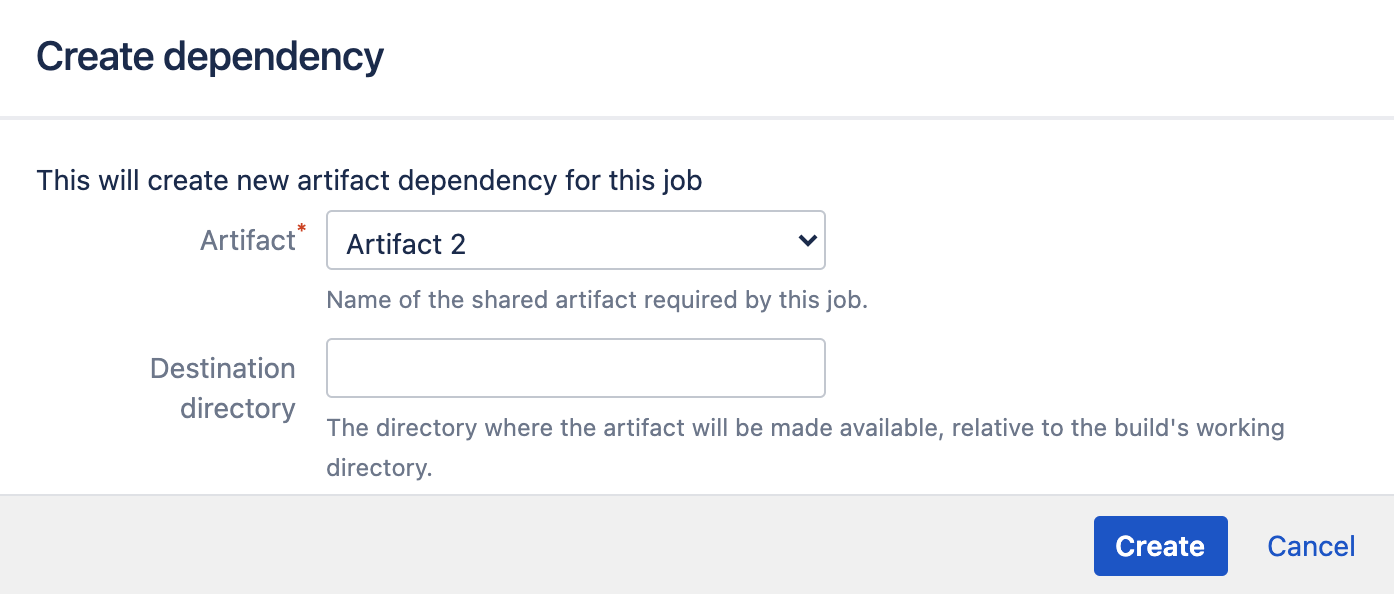
Select Create dependency, then:
Select from the Artifact list.
Specify the Destination directory, then select Create.
- [アーティファクト] リストには、共有としてマークされた前のステージにあるジョブのアーティファクトのみが表示されます。詳細は「ジョブのビルド アーティファクトを設定する」をご覧ください。
- [移動先ディレクトリ] はビルド ディレクトリと相対関係があります。移動先ディレクトリを参照するのに絶対パスを使用しないでください。
- 最新の成功したビルドのアーティファクトが使用されます。アーティファクトを生成する計画のビルドが成功しなかったり、アーティファクトの有効期限が切れたりすると、そのアーティファクトを使用するジョブは失敗します。
ビルド プラン間での成果物の共有
You can share artifacts between different build plans, however you need to use the Artifact downloader task to do so. For example, you may want to run acceptance tests on a particular build from a different plan by sharing the same WAR from one plan to another without rebuilding it each time.
2 つのビルド計画でアーティファクトを共有する方法は次のとおりです。
- アーティファクトを関連付けるビルド計画を探します。
- Select Actions > Configure plan.
- Select Stages & jobs and select a job or create a new job if one does not already exist.
- Select the Tasks tab for the selected job.
Select Add task > Artifact downloader.
次のオプションを使用して、設定を完了します。フィールド 説明 Optional? タスクの説明 アーティファクト ダウンローダー タスクの簡単な説明。 このタスクを無効化 Select this checkbox to disable the task. - Add condition to task Make task run only when a certain condition is met.
You can find conditions on Atlassian Marketplace or implement your own.Source plan The build plan that is the source of the artifact you need to download. Plan branch selection strategy Decide which plan branch selection strategy to use. There are two available strategies:
Match by plan branch name or use default plan branch if not matched. If you select this option, Bamboo fetches the artifact from the source plan branch with the same name. If the branch doesn't exist, Bamboo sources the artifact from the default plan branch.
Select custom plan branch If you select this option, Bamboo will always take the artifact from the specified source plan branch.
(default)
- Select Add another artifact to add another artifact to the download list. Alternatively, use the grey cross icon to delete an artifact from your configuration.
- 保存 を選択します。
- The Artifact dropdown menu only shows artifacts from jobs in previous stages that have been marked as shared. This is described in Configuring a job's build artifacts.
- The destination directory is relative to the build directory. Do not use the absolute path to refer to the destination directory.
ビルド プランからデプロイメント環境への成果物の共有
You can also share artifacts from a build plan into a deployment environment. For example, you may wish to share a particular build result from a plan with a deployment environment. To do this, you need to add the Artifact downloader task to a deployment environment during or after the environment creation process.
ビルド計画からデプロイ環境へアーティファクトを共有する方法は次のとおりです。
- Open your deployment project. Expand the relevant environment panel, and select Edit tasks. Select Add task > Artifact download.
次のオプションを使用して、設定を完了します。
フィールド 説明 Optional? タスクの説明 アーティファクト ダウンローダー タスクの簡単な説明。 このタスクを無効化 Select this checkbox to disable the task. - Add condition to task Make task run only when a certain condition is met.
You can find conditions on Atlassian Marketplace or implement your own.Artifact name Use the dropdown menu to locate the name of the artifact that you want to download. Destination path アーティファクトをダウンロードする作業ディレクトリの場所。 - Select Add another artifact to add another artifact to the download list.
- 保存 を選択します。
- The Artifact dropdown menu only shows artifacts from jobs in previous stages that have been marked as shared. This is described in Configuring a job's build artifacts.
- Destination directory is relative to the build directory. Don't use the absolute path to refer to the destination directory.

