カスタマー ポータルを設定する
プロジェクトのポータルを表示する
カスタマイズを始める前にポータルのデザインを確認する方法は以下のとおりです。
- サービス プロジェクトに移動します。
- サイドバーから [カスタマー チャンネル] を選択します。
- [カスタマー ポータル] セクションで [ポータルにアクセス] を選択します。
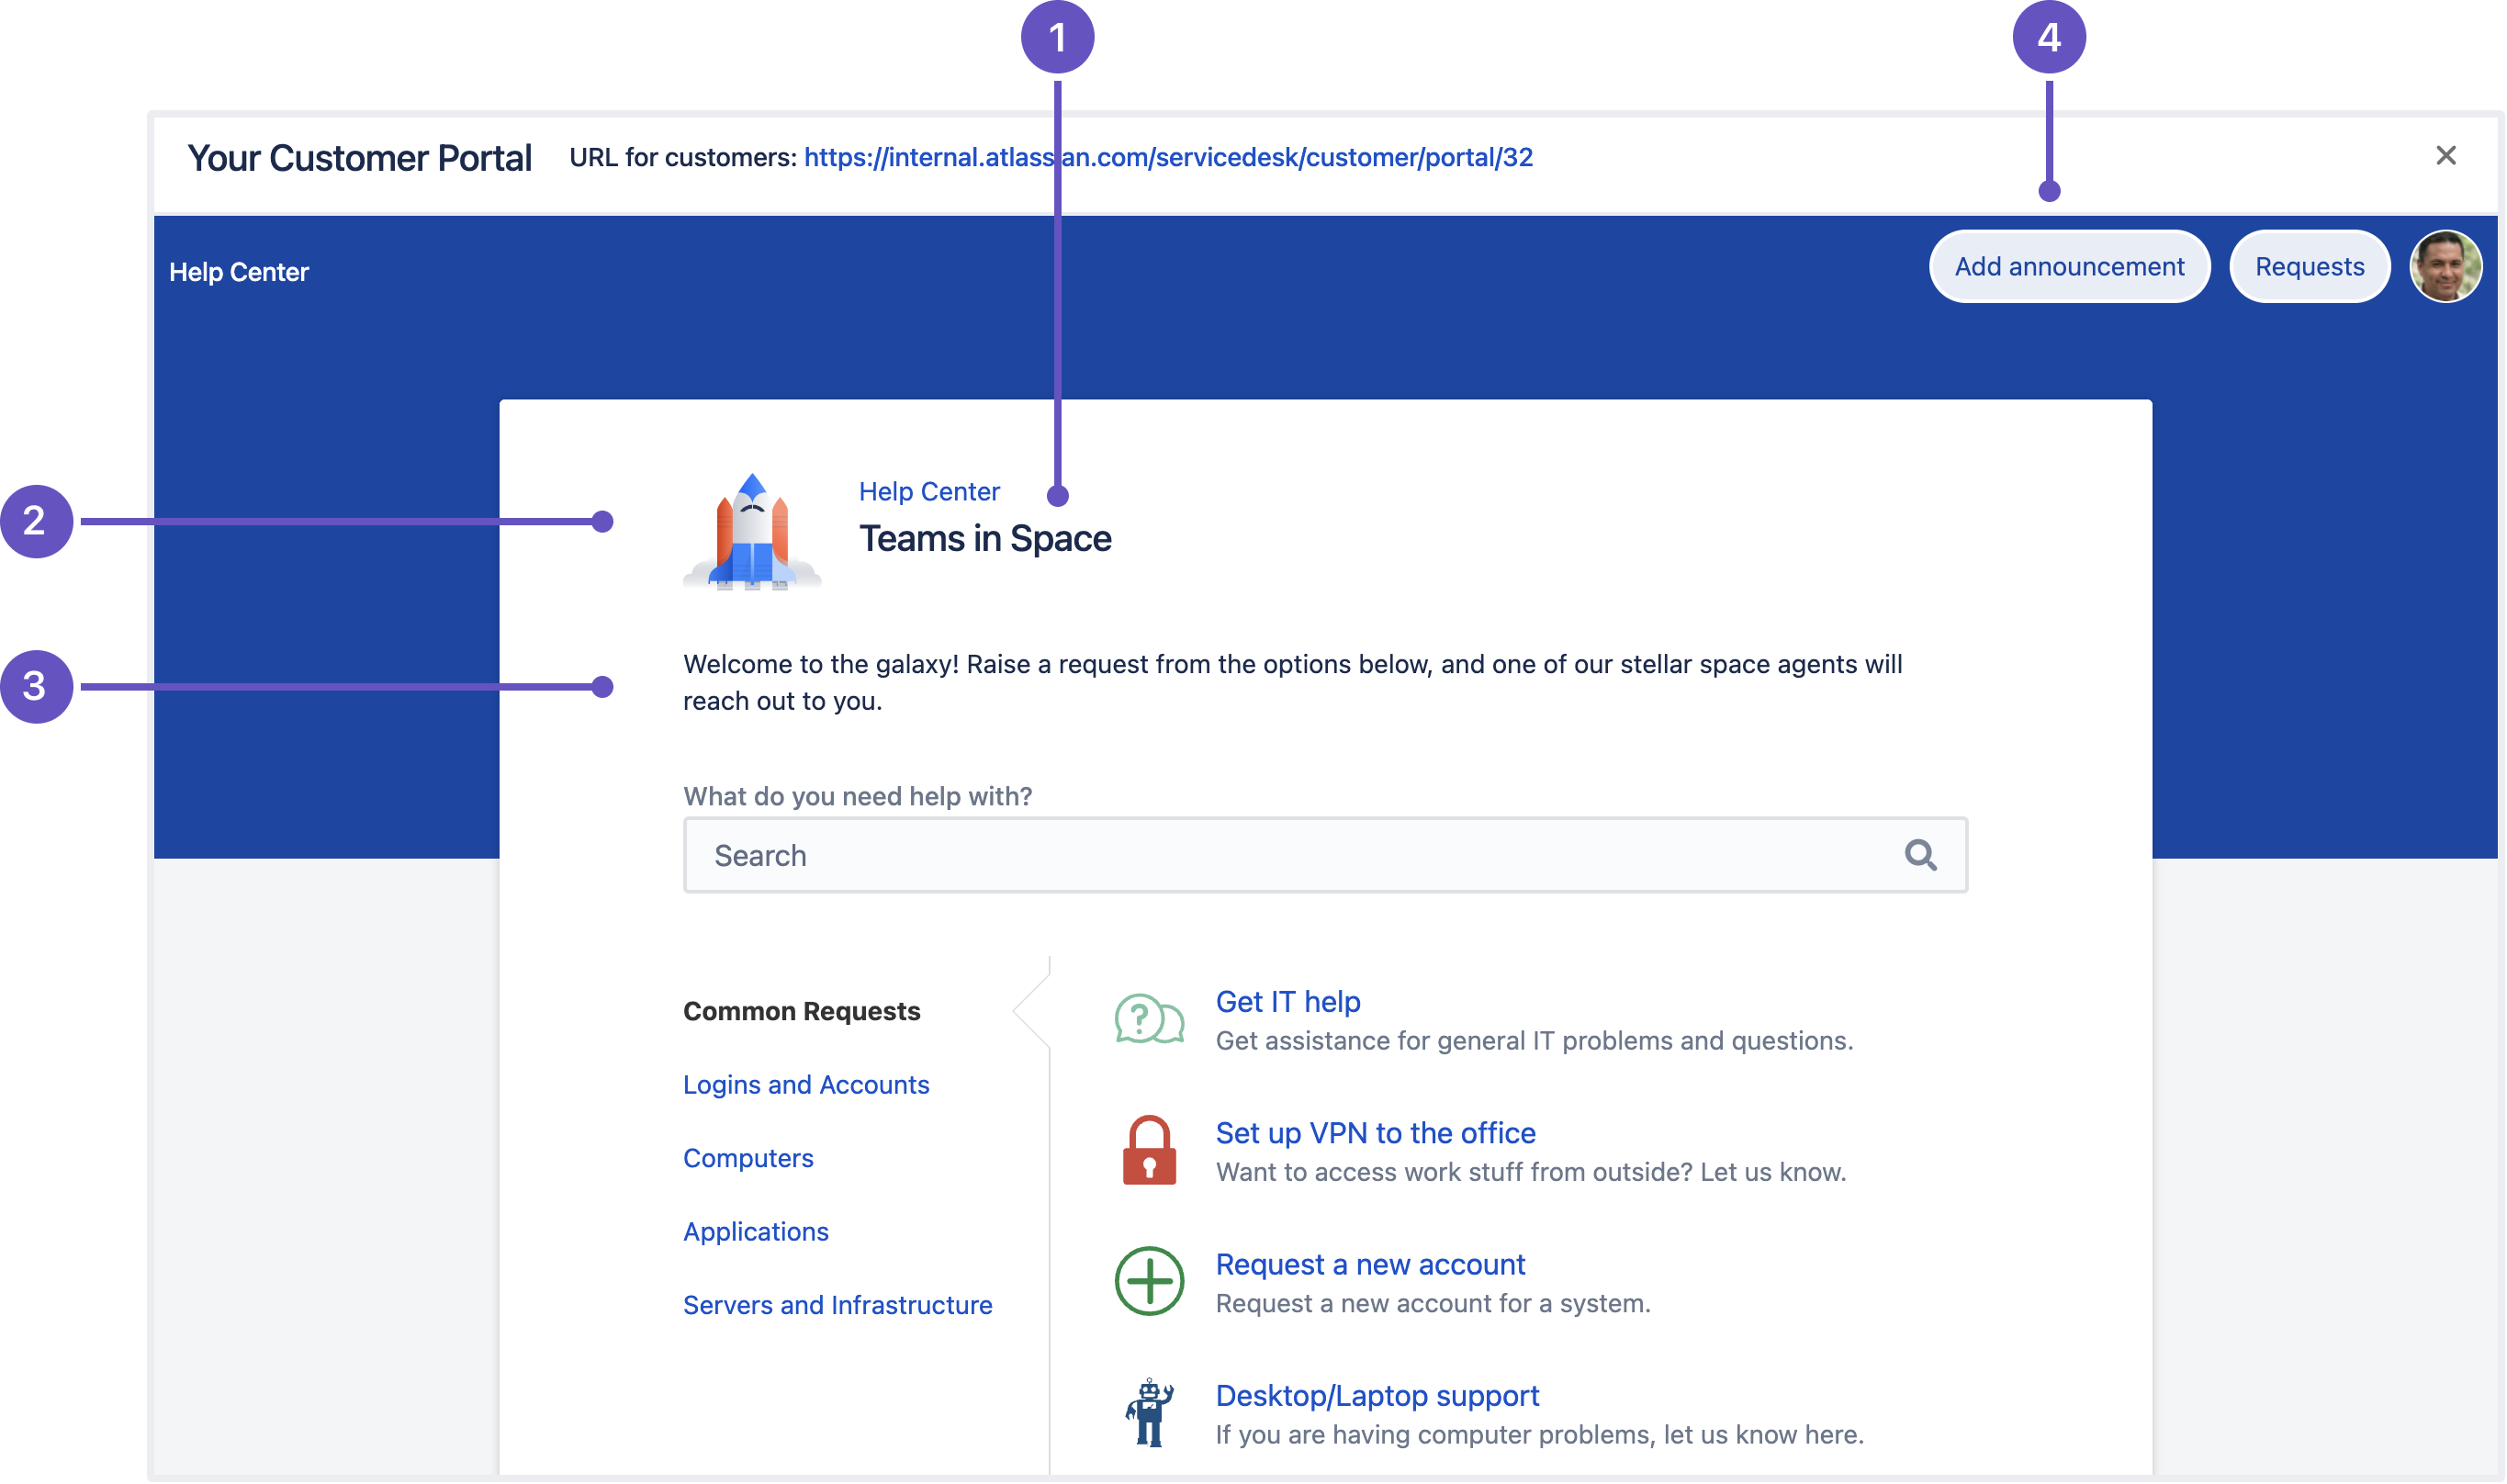
1: ポータルにアクセスするためのリンク
カスタマーポータルをブランド化する
カスタマー ポータルの次のエリアを変更できます。
- 名前
- ウェルカム メッセージ
- ロゴ
- お知らせ
バナー、リンク、ボタンの色など、その他の要素はヘルプ センター設定から継承されます。
カスタマー ポータルをブランディングするには、次の手順を実行します。
- プロジェクトのサイドバーから、[プロジェクト設定]、[ポータル設定] の順に選択します。
- [ポータルをカスタマイズ] セクションでは、ポータル名、ウェルカム メッセージ、ロゴを変更できます。
ロゴは、サービス プロジェクトから送信される通知に表示されます。 - 重要な情報をユーザーに通知するには、[お知らせを追加する] を選択します。たとえば、勤務時間やサービス停止などについて通知できます。
1: ポータル名
2: ロゴ
3: ウェルカム メッセージ
4: お知らせの管理
リクエストタイプを設定する
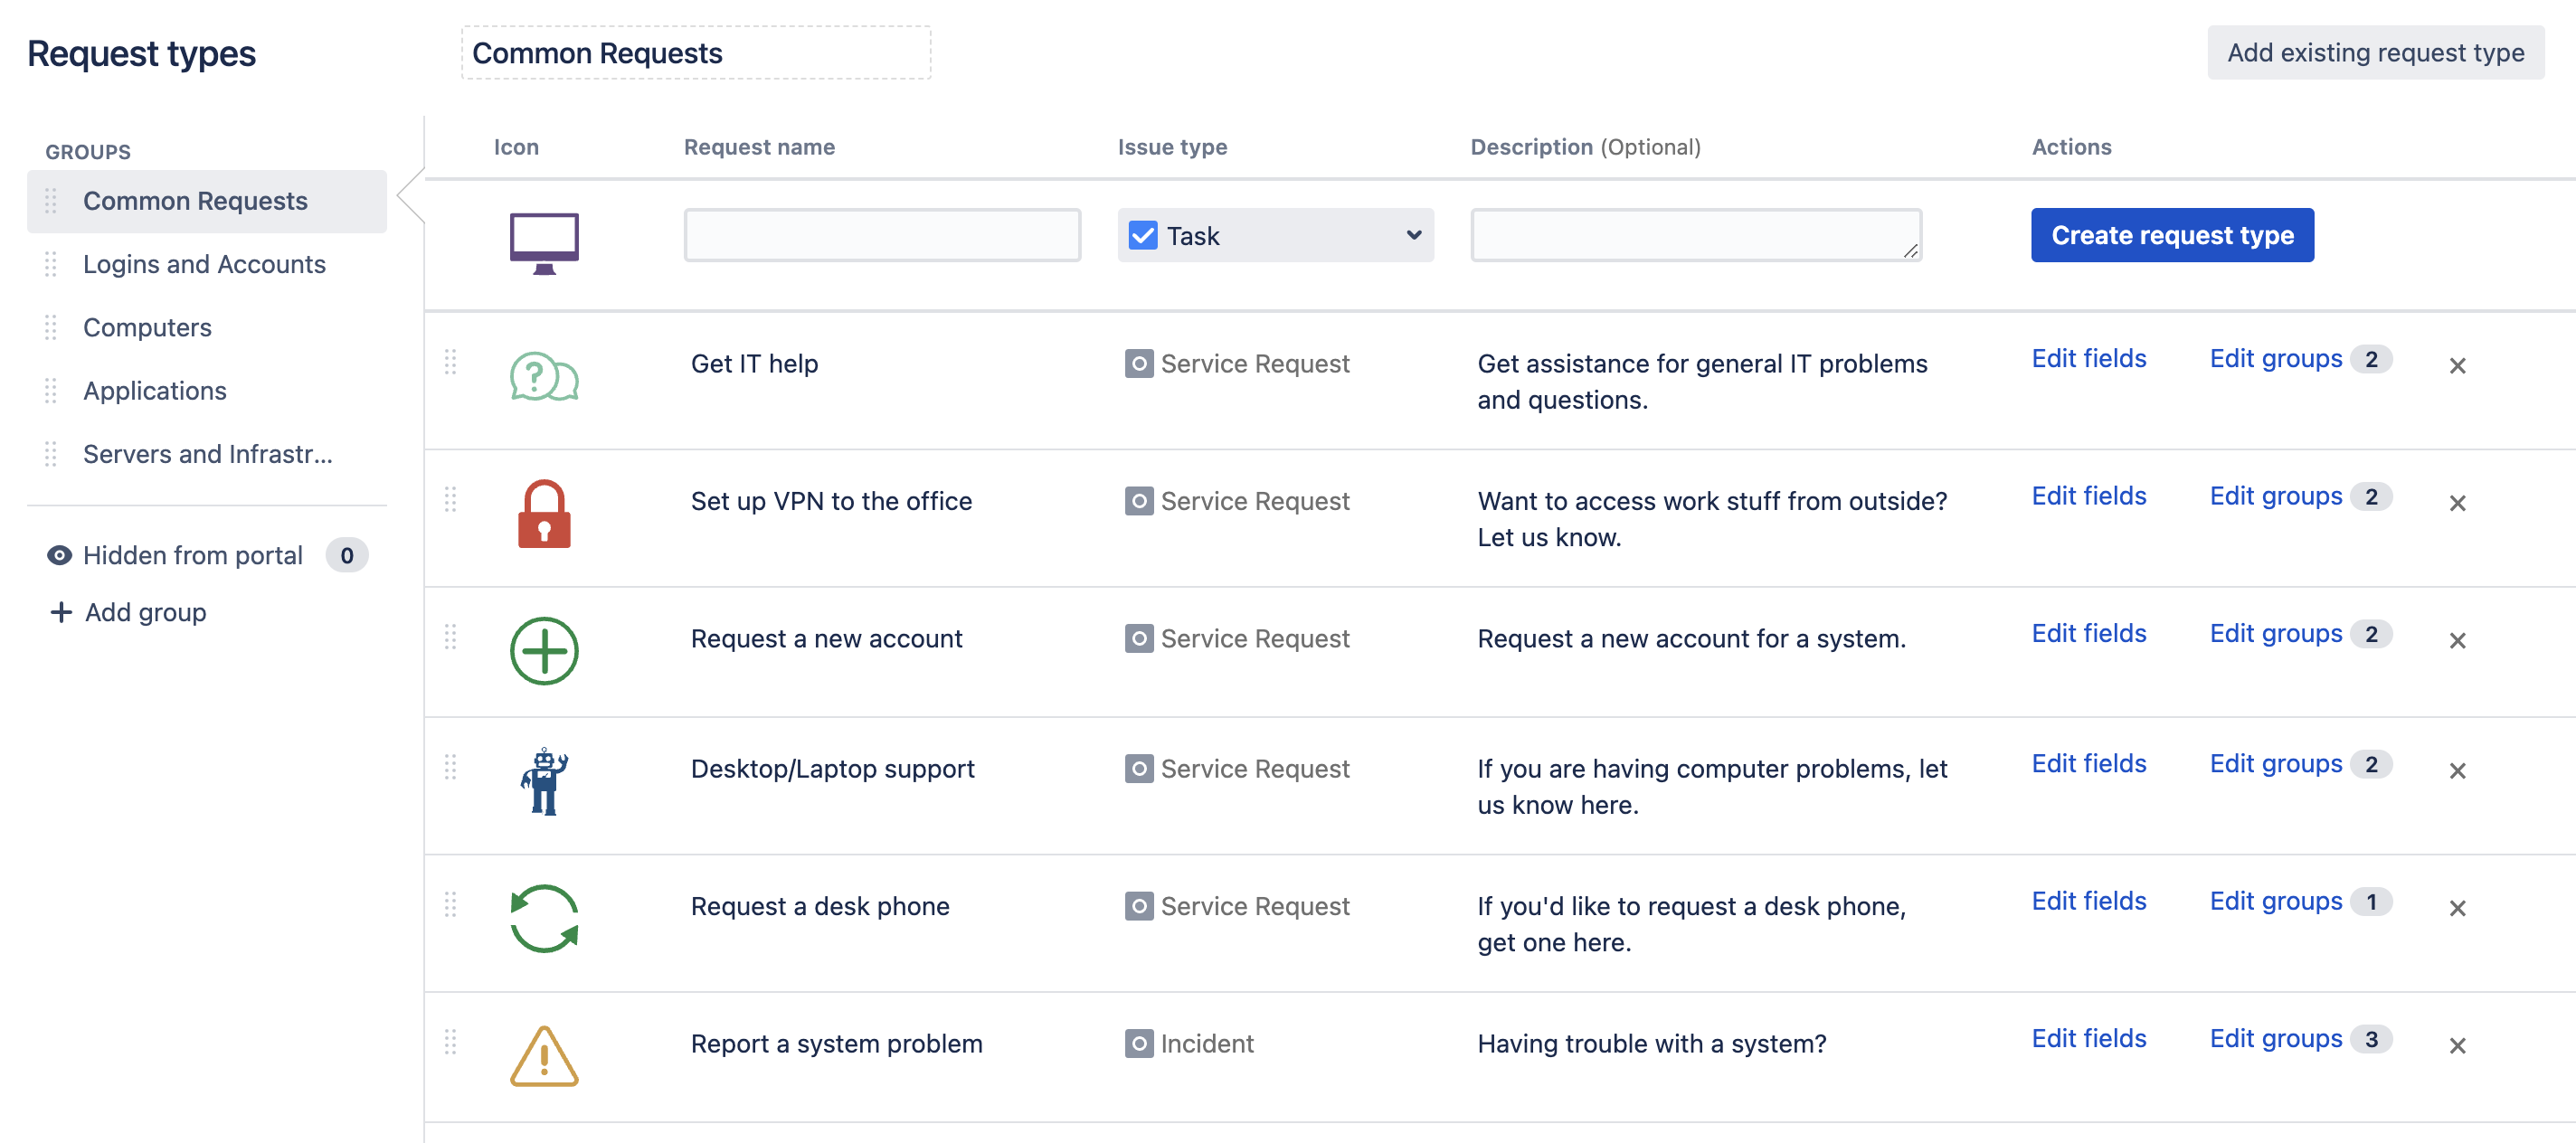
Jira Service Management には、一般的な IT ヘルプ シナリオに対応する複数のリクエスト タイプが用意されています。リクエスト タイプは既定でグループ分けされているため、必要とするリクエストをカスタマーが見つけやすくなっています。
カスタマーがポータルから起票するリクエストのタイプだけでなく、リクエスト タイプに関連するグループもカスタマイズできます。たとえば、「一般的なリクエスト」グループを追加し、IT サポートなどの問題についてカスタマーが支援を受けやすくすることができます。
リクエスト タイプを作成して管理するには、プロジェクトのサイドバーから [プロジェクト設定]、[リクエスト タイプ] の順に選択します。リクエスト タイプの設定についての詳細はこちらのリンク先をご確認ください。
トランジションの追加
ヘルプ依頼者にリクエストのステータスを更新してもらいたい場合は、カスタマー ポータルでステータスのトランジションを許可できます。たとえば、ヘルプ依頼者の問題を解決するナレッジ ベース記事をエージェントが共有した場合、ヘルプ依頼者はポータルから直接リクエストを解決済みとしてマークできます。
ポータルにトランジションを追加するには、次の手順を実行します。
- プロジェクトのサイドバーから、[プロジェクト設定]、[ワークフロー] の順に選択します。
- ポータルに追加するトランジションが含まれるワークフローの横にある編集 (鉛筆) アイコンを選択します。たとえば、[Jira Service Management 用サービス リクエスト対応ワークフロー] などです。
- サービス プロジェクトで [プロジェクト設定]、[ワークフロー] の順に移動します。
- ポータルに追加するトランジションが含まれるワークフローの横の鉛筆アイコンを選択します。
- [ダイアグラム] をクリックして、ダイアグラム ビューを開きます。
- ワークフローのトランジションを選択してから、[Show transition on the customer portal (カスタマー ポータルでトランジションを表示)] チェックボックスをオンにします。
顧客のトランジションは、他のワークフローのトランジションよりも少し異なる挙動を示します:
- 画面は、カスタマーポータルに表示されません。ポータルにトランジションを追加すると、顧客がトランジションをするリクエストの解決状況を設定することができます。
- 課題は、ポータルからトランジションされる場合は、トランジション時に定義されたすべての検証条件をバイパスします。
ワークフローとトランジションの詳細については、「高度なワークフローの設定」を参照してください。
ポータルのトランジションが動作しているように見えない場合は、自動化ルールがトランジションと競合していないかどうかを確認してください。自動化ルールの詳細については、「サービス プロジェクトを自動化する」を参照してください。
ポータルへのアクセスを管理する
ポータルへのアクセスは次のようにさまざまな方法で構成できます。
- 誰でもポータルでアカウントへのサインアップを実行できるようにします。
- サービス プロジェクトに追加したカスタマーのみを許可します。
Jira 管理者が Jira Service Management インスタンス全体にわたってログイン不要のポータル設定を構成している場合は、ログインしなくても誰でもポータルにアクセスし、リクエストを起票できます。
詳細については、サービス プロジェクトに対するアクセスの管理に関するこちらのリンク先をご確認ください。
カスタマー ポータルは、アトラシアンのシングル サインオン (SSO) フレームワークである Atlassian Crowd と連携します。サードパーティの SSO プロバイダーとの連携の詳細については、「Jira および Confluence とのシングル サインオン連携」を参照してください。
検索が必要かどうかを選択する
ご自身が Confluence ナレッジ ベースにリンクしておらず、ヘルプ依頼者がさまざまなリクエスト タイプを検索する見込みがない場合は、検索バーを無効にすることで、ポータルをシンプルで整理された状態に保てます。
- プロジェクトのサイドバーから、[プロジェクト設定]、[ポータル設定] の順に選択します。
- [検索] セクションでチェック ボックスをオフにします。
常に有効になるヘルプ センターの検索バーにはこの設定は影響しません。
コメントへのリアクションを有効にする
ヘルプ依頼者に絵文字でのコメントへのリアクションを許可できます。既定では、コメントのリアクションはポータルで無効になっています。
コメントへのリアクションを有効にするには、次の手順に従います。
- プロジェクトのサイドバーから、[プロジェクト設定]、[ポータル設定] の順に選択します。
- [コメントのリアクション] セクションで [このプロジェクトのカスタマー ポータルでコメントのリアクションを許可する] チェック ボックスをオンにします。
ヘルプセンター内のすべてのカスタマー ポータルを表示
ヘルプ センターには、Jira Service Management インスタンスのすべてのカスタマー ポータルが表示されます。顧客はここで、アクセス可能な任意のポータルでリクエストを申請できます。
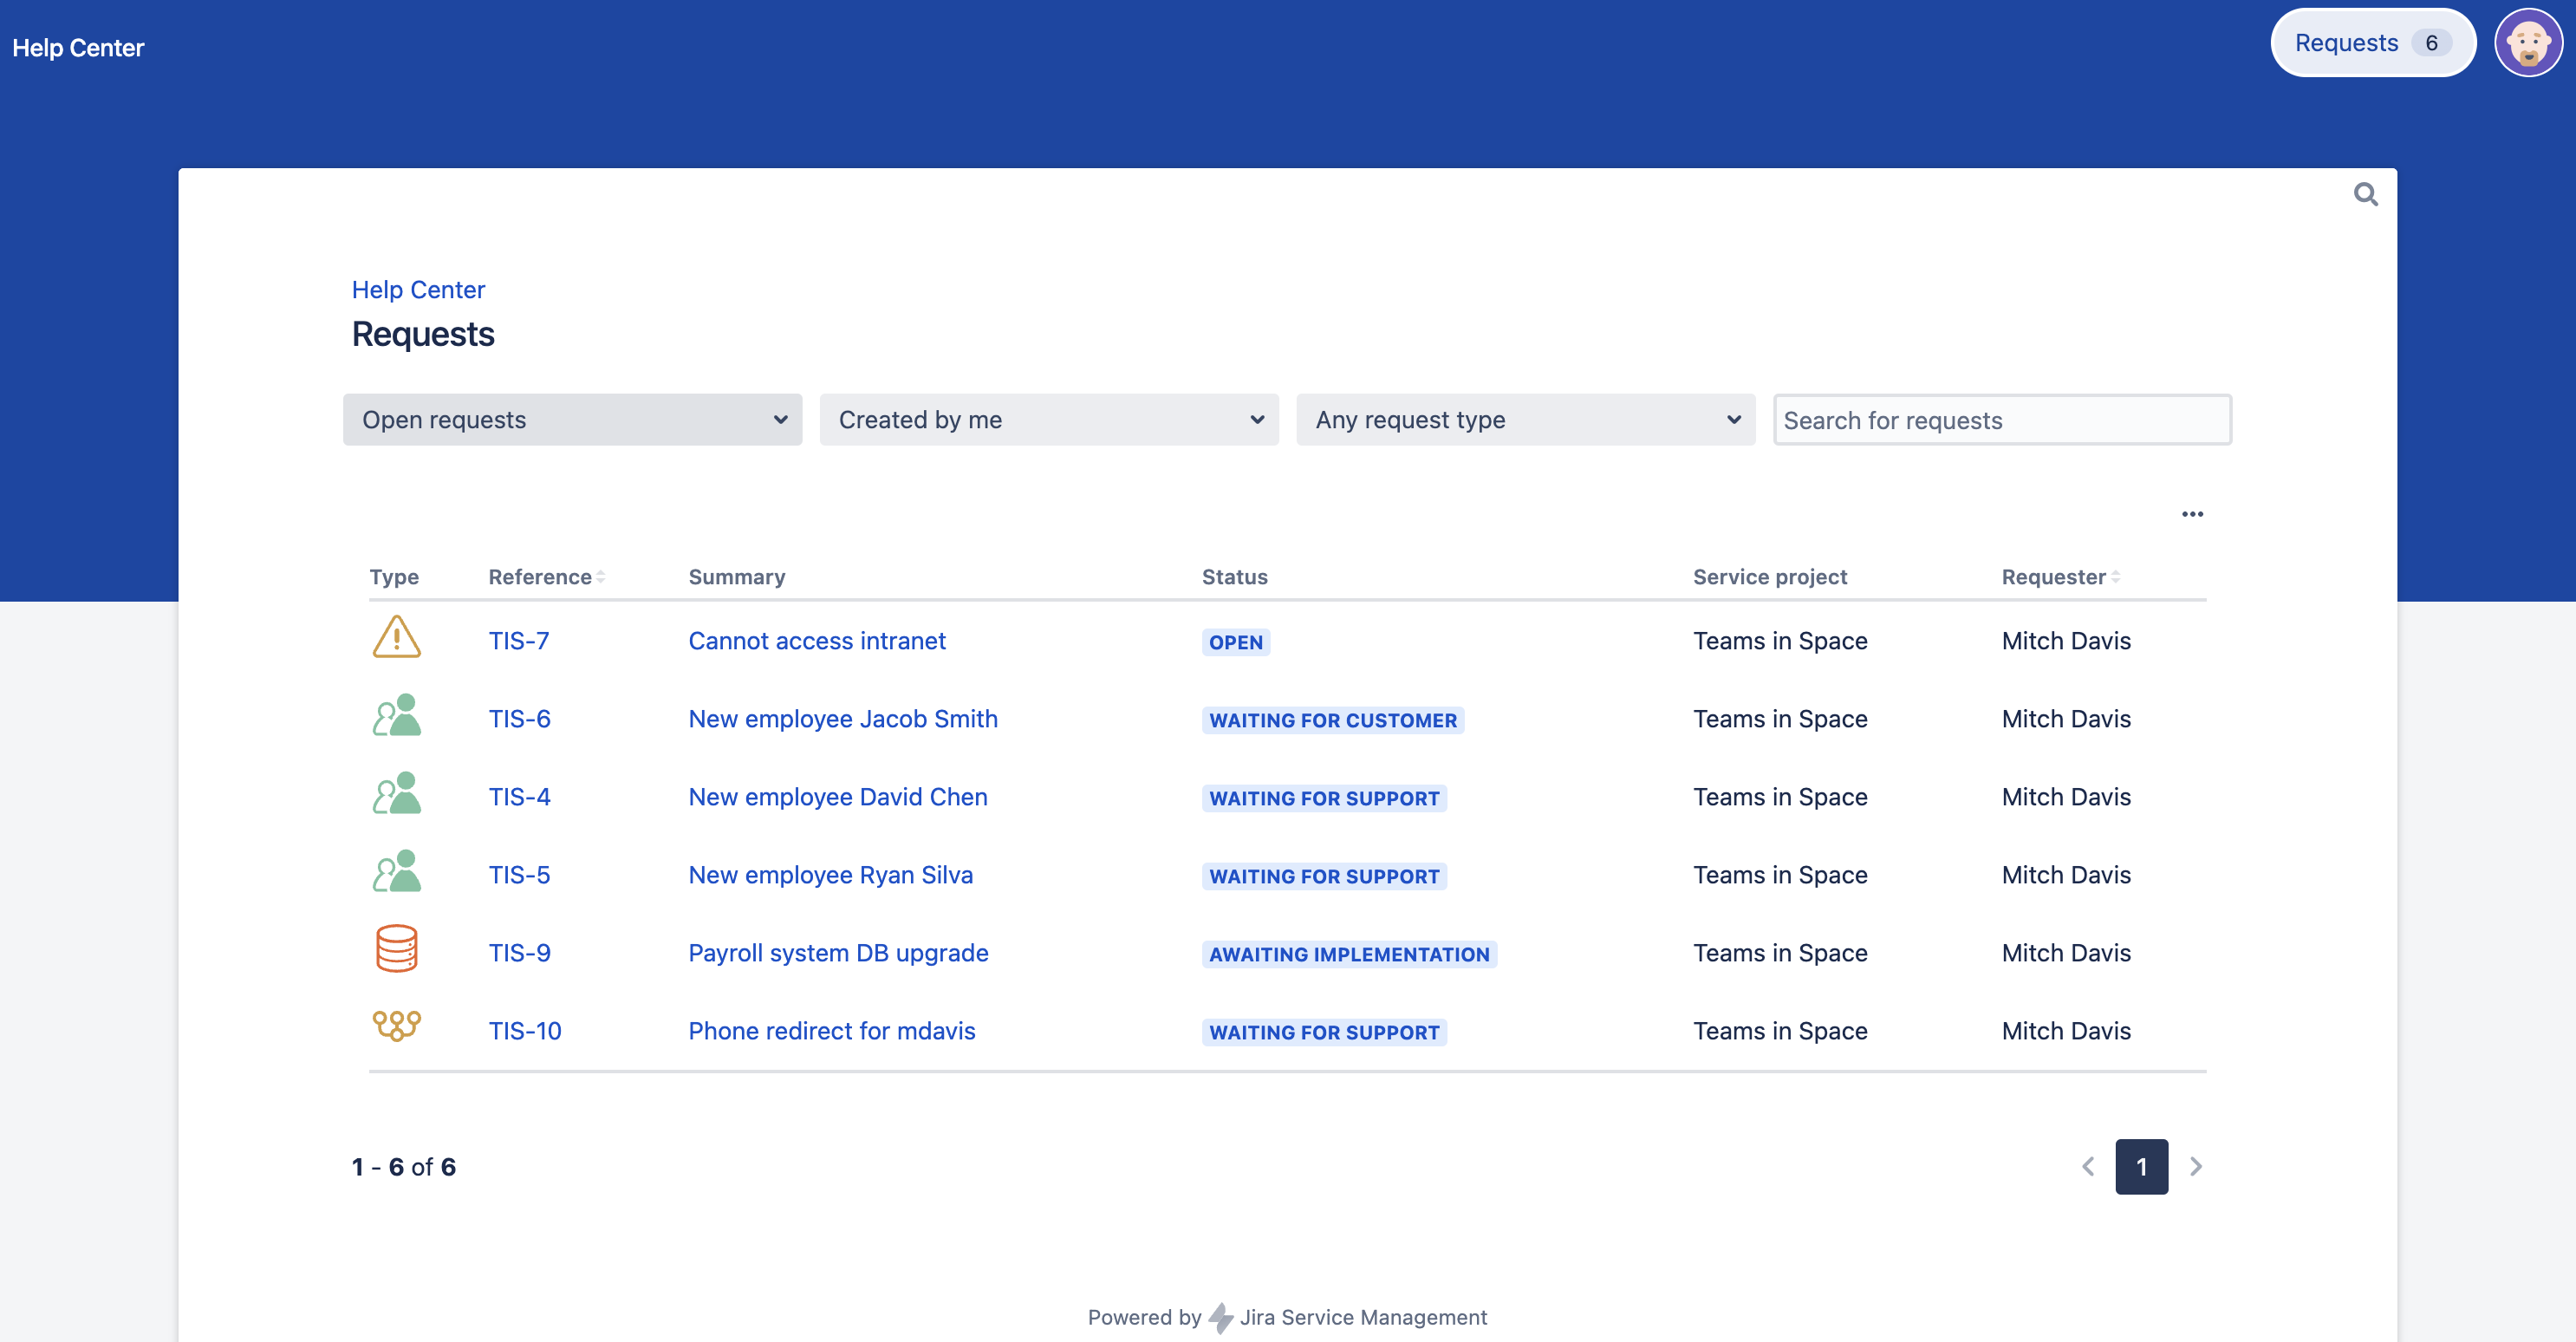
画面の右上隅にある [リクエスト] ボタンを使用すると、自分で起票したすべてのリクエストを表示できます。列のフィルター オプションとソート オプションは、カスタマーがリクエストをすばやく見つけるのに役立ちます。
ヘルプ センターやポータルを共有する
ヘルプ センターを顧客と共有するには、次のリンクを送信します。
http://<your_computer_name_or_IP_address>:<your_http_port_number>/jira/servicedesk/customer/portals
顧客をサービス プロジェクトに追加すると、ヘルプ センターにそのアカウントが作成されます。
特定のポータルへの直接リンクを共有するには、対象サービス プロジェクトの [カスタマー チャンネル] から「ポータルにアクセス」リンクを送信します。
![[カスタマー ポータル] セクションのポータル リンクにアクセスする [カスタマー ポータル] セクションのポータル リンクにアクセスする](https://confluence.atlassian.com/servicemanagementserver0516/files/1364558601/1431248143/1/1723368232997/VisitThePortal.png)


![カスタマー ポータルで [この課題を解決] トランジションを追加する カスタマー ポータルで [この課題を解決] トランジションを追加する](https://confluence.atlassian.com/servicemanagementserver0516/files/1364558601/1431248139/1/1723368880632/AddTransition.png)
