Form settings
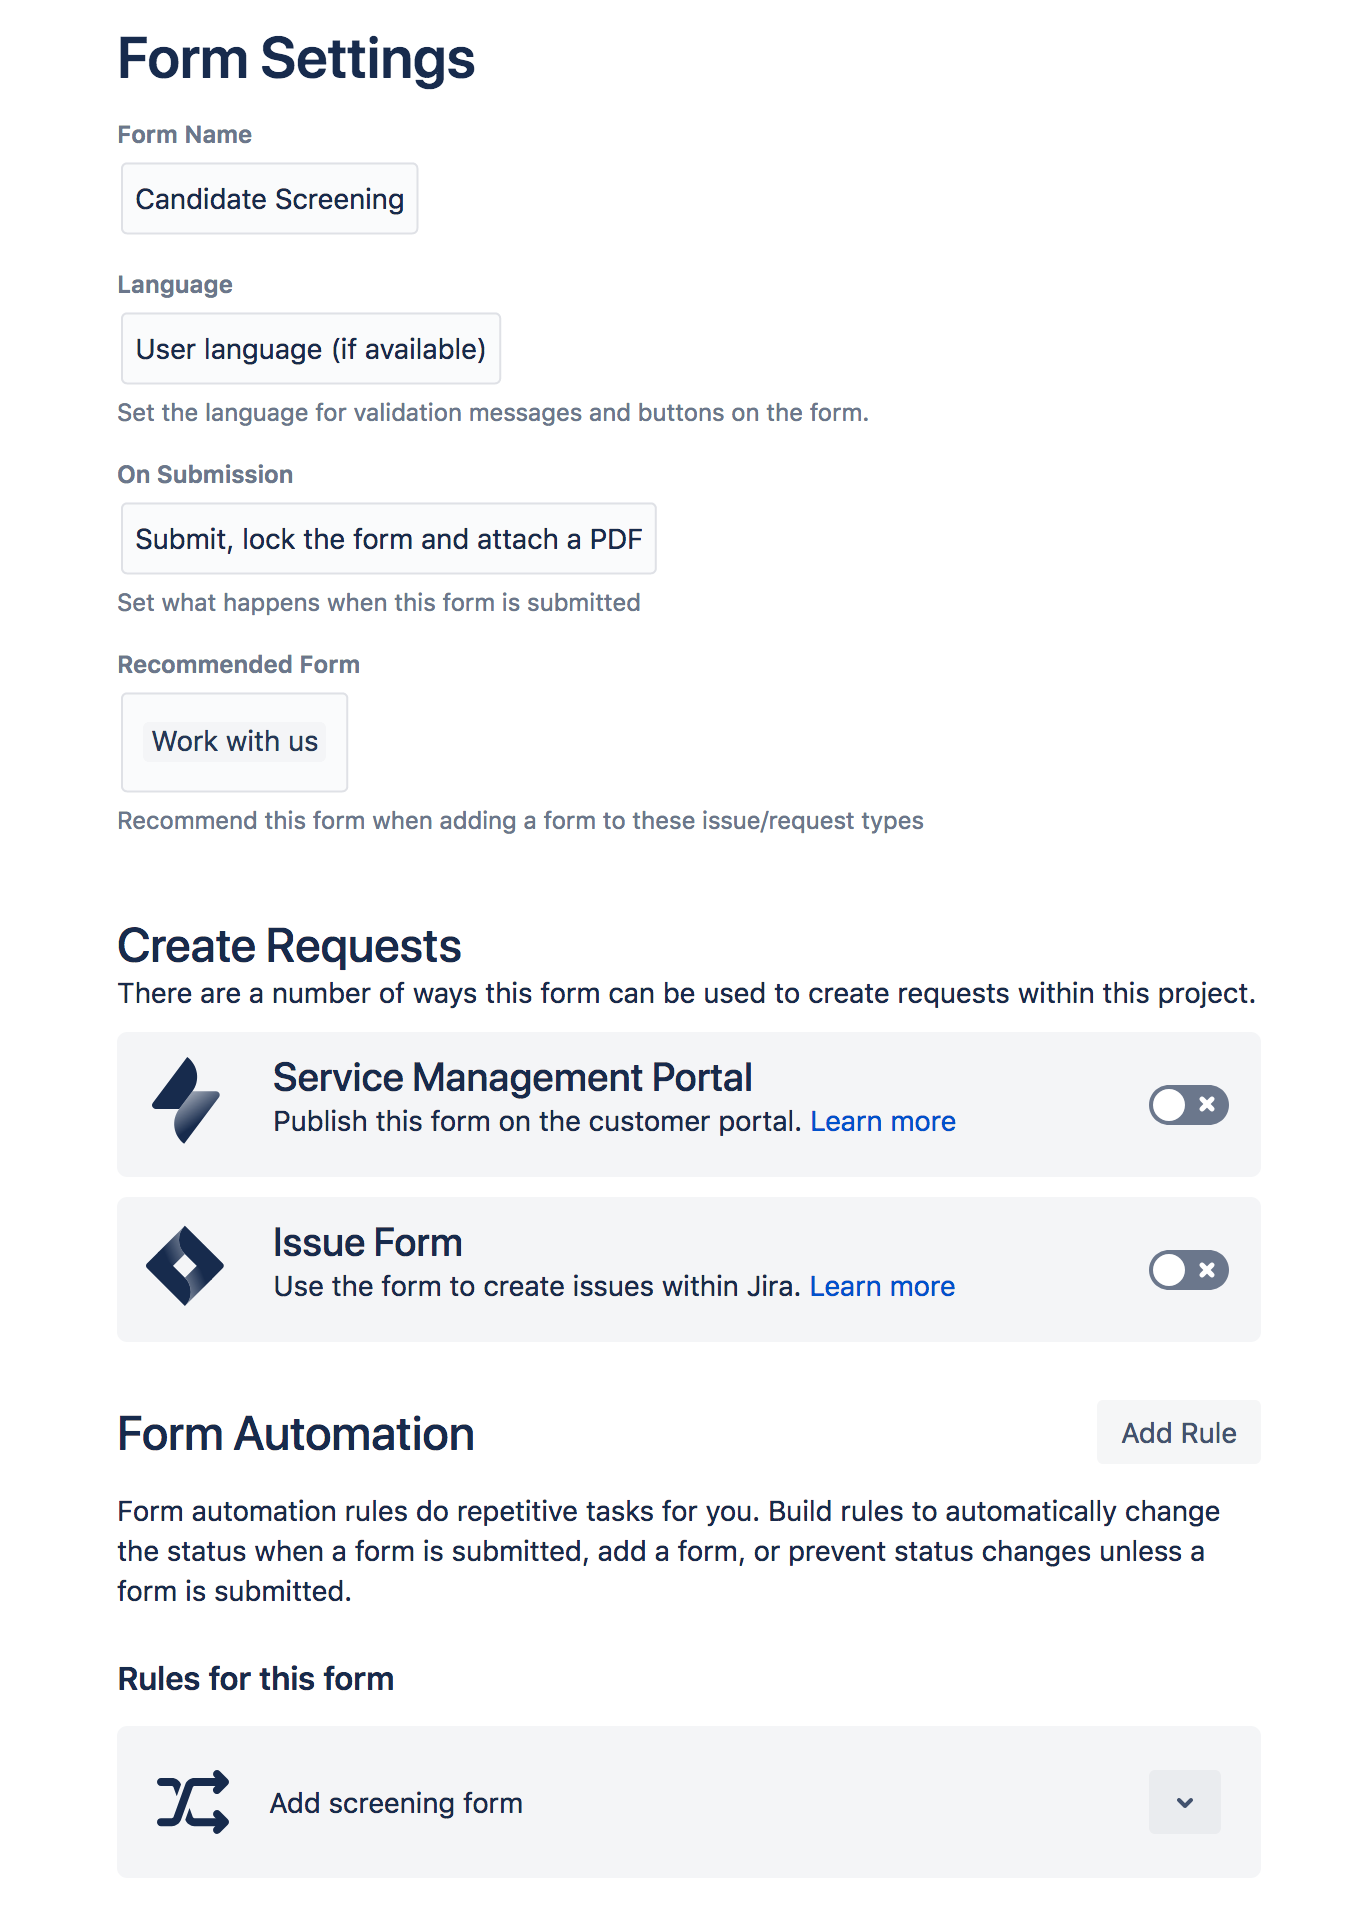
Form settings let you control how agents and users access and use ProForma forms. To access form Settings go to the Settings tab of the form builder.
Tutorial
Click here to see a tutorial. You can change the language for the video by clicking on the Language icon in the upper right corner.
名前
The name of the form which will be shown on the forms list and when the form is added to an issue.
言語
The language setting allows you to set the language that the form button and validation messages will be displayed in.
Currently, an individual ProForma form can only be set to one language. If you need a multi-lingual form you can:
Create multiple versions of your form in each of the target languages.
Create a choice question at the top of your form with the target languages. Then create conditional sections which include all of the form questions in each of the language options. Note that you will still need to choose only one language for the error and validation messages.
On Submission
This setting lets you control what happens when a the form is submitted. You can:
Generate and attach a PDF of the Form – Submitting the form will cause a PDF of the form, with all of the completed responses, to be automatically added to the issue as an attachment. You may need to refresh the issue to see the PDF.
Lock the form contents – Once the form is submitted, only users with Administer Project permissions will be able to update the contents of the forms. Customers and/or agents cannot change the contents of locked forms.
Recommended Form
ProForma lets you include multiple forms on a single issue/request. When an agent adds a form to an issue/request, they are presented with a list of available forms. Recommended forms are shown at the top of the list. Use this setting to recommend a form for a given issue type.
Create Requests/Issues from Forms
ProForma allows you to create Jira requests/issues directly from forms. You can do this by publishing a form to the Jira Service Management portal, or by allowing users to access an “Issue Form” directly from the Jira navigation bar.
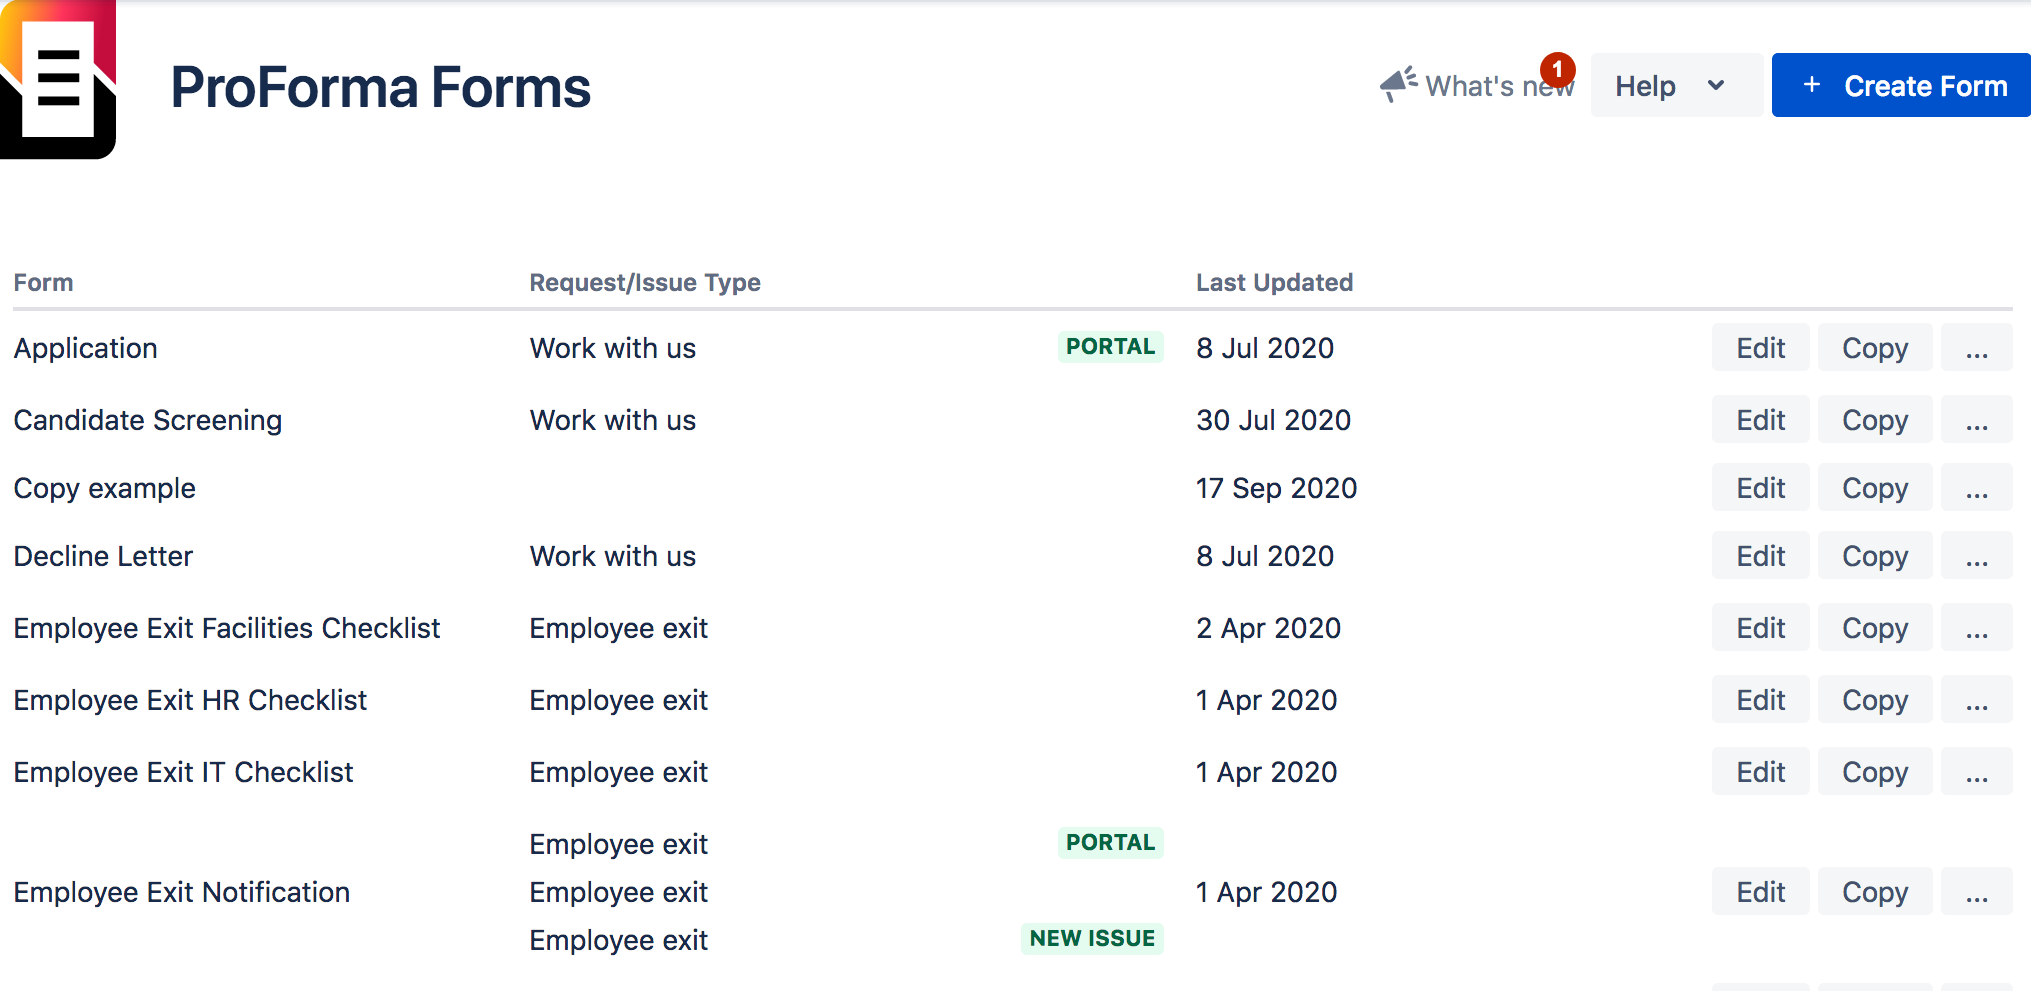
Forms that can be used to create Jira Service Management requests are tagged with a PORTAL label on the forms list, while forms that can be used to create issues are tagged with a NEW ISSUE label.
Publishing Forms to the JSM Portal:
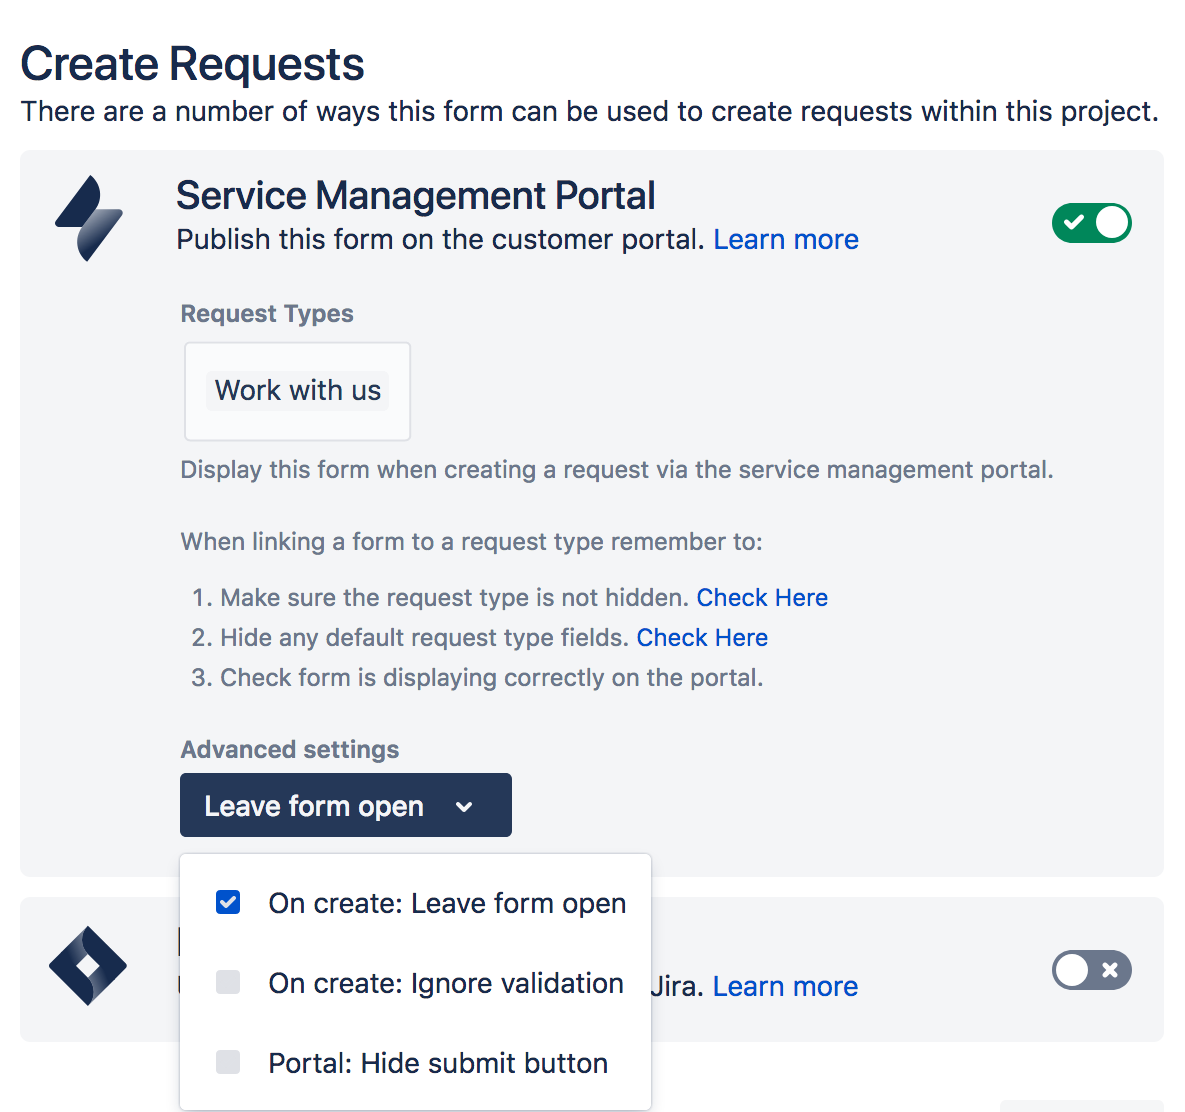
Use the toggle to indicate that you want to publish the form to the JSM portal. You will then be prompted to select the indicated request type. When a customer completes the form on the portal, a request will automatically be created.
Note that if the selected request type has not been assigned to a group, the form will not be available on the portal and a warning message that says PORTAL - HIDDEN will be displayed in the forms list.
Service Management Portal – Advanced options
You can also enable some Advanced options that govern how the form will behave on the portal. ProForma forms that are OPEN can be edited by the customer. When a customer Submits a form, they are signaling that the form is complete. SUBMITTED forms cannot be edited unless they are reopened by an Agent. See this tutorial for more information.
Leave form open – If this options is selected, then the form will stay in an open state, allowing the customer to continue to add to and edit their responses after the request is created. Validation will be enforced when the request is created.
Ignore validation – If you choose to leave the form open, then two more options will become available. Checking the Ignore validation option means the customer will be able to create the request even if required fields are left blank or their responses do not meet validation criteria. Validation rules will not be enforced until the the form is submitted.
Hide submit button – If you would like a form to stay perpetually open, or to only allow a Service Management Agent to determine when the form is complete, you can choose to hide the Submit button. The form will remain in an open state and will be editable from the portal. Only an agent will be able to submit the form.
Note that Jira will enforce validation for Jira fields that are shown on the request type. If you want validation to be ignored for all fields when the request is created, you will need to link a form field to the Jira Summary field and then hide the Summary field on the request type.
Using Issue Forms:
You can allow Jira users to create issues from forms, accessed directly from the Jira navigation bar. Note that this feature is only available if the Jira Administrator has enabled it under ProForma Configuration.
To allow users to create issues directly from a given form, go to Issue Form setting and select the indicated Issue Types. A user will now be able to select access the form from the Jira navigation bar. When the user clicks Create, the issue – with the form included – will be created.
As above, you can use the Advanced option to have the form remain Open after the issue has been created.
Issue forms are an easy way to ensure that you always get the right information, from the moment an issue is created.
In order to create an issue, ProForma needs to provide values for all mandatory fields. If the Jira Create Issue screen requires a field and there is no corresponding linked field on the ProForma form, then the user will receive a 400 error.
Check the Create Issue screen for the indicated issue type and ensure that all required fields are included and linked on the ProForma form.
Form Automation
You can also set automation rules from the Form Settings tab. Please see the Automation section for more information.


