クローンを行い、新しいブランチに変更を加える
When you know that you will be adding reviewers to review and approve your code prior to merging, you’d most likely already have the repository cloned before creating a branch. So that’s what we’re going to do first before you set up your own branch.
ステップ 1. リポジトリをローカル システムにクローンする
作業を開始できるよう、ローカル システム上にクローンしてみましょう。
- From the repository, click the Clone button in the top right.
Bitbucket displays the Clone this repository dialog. By default, the clone dialog sets the protocol to HTTPS or SSH, depending on your settings. As a result, you don't need to change your default protocol.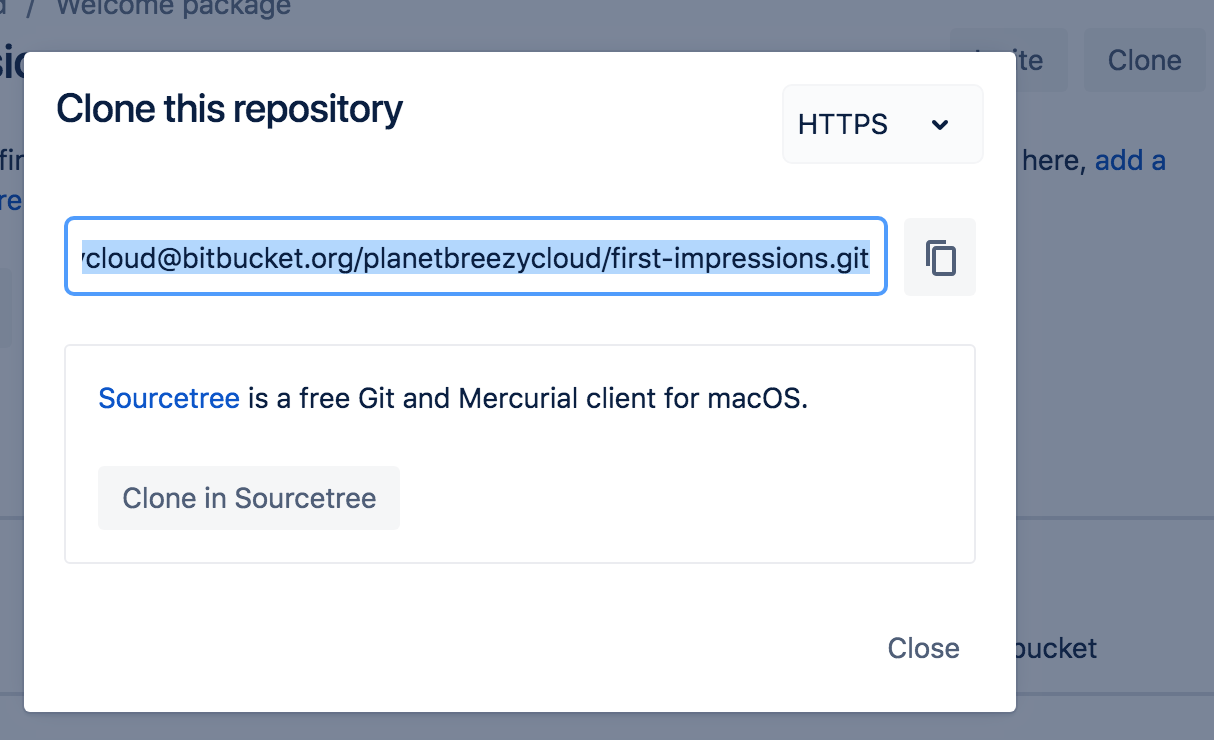
- クローン コマンドをコピーします。
- From a terminal window, change into the local directory where you want to clone your repository.
$ cd ~/<path_to_directory> Paste the command you copied from Bitbucket, for example:
$ git clone https://breezy@bitbucket.org/powerstars/first-impressions.gitCloning into 'first-impressions'...
Password for 'https://breezycloud@bitbucket.org':remote: Counting objects: 6, done.
remote: Compressing objects: 100% (5/5), done.
remote: Total 6 (delta 1), reused 0 (delta 0)
Unpacking objects: 100% (6/6), done.
ステップ 2. ブランチを作成してローカルにプルする
リポジトリのセットアップが完了したので、次の手順に進みます。これで、ローカルまたは Bitbucket からブランチを作成できるようになりました。このチュートリアルでは、Bitbucket からブランチを作成します。
- 左側のナビゲーションから [ブランチ] を選択します。1 つのブランチ (main ブランチである
master) が表示されます。 - 右上の [ブランチの作成] をクリックします。
After you create a branch, you need to check it out on your local system. Bitbucket provides you with a fetch and checkout command that you can copy and paste into your command line, similar to the following:
$ git fetch && git checkout my-updatesPassword for 'https://breezycloud@bitbucket.org':From https://bitbucket.org/planetbreezycloud/first-impressions* [new branch] my-updates -> origin/my-updates
Branch 'my-updates' set up to track remote branch 'my-updates' from 'origin'.
Switched to a new branch 'my-updates'
ローカルで新しいブランチに切り替えることができました。これにより、この個別のコード行で作業やプッシュを行うことができます。
ステップ 3. ブランチに変更を加える
次に、リポジトリに変更を加えます。ファイルのメンションと同様、好きなように変更することができます。CSS の変更、ファイルの追加、スペース オペラの作曲、単純に質問への回答など、あらゆる変更を行えます。
survey.htmlファイル (または自身で名前を設定したファイル) をテキスト エディタで開きます。任意の変更を加え、ファイルを保存して閉じます。
ターミナル ウィンドウでリポジトリ ディレクトリから移動している場合、リポジトリ ディレクトリに戻ります。
git statusを使用してリポジトリのステータスを表示します。変更したsurvey.htmlファイルが表示されます。他のファイルを追加または変更していた場合は、それらも表示されます。$ git status
On branch my-updates
Your branch is up-to-date with 'origin/my-updates'.
Changes not staged for commit:
(use "git add <file>..." to update what will be committed)
(use "git checkout -- <file>..." to discard changes in working directory)
modified: survey.html
no changes added to commit (use "git add" and/or "git commit -a")Add your changes locally with
git add <filename>:$ git add survey.htmlCommit your changes locally with
git commit -m "your commit message":$ git commit -m "Answered questions"
[my-updates 7506040] Answered questions
1 file changed, 3 insertions(+), 3 deletions(-)Enter
git push origin <branch_name>to push the changes to your branch on Bitbucket, and enter your password to finish pushing changes.$ git push origin my-updates
Password for 'https://breezycloud@bitbucket.org':Counting objects: 3, done.Delta compression using up to 8 threads.Compressing objects: 100% (3/3), done.Writing objects: 100% (3/3), 350 bytes | 350.00 KiB/s, done.Total 3 (delta 1), reused 0 (delta 0)To https://bitbucket.org/planetbreezycloud/first-impressions.git454ccaf..7506040 my-updates -> my-updatesBranch master set up to track remote branch master from origin.Bitbucket で、リポジトリの [ソース] ページをクリックします。ドロップダウンに両方のブランチが表示されます。
my-updatesに対するその他のコミットも、そのブランチに表示されます。
ステップ 1. リポジトリをローカル システムにクローンする
作業を開始できるよう、ローカル システム上にクローンしてみましょう。
- From the repository, click the Clone button in the top right.
- [Sourcetree でクローン] ボタンをクリックします。
[新規クローン] ウィンドウから、宛先パス を
<path_to_repo_directory>/first-impressions/に更新します。
[クローン] ボタンをクリックします。
ステップ 2. ブランチを作成してローカルにプルする
リポジトリのセットアップが完了したので、次の手順に進みます。ブランチは Bitbucket のみの概念ではないため、ローカルでも作成することができます。ただし、このチュートリアルでは、ブランチを Bitbucket から作成します。
- 左側のナビゲーションから [ブランチ] を選択します。1 つのブランチ (main ブランチ) が表示されているはずです。
- 右上の [ブランチの作成] をクリックします。
- ブランチ名を入力して [作成] をクリックします。ブランチ名が不明な場合、my-updates などとします。
ブランチを作成したら、ローカル システムからチェックアウトする必要があります。これを行うには、[Sourcetree でチェックアウト] ボタンをクリックします。
- Sourcetree の [既存のものをチェックアウト] ダイアログから、[チェックアウト] をクリックします。
Bitbucket のブランチを取得してローカル システムにチェック アウトすることができました。これにより、この個別のコード行で作業やプッシュを行うことができます。
ステップ 3. ブランチに変更を加える
次に、リポジトリに変更を加えます。ファイルのメンションと同様、好きなように変更することができます。CSS の変更、ファイルの追加、スペース オペラの作曲、単純に質問への回答など、あらゆる変更を行えます。
- Sourcetree のリポジトリから、[Finder で表示] ボタンをクリックします。
survey.htmlファイル (または自身で名前を設定したファイル) をテキスト エディタで開きます。任意の変更を加え、ファイルを保存して閉じます。
- Sourcetree を開くと、リポジトリに未コミットの変更が表示されていることがわかります。
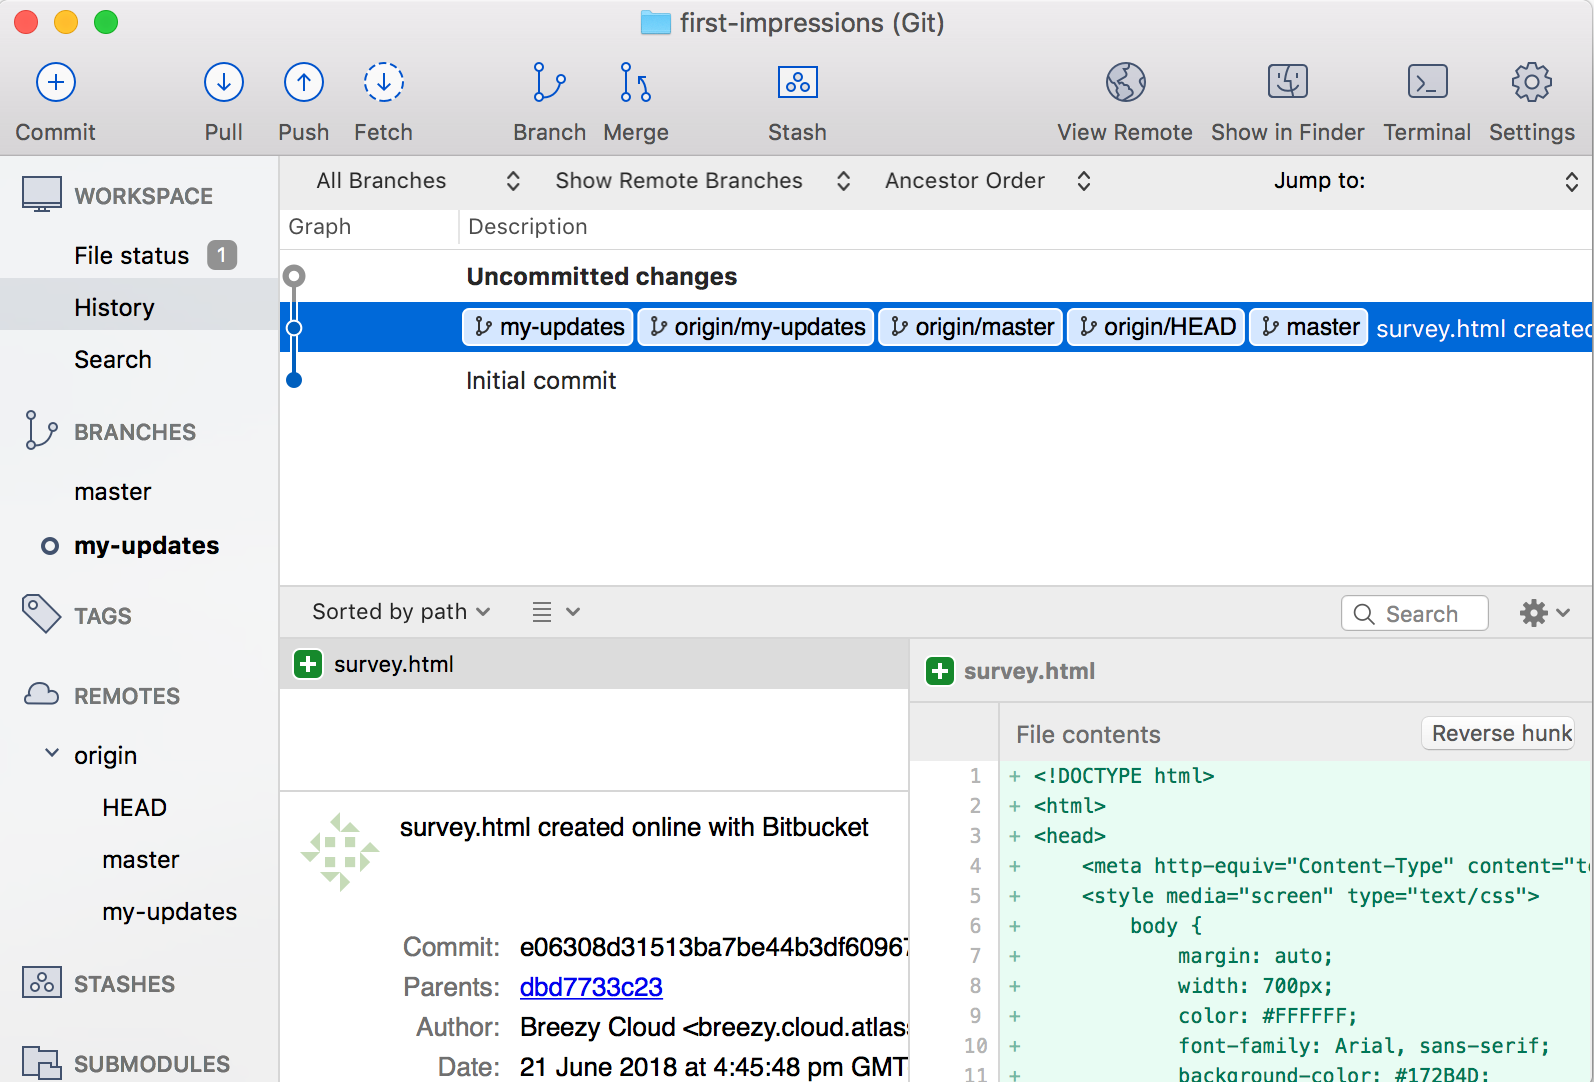
- (Git のみ) ファイルをステージング領域に追加します。
- [未コミットの変更] 行を選択します。
- From the Unstaged files list, place a checkmark next to the
survey.htmlfile (and any other files with uncommitted changes).
- [ステージの確認] ダイアログで、[OK] をクリックします。
- 一番上の コミット ボタンをクリックしてファイルをコミットします。
- 表示されたスペースにコミット メッセージを入力します (例: 回答済みの質問)。
- メッセージ ボックスの下の [コミット] ボタンをクリックします。ビューに切り替えると、ファイルはコミットされているが、Bitbucket リポジトリにはプッシュされていないことがわかります。
- Sourcetree で、[プッシュ] ボタンをクリックしてコミットされた変更をプッシュします。
表示されたダイアログ ボックスで [OK] をクリックして、コミットされたブランチを Bitbucket にプッシュします。
Bitbucket で、リポジトリの [ソース] ページをクリックします。ドロップダウンに両方のブランチが表示されます。
my-updatesに対するその他のコミットも、そのブランチに表示されます。