How to configure SAML authentication with Azure Active Directory on Jira Data Center
プラットフォームについて: Data Center - この記事は、Data Center プラットフォームのアトラシアン製品に適用されます。
このナレッジベース記事は製品の Data Center バージョン用に作成されています。Data Center 固有ではない機能の Data Center ナレッジベースは、製品のサーバー バージョンでも動作する可能性はありますが、テストは行われていません。サーバー*製品のサポートは 2024 年 2 月 15 日に終了しました。サーバー製品を利用している場合は、アトラシアンのサーバー製品のサポート終了のお知らせページにて移行オプションをご確認ください。
*Fisheye および Crucible は除く
目的
Jira Data Center には SSO for Atlassian Server and Data Center App がバンドルされています。このドキュメントの残りの部分では Atlassian SSO アプリと呼びます。
With this App, Jira administrators can configure SSO authentication using SAML 2.0 or OIDC with the preferred Identity Provider (IdP) supporting these standards. Check SAML single sign-on for Atlassian Data Center applications for further details about the Atlassian SSO App.
This document highlights the steps to integrate Jira Software Data Center with Microsoft Azure Active Directory (Azure AD) for SSO using SAML 2.0.
Although it uses Jira Software as a reference, the concept is the same for Jira Service Management – therefore we will refer to Jira in the remainder of the document.
It might also be used as a reference to integrate Jira Data Center with other IdP solutions.
This document is not intended to be a full reference guide, since you may need to change Azure AD or Jira configuration to your company needs. Hence, this describes a sample configuration to have it working.
For any Azure AD related issue or question, refer to Microsoft Azure support.
アトラシアン製品は様々なテクノロジーとのインターフェースを提供しています。Webサーバー(Apache HTTPサーバーなど)、ロードバランサー、シングル サインオン ソリューション(SSO)、SSL証明書、LDAP などのフロントエンドソリューションは、われわれの製品に重要な機能を提供します。
アトラシアンはこれらのサードパーティ製アプリケーションとの連携のためのドキュメントを提供するようにしていますが、サードパーティ製アプリケーションのサポートを提供しているわけではなりません。サードパーティ製アプリケーションの問題をサポートすることはできません。
詳細については「アトラシアン サポートの提供内容」をご確認ください。
ソリューション
Below is a summary of the steps we will cover in this document:
You may want to check the screencast below with the walk-through to complete the configuration.
Jira 8.15+
Jira 7.13+
Install or update the Atlassian SSO App
SSO capabilities are provided in Jira Data Center as an Atlassian Marketplace App. Although you may have the Atlassian SSO App bundled with your Jira instance, it's best practice to update it to the latest version supported by your Jira release, ensuring you are protected from security bugs and is also running with the latest improvements.
Refer to the Atlassian SSO App version history for further details on supported Jira versions and for release notes.
On this example we are using Jira Software 8.19.0, which is bundled with Atlassian SSO App 4.2.4, and the latest version available when this document was written is 4.2.5.
Updating apps explains the options to update an App with Universal Plugin Manager (UPM).
If UPM is connected to the internet, it will advise you there's an update available and give you the option to update.

On we released version 4.2.0 of the Atlassian SSO App with the ability to configure multiple IdPs. With this version the SSO 2.0 label was changed to Authentication Methods, together with a few UI changes.
Version 4.2.0 is available for Jira 8.15.0 onward and, therefore, throughout this document we have different steps depending on your Jira version.
Gather initial data from Jira
In order to make the initial configuration on Azure AD, we need to collect two information from Jira, the , and the Audience URL (Entity ID).
Jira 8.15+
- Access Jira as an administrator and go to Cog icon > System > Authentication methods.
- On the Authentication methods page, click on the Add configuration button.
- Under the option, choose SAML single sign-on.
- Scroll to the section named Give these URLs to your identity provider.
- Copy the values for and for .

- Click on the Cancel button as we won't complete any configuration on Jira now.
Jira 7.13+
- Access Jira as an administrator and go to Cog icon > System > SSO 2.0.
- On the Configure how users log in page, choose SAML single sign-on as the option
- Scroll to the section named Give these URLs to your identity provider.
- Copy the values for and for .

- Navigate away from the current page as we won't complete any configuration on Jira now.
Create an application on Azure AD
Usually, your company will have a specific team managing the Azure Active Directory activities and you will interact with them, providing and receiving the necessary information to complete the configuration.
If you are working with your Azure AD team, provide them the information collected on the previous section. When they finish their configuration, these are the information they need to share with you and will be used on the next section:
- The Login URL.
- The Azure AD Identifier.
- The SAML Signing Certificate on Base64 format.
- The Atlassian SSO App supports signing only the SAML assertion.
- The attribute in the SAML response to be used as the username mapping.
- This is often the Name ID attribute.
In this section we will go through the steps needed to complete a simple application configuration on Azure AD.
- On Azure Active Directory admin center, go to All Services > Azure Active Directory > Enterprise Applications.
- Click on New Application.
- On the Browse Azure AD Gallery page, click on Create your own application.
- On the Create your own application popup, give the application a meaningful name, choose the appropriate option and click on Create.
- Under the Overview page of your application, click on Single sign-on and choose SAML as the SSO method.
- On the Set up Single Sign-On with SAML page, click on Edit on the Basic SAML Configuration section.
- On the Basic SAML Configuration popup, configure it as follows and click on Save.
Identifier (Entity ID) must be configured with the value from the attribute on Jira.
- Reply URL (Assertion Consumer Service URL) must be configured with the value from the attribute on Jira.
- Collect the following information to be used on the next section.
- Download the Certificate (Base64).
- The Login URL.
- The Azure AD Identifier.
- Back to the Overview page of your application, go to Users and groups.
- On the Users and groups page, click on Add user/group.
- On the Add Assignment page choose None Selected under Users and groups.
- Choose a predefined group that will have access to the Jira application and then click on Assign.
Configure SAML on Jira
Jira 8.15+
- Access Jira as an administrator and go to Cog icon > System > Authentication methods.
- On the Authentication methods page, click on the Add configuration button.
- On the Add new configuration screen, choose a Name for your configuration (i.e. Azure Active Directory) and select SAML single sign-on as the Authentication method.
- Under the SAML SSO settings, configure it as follows.
- Single sign-on issuer is the value of the Microsoft Entra Identifier from the Azure AD application configuration.
- Identity provider single sign-on URL is the value of the Login URL from the Azure AD application configuration.
- X.509 Certificate is the value of the SAML Signing Certificate (Base64) from the Azure AD application configuration.
- Make sure to use only the certificate string, discarding the
BEGIN/END CERTIFICATElines.
- Make sure to use only the certificate string, discarding the
- Username mapping is the attribute in the SAML response to be used as the username mapping, which must be configured as
${AttributeName}.- On our sample application the attribute is the NameID and it must be configured as
${NameID}.
- On our sample application the attribute is the NameID and it must be configured as
- On Login button text choose a meaningful text that will be presented to users as a login option.
The configuration might look similar to the below images.


- Click on Save configuration.
Jira 7.13+
- Access Jira as an administrator and go to Cog icon > System > SSO 2.0.
- On the Authentication methods page, click on the Add configuration button.
- On the Configure how users log in screen select SAML single sign-on as the Authentication method.
- Under the SAML SSO 2.0 settings, configure it as follows.
- Single sign-on issuer is the value of the Azure AD Identifier from the Azure AD application configuration.
- Identity provider single sign-on URL is the value of the Login URL from the Azure AD application configuration.
- X.509 Certificate is the value of the SAML Signing Certificate (Base64) from the Azure AD application configuration.
- Make sure to use only the certificate string, discarding the
BEGIN/END CERTIFICATElines.
- Make sure to use only the certificate string, discarding the
- Username mapping is the attribute in the SAML response to be used as the username mapping, which must be configured as
${AttributeName}.- On our sample application the attribute is the NameID and it must be configured as
${NameID}.
- On our sample application the attribute is the NameID and it must be configured as
The configuration might look similar to the below image.

- Click on Save configuration.
SSO 連携のテスト
Jira 8.15+
- Open an incognito window on your browser to ensure it won't use any of your session cookies.
- Access the Jira Base URL.
- Click on the Log In button on top bar.

- On the Log in to your account page, click on the button related to Azure AD.

- This will send you to the Microsoft authentication page.

- Authenticate with a valid user credential.
- The user must already exist on Jira with the proper Jira Software access.
- The user must have application access on Azure AD.
- The username on Jira must match with the value sent from Azure AD within the NameID or other configured attribute.
Jira 7.13+
- As a Jira administrator, go to the SSO 2.0 page.
- At the bottom of the configuration page, there's a link to test the authentication under the Use SAML as secondary authentication option.
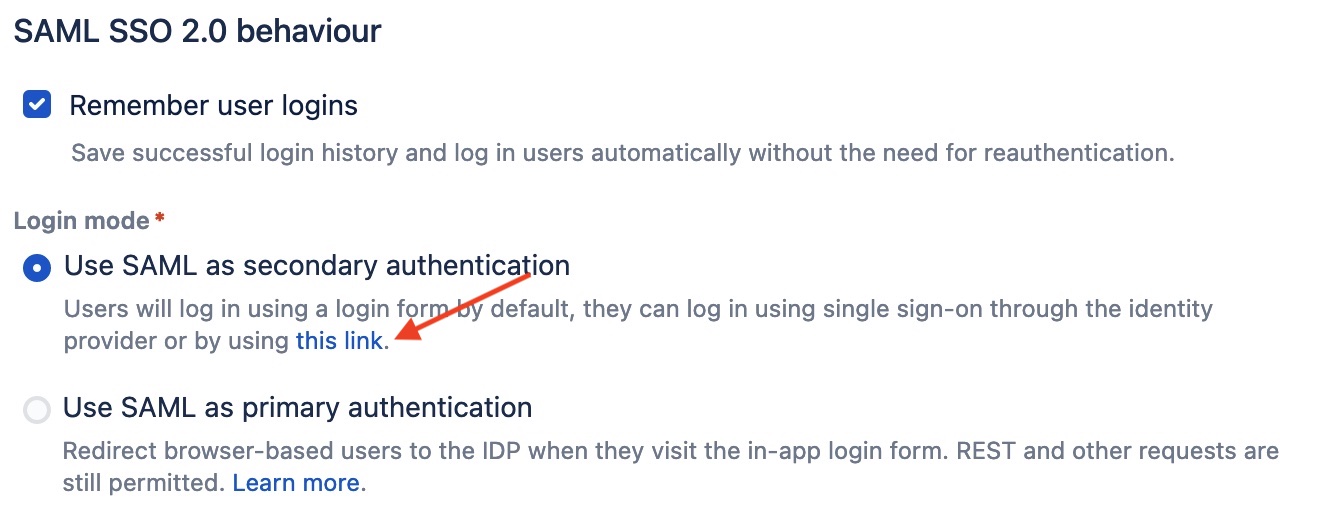
- Open this link in an incognito window and this should direct you to the Azure AD authentication page.
- Authenticate with a valid user credential.
- The user must already exist on Jira with the proper Jira Software access.
- The user must have application access on Azure AD.
- The username on Jira must match with the value sent from Azure AD within the NameID or other configured attribute.
- Once this authentication test works you may choose to setup SAML as the primary authentication method on Jira's SSO 2.0 configuration page.

備考と設定
未認証のユーザーを IdP に自動リダイレクト
このセクションの回避策を適用する前に、ロード バランサー / リバース プロキシのヘルス チェックが GET /status を送信するよう適切に構成されていることを確認してください。
ヘルス チェックのターゲットが GET / のみである場合、機能フラグの適用後、ロード バランサーによってノードが不健全であると報告されます。
Refer to Load balancer configuration options for further details on configuring the health check.
When a user access the Jira Base URL, the browser is redirected to the system dashboard, which is a public dashboard by default, and the user won't be redirected to the IdP to authenticate.
Also, the login form gadget may not be presented (since SAML is configured as the primary authentication method) and the user might be required to click on the Log In icon on the top bar.

There's a feature request to disable any public page in Jira – JRASERVER-65521 - Add possibility to disable public access to JIRA
While this feature isn't implemented, the suggested workaround makes the system dashboard private, redirecting unauthenticated users to the IdP.
- 管理者としてログインして次の URL にアクセスします。<Jira のベース URL>/secure/SiteDarkFeatures!default.jspa
- [ダーク機能の有効化] テキスト フィールドで
public.access.disabledを追加します。
上記の回避策を使用しても、非公開ダッシュボードの URL にアクセスしたときなど、リダイレクトが自動的に行われないページがほかにあります。
This is treated as a bug in JRASERVER-66554 - SAML redirection from Jira Dashboard page or any page other than login.jsp
セキュアな管理者セッション (websudo)
Jira has secure administrator session enabled by default, meaning that they are required to re-authenticate when accessing an administration page as below.

This authentication challenge isn't sent to the IdP and, therefore, it will use the configured user directories.
There's a feature request to change it to use the IdP – JRASERVER-69311 - Ability to have the Websudo functionality working with SAML / SSO
While this isn't fixed, you may choose to disable it as described in Configuring secure administrator sessions.
参考情報
Looking for similar guide for Confluence Data Center? See How to integrate Confluence Data Center with Azure for SAML 2.0 SSO.
Still having problems?
アトラシアン サポートにお問い合わせください。喜んでお手伝いします。可能な限り詳細な情報をご提供ください。
- 影響を受けているアプリケーションのログ (該当する場合)
- エラー メッセージのスクリーンショット (ログに含まれていない場合)
- 過去に行った手順についての情報