Install Team Calendars
Team Calendars offers great tools for planning and managing your events, whether they're travel, conferences, birthdays, or JIRA issues and sprints. Follow the installation instructions below to start organizing with Team Calendars.
If you're currently using the old Confluence Calendar Plugin, follow the migration process before you install Team Calendars.
Install Team Calendars
Get your license
Visit https://my.atlassian.com, generate a license key for Team Calendars and save it.
Next, install the plugin and insert your license.
Install the Team Calendars plugin
- In Confluence, go to Confluence Admin > Find New Add-ons
The in-product Atlassian Marketplace view appears - Search the Marketplace for Team Calendars
- Choose Buy Now to download and install the Team Calendars add-on for Confluence
- Once Team Calendars is installed, follow the prompts to get a license if you don't have one, or choose
[管理]
and choose Team Calendars to open the license entry dialog. > [アプリの管理] に移動します。
If you're renewing your license, choose Renew. - Paste your license key into the field provided and click Update.

You can also manually download the Team Calendars Plugin.
Configure JIRA application links
This step is optional and only required if you want to use JIRA integration with Team Calendars.
To enable a JIRA connection in Team Calendars, you must carry out the following steps.
In Confluence, click Browse > Confluence Admin > Application Links.
The Application Links dialog appears. Here, create an Application Link to your JIRA instance by clicking Add Application Link. Full instructions for this process are here:
Configuring Authentication for an Application Link.
Now, you must install or upgrade and enable the Team Calendars JIRA Integration Plugin on your JIRA instance to enable JIRA to send information to the calendar. The Team Calendars JIRA integration plugin is installed in JIRA 4.3.0+, but you will need to update it via the Universal Plugin Manager or download the latest version from the Atlassian Marketplace. See the Universal Plugin Manager documentation for details on how to do this.
Once this is complete, you should be able to add JIRA events in Team Calendars and see the projects you are expecting to see in the drop-down menu. If that works, you can go ahead and start Subscribe to Team Calendars from third-party calendars.
Migrate from the old Confluence Calendar plugin

If you have the old Calendar Plugin installed on your Confluence instance, you'll need to go through the following process to migrate to Team Calendars.
- Back up your Confluence instance
Choose Download to export data from each calendar using the old Confluence Calendar Plugin to back it up
You'll have a .ics file for each calendar after you complete this step.
To help you identify all the places where Calendars exist in your system, you can run this SQL:
SELECT CONTENT.SPACEID, SPACES.spacekey, SPACES.spacename, CONTENT.CONTENTID, CONTENT.title, CONTENT.LASTMODDATE FROM CONTENT, BODYCONTENT, SPACES WHERE PREVVER IS NULL AND (CONTENTTYPE = 'PAGE' OR CONTENTTYPE = 'BLOGPOST') AND CONTENT.CONTENTID = BODYCONTENT.CONTENTID AND SPACES.spaceid=CONTENT.spaceid AND BODYCONTENT.BODY like '%{calendar%' ORDER BY CONTENT.LASTMODDATE DESC- To Remove the old Confluence Calendar Plugin, choose Browse > Confluence Admin > Manage Add-ons and enter 'Calendar' in the Filter Visible Plugins field
- Expand the 'Calendar' add-on entry and choose Uninstall to remove it from Confluence
Note: Any existing pages set up to use the old calendar plugin will no longer work, as the Team Calendars plugin replaces it and has a different syntax - Follow the steps at the beginning of this page to install and activate Team Calendars
- To re-import your old calendar data from your backed-up .ics files:
- From your dashboard, choose Calendars
- Choose Add Calendar at the top-right of the page, then choose Import Calendar
- Choose the .ics file that you saved when backing up your old calendars.
Repeat this step to add each calendar back into Confluence.
Your old Calendar data will now display in the Confluence Calendars page.
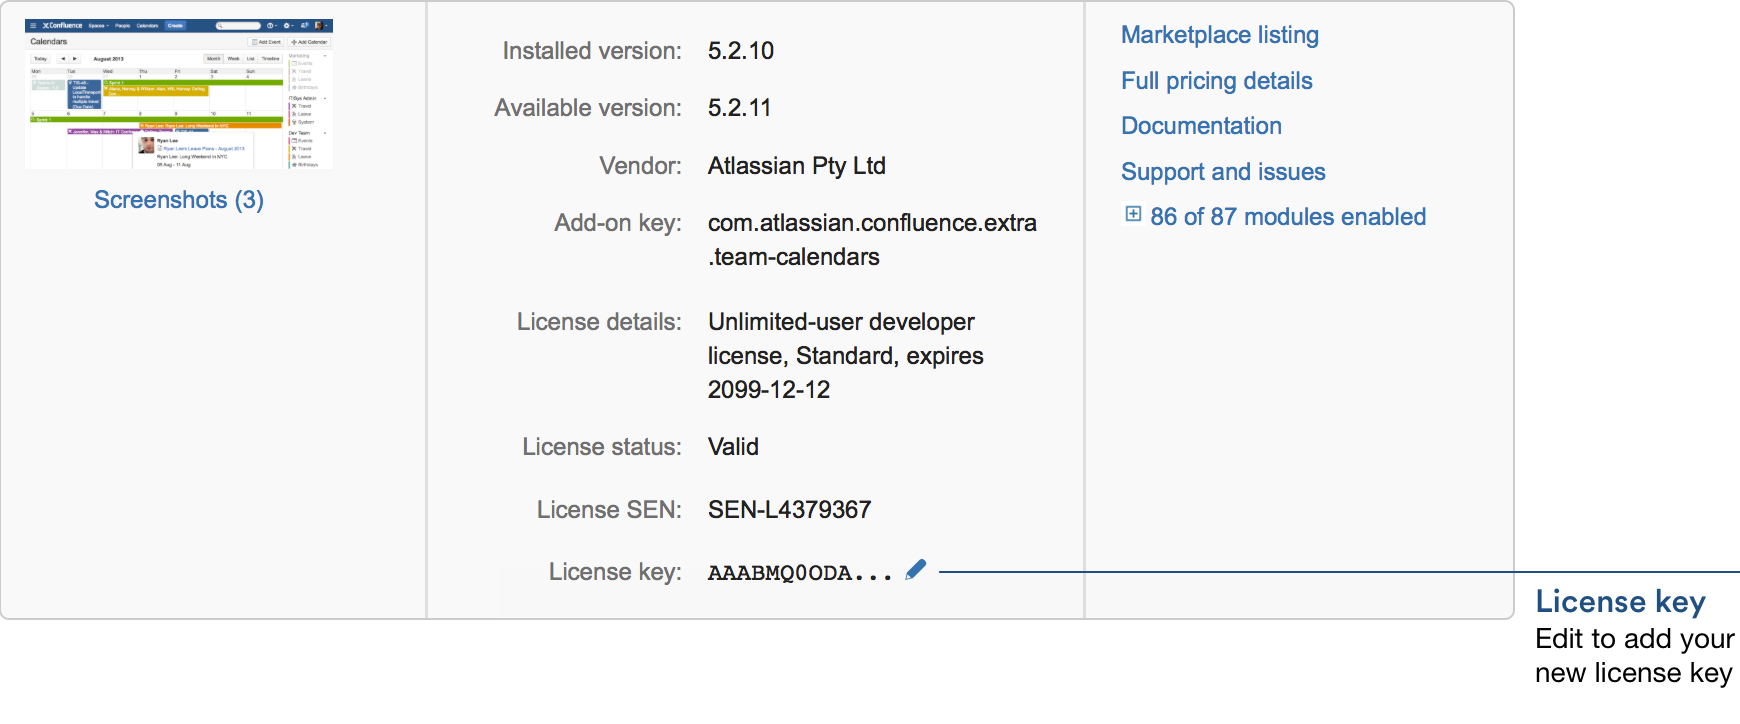
Update your license key
When you renew your Team Calendars license you'll be provided a new license key. You'll need to manually apply this key in Confluence.
To view your license key, or apply a new license key:
-
[管理]
> [アプリの管理] に移動します。 - Locate the Team Calendars add-on and expand to see more details
- Choose the Edit (pencil) icon beside your license key
- Paste in your new license key and choose Update