Jira ユーザー インポート

このページの内容

お困りですか?

アトラシアン コミュニティをご利用ください。

コミュニティに質問

By importing Jira users into Assets, you can manage user information more effectively within the Jira Service Management environment. This allows for better organization and accessibility of user data. More about importing

インポートを作成、設定、有効化するには、ユーザーがオブジェクト スキーマのアセット マネージャーである必要があります。

次のセクションにジャンプ:

Importing Jira users

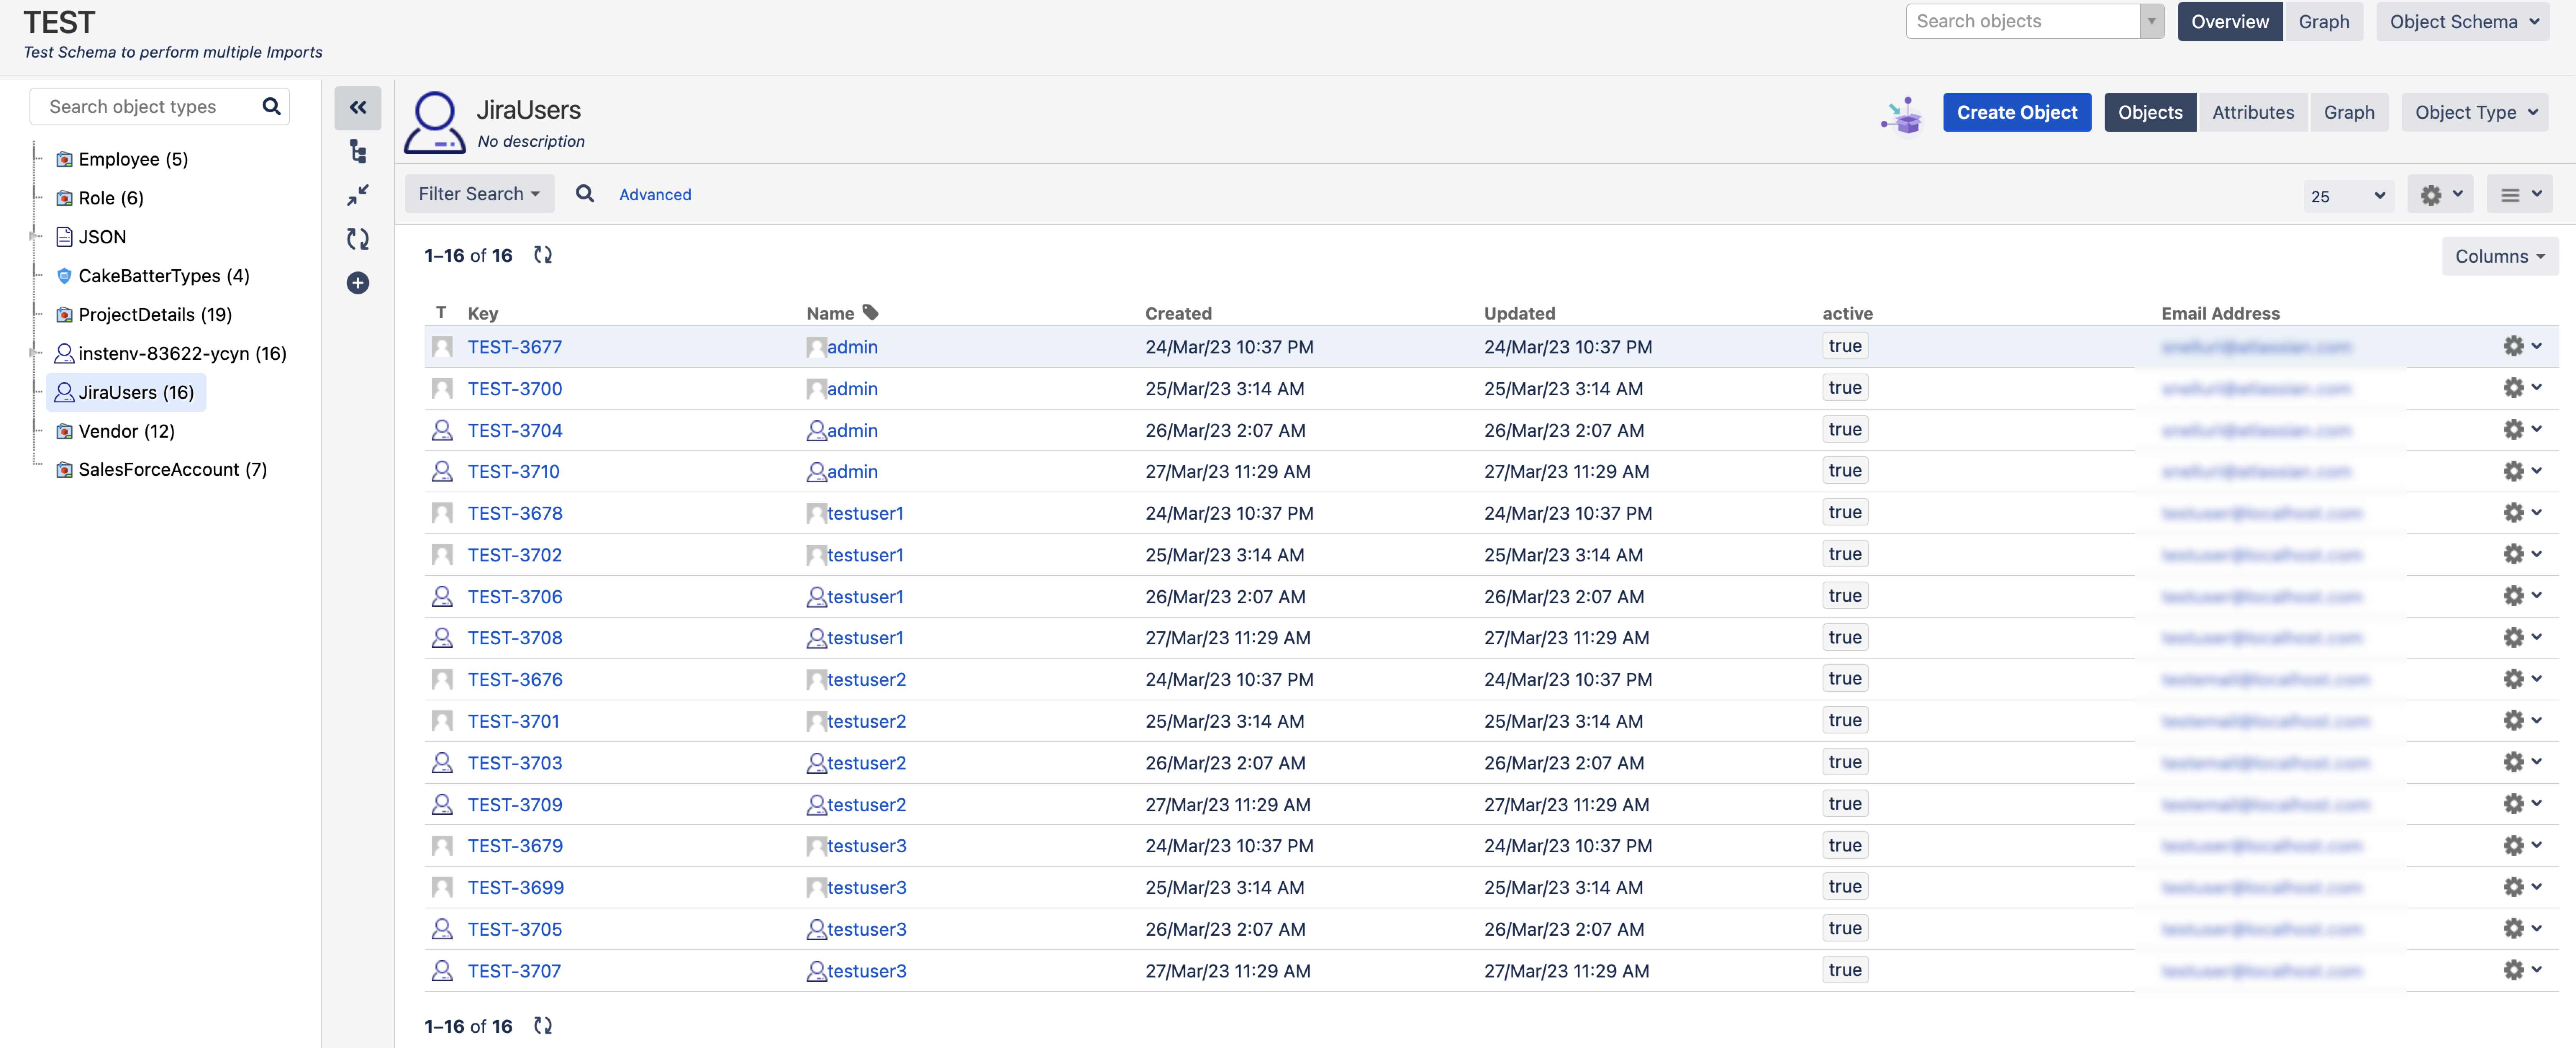
You might want to collect more information about your Jira users or relate Jira users to customers. For this, you need to import your Jira users or specific user groups in Assets. Imagine you have a group of 16 users called jira-servicedesk-user. You can use that group in Assets and retrieve it as Jira users objects. Depending on your mappings, you’ll see a configuration like this:

Example of Jira user import configuration

インポート構造を作成するには、次の手順に従います。
  1. From your service project, go to Assets, then Object Schemas.

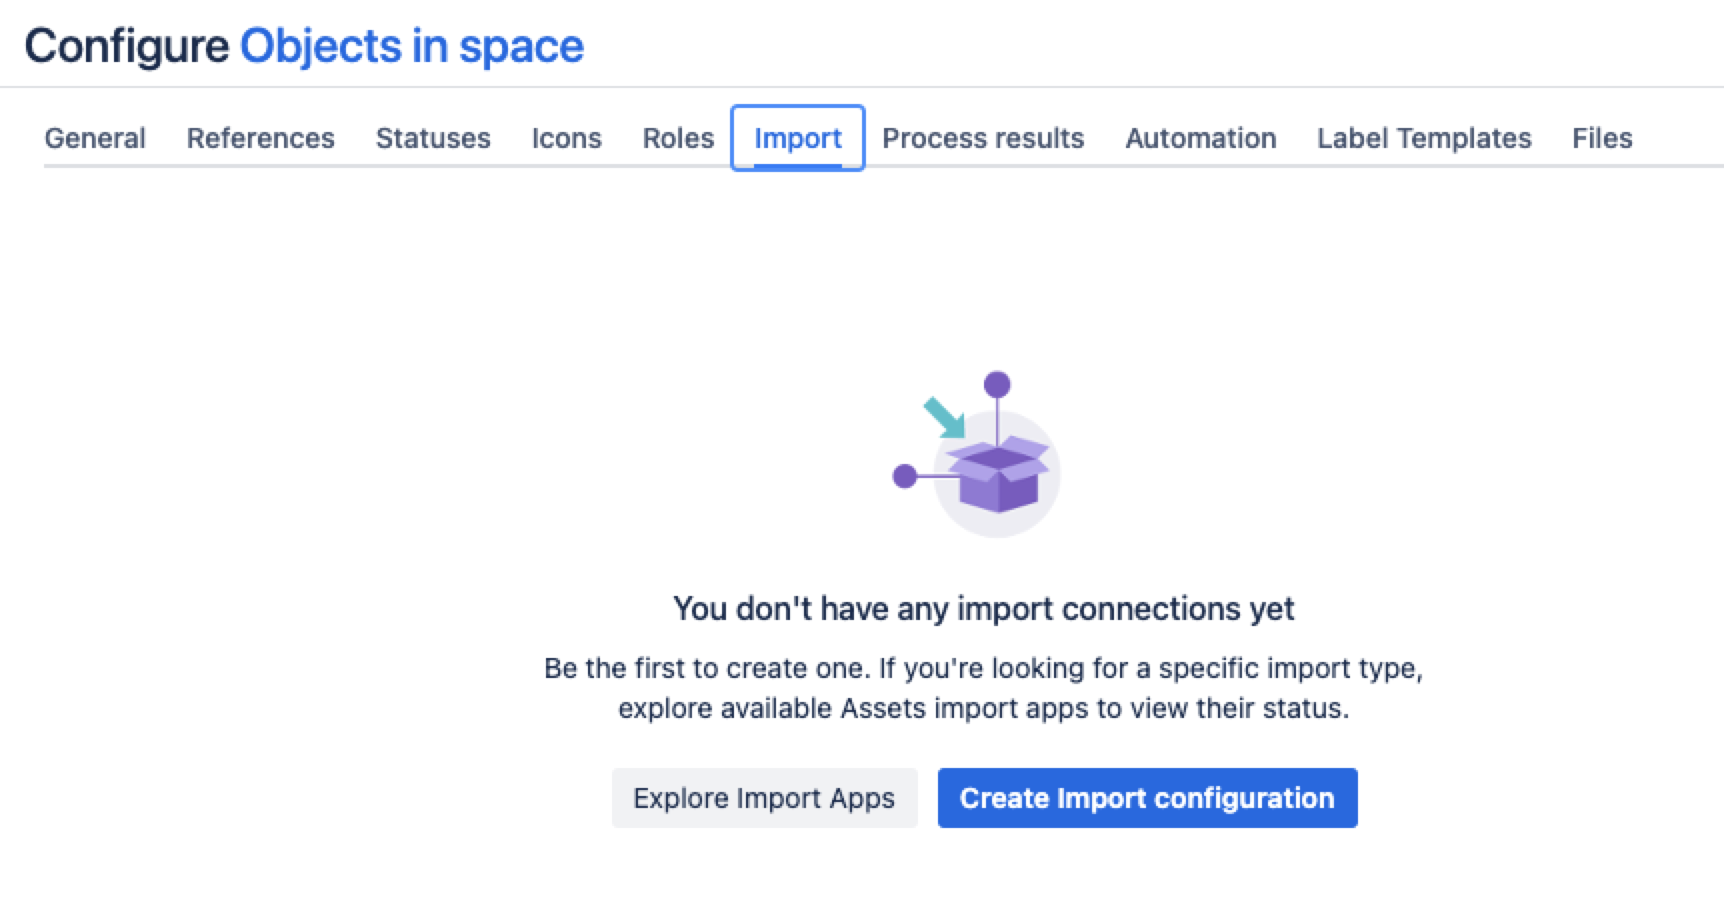
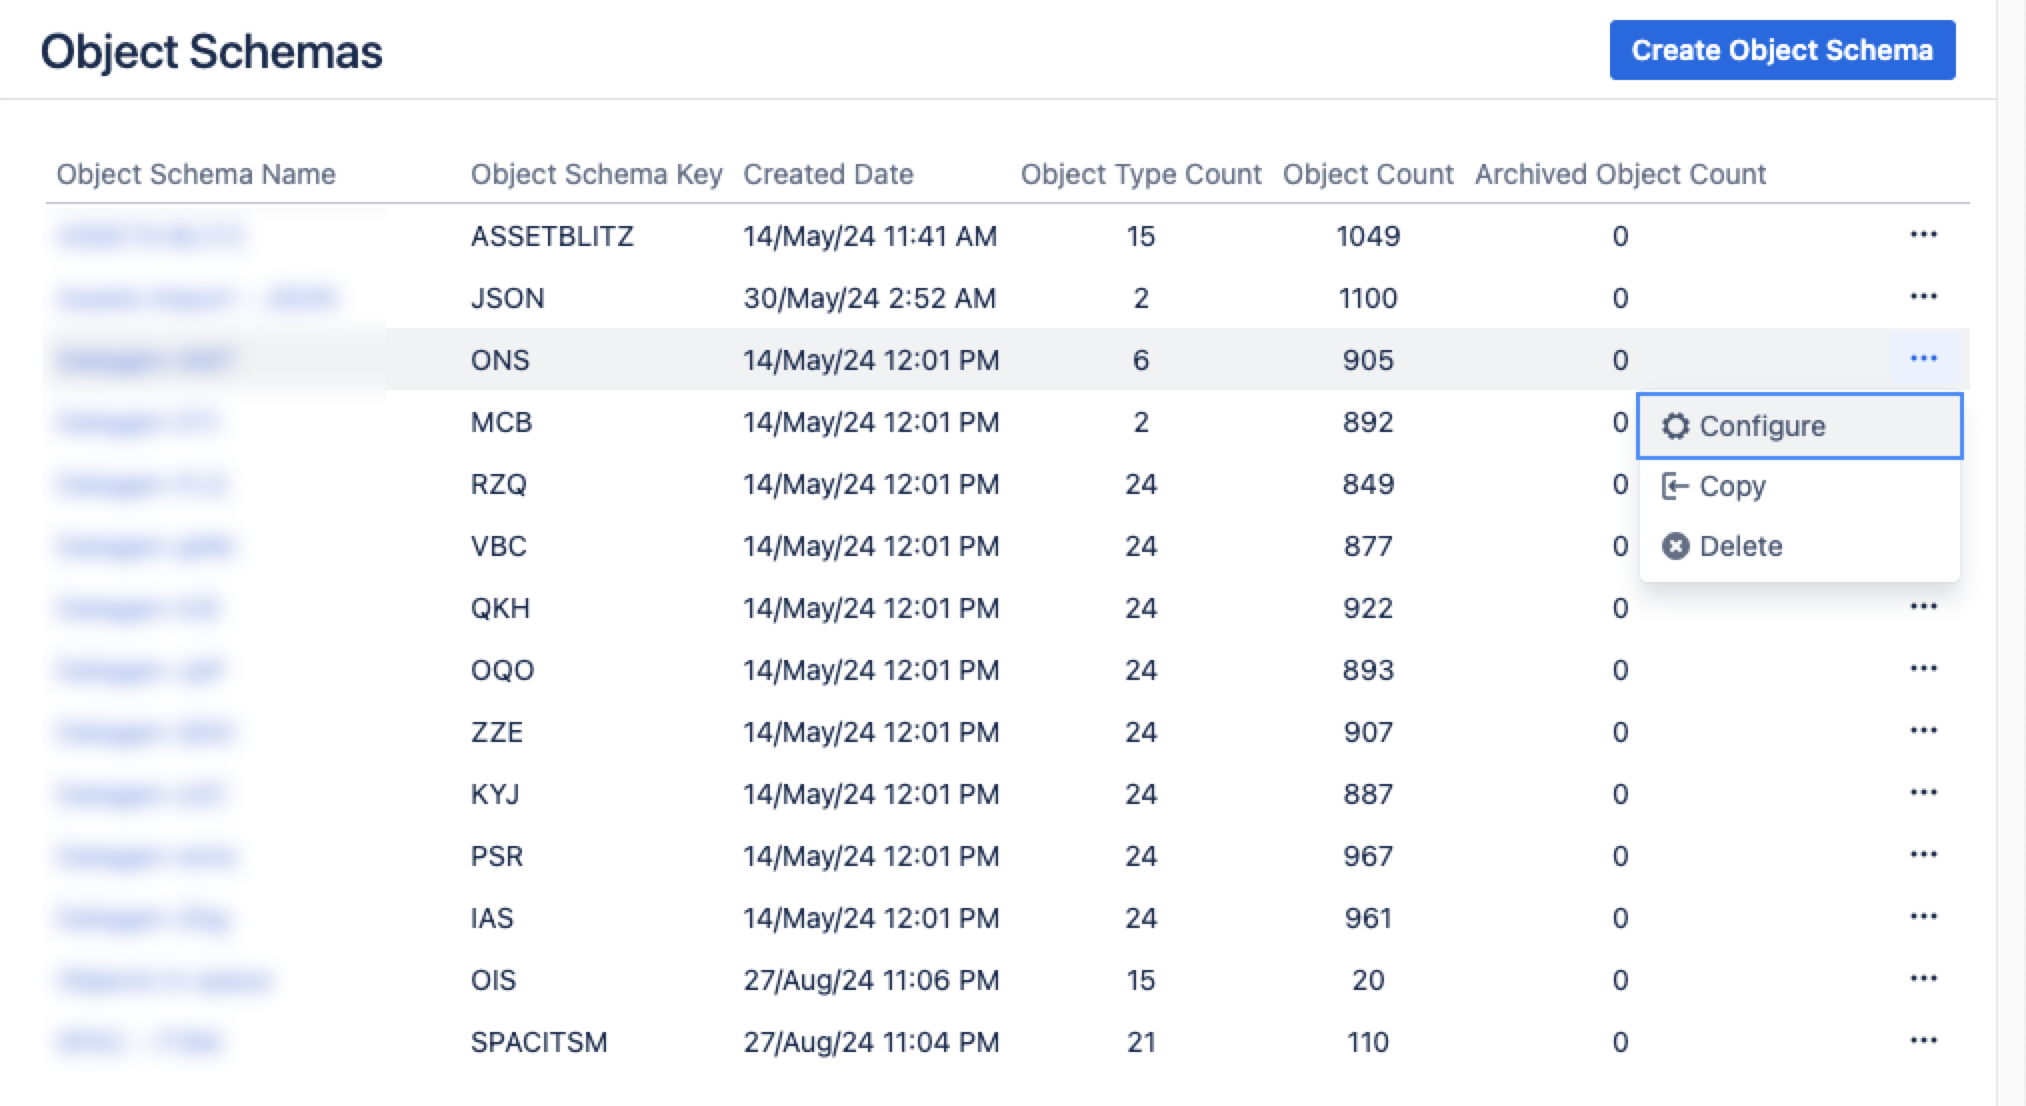
  2. From the Object Schemas list, select More actions and then select Configure.
    Configure an object schema window

  3. In the Schema configuration view, open the Import tab.

  4. Under the Import tab:

    • If there’s no import structure, you’ll see the message “You don't have any import connections yet”. Select Create Import configuration to create a new import structure.

    • If an import structure has already been created, select Create Configuration.
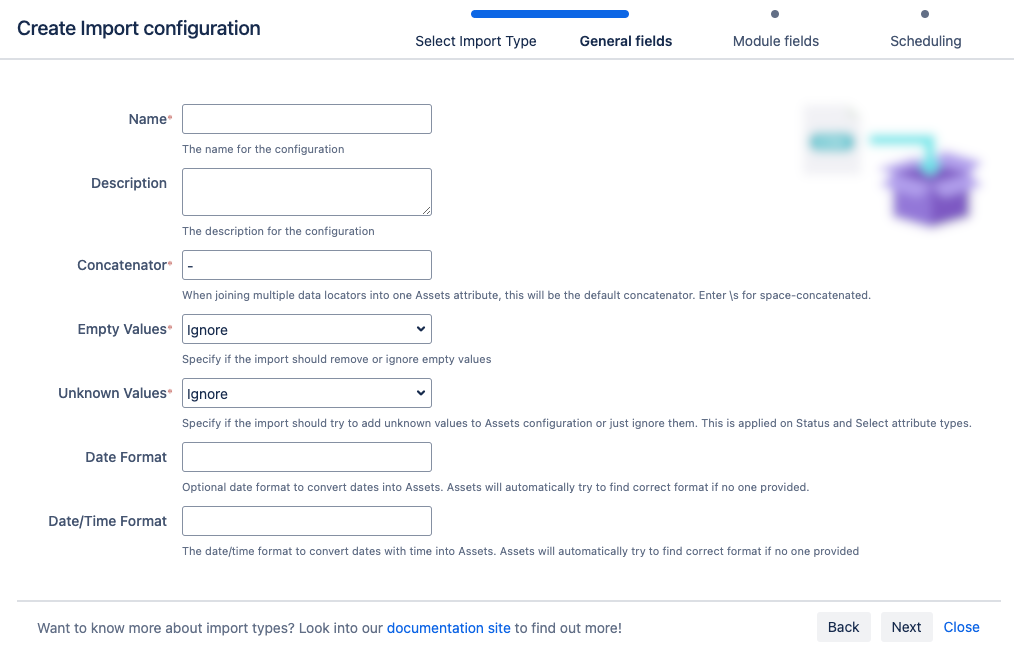
      Create import configuration window

  5. Select CSV import, then select Next.

  6. Fill in the General, Module, and Scheduling import fields.
    General fields of the import configuration

一般フィールド

次は、すべてのインポート タイプに共通する一般的なフィールドです。

名前

説明

名前インポートの名前。
説明 参考用の説明。
連結子

You can specify a default concatenator. When joining multiple data locators into one Assets attribute, this will be the default concatenator. One example could be to join two columns like "First name" and "Last name" into one attribute. So "Mathias" (first name) and "Edblom" (last name) will be concatenated as "Mathias Edblom" if using \s as concatenator.

Enter \s for space-concatenated. To include a concatenate character, place the value between double quotes (i.e "\s").

空の値

Defines what should happen when a Data Locator is empty:

  • Ignore - the existing value in the object will be retained and not overridden by an empty value.

  • Remove - the existing value for the object will be removed, and replaced with an empty field value.

Defines what should happen if a Data Locator is unknown. This could happen with attribute types like "Status" and "Select". 

  • Ignore - the value from CSV will be ignored and the object attribute will be left empty.

  • Add - the value passed in the CSV file will be added to the list and the object attribute will be updated with the new value.

インポート ソースの日付フィールドを Insight の日付に変換する際の形式。空のままにすると、Insight で正しい形式が自動で検索されます。
この形式は、Java の SimpleDateFormat のガイドラインに従って指定する必要があります。

インポート ソースの日付/時刻フィールドを Insight の日付に変換する際の形式。空のままにすると、Assets で正しい形式が自動で検索されます。
この形式は、Java の SimpleDateFormat のガイドラインに従って指定する必要があります。

モジュール フィールド

これらのフィールドはインポート タイプ (モジュール) に固有です。

設定

説明

グループを制限する

選択されたグループのユーザーのみがインポートされます。

アセットで非アクティブ ユーザーをソースから含めるかどうかを指定します。

スケジュール フィールド

スケジュール フィールドは、データの同期を維持する役割を果たします。

名前説明
同期アカウント

データをアセットに同期する際に使用する Jira ユーザー。

LDAP およびデータベースのインポートでは、同期に使用するアカウントに Jira 管理者権限が必要です。

cron 式自動同期の間隔。
自動同期インポートを自動で同期するようにスケジュールするかどうか。
通知インポートが失敗したときにすべてのオブジェクト スキーマ マネージャーに通知するには、チェックボックスを選択してください。 

7. Select Save Import Configuration.

Next, you can create a predefined structure and configuration for your import or create the object type and attribute mapping manually.

定義済みの構造と設定

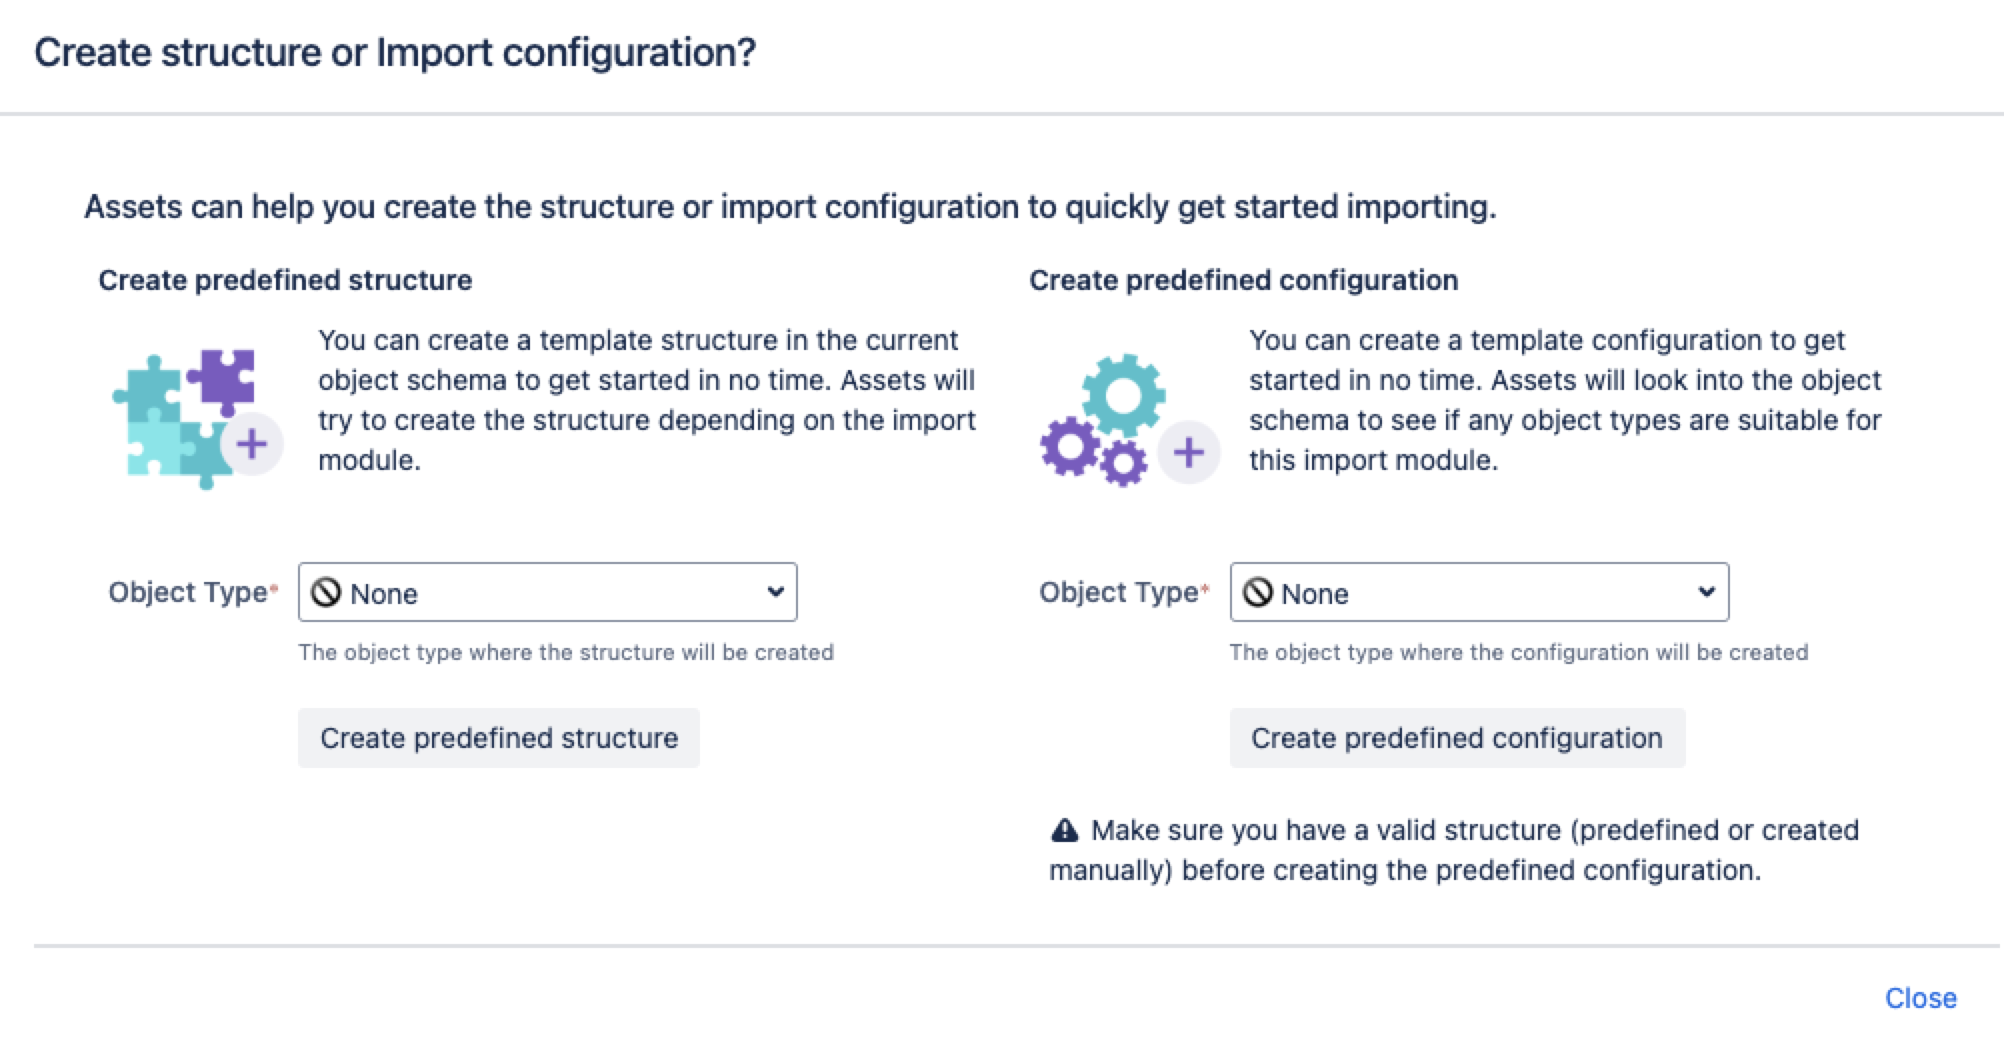
In the next step, you can create the predefined structure and configuration manually or Assets can create them automatically. To make this process automatic, select:
  • Create predefined structure – this will create object types with attributes and relationships in the schema

  • Create predefined configuration – this will create type mappings in the import configuration.

Create predefined structure and configuration window

作成されたインポート設定

If no predefined structure and configuration have been created, you still need to create the object type and attribute mapping. When you're ready, go to 2. Create object type and attribute mapping.

最後に一言

次のステップでは、オブジェクト マッピングの設定を作成します。Jira ユーザーのインポート タイプに固有の設定をいくつか紹介します。

オブジェクト タイプ マッピングの設定

名前

説明

セレクターJira ユーザー インポートのセレクターは使用されません。ユーザー AQL によって任意のデータをユーザー データから絞り込みます。

既知の制限事項

Currently, when importing Jira users into Assets, mapping and importing user properties directly within the Users import configuration isn’t possible.
最終更新日: 2024 年 12 月 30 日

この内容はお役に立ちましたか?

はい
いいえ
この記事についてのフィードバックを送信する
Powered by Confluence and Scroll Viewport.