SAML 2.0 SSO を設定するために Confluence DC を Okta と連携させる方法
プラットフォームについて: Data Center - この記事は、Data Center プラットフォームのアトラシアン製品に適用されます。
このナレッジベース記事は製品の Data Center バージョン用に作成されています。Data Center 固有ではない機能の Data Center ナレッジベースは、製品のサーバー バージョンでも動作する可能性はありますが、テストは行われていません。サーバー*製品のサポートは 2024 年 2 月 15 日に終了しました。サーバー製品を利用している場合は、アトラシアンのサーバー製品のサポート終了のお知らせページにて移行オプションをご確認ください。
*Fisheye および Crucible は除く
目的
Confluence Data Center is bundled with the SSO for Atlassian Server and Data Center App – we will refer to it simply as Atlassian SSO App in the remainder of this document.
With this App, Confluence administrators can configure SSO using SAML 2.0 or OIDC with your preferred Identity Provider (IdP). Check SAML single sign-on for Atlassian Data Center applications for further details on supported IdPs and more information on the SSO App.
This document highlights the steps to integrate Confluence Data Center with Okta for SSO using SAML 2.0.
This document is not intended to be a full reference guide, since you may need to change Okta or Confluence configuration to your organization's needs. Hence, this describes a sample configuration to have it working.
Atlassian Support can't provide assistance with configuring third-party tools like Okta. If you have questions, check the Okta documentation, Okta Help Center, ask the Atlassian Community, or get help from a Solution Partner.
要約
This is a guide to easily integrate Confluence (Service provider) with Okta (Identity provider IdP). Each requires their own specific configurations and we'll outline these below. If there are specific settings that need to in place and which are out of scope of this page, please check those with your IdP admins.
For more technical details and documentation, please refer to:
You may want to enable Confluence's default login page, as a security measure, so you won't lose access to Confluence, in the event of any issue during the following steps.
For reference: Enable default login page to bypass SAML in Confluence Data Center
Integration Steps
Confluence - User Base
The user base must exist in Confluence already, so the Okta users can log in successfully.
In this article, we're using a user base that's synchronized out of a Crowd directory.
参考:

Confluence - Start SAML SSO 2.0 Configuration
To configure SAML 2.0 on Confluence using the Atlassian SSO App, you need to have Confluence running with HTTPS. Refer to Running Confluence Over SSL or HTTPS if this isn't configured yet.
- Login to Confluence as an administrator and go to
 > User Management
 - Click on Authentication Methods (also known as SSO 2.0 on Confluence v7.15 and earlier versions) under USERS & SECURITY

- Select SAML single sign-on from the drop down

- Take note of the Assertion Consumer Service URL and Audience URL (Entity ID) under Give these URLs to your identity provider

- Leave the Confluence tab open and create a new tab for creating an Application on Okta
Okta - Create an Application
You will need to create a new application in Okta to make it available to users as Atlassian doesn't provide an Okta Application.
- As an Okta administrator, go to Applications and click on Create App Integration

- On the Create a New Application Integration screen, choose the following and click on SAML 2.0

- On the General Settings of the Create SAML Integration page, add the information as below and click on Next.
- App name: it could be any name you would like to be presented to your users; we are using Confluence in this example.

- App name: it could be any name you would like to be presented to your users; we are using Confluence in this example.
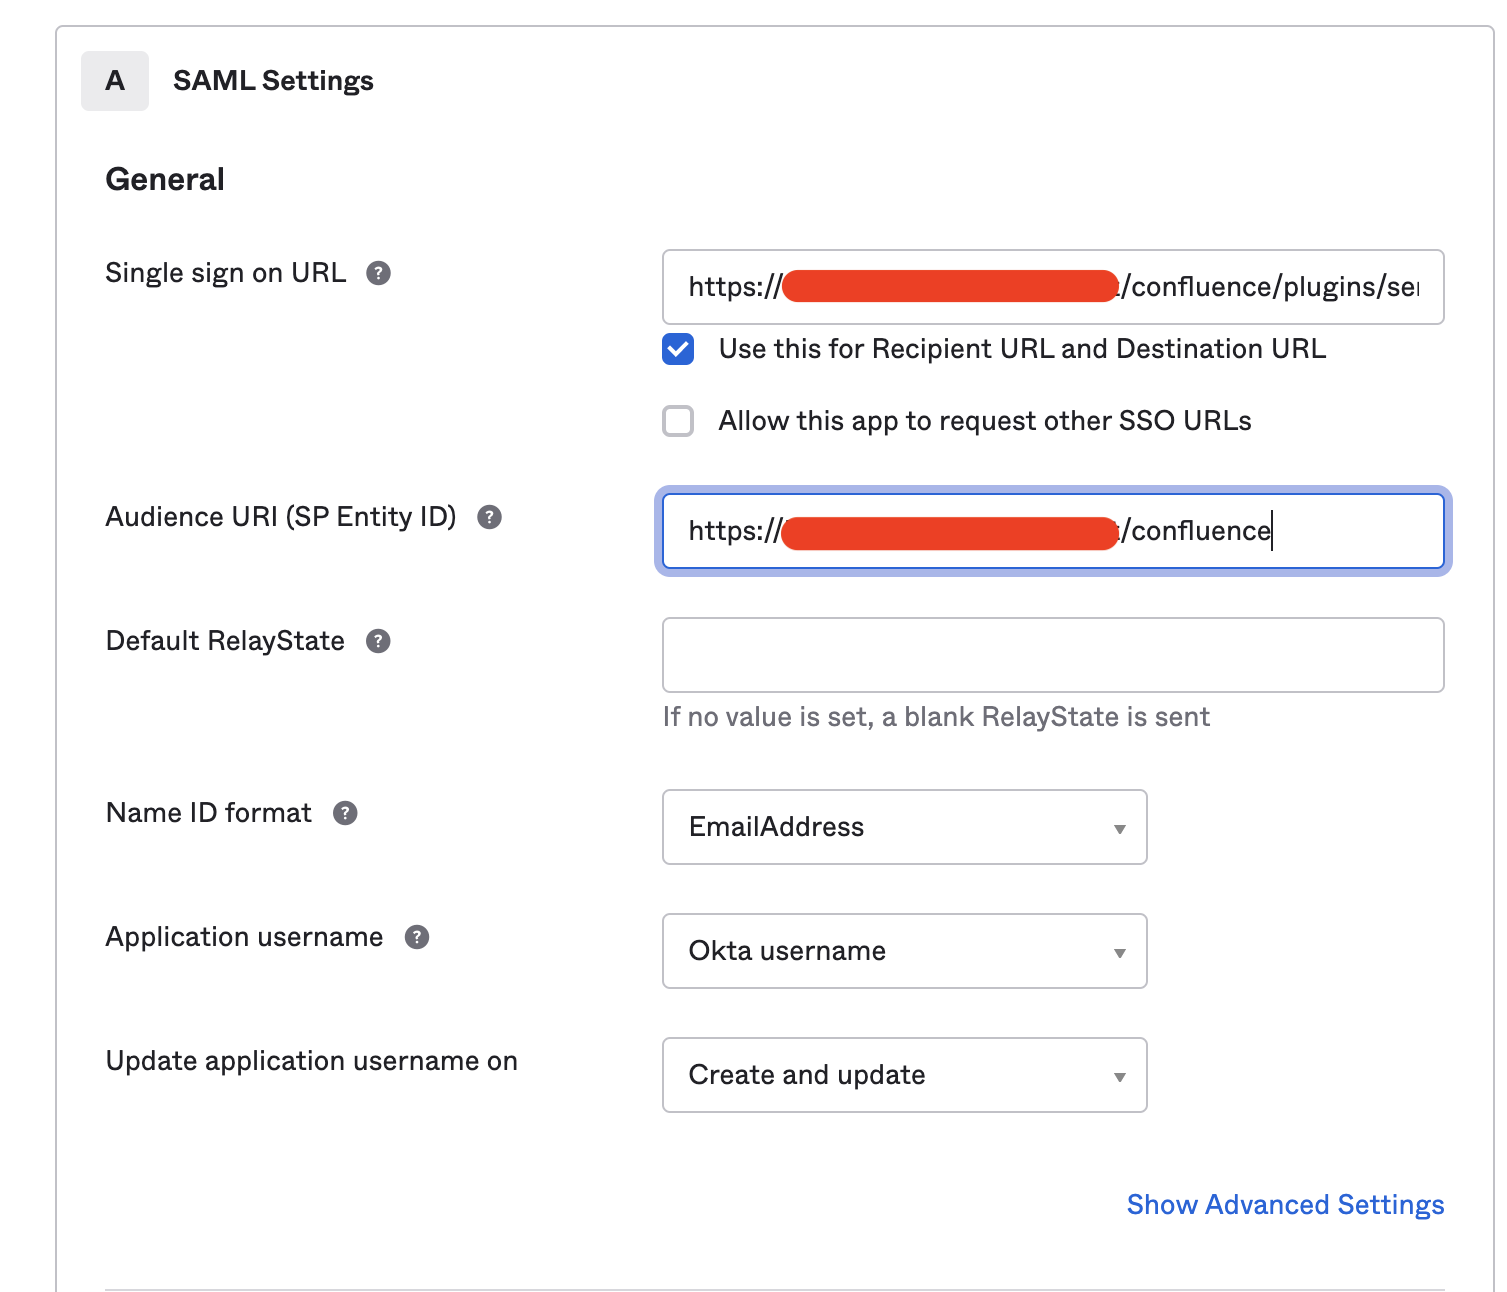
- On the Configure SAML screen, add the information as below and click on Next.
- Single sign on URL: Enter the Assertion Consumer Service URL captured in Step 4 under Configure SSO 2.0 on Confluence
- Audience URI (SP Entity ID):
- Name ID format:
EmailAddress; considering users would authenticate to Confluence using their email address.- This must match with the username attribute in Confluence's user directory, so you may need to change depending on the desired/used configuration.
Application username:
Email; considering users would authenticate to Confluence using their email address. If using a different method change accordingly.This must match with the username attribute in Confluence's user directory, so you may need to change depending on the desired/used configuration.
- On the Feedback screen, choose the options associated to your company and click on Finish

- The application is now created in Okta and you are sent to the Sign On tab.
- Under the Application Sign On Settings, click on the View Setup Instructions to open a new window with information that will be used in the next section.

Now that the Okta integration App is created, go back to the Authenticaction Methods tab in Confluence to complete the SAML SSO configuration.
We will get back to the Okta administration later to finish configuring the App.
Confluence - Finalize SAML SSO 2.0 Configuration
- On the Single sign-on issuer attribute, use the value from Identity Provider Issuer from Okta's configuration from the previous section.
- On the Identity provider single sign-on URL attribute, use the value from Identity Provider Single Sign-On URL from Okta's configuration from the previous section.
- On the X.509 Certificate attribute, use the value from X.509 Certificate from Okta's configuration from the previous section.
- On the Username mapping attribute, use
${NameID}.- This value is used based on the configuration made on Okta on the previous step. You may need to change it depending on your configuration.

- Use Confluence to manage Users and Groups and Okta is used just for authentication - (Without JIT); OR
- Use Okta to manage Users and Groups - (With JIT)
Without JIT
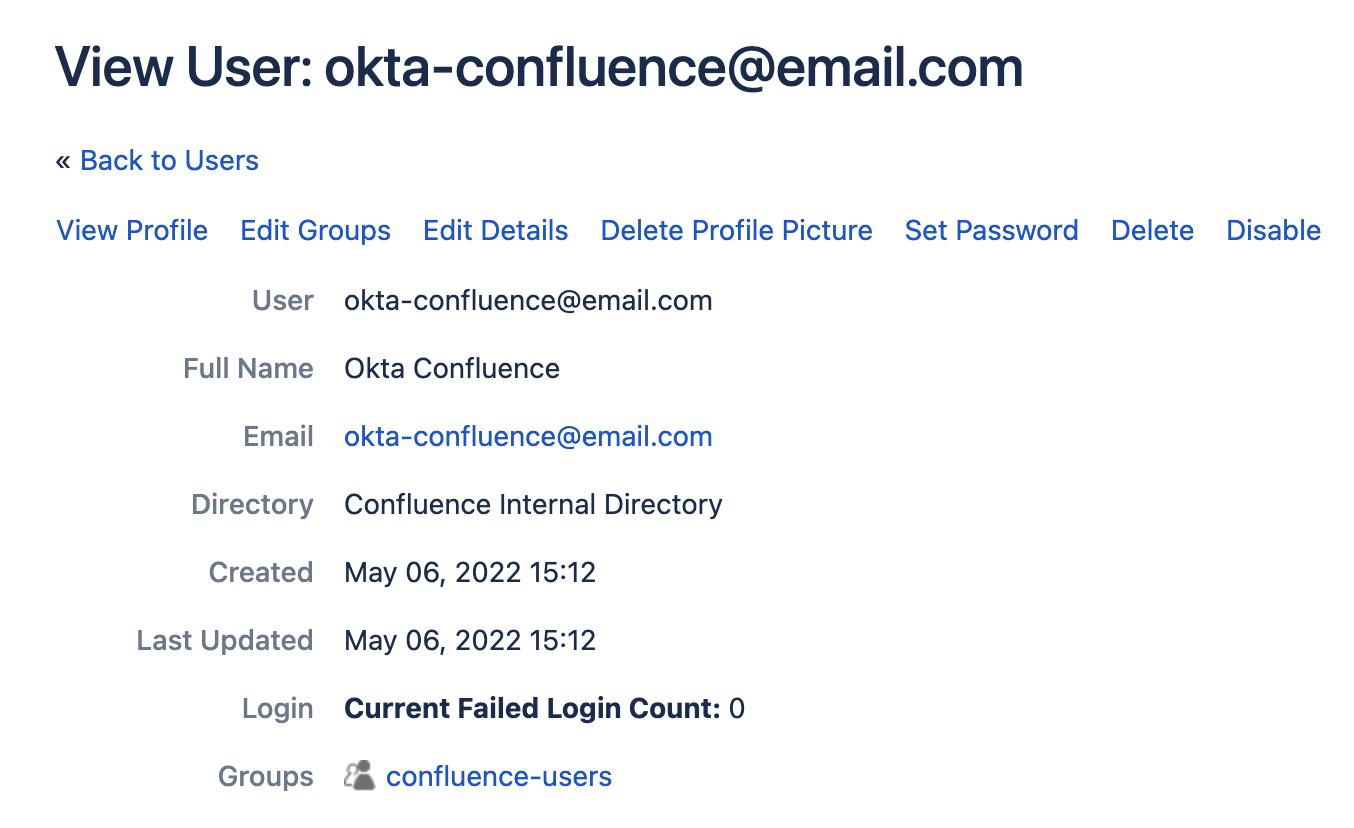
- Create a user (for example: okta-confluence@email.com) in both Okta and Confluence (the user on Confluence can be synced from an remote directory)

- In Okta assign the user to the Application

- In Confluence ensure the user has the preferred groups and permission
- Proceed to log in to Confluence via Okta as the user created in Step 1
With JIT (JIT User Provisioning)
- Create a desired group on Okta and assign user and the Application created in Create an Application on Okta to the grou

- Create Attribute Statements and Group Attribute Statements in Okta
- Browse to Application and click on the application you just created in Okta side
- Browse to General tab and click on 'Edit' to the right of "SAML Settings" section

- Enable JIT in Confluence and enter the attribute names in the respective fields:

- Save the changes
After completing all the steps above, proceed to log in to Confluence via Okta.
The users need to be members of confluence-users (default group in Confluence) to be able to browse the application. If you're testing with an admin user, make sure to add them to confluence-administrators group as well.
既知の問題