サービス プロジェクトのリクエストを承認する
Jira Service Management プロジェクトには、課題に承認ステップを設定して、承認者を割り当てるオプションがあります。ご自身に "承認者" のロールが割り当てられている場合は、サービス リクエストを承認するように求められることがあります。この場合、承認が必要であることを通知するメールが届きます。プロジェクトの承認通知テンプレートに、リクエスト詳細と承認ボタンの変数が追加されている場合は、メール内からリクエストを操作できます。そうでない場合は、リクエストを表示/操作できるカスタマー ポータルへのリンクが含まれます。
カスタマー ポータルで承認および却下する方法
プロのヒント: 承認通知テンプレートにリクエスト詳細および承認ボタンを追加するようプロジェクト管理者に依頼して、メール内でリクエストをすばやく操作することができます。「サービス プロジェクト通知の管理」を参照してください。
3.12 以前のバージョンの Jira Service Management からアップグレードすると、承認通知テンプレートが更新されない可能性があります。
- メール内のリンクを選択するか、URL を入力するか、そのどちらかの方法でサービスデスクのカスタマー ポータルに移動します。
- 承認が必要なリクエストを表示し、サポート情報を確認します。
- コメント フィールドの下の [追加] を選択することでコメントを残します。プロジェクトのワークフロー設定によって、コメントが必須な場合とそうでない場合があります。必須でなくても、特にリクエストを却下する場合などには、そのように決定した理由をコメントによってお客様に知らせておくことができます。
- [承認] または [却下] を選択します。コメントが必須な場合は、[このリクエストを承認する] または [このリクエストを拒否する] ダイアログにコメントを入力する必要があります。
なお、リクエストにすでにコメントを追加している場合でも、続行するにはコメントを入力する必要があります。 - カスタマーは、選択されたアクションの通知を受信します。
- 承認セクションにはリクエストの指定承認者の一覧が表示されます。このセクションは、承認が保留中のリクエストがある場合にのみ表示されます。
- リクエストが承認されると、承認セクションは表示されなくなり、承認に関する詳細はアクティビティ セクションに追加されます。
例えば、リクエストは承認済みになり、ステータスはサポート待ちに変更されます。
メールから承認および却下する方法
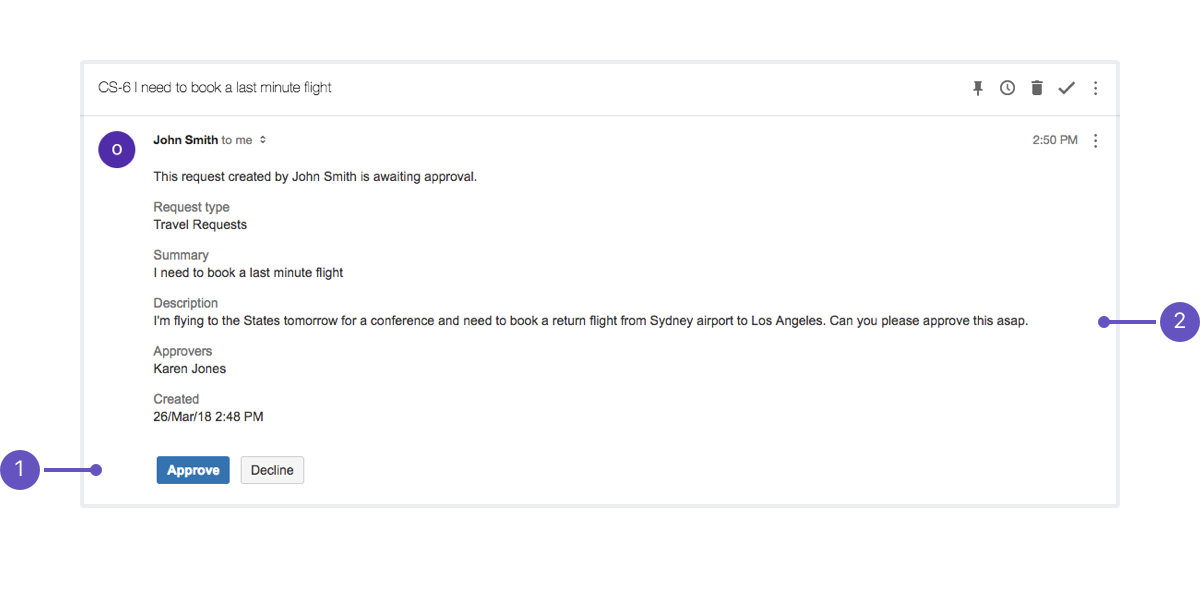
良い方法があります。既定の承認通知テンプレートを使用できます。
- 承認リクエストを表示し、行いたいアクションを決定します。
- メール内の承認または却下ボタンを選択します。カスタマー ポータルにログインしていない場合、ログインを求めるプロンプトが表示されます。以下が表示されます。
- 承認を押した場合は、確認画面が表示されます。
- [却下] を押した場合は、コメントの追加や却下を確認する画面が表示されます。プロジェクトのワークフロー設定によって、コメントが必須な場合とそうでない場合があります。必須でなくても、リクエストを却下する理由をコメントによってお客様に知らせておくことができます。
- カスタマーは、選択されたアクションの通知を受信します。
- 承認ボタン: 承認者はメール内からリクエストを操作可能
- リクエスト詳細: リクエストの完全な詳細 (リクエスト タイプ、要約、作成日、およびリクエスト タイプ設定で選択されたフィールドを含む)
リクエストに必要な承認者が 1 人だけで、当人がリクエストを承認する場合、リクエストは承認トランジションのワークフローで定義されたステータスに移行します。2 人以上の承認が必要な場合、ステータスはすべての承認者が応答するまで変わらず、応答済みの承認はリクエストに記録されます。
リクエストを却下した(またはいずれかの承認者が却下した)場合、リクエストは却下トランジションのワークフローで定義されているステータスに自動的に移動し、却下の返答はリクエストに記録されます。

