Adding approvers from Insight objects
Jira Service Management では、ワークフロー ステップの承認を要求できます。つまり、適切なユーザーが承認するまで、あるステータスから別のステータスにリクエストを移行できないようにします。Insight では、適切なユーザーとはアセットの所有者、またはアセットの保守を担当するグループです。所有している、または関係のあるアセットに対してリクエストが提出された際に、上記のユーザーを承認者として追加できるようになりました。承認者は、リクエストで選択したアセットに基づいて動的に変更されます。
はじめる前に
Insight から承認者を追加するには、次のアイテムが必要です。
Attribute of type User or Group added to an object type
Insight object/s custom field mapped to your objects in Insight
まだない場合は、次の手順に従います。
When you add the User/Group attribute to your object type, you can then fill it in for the underlying objects by choosing a specific user or group. These people will have relations to your objects and can be assigned as approvers. For more info on attributes, see Adding attributes to object types.
属性をオブジェクト タイプに追加するには、次の手順に従います。
- In Insight, select an object type, and switch to the Attributes tab.

- User または Group タイプの属性を追加します。次の例では User 属性を追加しました。次のステップで、適切なユーザーをこのオブジェクトに割り当てます。
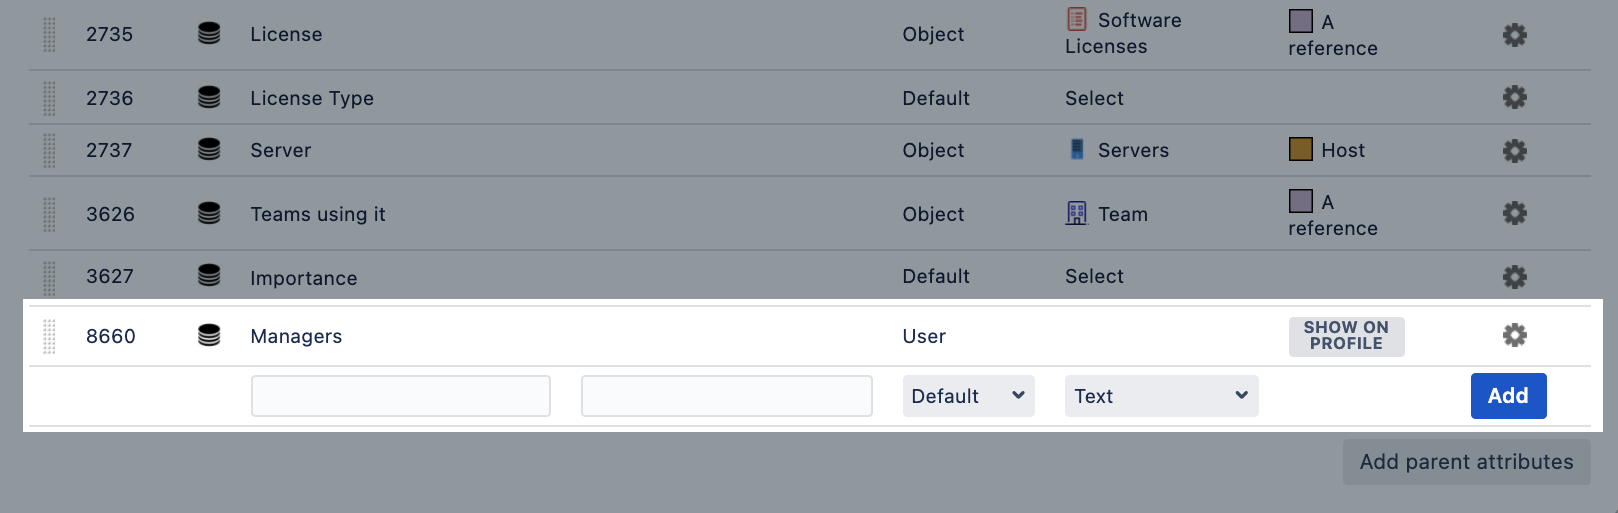
You can configure extra details for each of your attributes by selecting the cog icon on the right. One of the useful options is cardinality – it will let you choose how many users can be selected for a field.
Switch to the Objects tab, edit an object, and assign a user or group to the attribute you added.

An Insight object/s field works like a link between Insight and your projects in Jira. The field is configured differently than Jira custom fields, but when it comes to adding it to Jira screens, it behaves like a regular custom field. You will select this field, together with an attribute, when creating an approval step. For more info on the Insight object/s field, see Default Insight custom field.
To create the Insight object/s field:
In Jira, go to Administration > Custom fields, and create a new custom field.
Select the type as Insight Object/s.
Choose the name, applicable projects and issue types.
カスタム フィールドを、承認を追加する予定のワークフローで使用される画面に関連付けます。通常、これらはワークフローで使用される課題タイプに関連する作成と編集の各画面です。
To link the Insight object/s field to your projects and objects:
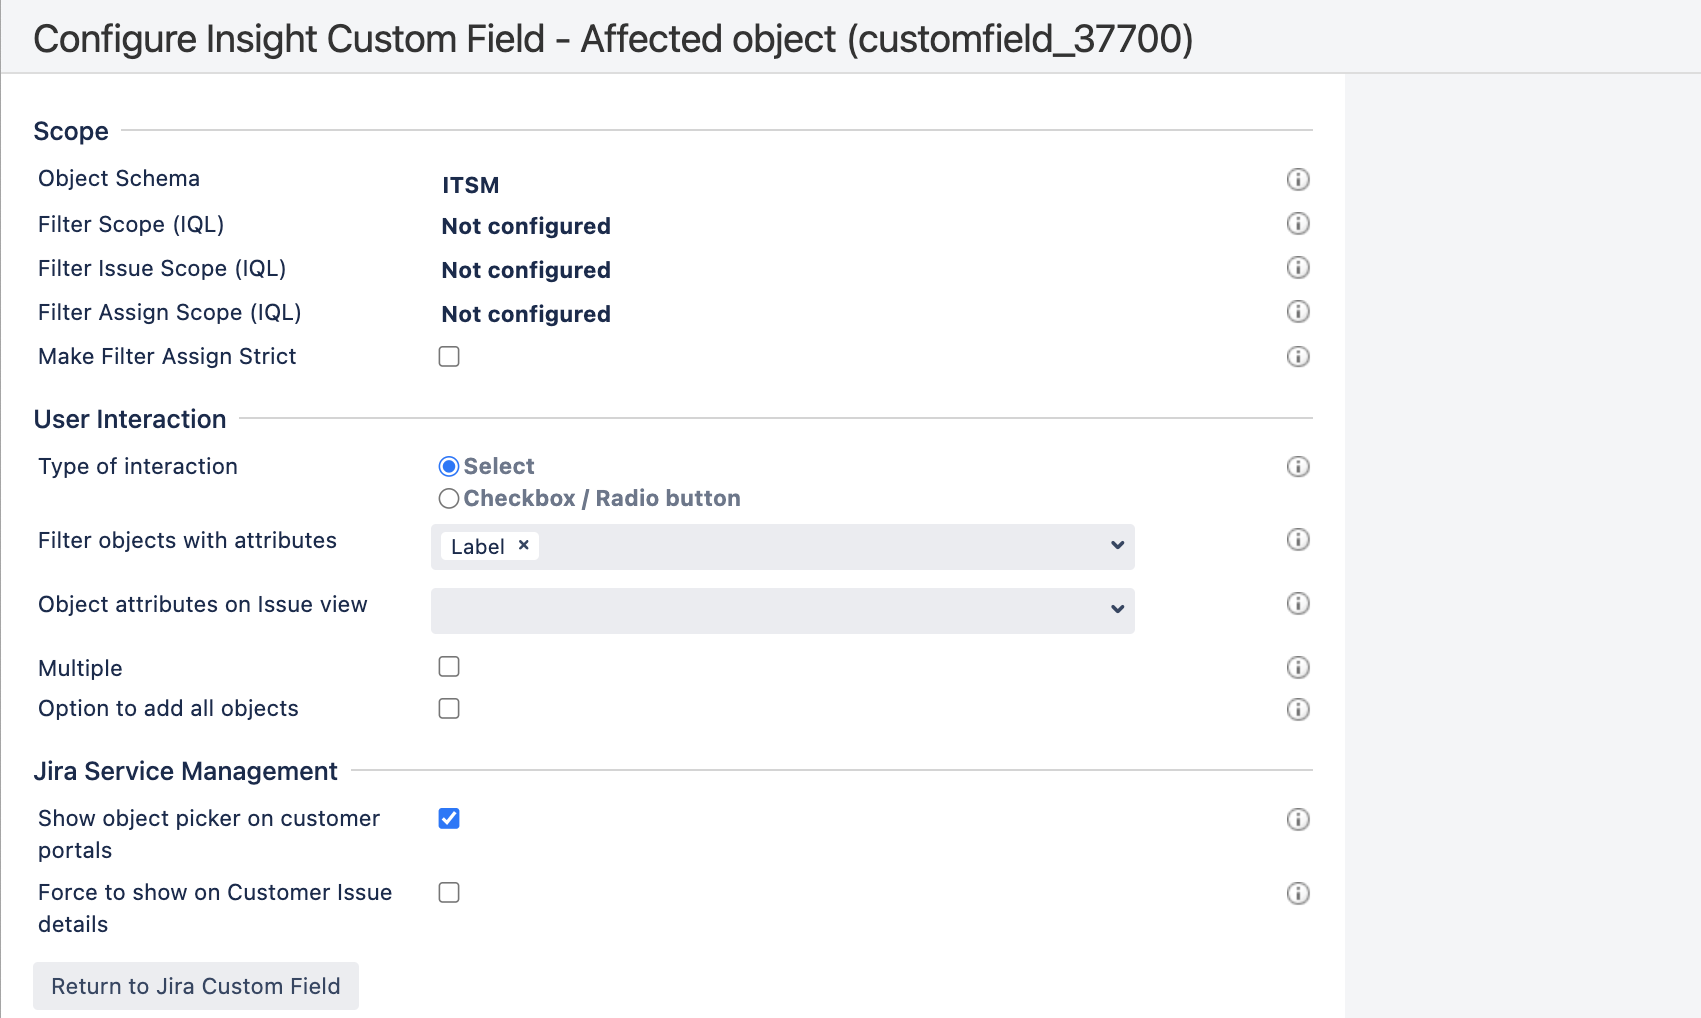
On the Custom field page, find the custom field, and click … > Configure.
[Insight 設定を編集] を選択します。このフィールドに固有の設定が表示されます。
アセットを格納するオブジェクト スキーマを選択します。このオプションは、フィールドを承認に使用するのに十分なはずです。さらに設定する場合は、上記のリンク先のドキュメントをご参照ください。
承認者の追加、設定、表示
属性とカスタム フィールドの準備が整ったら、承認ステップを設定して承認者を Insight からリクエストに追加できます。
1. ワークフローに承認ステップを追加する
承認ステップをワークフローに追加するには、次の手順に従います。
承認を追加するワークフローを編集します。
Select a status, and click Add approval.
Select Insight object field and choose your custom field. We’ll check this field for any valid attributes and will let you choose the one with your approvers.
Choose how many approvals are required and which transition your request should use when it’s approved or declined.
Click Create to add the approval.
2. カスタマー ポータルの [Insight オブジェクト] フィールドを有効にする
承認者はリクエストで選択したオブジェクトに基づいて変更されますが、実際にオブジェクトを選択するユーザーが必要です。このステップでは、カスタマーがカスタマー ポータルでオブジェクトを選択できるようにします。スキップしても、エージェントはオブジェクトをエージェント ビューで選択できます。
カスタマー ポータルでフィールドを有効にするには、次の手順に従います。
プロジェクト内で [プロジェクト設定] > [リクエスト タイプ] の順に移動します。
リクエスト タイプを選択します。
If your field isn’t in Visible fields already, click Add a field, and add it.
3. リクエストを申請して承認者を表示する
リクエストを申請してその中のオブジェクトを選択すると、リクエストが承認ステップに達した際に承認者が自動で追加されます。
リクエストを登録するには、次の手順に従います。
カスタマー ポータルを開いて、リクエストを登録します。
The Insight object/s field should let you select one of your objects from Insight.

リクエストの承認者を表示するには、次の手順に従います。
承認ステップによって、リクエストをワークフロー ステータスに移行します。
選択したオブジェクトに関連する承認者は、自動で追加されるはずです。また、承認者にはこのリクエストを承認または却下するように求めるメール通知が届きます。
