シークレット スキャン
A Data Center license is required to use this feature. Get an evaluation license to try it out, or purchase a license now.
On this page
About secret scanning
While your team collaborates on code to build software, sensitive information such as passwords, tokens, private keys, environment variables, .pem files or other secrets may accidentally get added to your repositories. As soon as code containing secrets gets pushed into your repositories, secrets are added to the commit history and persist until they are revoked. Unidentified breaches may result in the potential use of secrets by any users with access to your repositories.
To improve the security of your repositories and help you make sure that secrets are not accidentally exposed in your code, Bitbucket scans your repositories for secrets and triggers notifications when leaked secrets are detected within new commits.
Email notifications are sent out to everyone involved in the commit of the secret: the authors, committers, and the developer who pushed or merged the code containing secrets into the repositories. Note that Bitbucket doesn't send email notifications externally. This means that Bitbucket will send an email only to:
- user that exists in your instance
- user that has a configured email in your instance
- user that has at least read access to a repository where a secret is detected.
Even if a mail server isn’t configured in your instance, Bitbucket records an alert about the detected secret in the audit log, which you can access from Administration > Audit log, and in the audit.log file on the file system ($BITBUCKET_HOME/log/audit). Learn more about these records in the section Track alerts about leaked secrets.
Secret scanning is enabled by default in your Bitbucket instance, and both global and system admins can disable or enable secret scanning by modifying the configuration properties in the bitbucket.properties file.
Customize the scanner
The scanner makes use of default patterns to scan your repositories and can detect a majority of the generic secrets. You can customize the scanner to optimize the performance and reduce the number of false positives—modify or delete the default patterns or add your own regex patterns and file paths.
To customize:
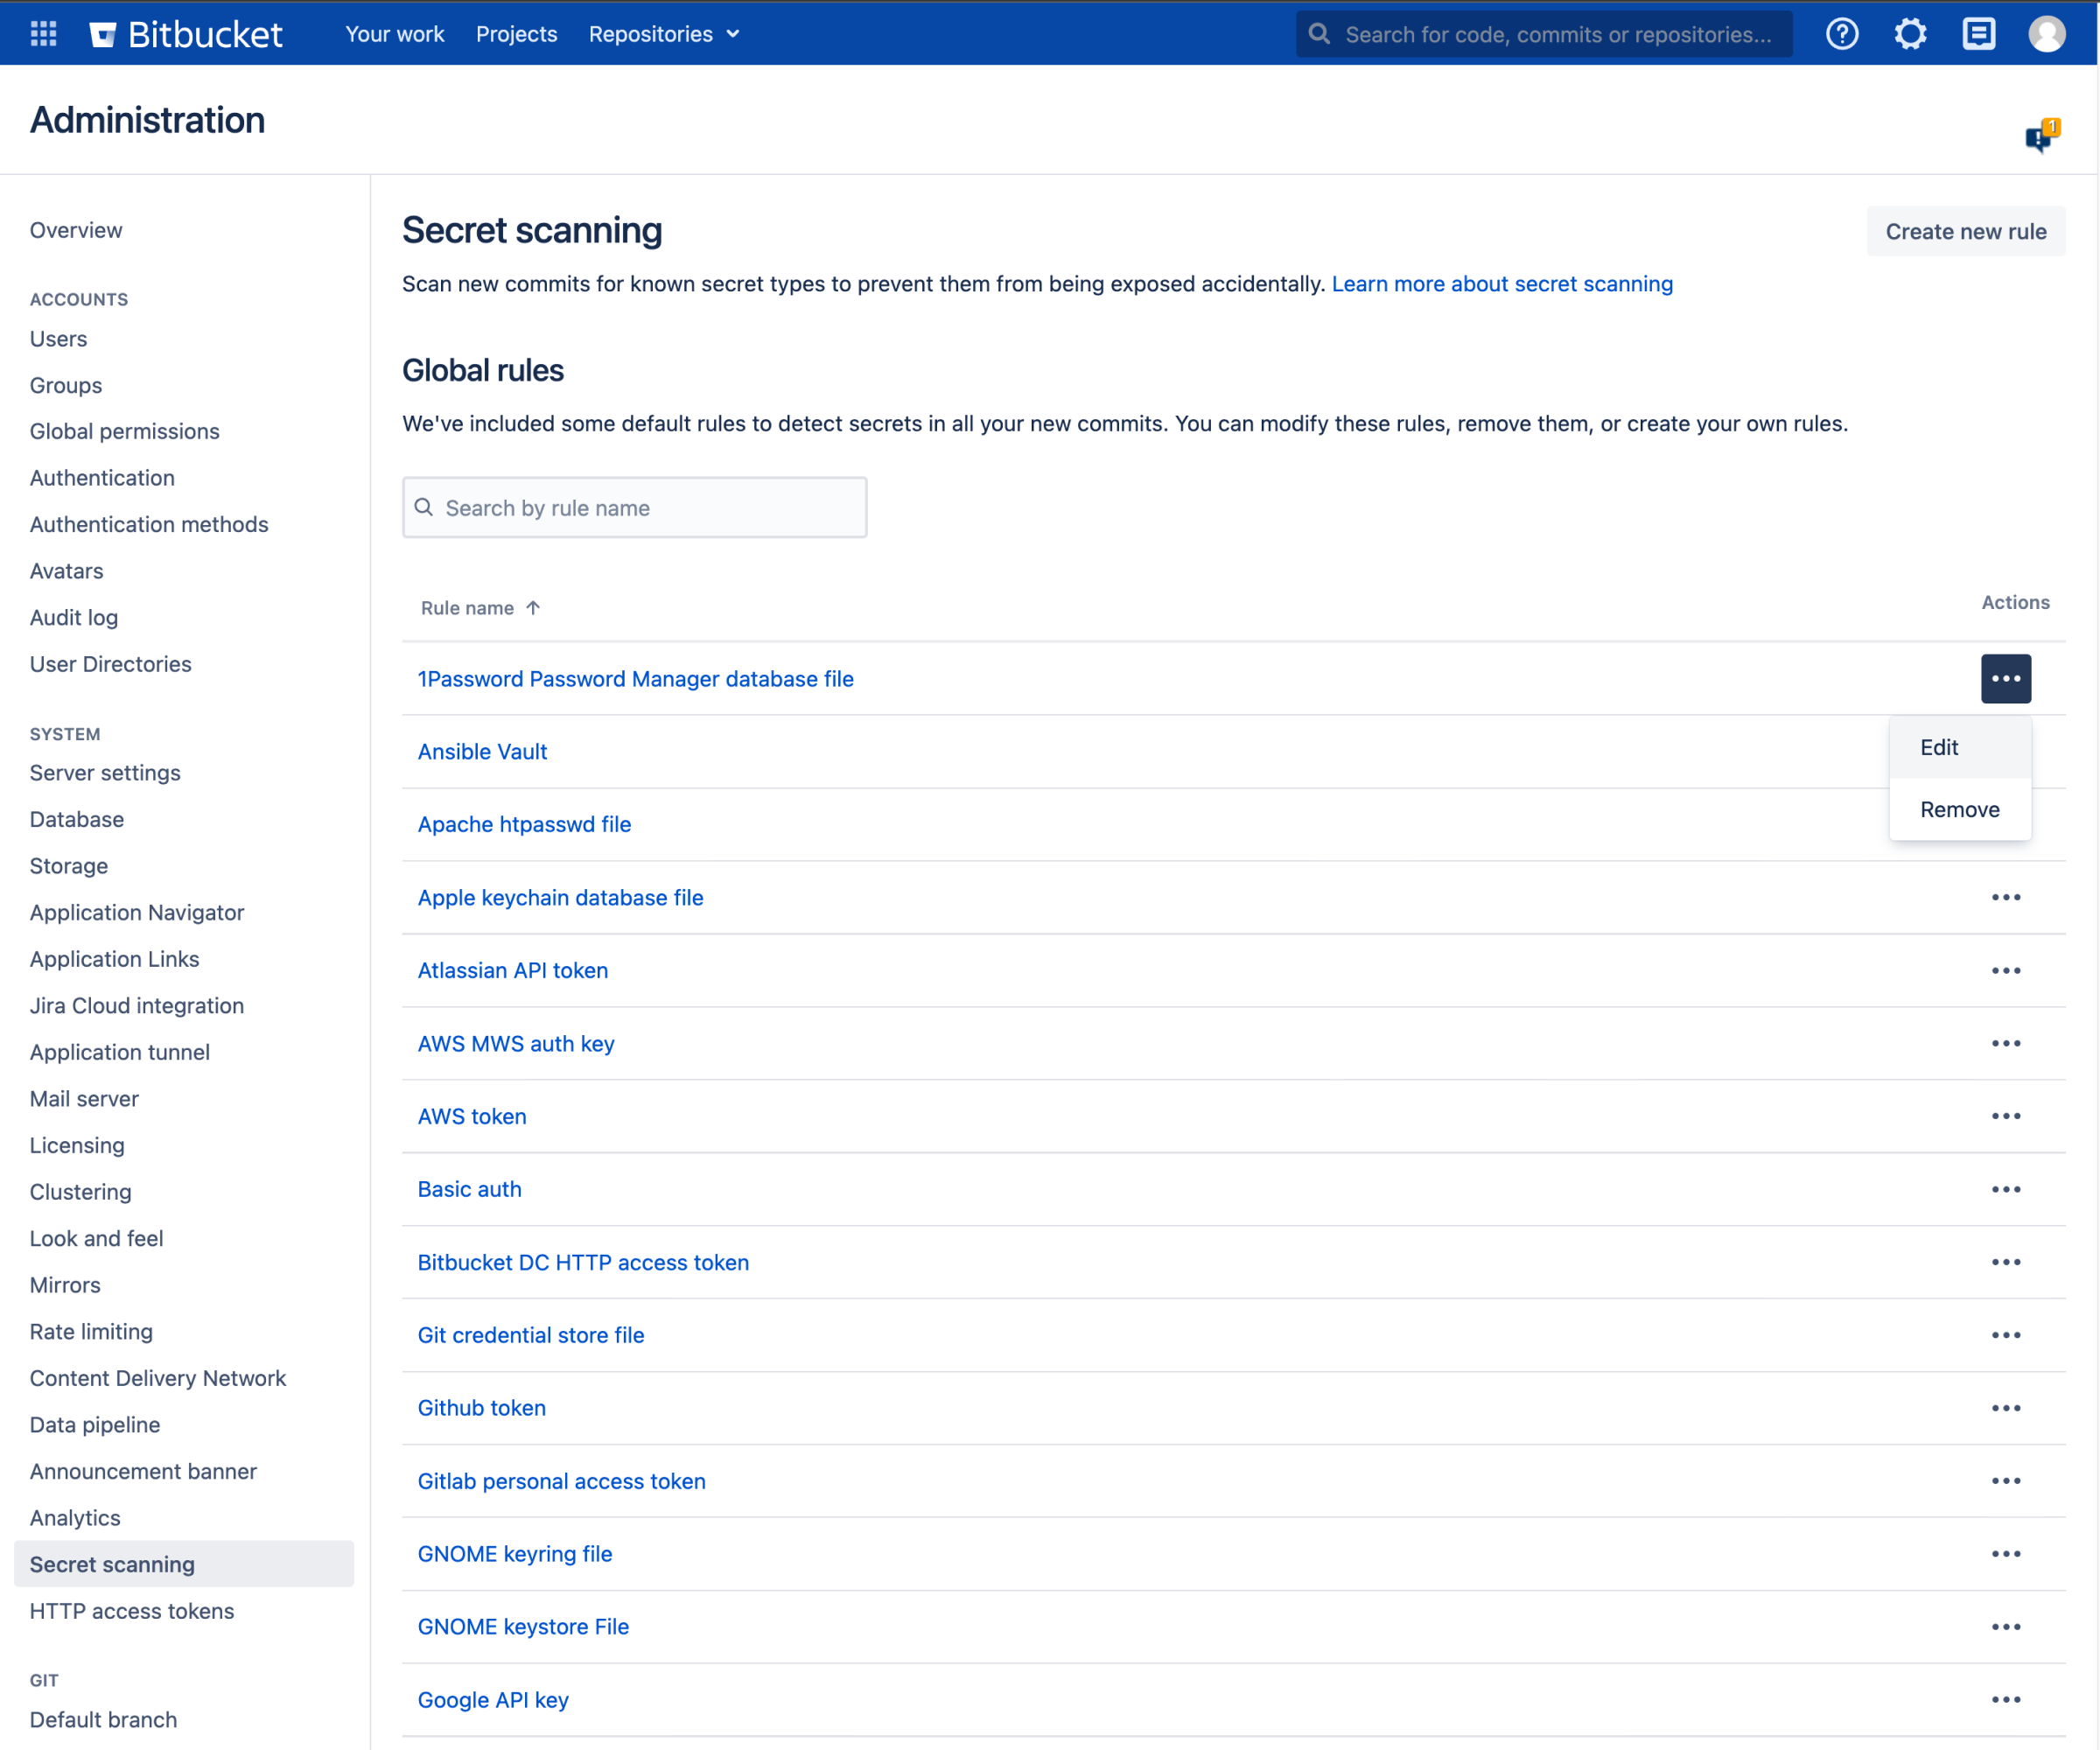
- Navigate to Administration > System > Secret scanning.
- Select Create new rule to add your own rule or select More actions … > Edit to modify a default rule.
Enter the rule details such as name, including regex for Line pattern or Path pattern.
When you specify both path and line pattern regex, scanning looks for the pattern only in the specified file paths.
- [保存] を選択します。
To remove a rule, select More actions … > Remove.
Learn more about regex patterns and Bitbucket secret scanning rules
Resolve issues detected by secret scanning
Once a secret has been detected in a repository by the scanner, it is good practice to treat the secret as being compromised. Any secrets that are detected by the scanner should be invalidated in the tool they were created in (either through revoking, deleting, or rotating said secret) and new secrets should be generated in their place. Invalidating secrets may involve working with other teams in your organization such as DevOps or Security to make sure that existing systems and workflows are not impacted.
Removing the secret from Git history by force pushing does not guarantee that the commit is completely cleaned up. There are lots of edge cases (other branches, pull requests, forks, local copies, etc) where the commit may still be referenced and so will never be completely removed from Git, even if it is not part of the main branch. Additionally, anyone with access to the repository may have already seen the secret and made a copy of it elsewhere. Therefore, we don’t recommend that you revoke the secret from your commit history.
If the detected secret is a false positive, you can get in touch with your admin and ask them to make modifications to secret scanner to reduce the chance of a false positive. Here are some ways to narrow down false positives:
- Modify the regex in a secret scanning rule (sometimes the regex used may be too permissive).
- Provide a path pattern to limit the files and directories scanned.
Track alerts about leaked secrets
Along with sending email notifications about detected secrets when a mail server is configured, Bitbucket also records these alerts in two locations:
the audit log that you can access from Administration > Audit log
the
audit.logfile on the file system ($BITBUCKET_HOME/log/audit).
Audit log in the user interface
To find alerts about detected secrets in the audit log, select Administration > Audit log. You can filter the list of alerts by selecting the + More button and Secret detected for Summary.

Each record will look similar to the following:
## When a file containing secrets is found:
Node ID: 67a19601-3e87-405e-8951-6b0be58caf71
Method: System
Commit id: db53836ac53694d4a12dc2a84e56f46ac8cf01d4
Initiating user: kevin
Line: null
Path: more.jks
Rule id: Java keystore file
More affected objects: db53836ac53 kevin
----
## When a secret is found within a file:
...
Line: 1
Path: env
Rule id: Basic auth
More affected objects: 0a1fea57765 kevin
The audit.log file
In $BITBUCKET_HOME/log/audit, Bitbucket includes a JSON record for each audit event. If secret scanning is triggered, a new record with the relevant information will be appended. If pragmatically parsing these JSONs, we may want to look inside the auditType key for entries similar to the following:
...
  "auditType": {
    "action": "Secret detected",
    "actionI18nKey": "bitbucket.secretscanning.audit.action.secretdetected",