Quick Start with Bitbucket Server and AWS
This page describes deploying a single-node instance of Bitbucket Server on AWS. For a deployment that is better suited to the architectural principles of AWS, we recommend deploying a clustered Bitbucket Data Center instance, which offers greater performance at scale, high availability and elastic scalability.
To get started using Bitbucket Server in AWS
- Sign in to the AWS Console, and go to Services > CloudFormation.
- Click Create Stack.
Select Specify an Amazon S3 template URL field and paste in
https://atlassian-software.s3.amazonaws.com/templates/bitbucket/BitbucketServer.template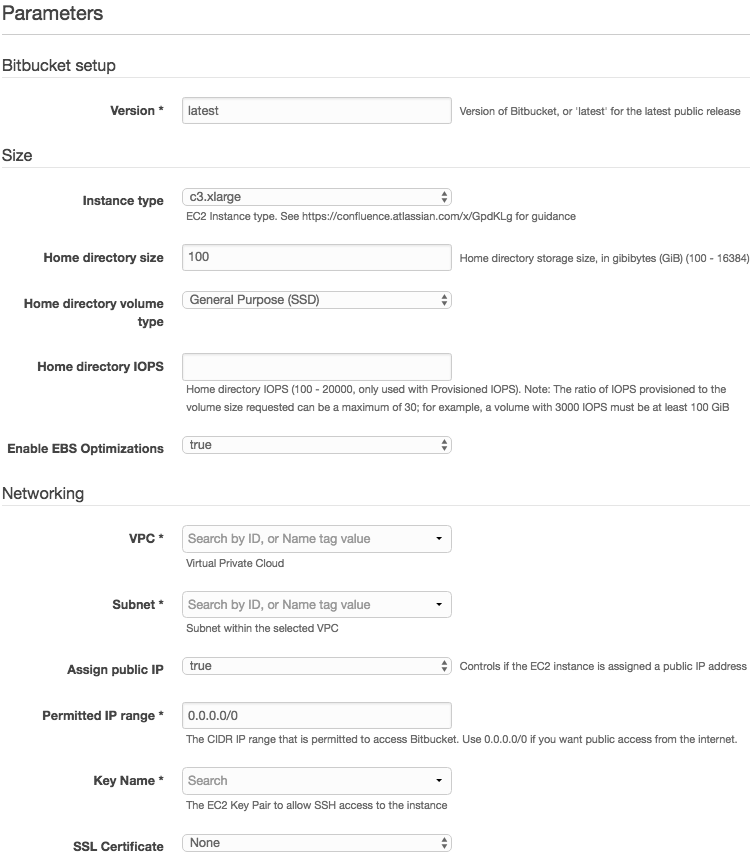
VPC * and Subnet * (REQUIRED): Choose the right public or private VPC for your account, and make sure the Subnet you select is within the VPC.
Permitted IP range * (REQUIRED): You can restrict access to your instance to an IP address range in CIDR notation. NOTE: using
0.0.0.0/0means unrestricted access to the public Internet.Key Name * (REQUIRED): Make sure you have access to the private key file for the EC2 Key Pair you have selected. Without this file, you won't be able to SSH into your instance. See Creating an EC2 Key Pair.
SSL Certificate: You can optionally generate a self-signed SSL certificate, forcing all Web access to your instance to use HTTPS. See Installing an SSL certificate in your Bitbucket Server instance.
See Securing Bitbucket in AWS for more information about these options.
Don't forget when filling in Parameters, you fill in the parameters appropriately for your organization.
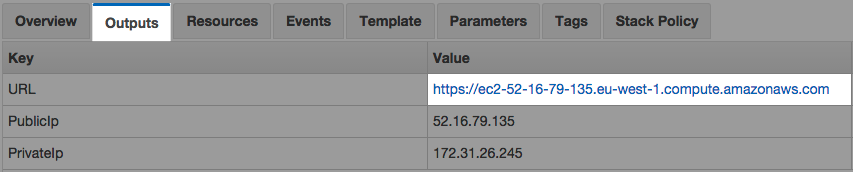
Once your CloudFormation stack has finished, select the Outputs tab and click the URL.
次のステップ
Now you're ready to configure your Bitbucket Server instance in AWS.
- Complete the Bitbucket Server Setup Wizard, and begin using this like any other instance of Bitbucket Server.
- Review and update your security settings for AWS.
- Migrate your existing Bitbucket Server instance into AWS.
- Be sure to see the rest of the Administering Bitbucket Server documentation.