Automation for Jira によって Slack メッセージを使用する方法
Today’s guest blog is written by Tom Harris — head of the London Atlassian User Group, Atlassian Consultant at our partner Old Street Solutions and an all-round nice guy! Every day Tom goes to customers to help automate their Jira instance and integrating with Slack is one of the most common requests. I’ll hand over to Tom to walk you through best practice.
アトラシアンと Slack のコラボレーションは広く知られていますが、まだほとんどの人が期待するほど統合、カスタマイズ性、自動化、サポートは実現されていません。だからこそ、Automation for Jira は Slack を扱うすべての人にとって非常に有効です。
自動化によって、特定のトランジションの発生時、日付の超過時、または優先順位の変更時に警告するカスタム通知メッセージを作成できます。コーディング、スクリプティング、または Jira 管理者の詳細な専門知識は不要です。
このブログでは、Jira のイベントによってトリガーされるカスタム Slack 通知をいかに簡単に自動化できるか、特に新しい Jira 課題が作成されるたびに Slack チャンネルを更新する方法を段階的に紹介します。
これは、Jira ダッシュボードを凝視したり大量の Jira のメール通知に圧倒されたりすることなく、課題が作成されたときにリアルタイム通知を受け取りたいチーム リードにとっては特に便利です。それでは、始めましょう!
![]() This article applies to Automation for Jira 7.4 version and is outdated when using a 9.0 or later version. Starting version 9.0, the Automation rule's webhook URLs are entered and stored as Secret Keys. For the updated steps, please visit the page Integrate an Automation rule with Slack.
This article applies to Automation for Jira 7.4 version and is outdated when using a 9.0 or later version. Starting version 9.0, the Automation rule's webhook URLs are entered and stored as Secret Keys. For the updated steps, please visit the page Integrate an Automation rule with Slack.
課題作成時の Slack 通知
Step 1) Create a new rule and select the trigger “Issue created”.

Step 2) Add conditions so you only get notifications about the issues important to you.

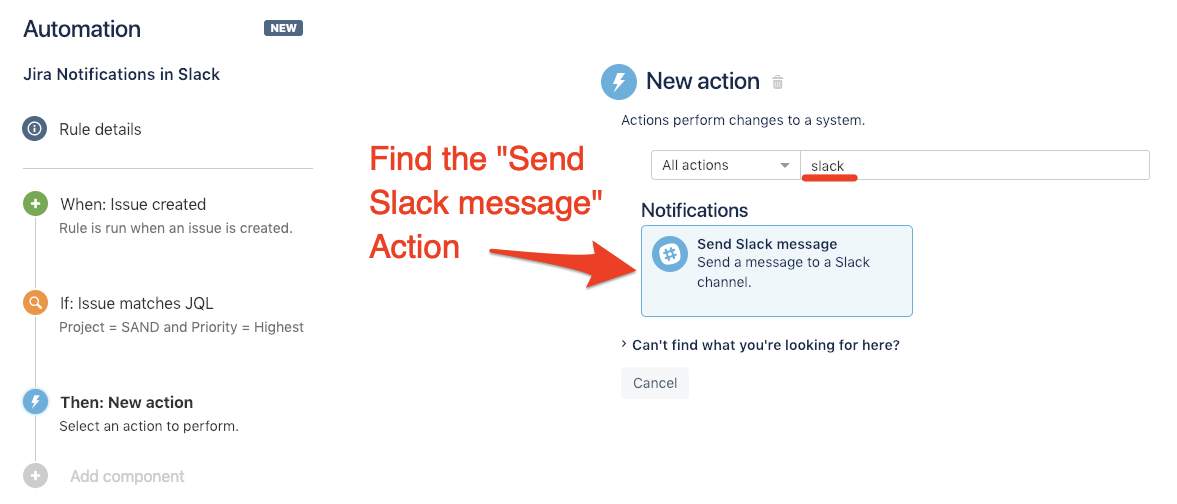
Step 3) Select the action: “Send Slack message”.
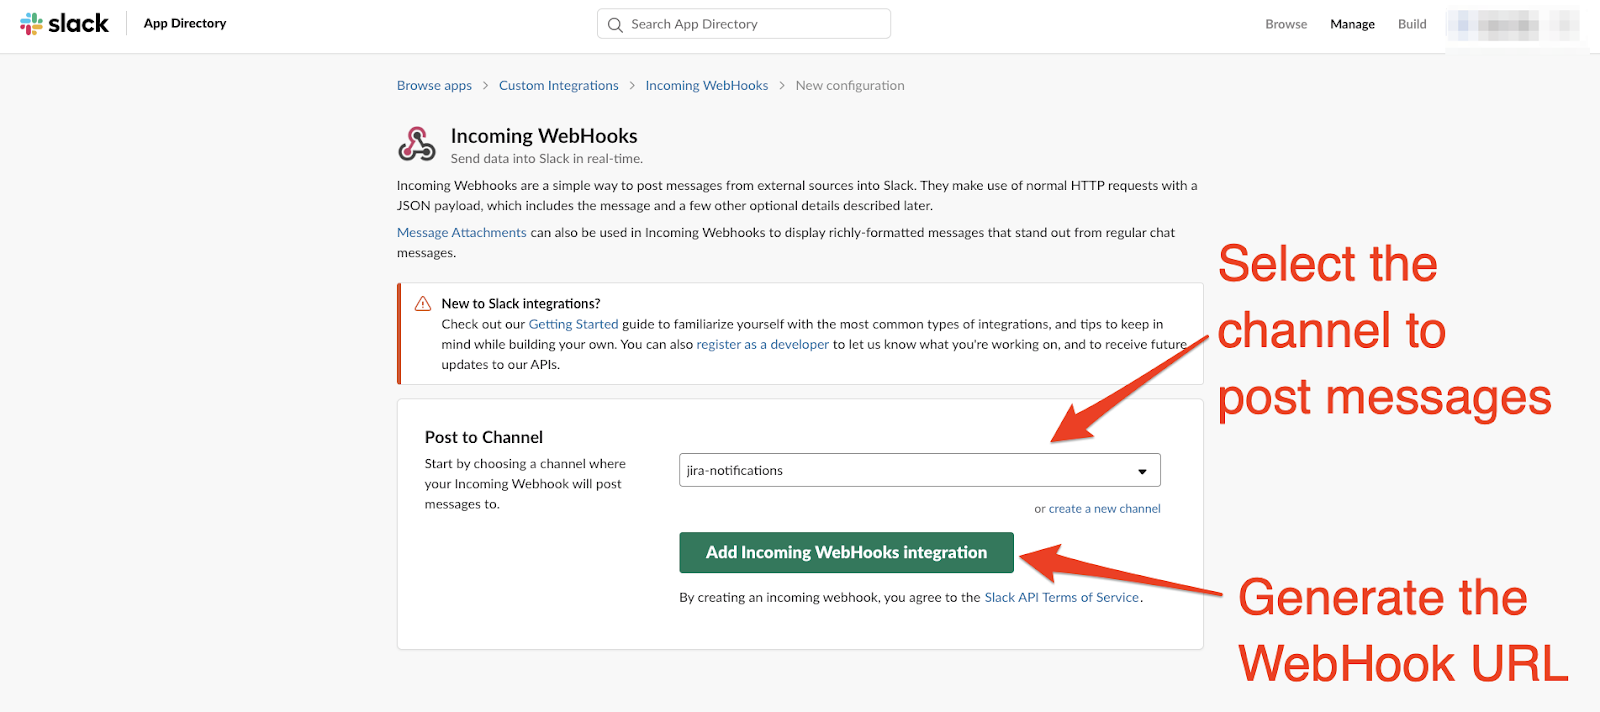
Step 4) Click on the “configure an incoming webhook” link to generate a URL to authorise Automation for Jira to post messages to your Slack channel.

ステップ 5) 新しい Web ページが開いて、Slack ワークスペースの統合設定に移動します。
ここから、メッセージを投稿するチャンネルを選択して [Add incoming WebHooks integration (受信 Webhook 統合を追加)] をクリックし、自動化ルールの一意の URL を生成します。
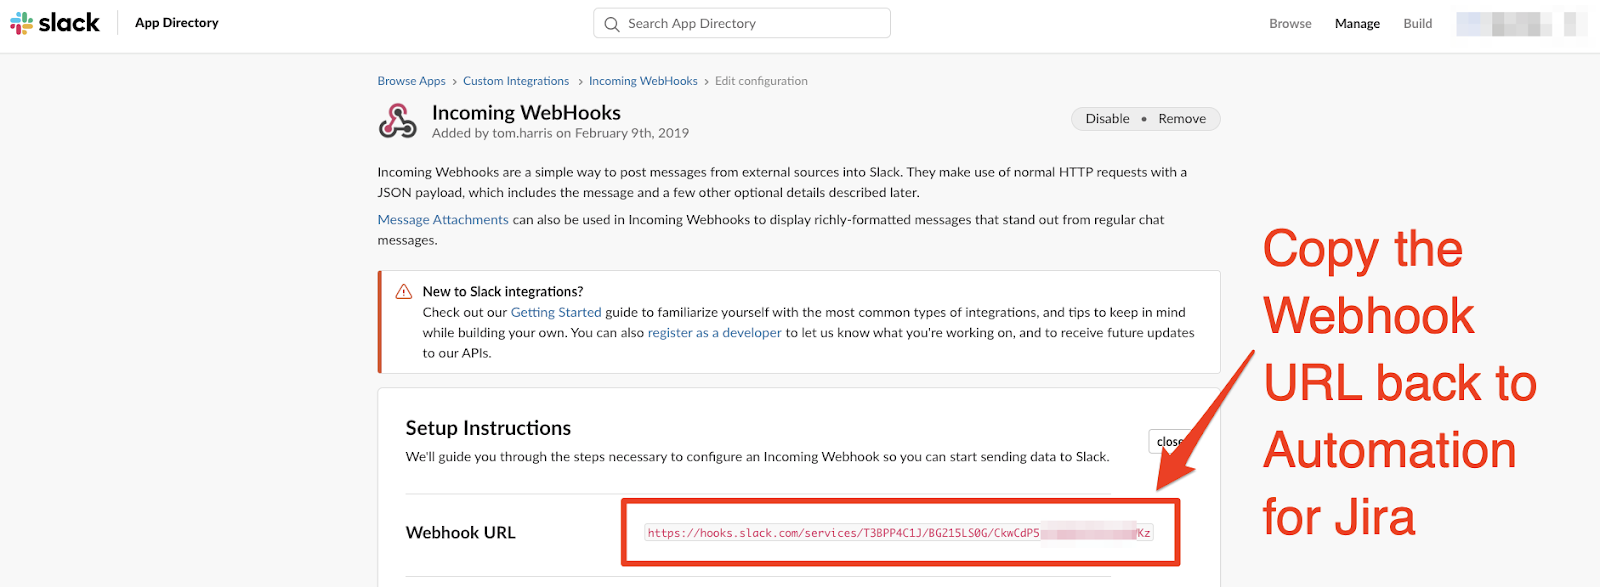
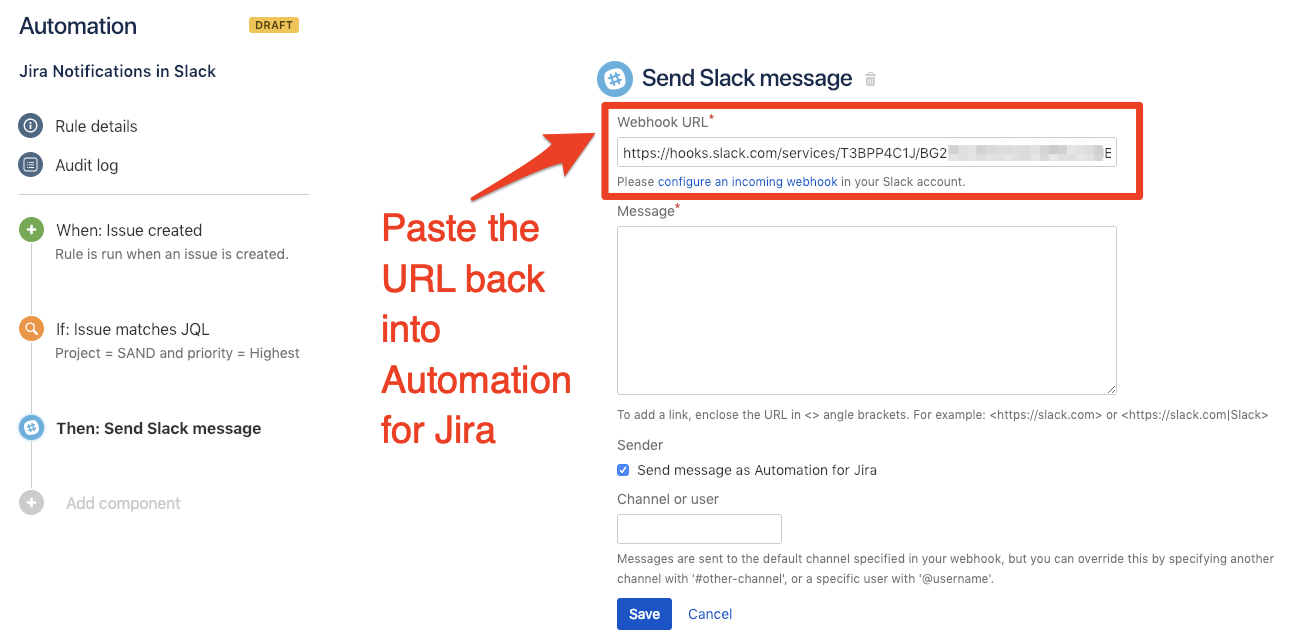
Step 6) Copy the Webhook URL that’s generated and paste it back into your Automation for Jira rule.
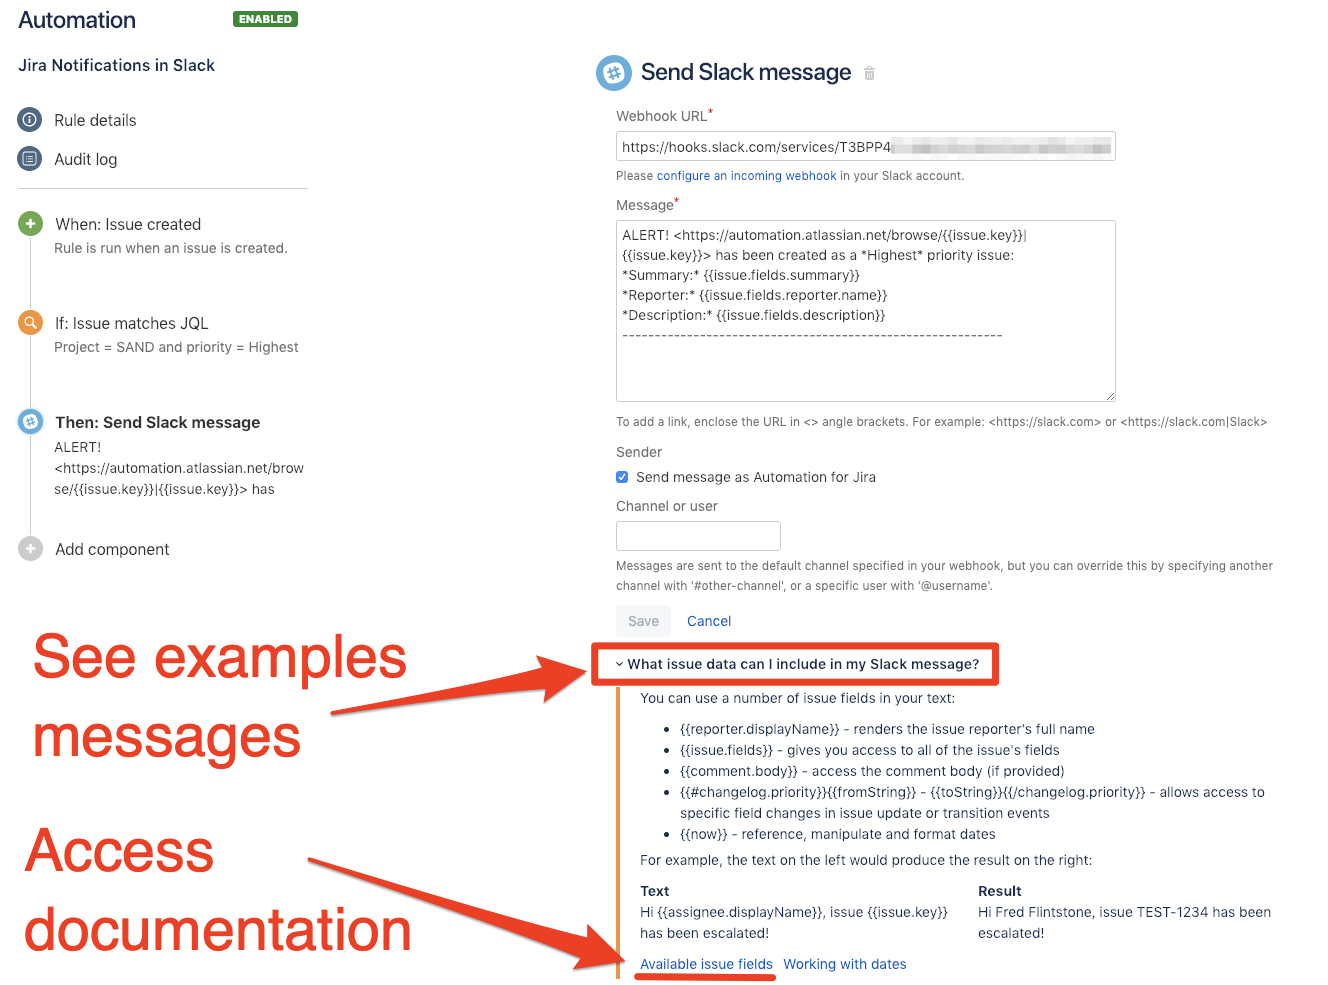
Step 7) Add content to your Slack message using fields from the newly created issue (see example below).

注: <https://automation.atlassian.net/browse/{{issue.key}}|{{issue.key}}> は *最優先* の課題として作成されました。
*要約:* {{issue.fields.summary}}
*報告者:* {{issue.fields.reporter.displayName}}
*説明:* {{issue.fields.description}}
Step 8) Save and publish your new automation rule. Then create a new issue and view the output in your chosen Slack Channel.

その他の例やドキュメントへのリンク
If you’re interested in seeing more examples of what you can do to better automate your Jira and Slack integration, check out the automation docs here or via the app as per the screenshot below.”