Work in a Jira Cloud project on an Android device
This page contains:
Board basics
Swipe from right-to-left to move across your board's default columns – To do, In progress, and Done.
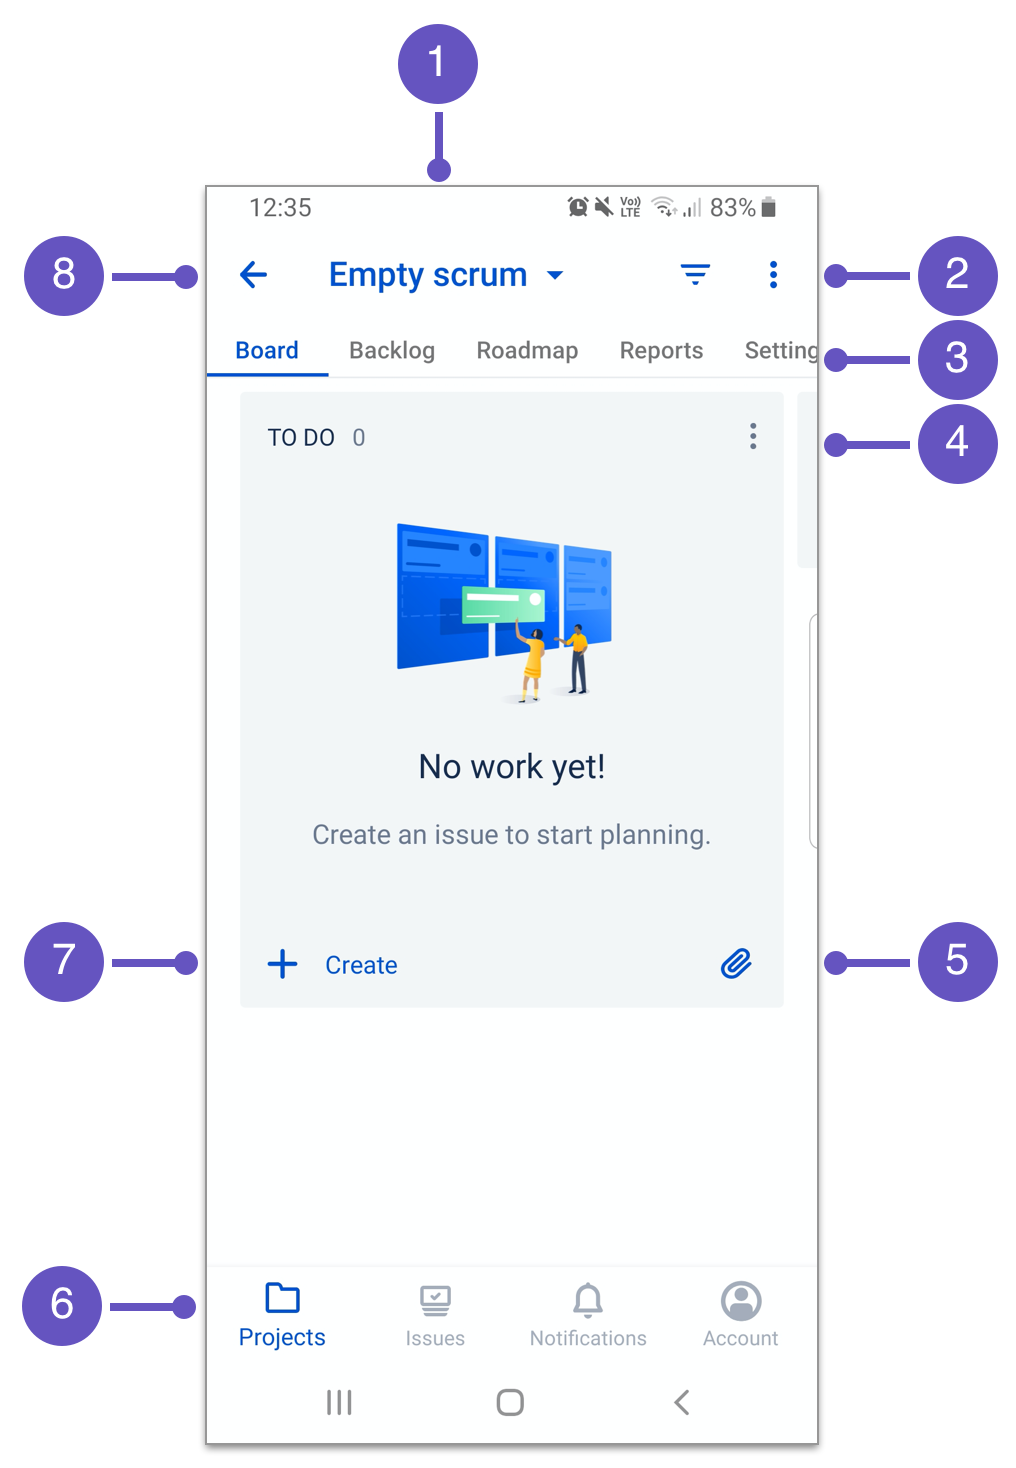
If you have multiple boards within one project, select the name of your board to switch between boards.
The two icons on the right:
Select
 to search for issues on your board, and/or enable filters.
Select
 for board actions: add a new column, and enable notifications.
Use these project tabs to switch between your project's board, backlog, roadmap, reports, and settings*.
Select
 at the top of the column for column actions: rename the column, move the column, set a column limit, and delete the column.
- Create an issue from media by selecting
 : take a photo or video, upload an existing file, or record your screen.
 Within the bottom navigation bar:
• Select Projects to return to your site's full list of projects, or the latest project you were working in. If a project is open, select ← (top left) to go to the full project list.
• Select Issues to search via a list of issue categories, including Assigned to me and Reported by me. Or start typing in the top search bar to reveal search filters including project, issue type, and status. In this screen, you can select + (top right) to create an issue.
• Select Notifications to keep on top of changes and updates.
• Select Account to find details of the Jira site you’re working in (plus the option to switch between sites, if applicable), your account settings, notification settings, and more.Select + Create to create a new issue.
Select back to exit the project and go to a full list of projects.
*Settings require admin permissions
Board shortcuts and handy features
- Search for issues faster by long-pressing Issues in the bottom navigation bar.
- Switch between sites by long-pressing Account in the bottom navigation bar.
- Stay undisturbed with Do not disturb mode: Go to Account > Notifications > Do not disturb and specify the days and times to block push notifications.
- Work comfortably after sunset with dark mode: Go to your Account > Settings > Theme.
Backlog basics

- The two icons on the right:
- Select to search for issues in the backlog, and/or enable filters.
- Select for backlog actions: create a new issue, and create a sprint.
- Select
- Use these project tabs to switch between your project's board, backlog, roadmap, reports, and settings*.
- Select for sprint actions: start sprint, edit sprint. (In this example, sprints are enabled. To enable or disable sprints, go to your project > Settings > Features.)
- Create an issue from media by selecting: take a photo or video, upload an existing file, or record your screen.
- Select + Create to create a new issue in the backlog.
- Select + Create to create an issue in your sprint. (In this example, sprints are enabled. To enable or disable sprints, go to your project > Settings > Features.)
*Settings require admin permissions
Once your backlog is populated with issues:
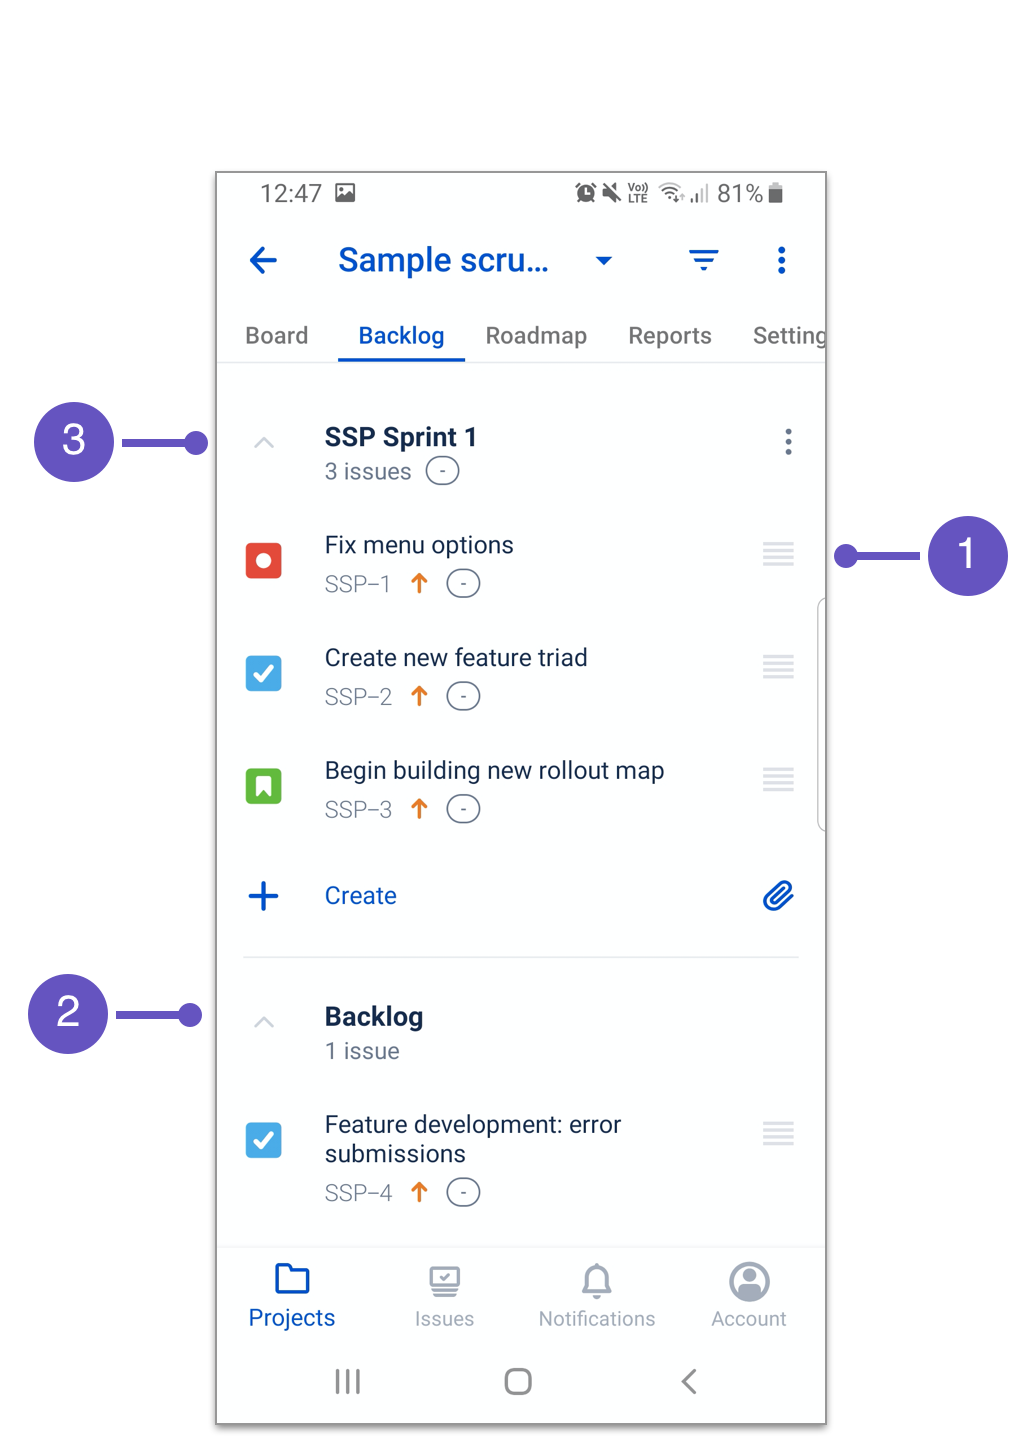
- Rearrange issues by holding the
 icon. Rank them in order of priority, and/or move them between backlog and sprints.
 - Minimise the backlog by selecting the ^ icon, to simplify your view.
- Minimise the sprint by selecting the ^ icon.
Backlog shortcuts and handy features
- Quick-move an issue to the top or bottom of the backlog, or to a sprint or board, by swiping (left-to-right) or long-pressing the issue in the backlog.
Roadmap basics
A roadmap is where you can create, manage and visualize your team's epics. Roadmaps are useful for planning large pieces of work in advance.
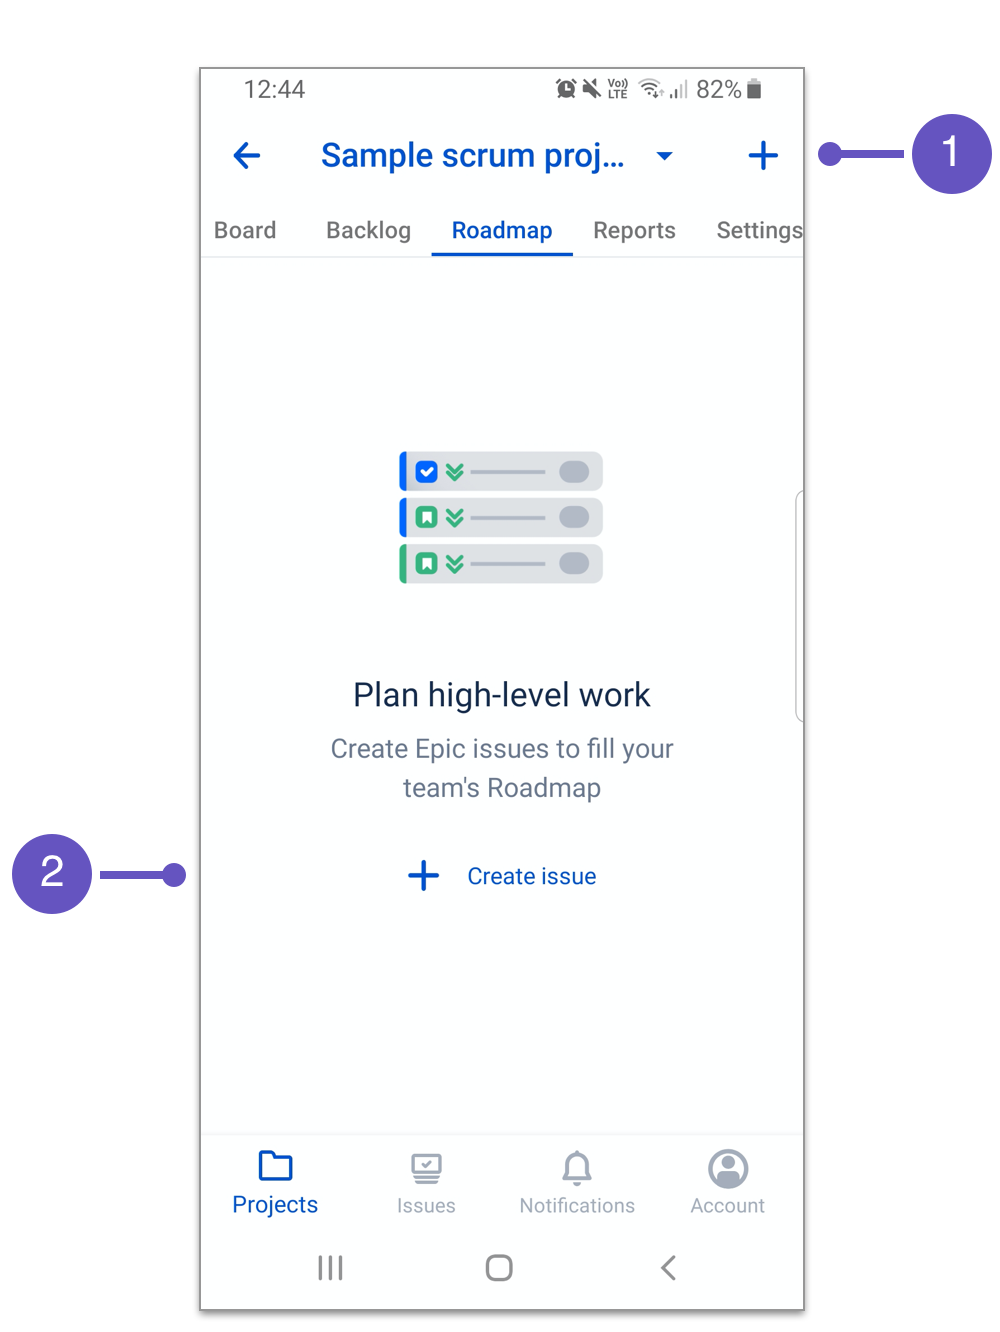
- Select + to add epics to your roadmap.
- Select + Create issue to add epics your roadmap.
Note: Via both of the methods above, you can also choose to create other issue types (bug, task, or story) which will appear in your backlog instead.
Once you've added epics to your roadmap:
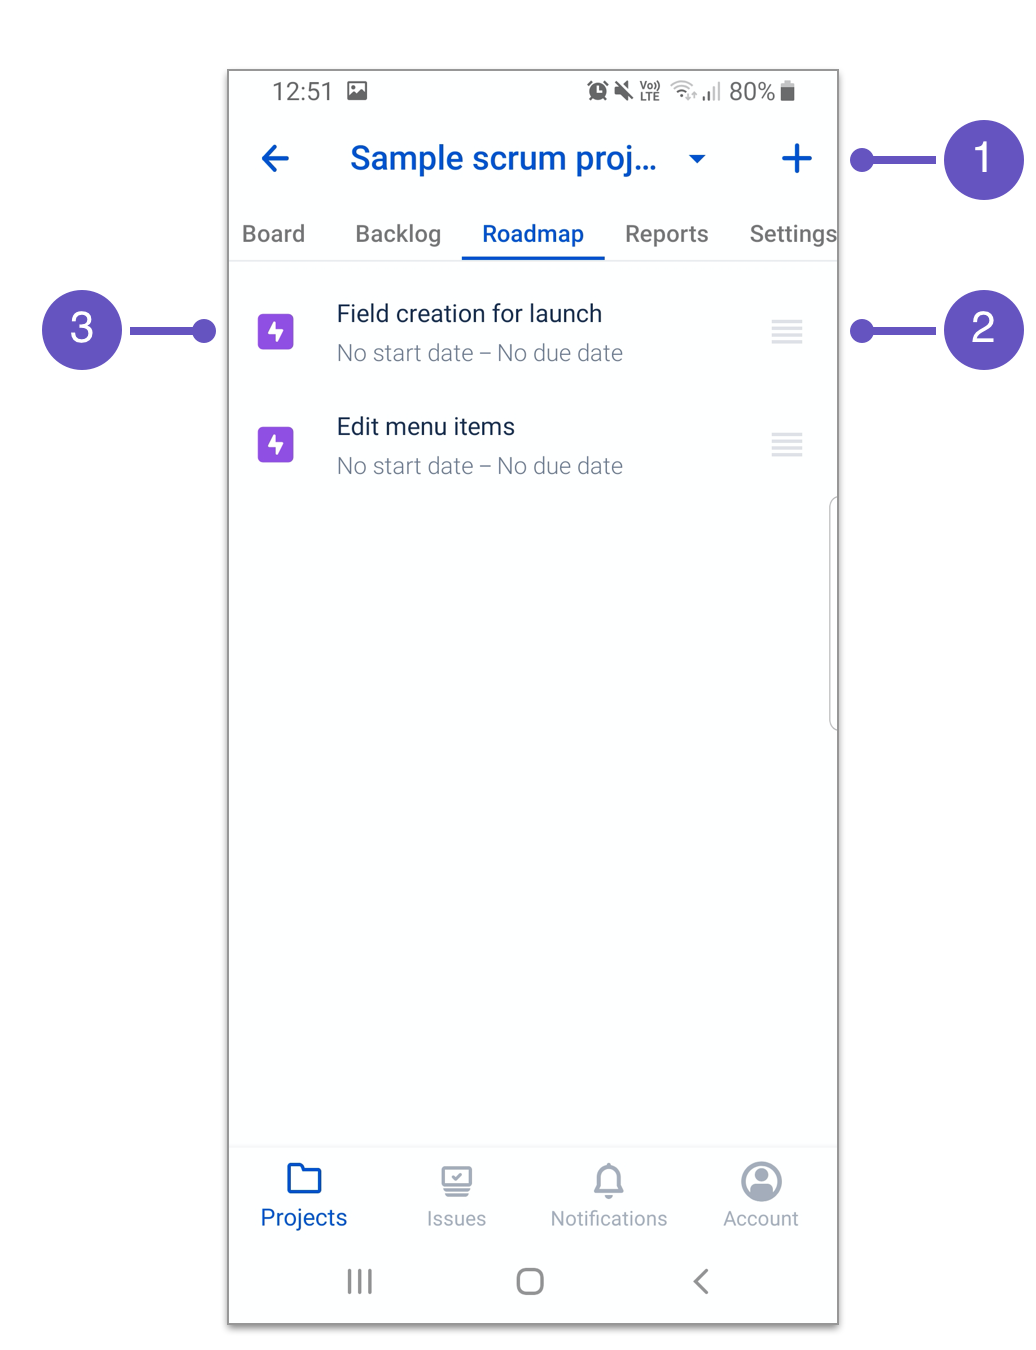
- Select + to add epics to your roadmap.
- Rearrange epics by holding the icon.
- Select an epic to view and edit its details.
Note: The example above displays the roadmap in list view. Chart view is not currently available on Android.
レポート
To enable reports, go to your project > Settings > Features.
Velocity charts
Velocity charts show the amount of value delivered in each sprint, enabling you to predict the amount of work your team can accomplish in future sprints. It's useful during your sprint planning meetings to help you decide how much work you can feasibly commit to. Learn more about velocity charts.
How to read the velocity chart:
- The X-axis (horizontal) represents your team's last seven sprints.
- The Y-axis (vertical) displays the statistic used for estimating stories.
- Each set of columns (one blue and one green) represents a sprint.
- Blue = the total committed estimates of all issues in the sprint when it begins.
- Green = the total completed estimates when the sprint ends.
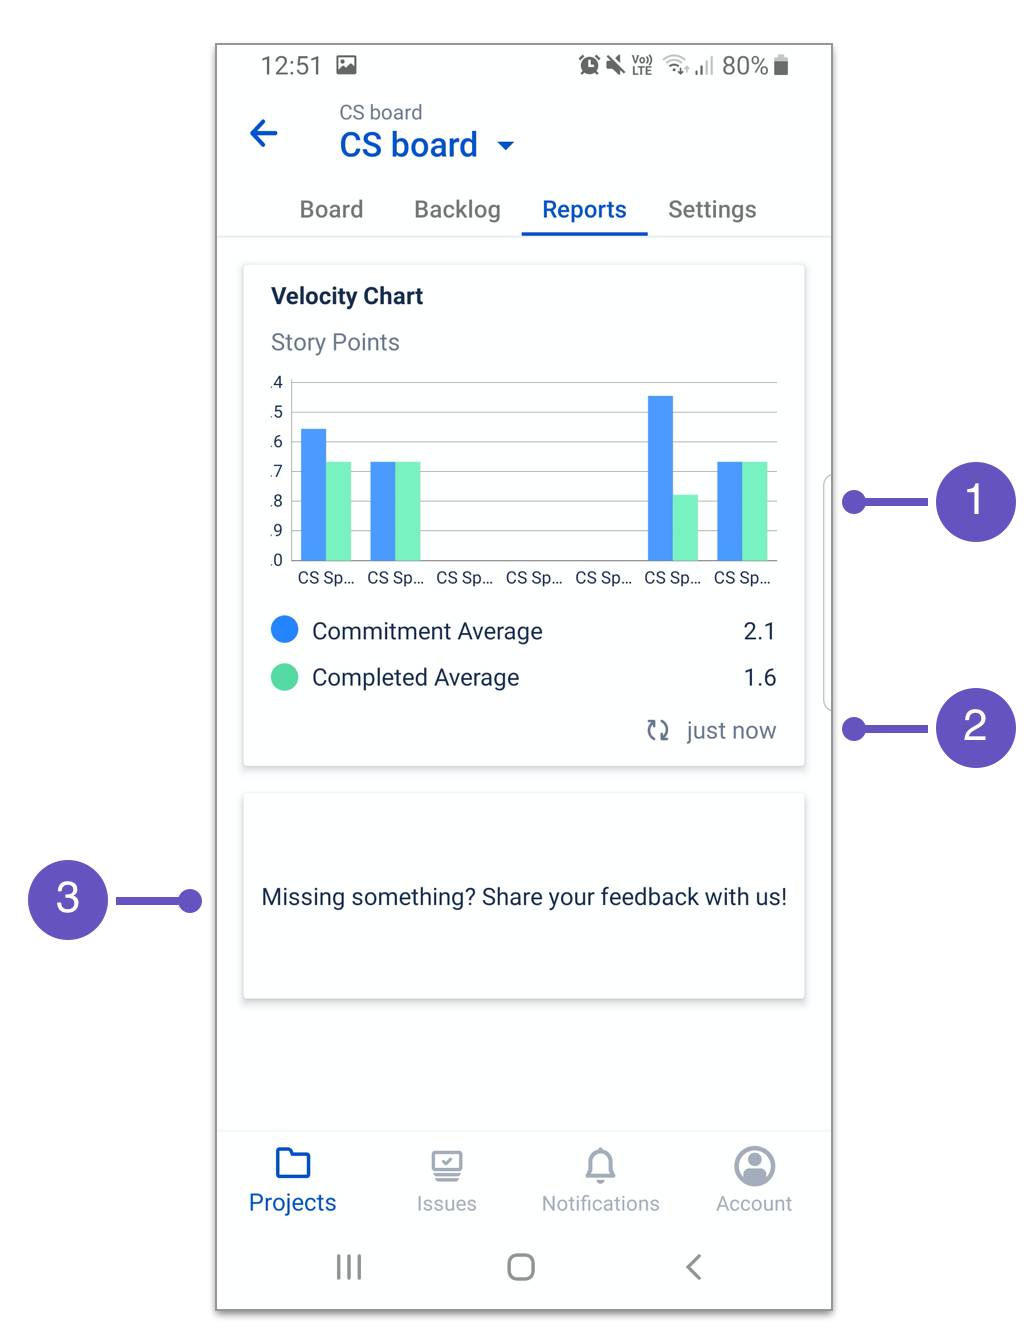
- View each column's details (name of the sprint and story point total) by selecting anywhere in the column. Select it again to hide its details, select other columns, or hold-and-swipe across columns to open other details.
- Update the graph's statistics by selecting refresh.
- Let us know what you'd like to see next (or provide feedback) by selecting the text box.