How to copy issues using Team-managed fields to another project
プラットフォームについて: Cloud のみ - この記事は クラウド プラットフォームのアトラシアン製品に適用されます。
要約
When tickets are moved between team-managed (TM) projects, the values of custom fields are not preserved.
Team-Managed fields lost on Request Type move
When team-managed custom fields are used in a Request type, and the tickets need to be moved to another project, Jira is unable to map these fields to the new Request type. Jira removes the team-managed custom fields from the source Request Type and adds the custom fields from the destination Request type.
Use the Automation clone action to copy the field values
Automation can be used to 'move' issues from one TM project to another that uses its custom fields. This can be achieved by creating a rule that clones the ticket from the source TM that updates the custom fields in the destination TM. This can be done by:
- In your site, navigate to Settings > System > Global Automation.
- Click on Create rule (top right corner).
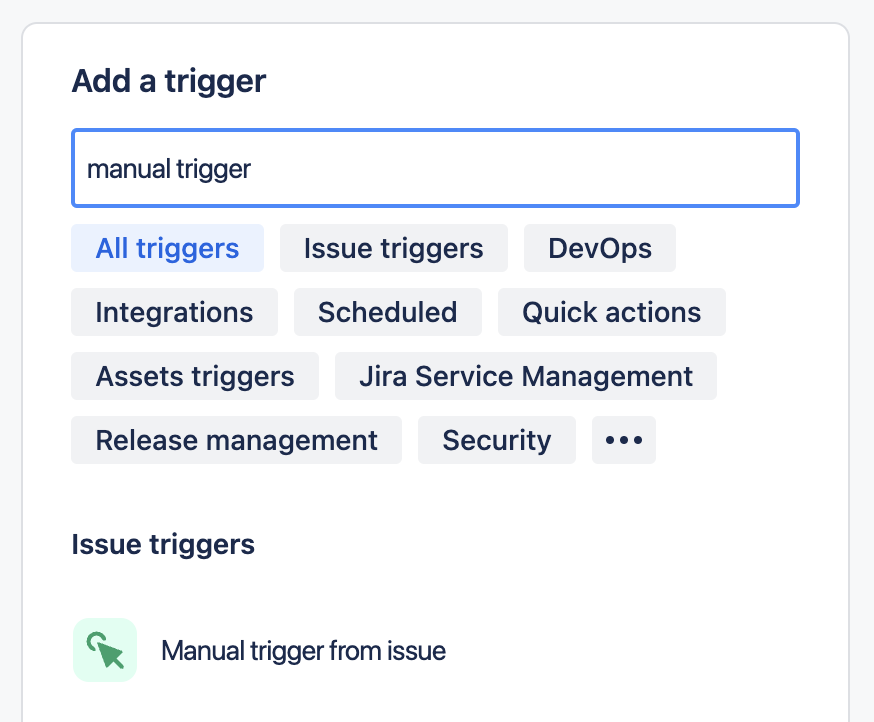
- Select Add Trigger and add Manual trigger from the issue. This is an example, but the trigger can also be configured for cases in which a ticket reaches a certain status to avoid having to move one by one manually.
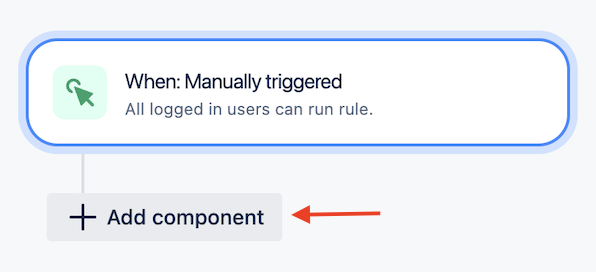
- Click on Add Component.
- Choose Then: Add an action option.
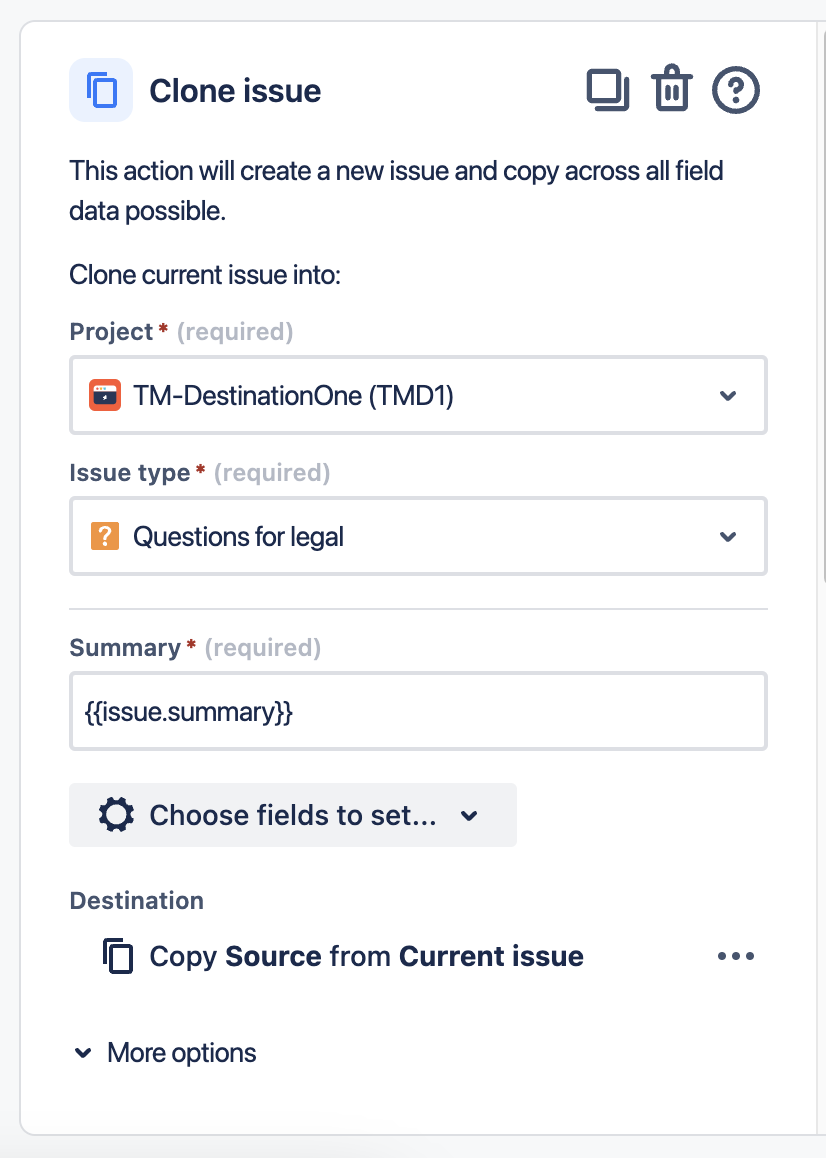
- Search and add Clone issue.
- Customise the action:
- Project: Target project to create a copy of this issue.
Issue Type: The Issue Type it will be cloned.
Do not choose Same issue type option for team-managed projects as it will not work.- Summary: This will be the value of the summary field in the target TM project. For example: CLONE - {{issue.summary}} will add "CLONE - " to the ticket. If it is to be kept the same, then {{issue.summary}} will suffice.
- Choose fields to set: In this option, you will need to select the fields to be updated in the ticket once it is copied to the destination project. This means that the fields shown will be from the destination TM project Request type custom fields.
- For each destination TM project Request type custom field added, the value from the source TM project Request type custom field needs to be matched.
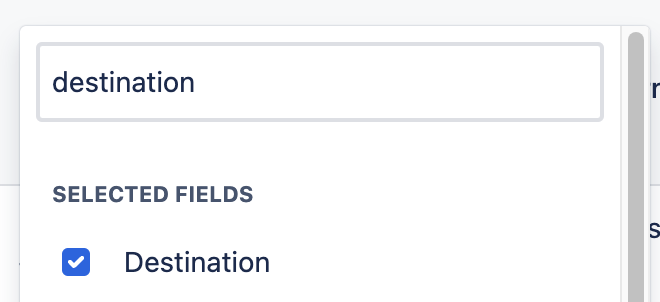
- Click on Chose fields to set, search and add the desired fields from the Destination project (in this case Destination field from TM-DestinationOne (TMD1)).
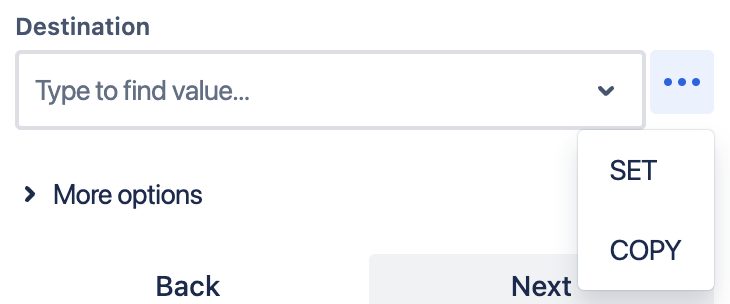
- Next to the field, click on the tree dots > Copy.
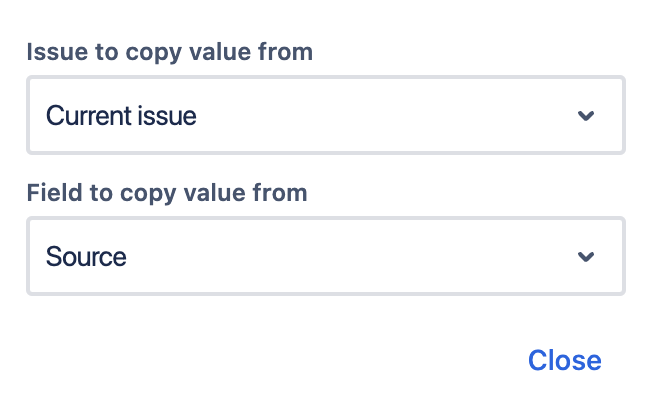
- Once the Destination field is set to Copy Destination from Current Issue, then click on the Copy icon.
- In the new pop-up screen, select Current issue and the field to copy the value from. The below example, the source field has been purposely named Source so that it is easy to identify how this works.
- An example of the above could be:
- Source Project: TM-Source (TMS).
- Destination Project: TM-DestinationOne (TMD1).
Issue Type: Questions for Legal.
- Summary: {{issue.summary}}.
Choose fields to set: The Source field value will be updated on the Destination field.
In this case, when a ticket from TM-Source (TMS) project is cloned to TM-DestinationOne (TMD1) project, then the Destination field value in TMD1 Request type will be the same as the Source field value from TMS Request type.
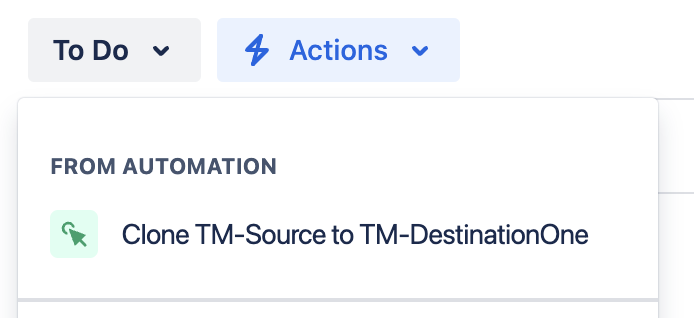
- Navigate to the ticket that needs to be cloned, and select Actions (left panel) > Click on the rule (i.e. Clone TM-Source to TM-DestinationOne).
