How to change the issue creation date using a database update
The content on this page relates to database updates which are not supported by our Atlassian Support Offerings. Consequently, Atlassian can not guarantee providing any support for it. Please be aware that this material is provided for your information only and using it is done so at your own risk.
プラットフォームについて: Server および Data Center のみ。この記事は、Server および Data Center プラットフォームのアトラシアン製品にのみ適用されます。
サーバー*製品のサポートは 2024 年 2 月 15 日に終了しました。サーバー製品を利用している場合は、アトラシアンのサーバー製品のサポート終了のお知らせページにて移行オプションをご確認ください。
*Fisheye および Crucible は除く
目的
Sometimes the creation date of an issue may need to be modified after the issue has been created. This article covers how to do this using a database update.
ソリューション
Database updates are not supported and can result in integrity issues. We recommend to use the CSV import functionality as described in How to change the issue creation date using CSV import instead.
Preparation:
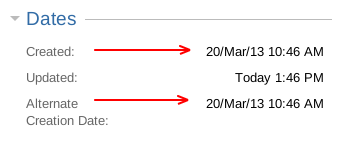
- Create a Date Picker Custom Field called Alternate Creation Date, set it to the project that you need to modify, and apply it to the Default Screen.
- Browse to the issue you want to modify.
- Click on Edit, look for the Alternate Creation Date field on the Edit Issue screen and set the desired created date on it.
- Update the issue and check if the change has been applied.
- Repeat this process to all the issues you want to modify.
Perform the database update:
データベースの変更を行う場合は必ず事前にバックアップを取得してください。可能な場合は、まずステージング サーバーで SQL コマンドの変更、挿入、更新、または削除を行うようにします。
- Stop your JIRA application.
Execute the below SQL to perform the update. Repeat this step for every issue that requires updating.
Start the application and perform a full reindex. This is required as the indexes for the created date will be out of sync with the database.
- Check if the creation date has been changed, for example:
- Remove the custom field Alternate Creation Date and the issue update will be complete.

