How to create an Application tunnel link between Bitbucket Datacenter and Jira Cloud
プラットフォームについて: Data Center のみ - この記事は、Data Center プラットフォームのアトラシアン製品にのみ適用されます。
この KB は Data Center バージョンの製品用に作成されています。Data Center 固有ではない機能の Data Center KB は、製品のサーバー バージョンでも動作する可能性はありますが、テストは行われていません。サーバー*製品のサポートは 2024 年 2 月 15 日に終了しました。サーバー製品を利用している場合は、アトラシアンのサーバー製品のサポート終了のお知らせページにて移行オプションをご確認ください。
*Fisheye および Crucible は除く
目的
This page describes the detailed steps on how to create a tunneled application link between the Bitbucket Datacenter instance and Jira Cloud.
Reference documents
We will be following the steps one-by-one mentioned on the following pages:
環境
- Bitbucket Datacenter (these tests are performed on Bitbucket version 8.17.0)
- Jira Cloud
ソリューション
Step 1: Install Application tunnels on the Bitbucket server
We'll start off by following the steps for Bitbucket on this page: Install application tunnels from Atlassian Marketplace
Application tunnels are available in the cloud out of the box, but you need to install them in your self-managed instance.
Go to Bitbucket Administration >> Find New Apps >> search for Application tunnels
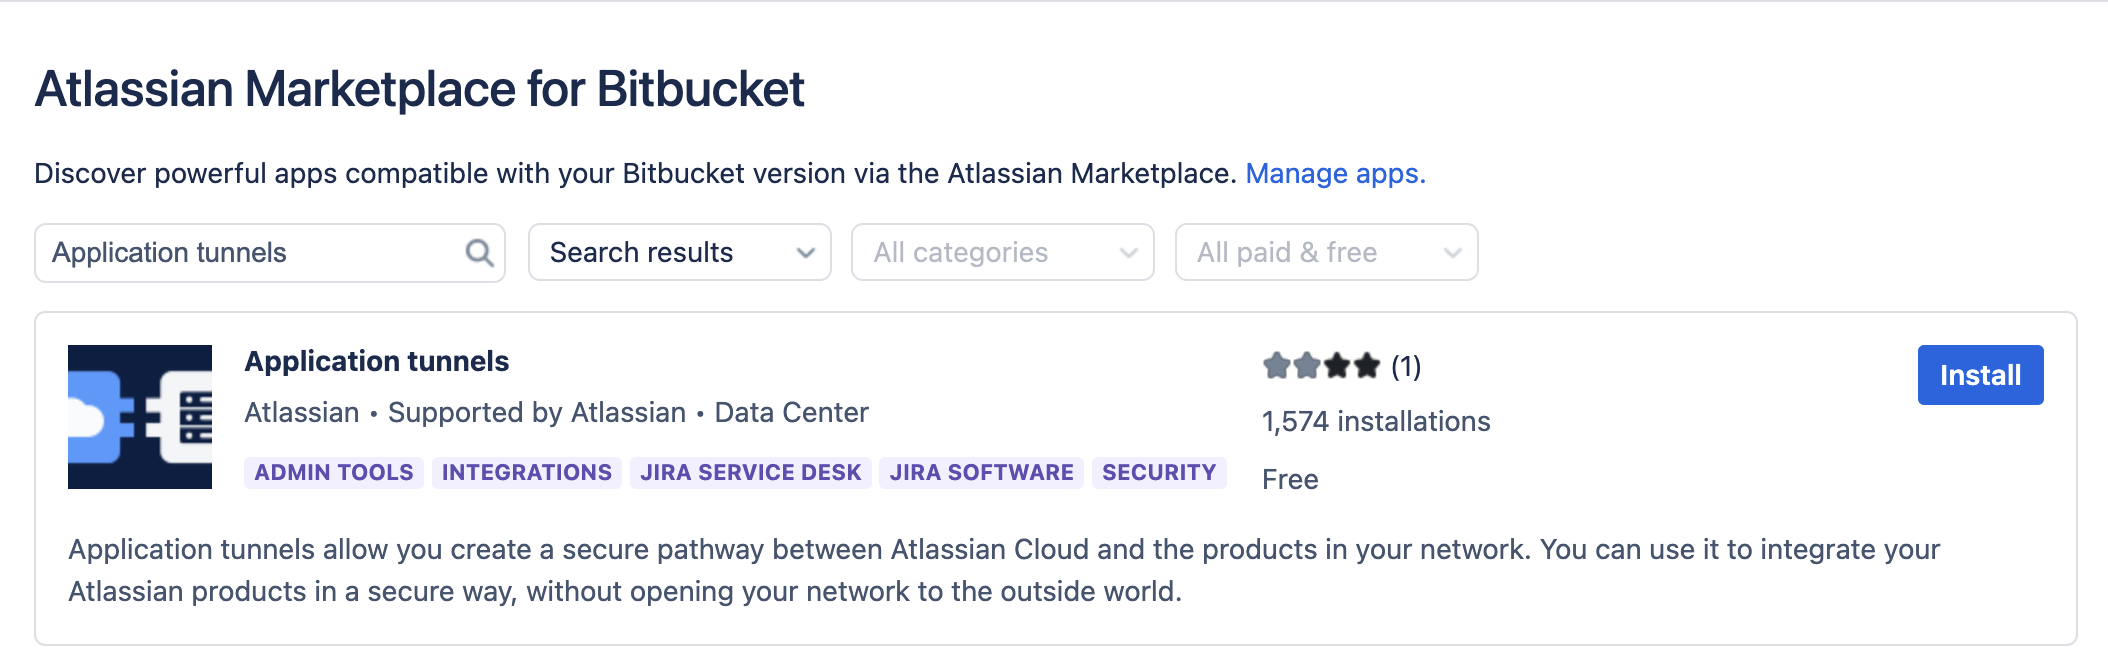
Click on the Install button, you'll see the below when it's downloaded and installed and ready to use.

Refresh the page, you’ll now see Application tunnels under Administration >> SYSTEM on the left Menu.
Step 2: Configure required connections and upstream ports
We'll now follow the steps for Bitbucket on this page: Configure required connections and upstream ports.
Allow outgoing connections from your network
Allow outgoing connections on port 443:
To tunnel endpoint
When creating the tunnel, your self-managed instance needs to reach https://tunnel.services.atlassian.com, which is the tunnel endpoint on the cloud side.
You can verify that it does by running curl https://tunnel.services.atlassian.com/status -I. The request should return an error, which is the correct behavior.
To cloud products
When authorizing the application links as the last step of the procedure, your self-managed instance needs to reach your cloud products directly. The outgoing communication is not using the tunnel.
You don’t have to allow any incoming connections to your network or IP ranges.
HTTP コネクターとアップストリーム ポートを追加する
The HTTP connector that you configure needs to be accessible from localhost only.
Stop your instance and then complete the following steps:
In your Bitbucket home directory, go to the shared directory and edit the
bitbucket.propertiesfile.Add a connector and upstream port. Use a port number that isn't already used by any application in this instance.
server.additional-connector.1.port=8081
plugin.secure.tunnel.upstream.port=8081
Remove HTTPS redirection
If you enabled SSL for your instance, you probably modified the configuration files to redirect traffic to HTTPS. Since the new connector is using HTTP, you need to revert these changes so the traffic isn’t redirected. Any traffic that passes through the tunnel will still be encrypted, but if some traffic is trying to reach your regular port on HTTP, it will no longer be redirected.
始める前に
If you rely on the Atlassian product to handle the HTTPS redirection through configuration files, it will no longer work. If you still need the redirection, you’ll need to configure it by using another component, such as reverse proxy or load balancer. For an example on how to configure it, see Securing your Atlassian applications.
To remove the HTTPS redirection:
In your Bitbucket home directory, edit the
bitbucket.propertiesfile.Remove the
server.require-sslproperty.
Step 3: Create an application tunnel to your self-managed instance
We will now follow the steps on this page: Create an application tunnel to your self-managed instance page.
An application tunnel connects your whole organization to a self-managed instance and can be used to forward application links from specific cloud products.
はじめる前に
Make sure you’ve prepared your self-managed instance by completing the steps described in Install application tunnels from Atlassian Marketplace and Configure required connections and upstream ports.
In admin.atlassian.com, you can create up to 100 tunnels, each going to a different self-managed instance. However, each self-managed instance can receive only one tunnel. You can still link multiple cloud products to this single tunnel.
You’ll generate a security key for each tunnel. If you’d like to later regenerate it or set up the automatic key rotation by using APIs, see Regenerate security key and Set up automatic key rotation.
Create a tunnel from admin.atlassian.com
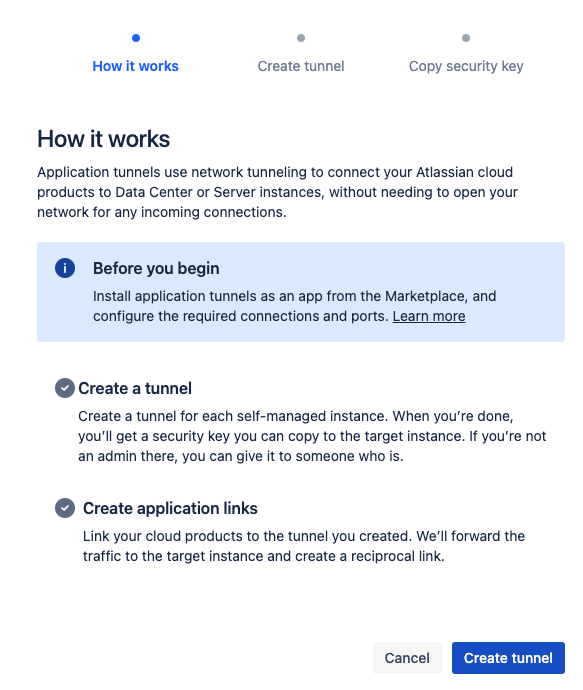
To create a tunnel from admin.atlassian.com:
Go to admin.atlassian.com, and select your organization.
[設定] > [アプリケーション トンネル] の順に移動します。
Click on the Create tunnel button

4. Go through the wizard to provide the details of your Bitbucket Server instance and generate the security key associated with your tunnel.

5. When you click on Next, you'll be redirected to a screen where you need to copy the security key to be entered in your Bitbucket server instance.

6. Add the key to your Bitbucket server instance. You can either choose to be redirected to your instance or copy the key and give it to the admin of this instance so they can add it manually.
Add the tunnel’s security key to your Bitbucket Server instance
To add the tunnel’s security key:
アプリケーション トンネルに移動します。
If you were redirected here from the cloud, you should already be on the right screen.
If you weren’t redirected, go to Administration > Application tunnel, and select Add security key.
セキュリティ キーを貼り付けて、ウィザードのステップに従います。

Your tunnel is created. Wait until its status changes to Connected. For more info on statuses, see Available statuses for application tunnels.
If a tunnel displays the Error status…
Because of an incident on our side, some application tunnels might have stopped working. If a tunnel worked previously, but now displays the Error status, restart the Marketplace app in your self-managed instance. Learn more
例
This is how a sample tunnel looks in your Bitbucket server instance:

Your tunnel is ready, now you need to make your Jira cloud use it by creating a tunneled application link.
Step 4: Create a tunneled application link
Following the steps on the Create a tunneled application link page.
A tunneled application link allows you to select an existing application tunnel that will be used to forward the traffic to the target instance, as opposed to a direct link where you use the URL of the target instance. You can create a tunneled application link only from your cloud product.
Create a tunneled application link in Jira Cloud
The tunneled links must be created in your Cloud products. The reciprocal links will be created automatically and won’t use the tunnels, because they’re outgoing from your network.
To create a tunneled application link:
Go to the Jira Cloud UI and Administration >> Products >> Application links page. This is different from admin.atlassian.com, each product has its own administration.
Click on the Create link button:

3. On the Create link screen, select the Tunneled application link option, and then choose the application tunnel from the dropdown that is connected to your Bitbucket server instance. Next, click on Continue.

4. On the Confirm URLs screen, check the URLs and confirm them. Application URL should show the URL of the tunnel, and Display URL the base URL of your Bitbucket server instance. Click on Continue:

5. On the Review link screen, you’ll see the details of the products you’re connecting:

6. When you click on Continue, you’ll be redirected to the Bitbucket Server and see the below:

7. Click on Continue again, you’ll be redirected back to the Jira Cloud screen, and see the below. Click on Save settings:

The status of the Bitbucket server applink on the Jira Cloud will show up as Connected:

8. Now go to the Bitbucket Server UI >> Administration >> Application Links page to confirm if the Jira Cloud applink shows up there as Connected:

The Tunneled application link between your self-hosted Bitbucket instance and Jira Cloud is successfully created.