Reviewing a pull request
The review phase of a pull request in Bitbucket Data Center and Server typically involves reviewers making comments and the author pushing additional changes and commenting in response, until the pull request is ultimately approved. The pull request author usually starts by adding colleagues as reviewers. Reviewers then leave comments – either on the entire pull request or on a specific part of the code changes, and then update their reviewer status to notify the author that they've completed their review.
Depending on the feedback provided by reviewers, the author may then update a pull request with new commits. This may be to clean up the code, resolve any outstanding tasks, or improve the quality of the code. They can also apply suggestions to quickly make code changes for minor issues like typos.
Once the cycles of reviewer feedback and new commits have reached a conclusion, a pull request can either be merged to its target branch, or declined if the changes are not to be merged.
For details on how authors and reviewers can collaborate and discuss a pull request, see Commenting on a pull request.
プル リクエストをレビューする
Bitbucket allows you to add one or more reviewers to a single pull request who can then approve or decline the request. Pull requests give those who have access to the repository, the ability to review the quality of the code that’s specified in the pull request.
To review a pull request
- Access the pull request by either following links from an email notification, selecting a notification within the pull request inbox (in the upper-right), or searching for a pull request by clicking Pull requests on the sidebar (read more about searching for pull requests).
- Review the changes and comments left by your teammates within the pull request.
- Leave some feedback about the changes, in any of the views, and use @ mentions to ask questions directly of your colleagues, who will receive a notification after you enter your comment. See Commenting on a pull request for more details about the various ways you can leave comments, including pull request tasks.
- Finish your review by indicating if you feel the pull request can be merged, or if the author of the pull request needs to make additional changes before you can provide your stamp of approval. Select either of the status indicators to let your team know you've reviewed the changes and the ball is now in their court:
- Approve - indicates you've reviewed the changes and the code is ready to be merged.
- Needs work - indicates you've reviewed the changes, but the code is not quite ready to be merged.
Create a Jira issue from a pull request
Bitbucket allows you to create a Jira issue directly from a pull request comment or task instead of being forced to leave Bitbucket and return with a created issue.
To create an issue from a pull request comment or task:
- Create a new issue by clicking ... > Create Jira issue.
- Select the Project and Issue type.
- Add a summary, description, and any other fields as needed.
- Click Create issue.
If a created issue is deleted inside Jira, it will continue to be counted as an issue in Bitbucket, but will no longer be visible on the pull request.
There are three main ways to view changes:
- The Overview tab - lists all of the activity for a pull request since the pull request was created.
- The Diff view tab - highlights which lines of code have been added, deleted, or modified.
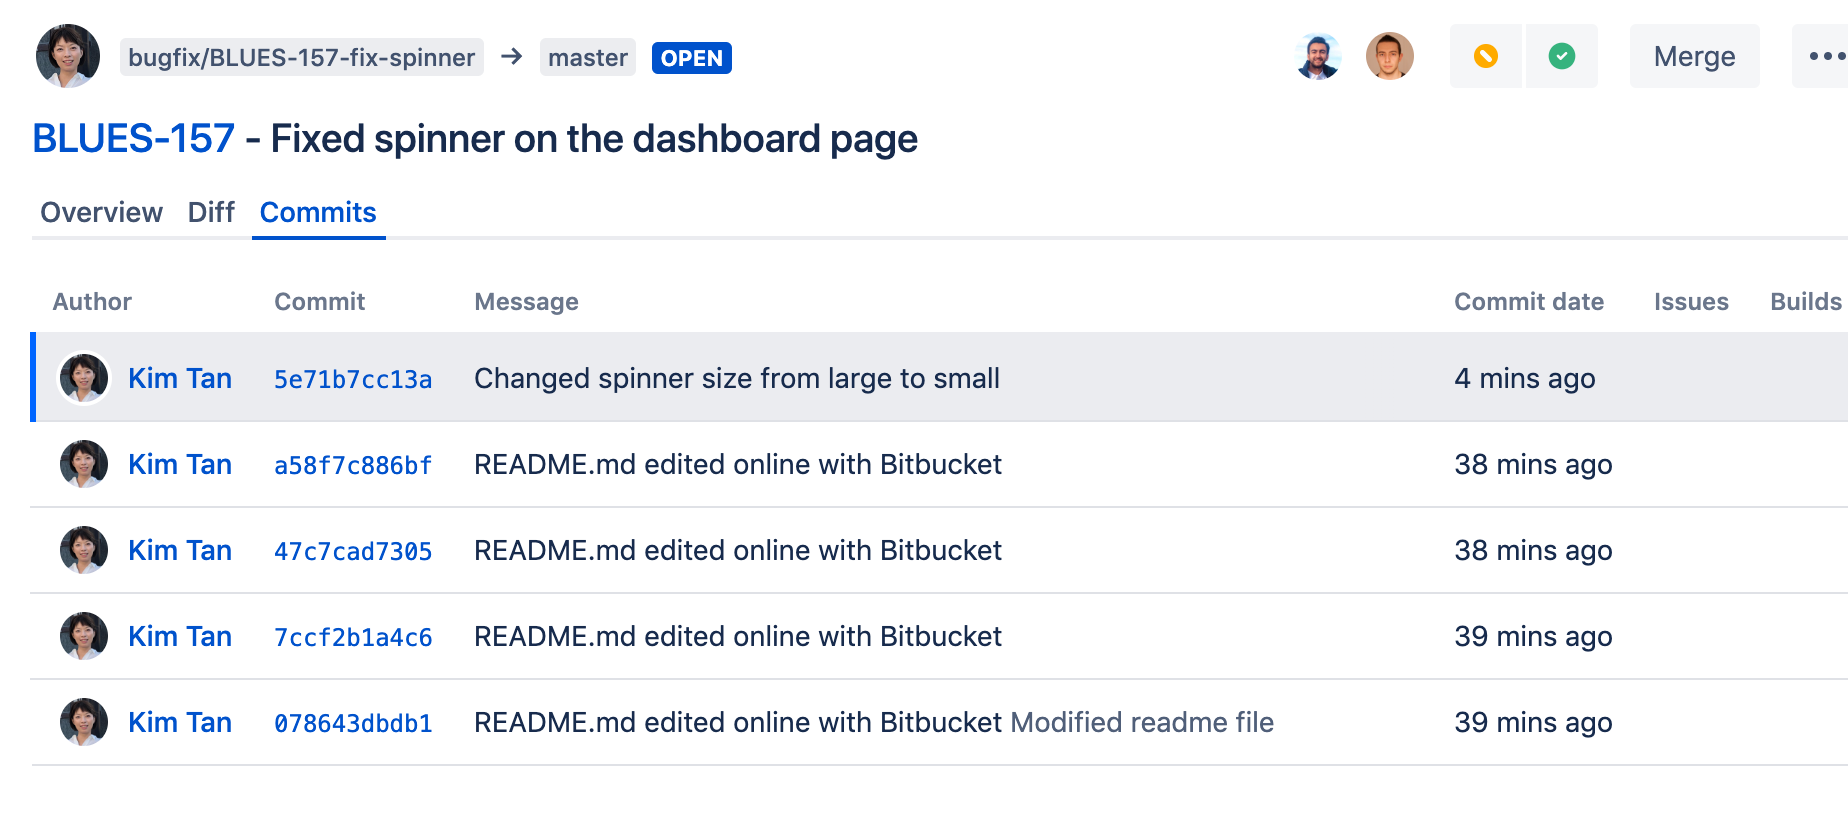
- The Commits tab - lists all the commits that will get merged. You can click to view a single commit.
概要
The overview tab captures all of the team's activity on the pull request in one place, right from the initial creation, through to when it is finally merged (or declined), with all the comments, replies, and commits that happen along the way.
Diff view
The diff view highlights the changes between the source and target branch. You can choose whether you want to highlight word level changes in the diff, or display details like comments and whitespace changes from the Diff view settings icon.
The Unified diff option shows the changes in one continuous column.
The Side-by-side diff lets you easily compare the changes by showing the original file on one side, highlighting removed and modified lines, and then changed files on the other side, highlighting added and modified lines.
インタラクティブなレビュー
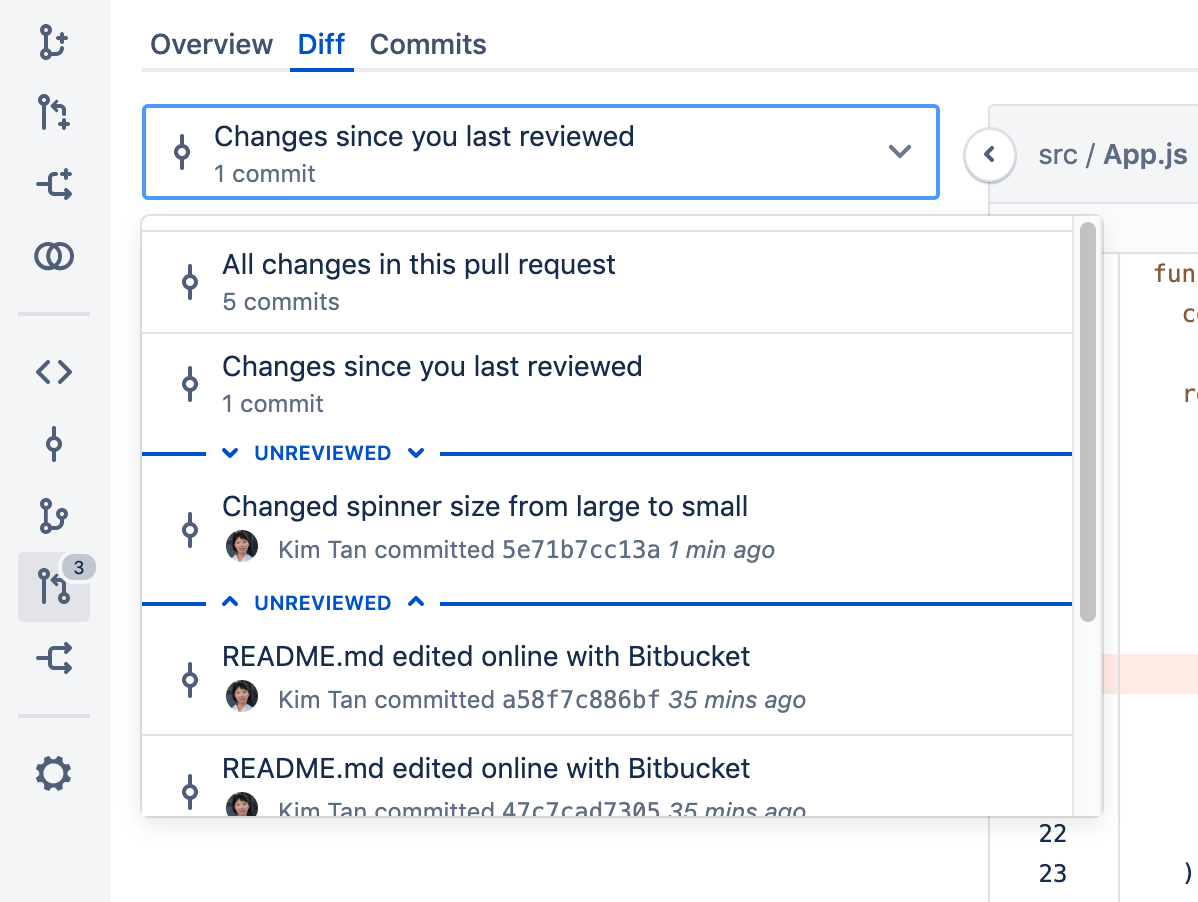
Within the diff view, using the Change Scope selector, you can select a specific commit to review, or choose to view all changes within a pull request. If you return to a pull request that you previously reviewed, you'll only see the new commits added since you last reviewed the pull request.
変更を確認できる「コミット」
The Commits tab lists all the commits that will get merged (those that are greyed out have already been merged). Clicking through to a commit leaves you inside the pull request context and the commit can be reviewed as part of the pull request.
When viewing a commit, you can comment on the whole file, or a particular line of code, for any file in the commit.
Participants can commit new changes to the branch. Bitbucket auto-updates the Commits tab of the pull request, so you can see exactly which commits will be merged. Bitbucket is smart about comments, moving them along when lines are added or removed. If a line with a comment gets removed, you can still view the comment in the activity, but Bitbucket marks the diff as outdated to let you know that this piece of code has been changed in recent commits. These hidden comments can also be viewed by selecting other comments.
View a single commit within a pull request
Find matching code in a pull request
When you want to locate code in a pull request, you can search for it within changed files in the diff view.
To locate code within changed files, click Search code and enter your text into the search field. Only the files containing the match are then displayed expanded in the file tree with the number of occurrences highlighted per file. Easily navigate between occurrences by clicking through each line.
Find files in a pull request
To filter through changed files, click Filter file tree and enter the file name into the field. You can search through files in folders using wildcards.
Some common wildcards supported are *, ?, and **. For example; filtering on **/test/**/*mock*, reveals all files or folders within a directory called test that uses mock in their name. Note that matching is case-insensitive, so the filter will match both text/one/my-mock-test.js and Test/two/MyMockTest.java.
Watching and notifications
You automatically get added as a watcher of a pull request when you are added to the pull request as a reviewer, or when you perform an action related to the pull request (such as adding a comment):
| 操作 | You're now a watcher |
|---|---|
| You are added as a reviewer | |
| You add yourself as a reviewer | |
| You comment on a pull request | |
| You reply to a comment | |
| You push to the source branch |
You can manually add yourself as a watcher by selecting Watch from the selection menu drop-down on the pull request screen.
You can stop watching a pull request by clicking the link in the email notification, or ... > Unwatch on the pull request screen. If you stop watching a pull request, you will not automatically be added as a watcher again if you subsequently perform an action that would otherwise have added you.
Bitbucket sends email notifications to watchers when certain pull request events occur. Email notifications are batched by default, but you can change your personal account settings (on the Notification settings tab) so that you get notifications immediately. The following notifications however, are always sent immediately to:
- the reviewers when a pull request is created
- all watchers when a pull request is deleted
- a user when they are added as a reviewer to a pull request
- a user when they are removed as a reviewer from a pull request
- a user when they are mentioned in the description of a pull request
See Notifications for details.


