How to export Advanced Roadmaps fields in Data Pipeline using Automation for Jira
プラットフォームについて: Data Center - この記事は、Data Center プラットフォームのアトラシアン製品に適用されます。
このナレッジベース記事は製品の Data Center バージョン用に作成されています。Data Center 固有ではない機能の Data Center ナレッジベースは、製品のサーバー バージョンでも動作する可能性はありますが、テストは行われていません。サーバー*製品のサポートは 2024 年 2 月 15 日に終了しました。サーバー製品を利用している場合は、アトラシアンのサーバー製品のサポート終了のお知らせページにて移行オプションをご確認ください。
*Fisheye および Crucible は除く
要約
Some custom fields in Jira aren't supported by Data pipeline yet, like the Advanced Roadmaps fields Team, Target start, Target end, Parent Link and other custom fields provided by third party apps.
This is being tracked by this Feature Request: JRASERVER-76425 - Getting issue details... STATUS
In the meantime, there are a few alternatives Admins can implement to export these fields:
- Have a client system reach back to Jira through REST API to fetch the missing data
- Use scripted/calculated/dynamic custom fields provided by 3rd party apps to fetch the data from the fields (though this may considerably impact all Reindexes times!)
- Create extra custom fields exclusive for the export and keep them updated
This article offers examples on the third option.
Please note the information shared here is a mere example and provided AS-IS.
This is beyond the scope of Atlassian support and if you need further guidance you may reach out to the Community or sign for our Solution Partners services.
Below is an example on how to export the data from the Advanced Roadmaps fields: Team, Target start, Target end and Parent Link. You may use this example to create a similar mechanism for other fields that you wish.
Some useful articles:
- Jira Automation のスマート バリュー
- Jira スマート バリュー - JSON 関数
- Automation for Jira - Different ways to copy the value of a field into another field
環境
Any Data Center version of Jira Software or Jira Service Management.
ソリューション
Here's the layout of this example alternative:
- Create the extra custom fields
- Setup an Automation Rule to update the fields
- Setup another Automation Rule to update the historical data and run it several times
- Validate the sync
1. Create the extra custom fields
We'll create 4 fields:
- Team (export): Text field (single line)
- Target start (export): Date picker
- Target end (export): Date picker
- Parent Linke (export): Text field (single line)
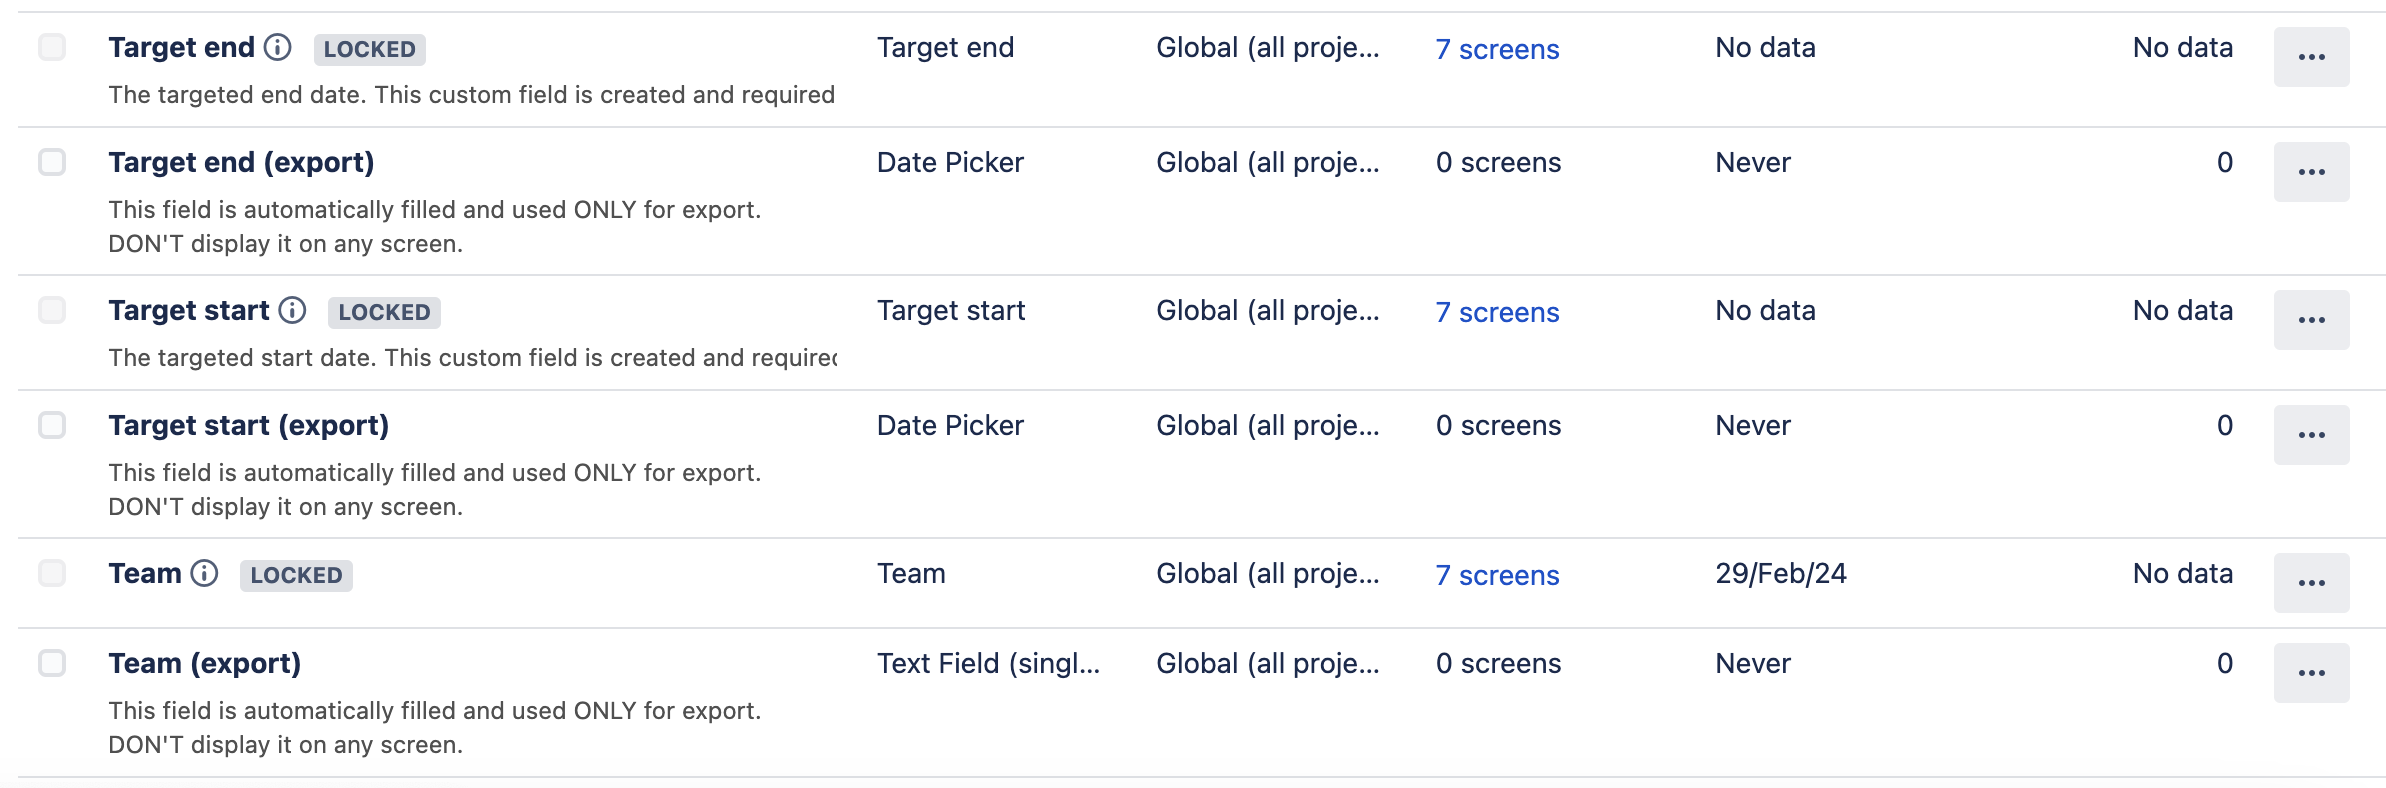
They all could be Text field (single line), in case ou ever want to customize the contents of them for the export, too, and you can name them whatever you want. The "(export)" is to make them intelligible, and it's a good practice to add a description to help avoid anyone putting them on any screens or sing them. Since they're "internal mechanics fields" we don't want them being used (or even seen) by end-users:
This field is automatically filled and used ONLY for export.
DON'T display it on any screen.
This is how they look with their original counterparts:
On the examples below the fields are as follow — you should change for your respective field ids:
- Team: customfield_10200
- Parent Link: customfield_10201
- Target start: customfield_10202
- Target end: customfield_10203
2. Setup an Automation Rule to update the fields
Since we'd want to keep the fields in sync, you can create an Automation Rule that monitors for changes on either of the 3 fields and updates them all.
Rule trigger:
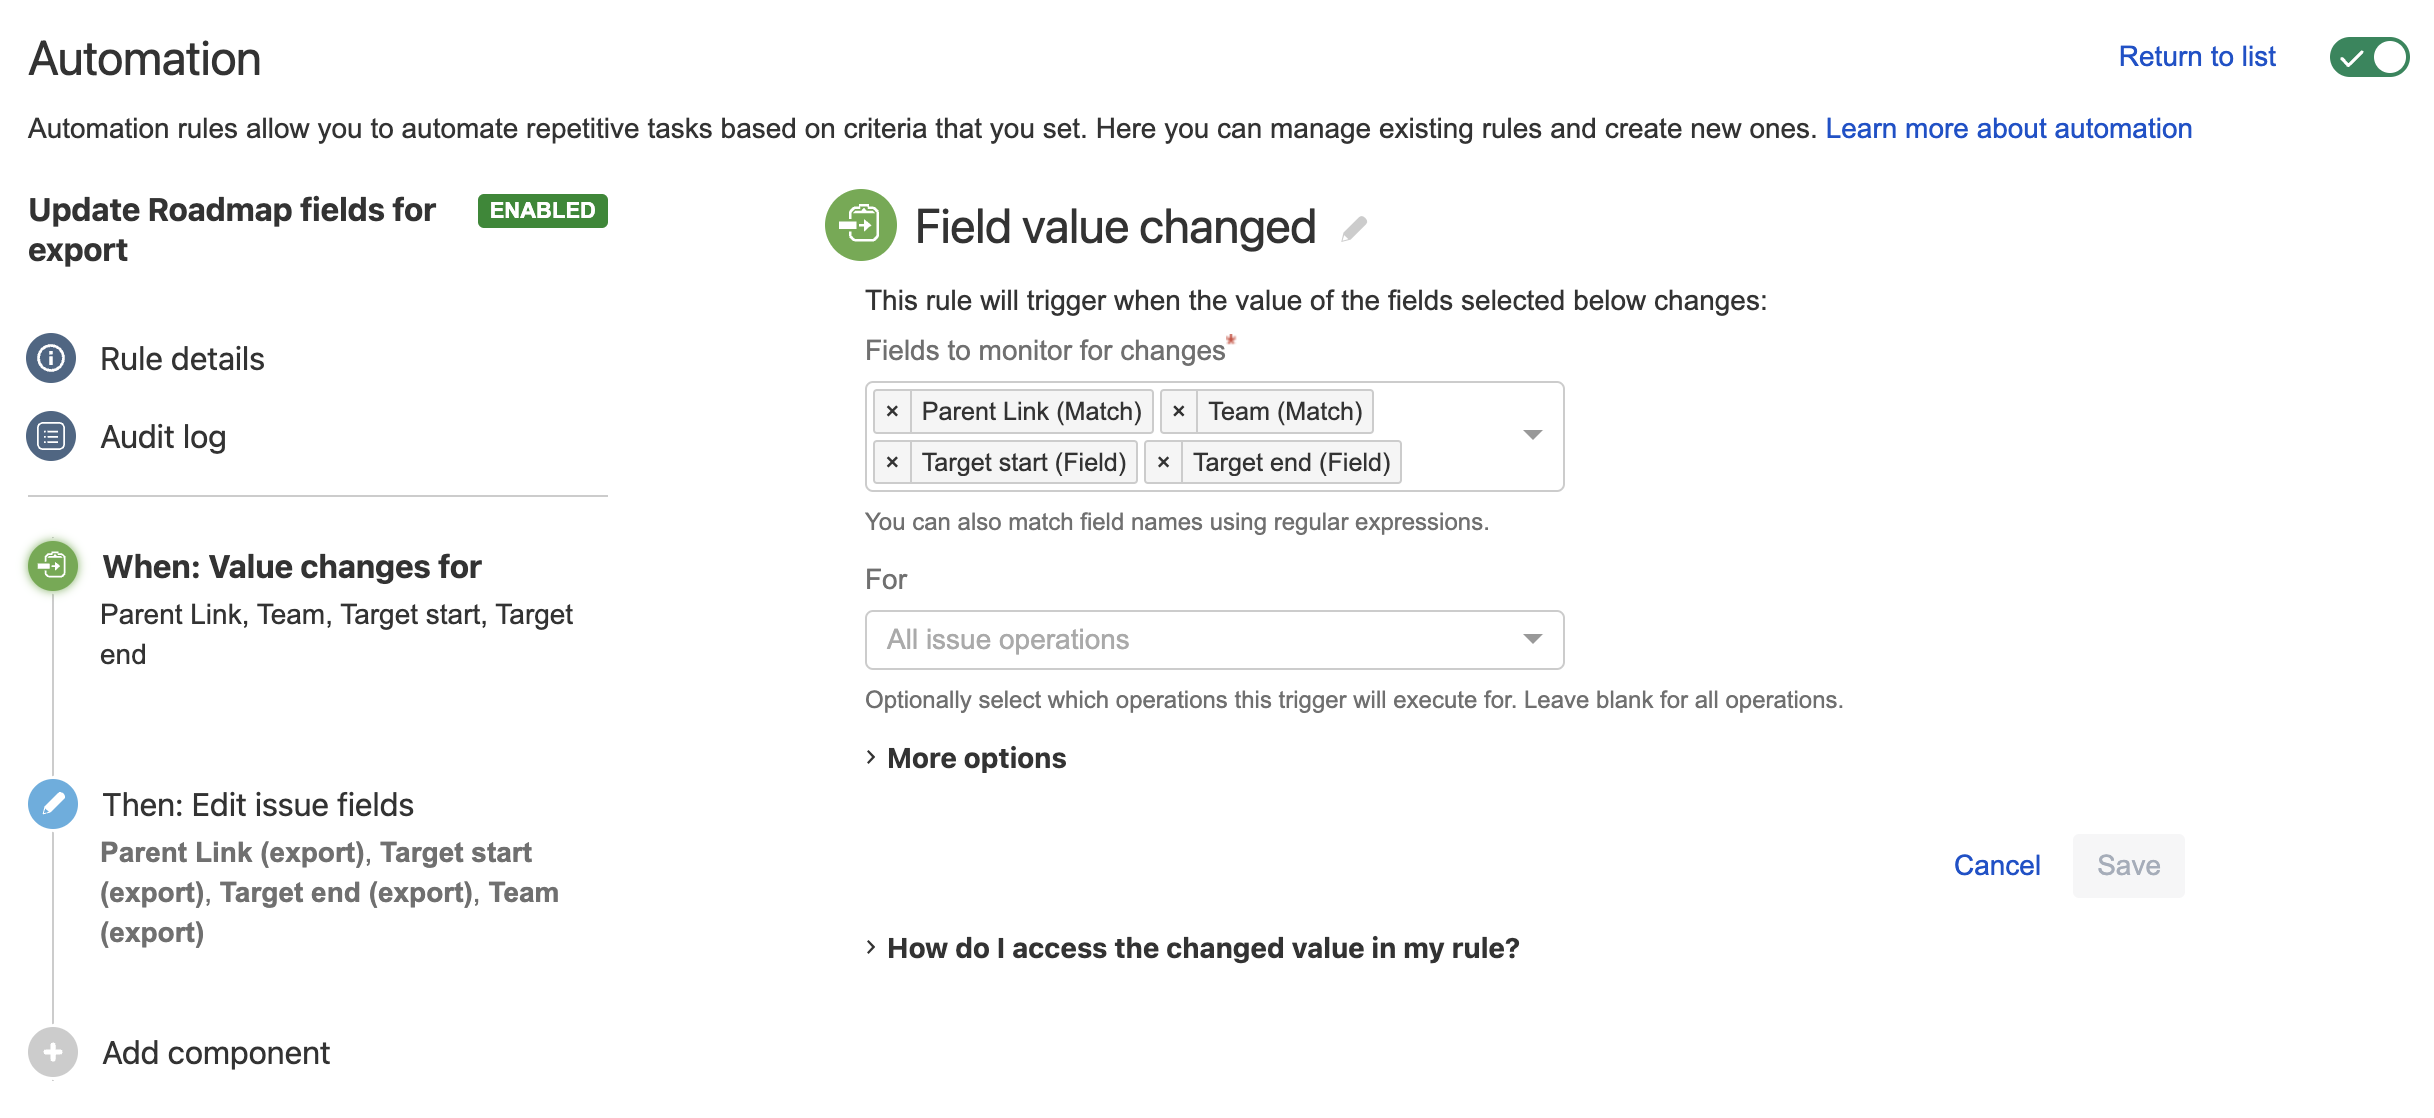
- The Team field is matched, it won't show up in the drop down so make sure there are no typos.
- Also notice we're not marking the rule for immediate execution. This is best for performance.
Rule Action:
Notice we're not sending e-mails for this. Since they are "internal mechanics fields" we don't want notifications on them.
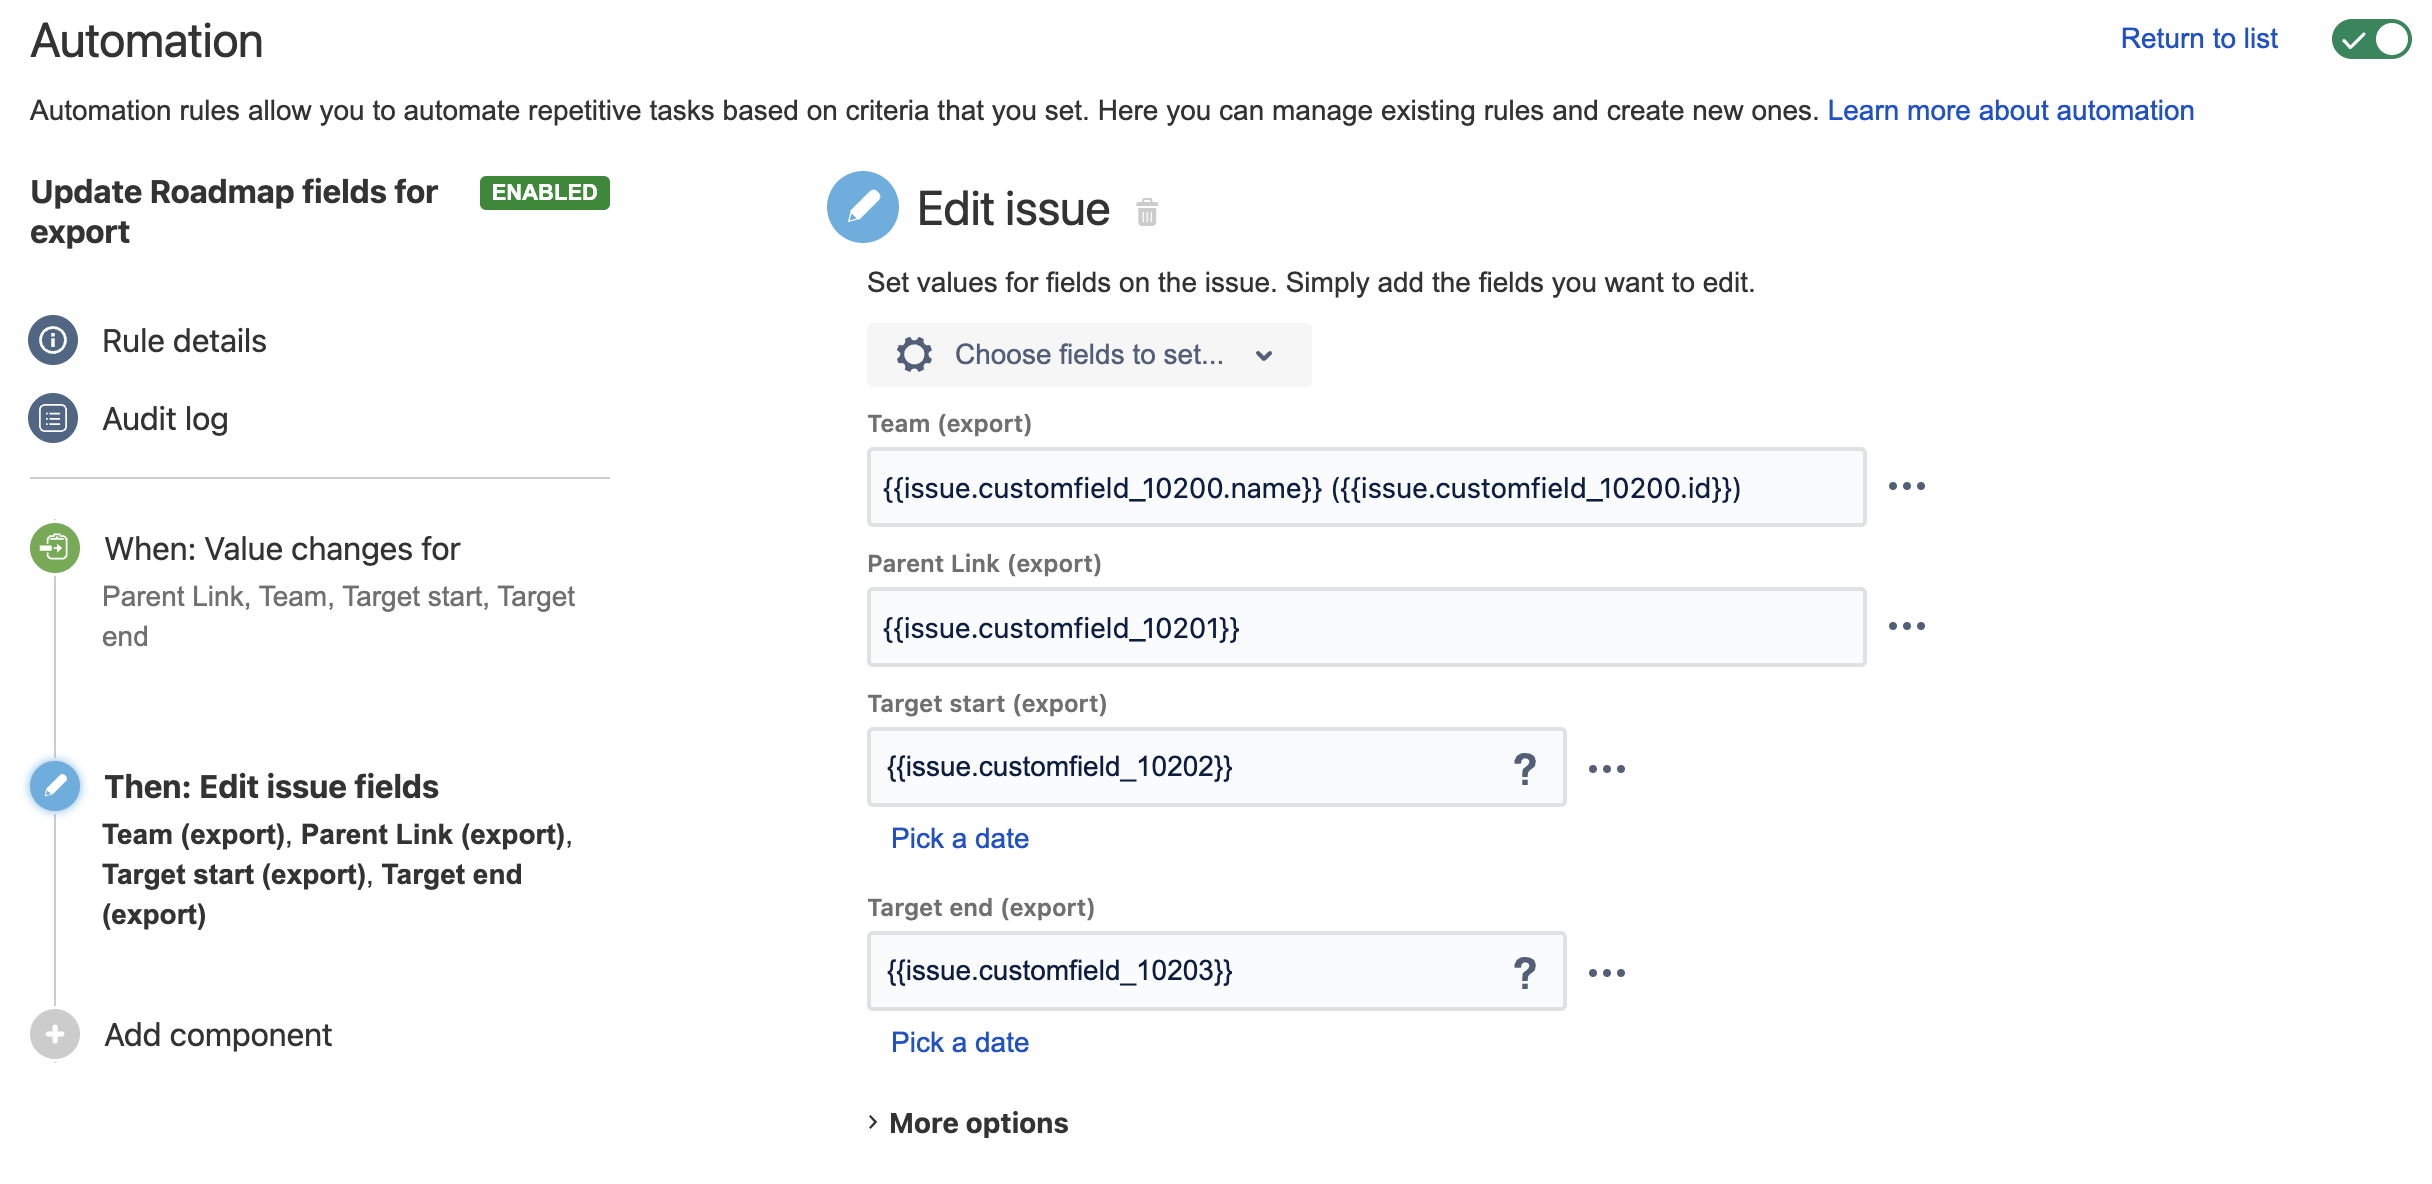
Rule Action Smartvalues:
Team (export): {{issue.customfield_10200.name}} ({{issue.customfield_10200.id}})

Parent Link (export): {{issue.customfield_10201}}

Target start (export): {{issue.customfield_10202}}

Target end (export): {{issue.customfield_10203}}
In this example the Team is being transformed to the format TEAM_NAME (TEAM_ID). You can change this as you want.
The choice for a Rule to listen to 3 fields and update them all always is for performance — this is generally better than having 3 separate rules (because this rule is very simple and without conditions and etc) and the overhead of reading/updating the other fields is minimum.
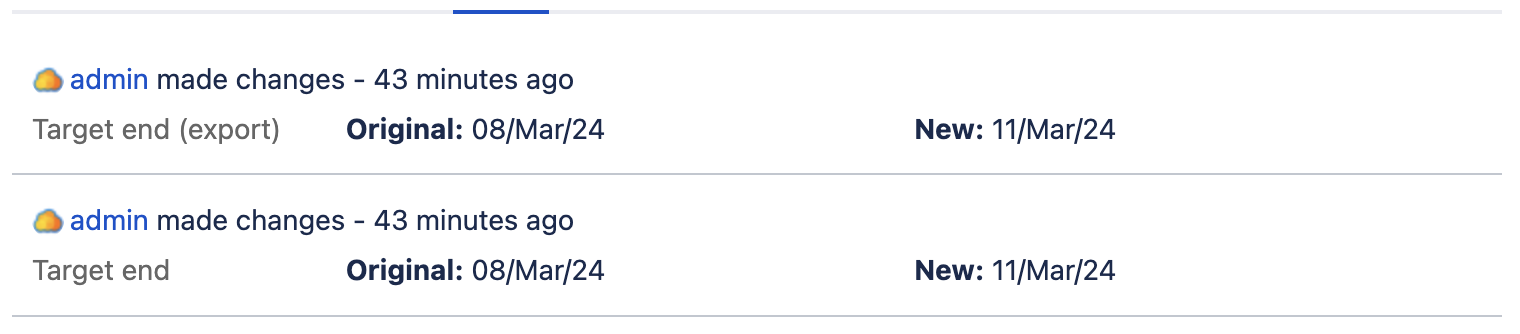
If one of the fields was updated, all 3 will be synced but Jira won't change the other 2, just the one that actually changed values:
3. Setup another Automation Rule to update the historical data
The previous rule will sync values updated after the Rule being published, now we'd need to sync all existing values.
This can be accomplished through another Automation Rule — you can clone the one above and change the Trigger to Scheduled:

The rate doesn't matter as we'll run this rule manually a few times.
The JQL should look for Issues that should have the values synced but also restrict them by some date date (created or updated) in order not to overload the Automation. We'd run the rule with a JQL, then shift the dates forward or backward and run again and so on:
project in (KANBAN, SCRUM) and (Team is not empty OR "Target start" is not empty OR "Target end" is not empty) and created >= "2021-01-01" and created < "2021-04-01"4. Validate the sync
Since it's advised these "internal mechanics" fields to be absent in all screens, we can validate the sync's working through a Search and showing the respective columns:

Here we'll see the original fields and the new "(export)" ones.