カスタム フィールドの追加
カスタムフィールドタイプ
新しいカスタム フィールドを作成するときは、まずそのフィールドのタイプを設定する必要があります。タイプでは、カスタム フィールドの表示方法、機能、使用できる値を選択します。
次の表は、課題に含める必要がある情報とその方法に関するさまざまなユース ケースに対応できるように Jira に用意されている各種カスタム フィールド タイプを示しています。
既定では、新しいカスタム フィールドを追加するときに、標準フィールド タイプから選択するように求められます。カスタム フィールド タイプの全リストを開くには、ダイアログ ウィンドウで [すべて] を選択します。
| カスタム フィールド タイプ | 説明 |
|---|---|
JIRA CORE のカスタム フィールド タイプ | |
チェックボックス (標準) | リストから複数の値を選択できます。 チェックボックスは、オプションを作成する必要があるカスタム フィールド タイプの 1 つです。詳細を見る |
日付ピッカー (標準) | 日付を選択できます |
日時ピッカー (標準) | 日付と時刻を選択できます |
ラベル (標準) | 課題の分類と検索を容易にするため、課題にラベルを追加できます |
数値フィールド (標準) | 浮動小数点数を格納して検証します |
ラジオ ボタン (標準) | リストから 1 つの値を選択できます。 ラジオ ボタンは、オプションを作成する必要があるカスタム フィールド タイプの 1 つです。詳細を見る |
選択リスト (カスケード) (標準) | 親子関係に基づいて値を選択できます。 選択リスト (カスケード) は、オプションを作成する必要があるカスタム フィールド タイプの 1 つです。詳細を見る |
選択リスト (複数選択) (標準) | リストから複数の値を選択できます。 選択リスト (複数選択) は、オプションを作成する必要があるカスタム フィールド タイプの 1 つです。詳細を見る |
選択リスト (単一選択) (標準) | リストから 1 つの値を選択できます |
テキスト フィールド (複数行) (標準) | ユーザーが何行もの長いテキストを入力できる無制限のテキスト領域を作成します |
テキスト フィールド (単一行) (標準) | ユーザーがスペースを含めて 255 文字以内で 1 行のテキストを入力できるテキスト ボックスを作成します |
URL フィールド (標準) | 1 つの URL を入力できます |
ユーザー ピッカー (単一ユーザー) (標準) | 1 人のユーザーを選択できます |
グループ ピッカー (複数グループ) (詳細) | 複数のユーザー グループを選択できます |
グループ ピッカー (単一グループ) (詳細) | 1 つのユーザー グループを選択できます |
プロジェクト ピッカー (単一プロジェクト) (詳細) | ユーザーが Jira で表示できる 1 つのプロジェクトを選択できます |
テキスト フィールド (読み取り専用) (詳細) | プログラムで値を設定するための読み取り専用のテキスト ラベルを作成します。値には、スペースを含めて 255 文字までしか含められません。 |
ユーザー ピッカー (複数ユーザー) (詳細) | 複数のユーザーを選択できます |
バージョン ピッカー (複数バージョン) (詳細) | 複数のバージョンを選択できます |
バージョン ピッカー (単一バージョン) (詳細) | 1 つのバージョンを選択できます |
JIRA SOFTWARE 専用のカスタム フィールド タイプ | |
グローバル ランク (詳細) | Jira Software では、このタイプのランク カスタム フィールドが自動的に作成されます。ランク フィールドでは、課題の重要性や緊急性を評価して優先順位を付けたり、課題をスプリント間で移動したり、特定の親課題の下にサブタスクをグループ化したりできます。ランキングの詳細を見る |
非表示ジョブ スイッチ (詳細) | プログラムで非表示スイッチを設定して、Perforce ジョブを作成するかどうかを選択します。 |
Jira リリース済みバージョン履歴 (詳細) | カスタム リリース バージョンを設定できます |
ジョブ チェックボックス (詳細) | Perforce ジョブを作成するかどうかを選択するチェックボックスを作成します。 |
元のストーリー ポイント (詳細) | 課題の作業が開始される前にその課題に割り当てられた元のストーリー ポイント数を格納します |
新しいカスタム フィールドの作成
カスタム フィールドを作成するには、次のようにします。
- 画面右上で [管理
 ] > [課題] の順に選択します。
Under Fields (the left-side panel), select Custom fields.
[カスタム フィールドを追加] を選択します。

[フィールド タイプの選択] モーダル ダイアログで [すべて] を選択し、使用可能なすべてのフィールド タイプを表示できるようにします。
フィールド タイプを選択し、[次へ] を選択します。たとえば、[チェックボックス] フィールド タイプを選択します。
Configure the field by entering its name, description, and options if required. Select Next.

You’ll see the Name as the custom field's title when entering and retrieving information on issues. You’ll see the Description beneath the field when creating new issues and editing existing issues, but not when browsing issues.フィールドのコンテキストを設定します。
- カスタム フィールドを適用する必要があるプロジェクトを選択します。
- [作成] を選択します。
これで、新しいカスタム フィールドを課題画面に関連付け、課題にフィールドを追加できるようになりました。詳細情報
カスタム フィールドの課題画面への関連付け
カスタム フィールドを作成すると、[画面] ページが表示されます。画面の詳細
ここで、カスタム フィールドが表示される課題画面を選択できます。たとえば、[既定の画面] や [課題解決画面] などに表示できます。
フィールドを画面に関連付けるには、目的の画面の横にあるチェックボックスをオンにして、[更新] を選択します。

カスタム フィールドは、これを有効にしたすべての課題画面で使用できるようになります。ここでどの画面も選択しなければ、課題の作成または編集するときにカスタム フィールドは表示されません。
既存の関連付けの編集
カスタム フィールドと選択した画面の関連付けはいつでも編集できます。この操作を行うには、次の手順に従います。
- 画面右上で [管理] > [課題] の順に選択します。
Under Fields (the left-side panel), select Field configurations.
フィールド設定を選択します。
リスト内からカスタム フィールドを見つけて、[画面] を選択します。

関連付けを変更し、[更新] を選択します。
画面との関連性に関係なく、カスタム フィールドを既存の課題に追加することもできます。
カスタム フィールドを課題に直接追加する
カスタム フィールドが課題画面に関連付けられていなくても、特定のタイプの既存の課題にこのフィールドを追加できます。これを行う前に、目的の課題タイプのフィールドが有効になっていることを確認してください。
課題にフィールドを追加する手順は、次のとおりです。
課題を開きます。
Select Admin > Add field. In the dropdown, select the field you want to see in the issue view.
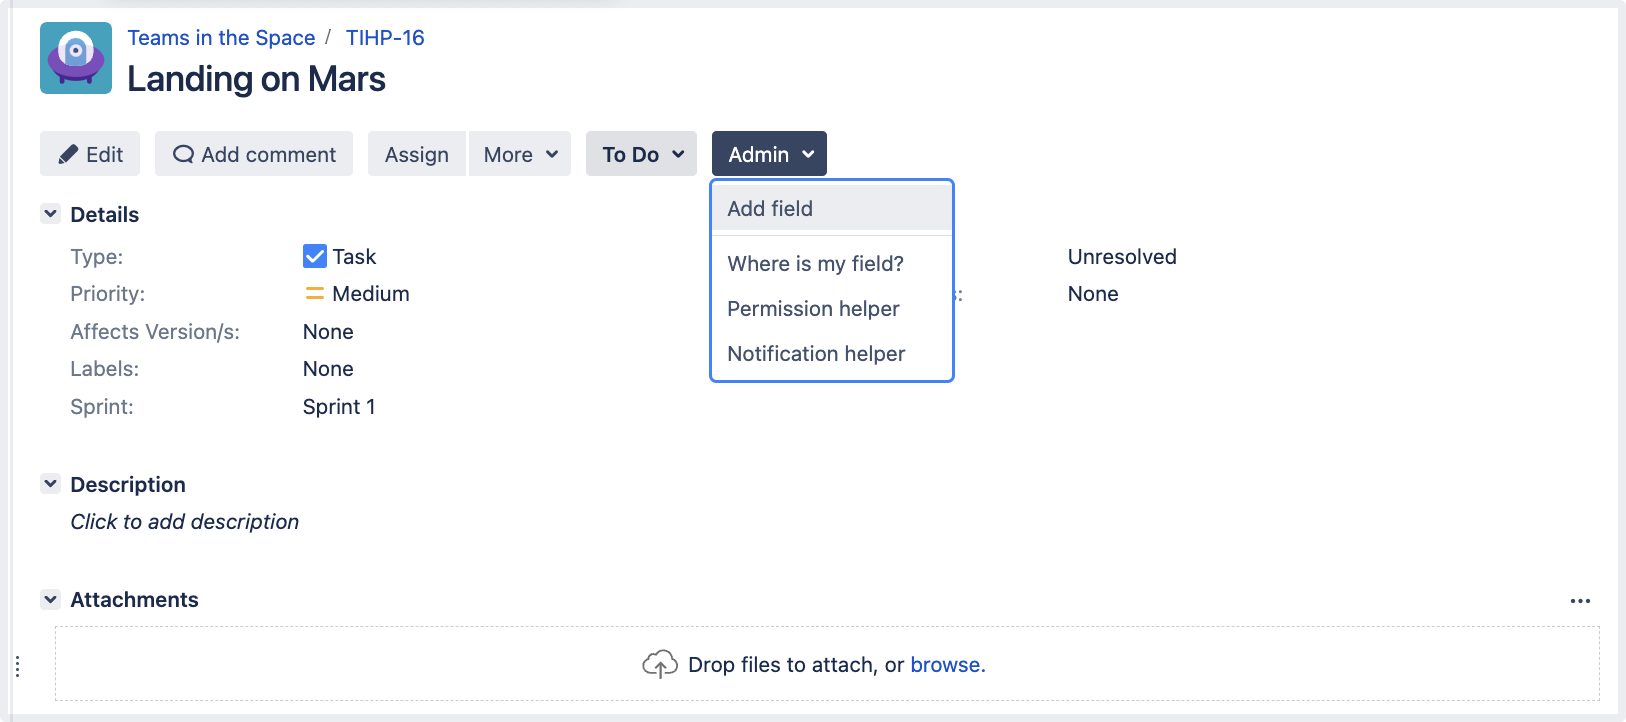
Select Edit field to set a value for the field immediately.

[送信] を選択します。
次のすべての手順を行うには、Jira 管理者 グローバル権限 を持つユーザーとしてログインする必要があります。
カスタム フィールドは、[詳細] ブロックまたは [課題編集画面] のいずれかに表示されます。フィールドを編集できない場合、変更方法を確認してください。
対応する課題画面との関連付けは、自動的に生成されます。
フィールドは、有効にしたすべてのタイプの全課題で使用できるようになります。たとえば、バグに対してのみ、フィールドが有効になっているとします。この場合、そのフィールドを 1 つのバグに追加するとすぐに、フィールドに設定したコンテキストに応じて、特定のプロジェクトまたはインスタンス全体のすべてのバグにフィールドが表示されるようになります。
ボードまたはバックログ ビューでフィールドを有効にする
Jira 管理メニューからフィールドを追加できます。詳細については、画面のタブとフィールドを設定するを参照してください。
あるいは、課題から直接行うこともできます。たとえば、前のセクションで追加した [課題ラベル] カスタム フィールドを有効にしてみましょう。
ボードまたはバックログ ビューに移動して、既存の課題を編集します。
右上隅にある [フィールドを設定] > [フィールドがありません] を選択し、フィールド ヘルパーを開きます。

カスタム フィールドの名前を入力します。この場合は、「Issue label」と入力します。
フィールドのステータスや、フィールドが表示されない理由の詳細、およびフィールドの設定を更新する方法が表示されます。

"課題ラベルの設定" ページから、プロジェクトと課題タイプ スコープのフィールド設定を更新します。 詳細は「カスタム フィールド コンテキストの設定」をご確認ください。
- [OP: Scrum Bug Screen' Screen configuration (OP: スクラムバグ画面の画面設定)] ページから、フィールド画面の設定を更新します。詳細については、「課題ビューの設定」の「追加したフィールドを課題ビューで編集可能にする」セクションを参照してください。
カスタム フィールドが追加される課題タイプを変更する
カスタム フィールドを追加した課題タイプはいつでも変更できます。たとえば、フィールドはバグにのみ追加できますが、すべてのタイプの課題にそれを追加したいとします。
課題タイプを変更するには、以下のようにします。
- 画面右上で [管理] > [課題] の順に選択します。
Under Fields (the left-side panel), select Custom fields.
リスト内からフィールドを見つけて、[アクション] で [設定] を選択します。
On the page with configurations, select Edit configuration.
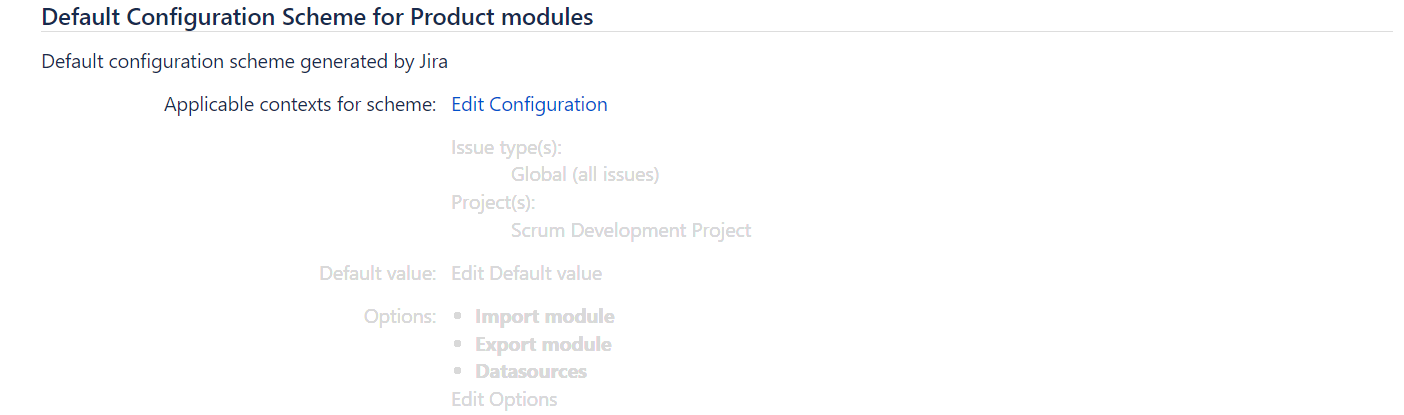
- Go to Choose applicable issue types and select Any issue type.

フィールドは、すべてのタイプの課題に追加できます。対応する課題画面との関連付けは、自動的に生成されます。
次のステップ
フィールドのコンテキストを変更する場合は、「カスタム フィールドの設定」を参照してください。
You can also find more custom fields from apps on the Atlassian Marketplace (for example, the Jira Toolkit).
独自のカスタム フィールド タイプを構築するには、Jira 開発者向けドキュメントのチュートリアルを参照してください。
Jira でカスタム フィールドを使用する機会をさらに見つけるには、Atlassian Marketplace から以下のいずれかのアプリを試してみてください。
Projectrak – Project Tracking for Jira: 各プロジェクトのニーズに応じて、Jira プロジェクトのフィールドを追加、管理、カスタマイズします。
Power Custom Fields:カスタム フィールド内で、数式、スクリプト、計算済みのフィールド、およびカスタム メッセージを使用します。
Elements Connect – 外部データ フィールド: 任意のデータ ソースを入力できるカスタム フィールドを作成します。
Dynamic Forms for Jira:動的フォームを使用して、明確で関連性があり、ナビゲートしやすい課題画面を作成します。
Jira のインデックスを再作成する
Changes to custom fields affect Jira search index. After you make changes to any settings, you'll get the following message in the Administration view:
We recommend that you perform a re-index, as configuration changes were made to 'SECTION' by USER at TIME. If you have other changes to make, complete them first so that you don't perform multiple re-indexes
このメッセージは、Jira に対する設定変更は実施されたが検索インデックスにはその変更が反映されていないことを意味します。Jira の検索インデックスが再構築されるまで、Jira からの検索クエリは正しくない結果を返す場合があります。
不一致を避けるには、Jira 検索インデックスを再構築する必要があります。
If you want to know after what actions with custom fields you need to re-index Jira, check Reindexing in Jira Server and Data Center after configuring an instance for tips.