プロジェクトの課題をカスタマイズする
Issues are the packets of work that your team needs to complete in a project. Each issue is made up of fields that contain data about this issue. This data defines the issue by providing the details of what needs to be done, when, and how.
For example, an issue can include a summary of work, a description of a task, and due dates. This information is presented on an issue screen. A screen groups all available fields (or a subset of all available fields) defined in Jira applications, and displays them to a user.
You can customize issues by changing the configuration and behavior of fields and screens to meet your team's or customers' needs. Here's what you can do:
- フィールド様式を変更する(フィールドの記述変更、フィールドの表示/非表示設定、フィールドの必須/オプション設定等)
- 既定値が設定されたフィールドに好みの値を設定する(解決策とステータス等)
- 新しいカスタム フィールドを作成する
- フィールドに異なるレンダラーを設定する
- 画面の位置フィールドを変更する
- それぞれの課題運用でどの画面を表示させるかを選択する。(例:「課題を作成する」、「課題を編集する」) または、ワークフローの遷移(例:「課題の解決」、「クローズ」)
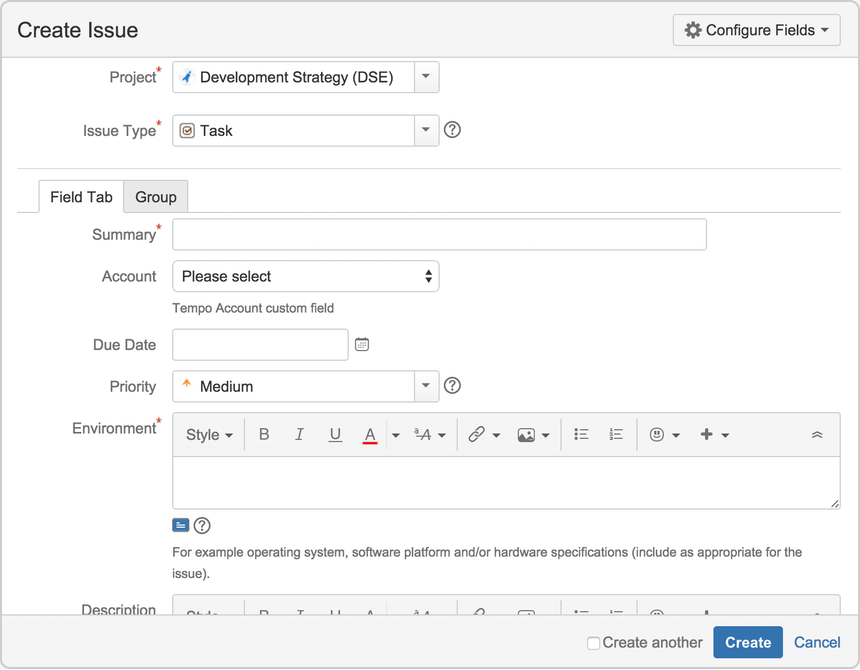
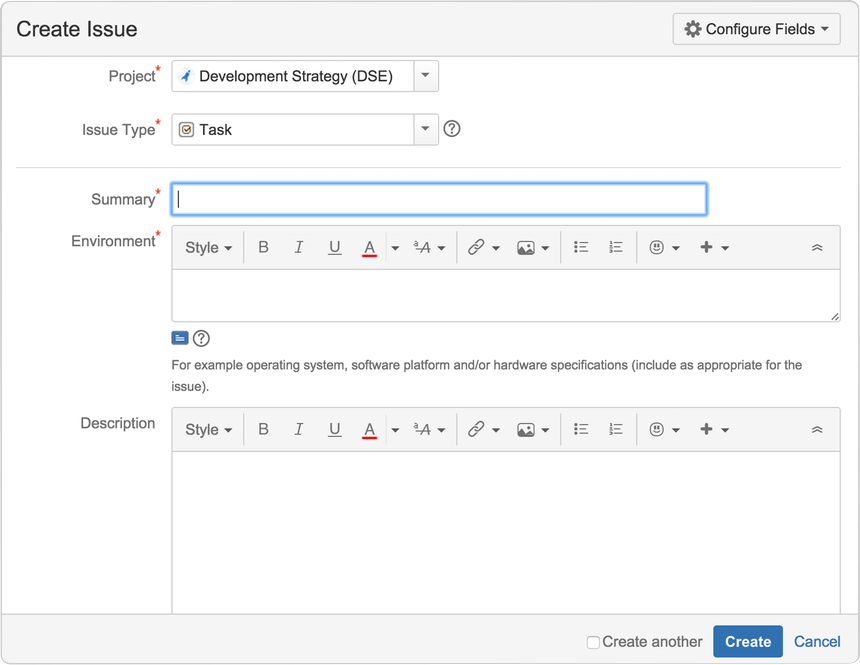
A simple example of how customizing an issue could benefit your team could be marking fields as 'Required' when an issue is created. This would ensure you always capture the required information you need to get the work done to resolve the issue. If you couple this with positioning the required fields at the top of the screen and even hiding fields you know the issue creator won't use, you'll make sure your users can see and complete the required fields as quickly as possible.
カスタマイズ前
カスタマズ後
Jira 管理者とプロジェクト管理者はワークフローのカスタマイズに関して異なる権限を持っています。
プロジェクト管理者
プロジェクト管理者は、次にあてはまる場合、プロジェクトで課題のいくつかの側面をカスタマイズできます。
- 既定で有効化されている 拡張プロジェクト管理者 権限を持っているt (プロジェクト設定 > 権限 で確認できます)。
- 他のプロジェクトで使用されている画面や、ワークフローのトランジション画面として使用されている画面に変更を加えることはできません。
- the screen isn't the default Jira screen (no one can edit these screens).
画面が別のプロジェクトと共有されている場合、画面を表示するとこの情報が表示されます。画面が上記の条件を満たす場合は、次が可能です。
- 画面に表示されるタブの追加と削除、およびタブ名の編集
- add, remove, and rearrange system fields, and
- add, remove, and rearrange existing custom fields, but you can't create custom fields.
画面の編集
- プロジェクトを選択し、表示する画面のあるプロジェクトを選択します。
- サイドバーのプロジェクト設定を選択します。
- プロジェクト サイドバーで画面を選択します。
You'll see the screen scheme/s used by your project and the issue types that use that scheme. Expand the screen scheme to see the screens associated with that scheme and issue types. Select the screen you wish to edit. You can perform the following actions:
操作 | 手順 |
|---|---|
| タブの追加 | [タブの追加] () をクリックします。表示されるダイアログで、新しいタブの名前を入力し、[追加] をクリックします。 |
| タブの移動 | タブの点線の部分 (タブ名の横) にカーソルを置き、希望する位置にタブをドラッグします。 |
| タブの名前変更 | 1. タブ名の上にカーソルを置き鉛筆アイコンをクリックします。 2.新しいタブの名前を入力し、OK をクリックします。 |
| タブの削除 | タブ名の上にカーソルを置きXをクリックします。 |
| フィールドの追加 | 1. フィールドを追加するタブをクリックします。 2. 現在のフィールドの一番下に表示されているドロップダウンにフィールド名を入力すると、フィールド候補が表示されます。 3. フィールドの追加 をクリックして現在のタブに追加します。 |
| フィールドの移動 | フィールドの点線の部分 (フィールド名の横) にカーソルを置き、希望する位置にフィールドをドラッグします。 フィールドを別のタブの名前までドラッグして移動し、ドロップします。 |
| フィールドの削除 | フィールドの上にカーソルを置き、表示される X をクリックします。 |
Jira 管理者
Jira 管理者として、より詳細な概念情報については、Jira 管理者ドキュメントにある、「課題をカスタマイズする」を参照してください。


