カスタマーポータル
JIRA Service Desk pre-configures a Customer Portal for each service desk you set up. The Customer Portal is where you design the request forms your customers will fill out. As the service desk manager, you can map the JIRA features that are used to manage each request to the user friendly language your customers will see.

Tip: You can click the Preview the Customer Portal link at any time to see how your changes will appear for customers.
For information about the permissions needed to adminster a Customer Portal and the permissions customers need to submit requests, see How JIRA and JIRA Service Desk Work Together.
Setting up a new Customer Portal
The first step in setting up a Customer Portal is configuring the request types the service desk will support. Each request type in a service desk is based on a JIRA issue type. (See How JIRA and JIRA Service Desk Work Together for more information on how JIRA Service Desk works with JIRA.)

注記:1つの JIRA 課題タイプがさまざまなリクエストタイプの基本となる場合があることにご注意ください。(たとえば、「購入」という課題タイプは、「新規ハードウェアのリクエスト」と「新規ソフトウェアのリクエスト」の両方の基本になります。)
Grouping request types in the Customer Portal
You can group request types to make it easy for customers to find the right request type in the Customer Portal. The groups you assign to each request type allow customers to browse the high-level groups of request types, and then select the one that they think will provide the correct request type for them.
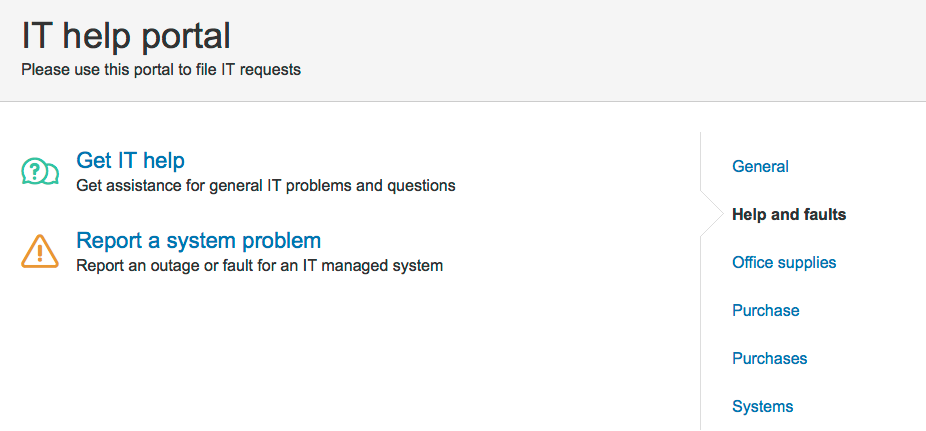
Use the Groups drop down when you design the Customer Portal to set up the group(s) the request type belongs in.
You must have more than one group for the groups to appear in the Customer Portal. Groups are unique to each service desk; if you want to use the same groups in all your service desks, the service desk admin must manually create the same groups.
リクエストタイプのワークフロー ステータスをカスタマイズ
JIRA Service Desk uses the workflow associated with the request's issue type for the flow of the request.

You can re-map the default workflow statuses to more customer friendly statuses that will appear for customers, and you can also map multiple statuses to a single customer status to simplify the appearance of the workflow. Use the Workflow Statuses tab on the Customer Portal designer to customize the workflow that customers will see.
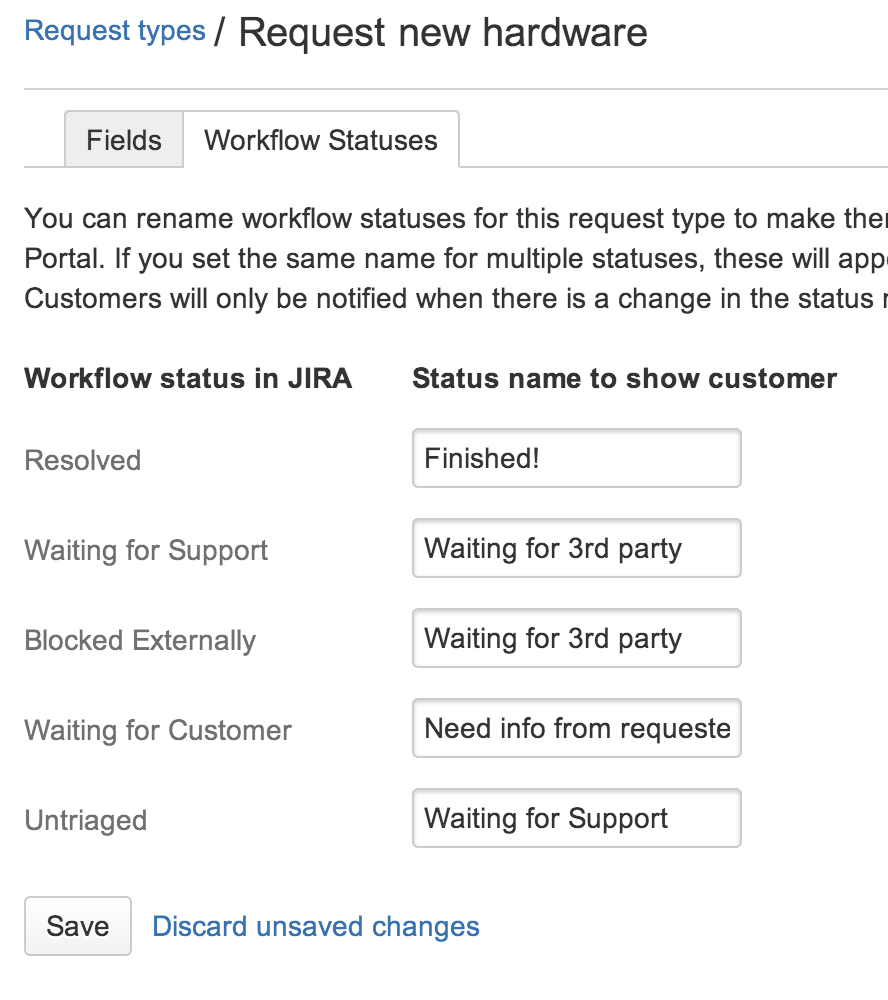
Only changes between these customer-visible 'status names' will be reflected in the Portal and its notifications (e.g. a transition between two workflow statuses can be hidden on the Portal by giving them the same 'status name'). Customers receive email notifications when they raise a request through the Customer Portal, when their request is resolved, when another user comments on their request, and when there is a change in the 'status name'.
When an issue is created through the Customer Portal, JIRA Service Desk suppresses emails that would be sent to the reporter by the project's notification scheme. In this case the issue reporter is also prevented from becoming an auto watcher on the issue to prevent duplicate notifications.
To disable email notifications completely (for all service desks), go to  > Add-ons. Then use the Service Desk link in the left panel to open your JIRA Service Desk settings.
If you need to change the workflow of a request, you must edit the workflow associated with the service desk project. You can find this workflow on the project administration section of the service desk project.
リクエストタイプのフィールドをカスタマイズ
リクエストタイプに表示されるフィールドと詳細は課題タイプに設定されたフィールドに紐づいています(リクエストタイプが紐づく課題タイプ)

You use the Fields tab on the Customer Portal to change the default JIRA field names to more customer friendly language. For example, the "Summary" field appears as "What do you need?" for customers.
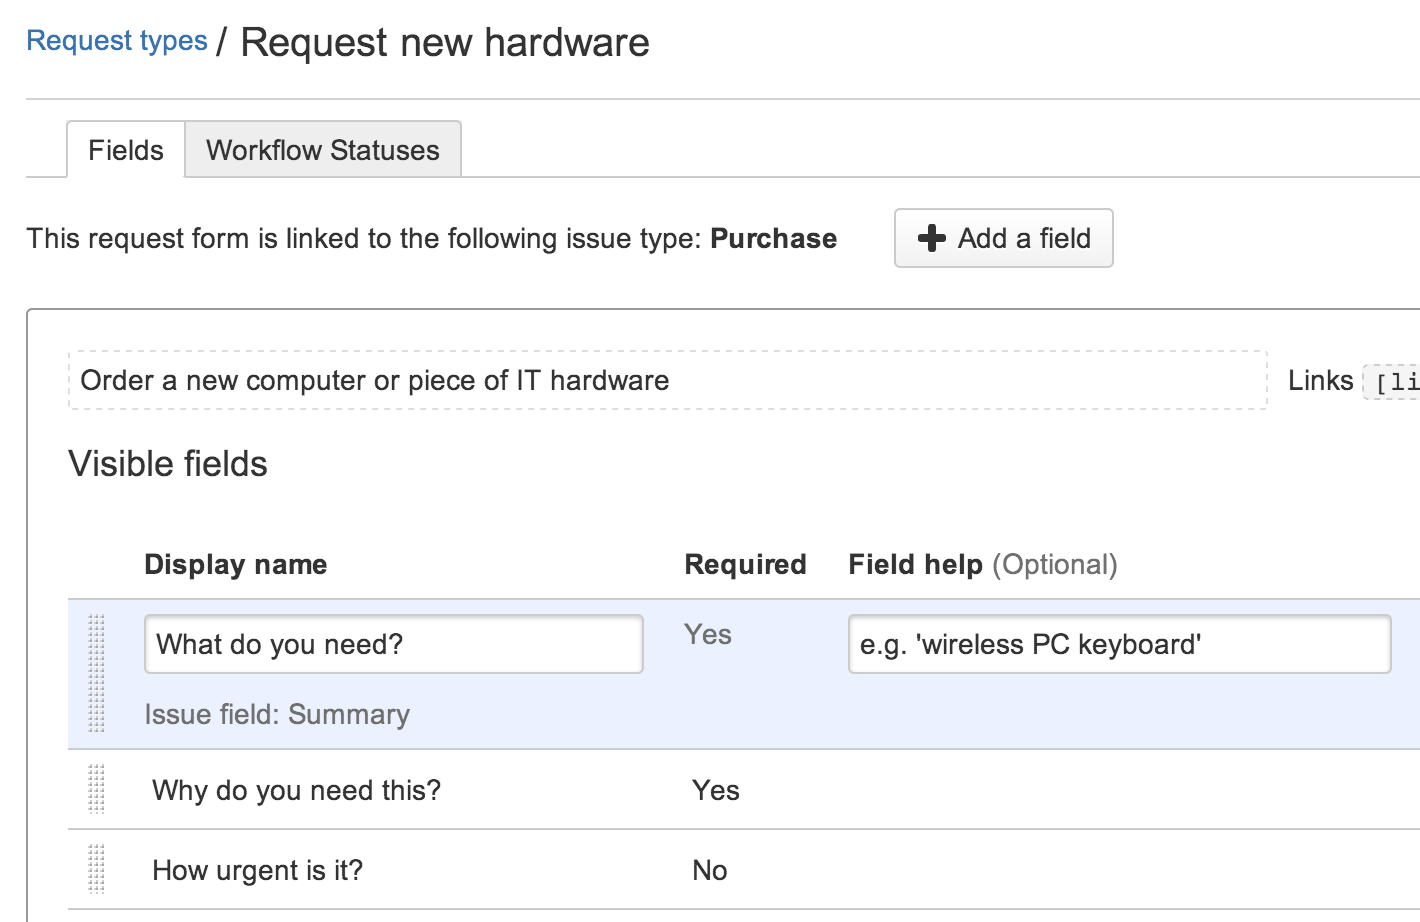
You can also keep fields hidden but available on the request type so that their value can be used for other processes. For more details about how different types of fields work in JIRA Service Desk, see Hidden fields and unsupported fields.
If the issue type doesn't have the fields you need, you must add a field to the JIRA issue type that the request type is based on. If the issue type uses multiple screen schemes, the new field must be available in the create screen. See Configuring Fields and Screens.
非表示にするフィールドと非サポート対象のフィールド
Each request type in a service desk is based on a JIRA issue type. Every JIRA issue type has a set of allowed (and possibly required) fields associated with it. As you set up the request type, you can choose to include fields that are hidden on the Customer Portal but still provide a value to assist with your internal processes and reporting. For example, you might want to set the value of the "Label" field as "hardware" for the "Request new hardware" request type, and set the value as "software" for the "Request new software" request type.
課題タイプに使用されているフィールドの中にはカスタマーポータルでの使用にはサポート対象とならないものがあります:リクエストタイプにこのようなフィールドがある場合は、自動的に規定値のある非表示フィールドセクションに追加され、ここに値を設定するよう求められます。
Other fields aren't supported for use in JIRA Service Desk.
これらのフィールドにリクエストタイプと規定値を追加することはできますが、カスタマーポータルで表示させることはできません:
- 担当者
- ラベル
- 紐づく課題
- JIRA の他のアドオンで定義されたフィールド
以下のタイプのフィールドはリクエストタイプに追加できません。また、「フィールドの追加」ダイアログに表示されません:
- 課題タイプ
- ログ
- 報告者
- セキュリティレベル
- タイム トラッキング