Update Message or Description of the Alert automatically in Opsgenie when the same is updated on the Jira ticket
プラットフォームについて: Cloud のみ - この記事は、 クラウド プラットフォームのアトラシアン製品にのみ適用されます。
問題
It is not possible to update the summary or description of the Alert automatically in Opsgenie when the same is updated on the Jira ticket. This is expected behaviour as it is not a part of the integration (Jira Service Management Cloud / Jira Software Cloud).
The below mentioned workaround can help if you want to update the Opsgenie alert with the updated summary or description of the Jira ticket.
環境
Jira Service Management Cloud / Jira Software Cloud integrated with Opsgenie via the New Integration:
ソリューション
You can follow the approach mentioned below to configure the Automation rule in Jira to update the Alert message or description in Opsgenie.
- Create an API Key in Opsgenie for Authorization purposes.
- Navigate to Settings → API key management.
- Click on Add new API key
- Add a Name > Select the following option for Access rights:
- Read
- Create and update. - Click on Add API key and copy it.
- Create an Automation Rule in Jira.
- Open the project that you have chosen while adding the Jira Service Management/Jira Software integration in Opsgenie.
- Navigate to Project Settings → Automation → Create Rule.
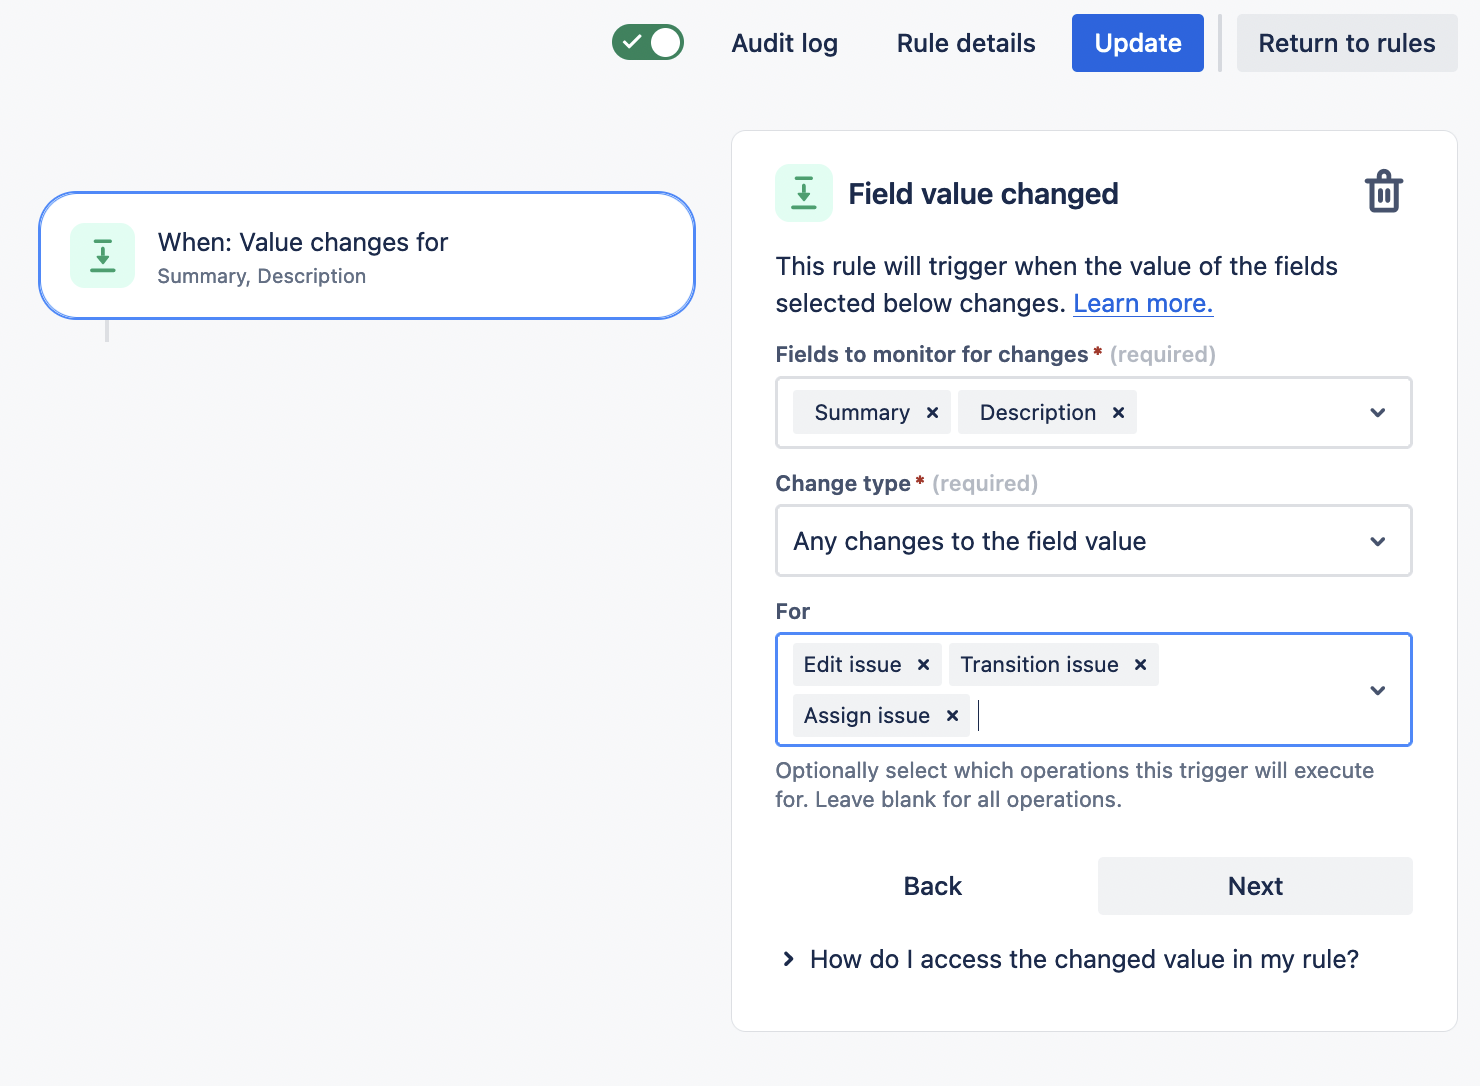
- Trigger: Select the Field Value Changed action
- Fields to monitor for: Summary and Description
- Change type: Any changes to the field value
- For: Edit issue, Transition issue and Assign issue
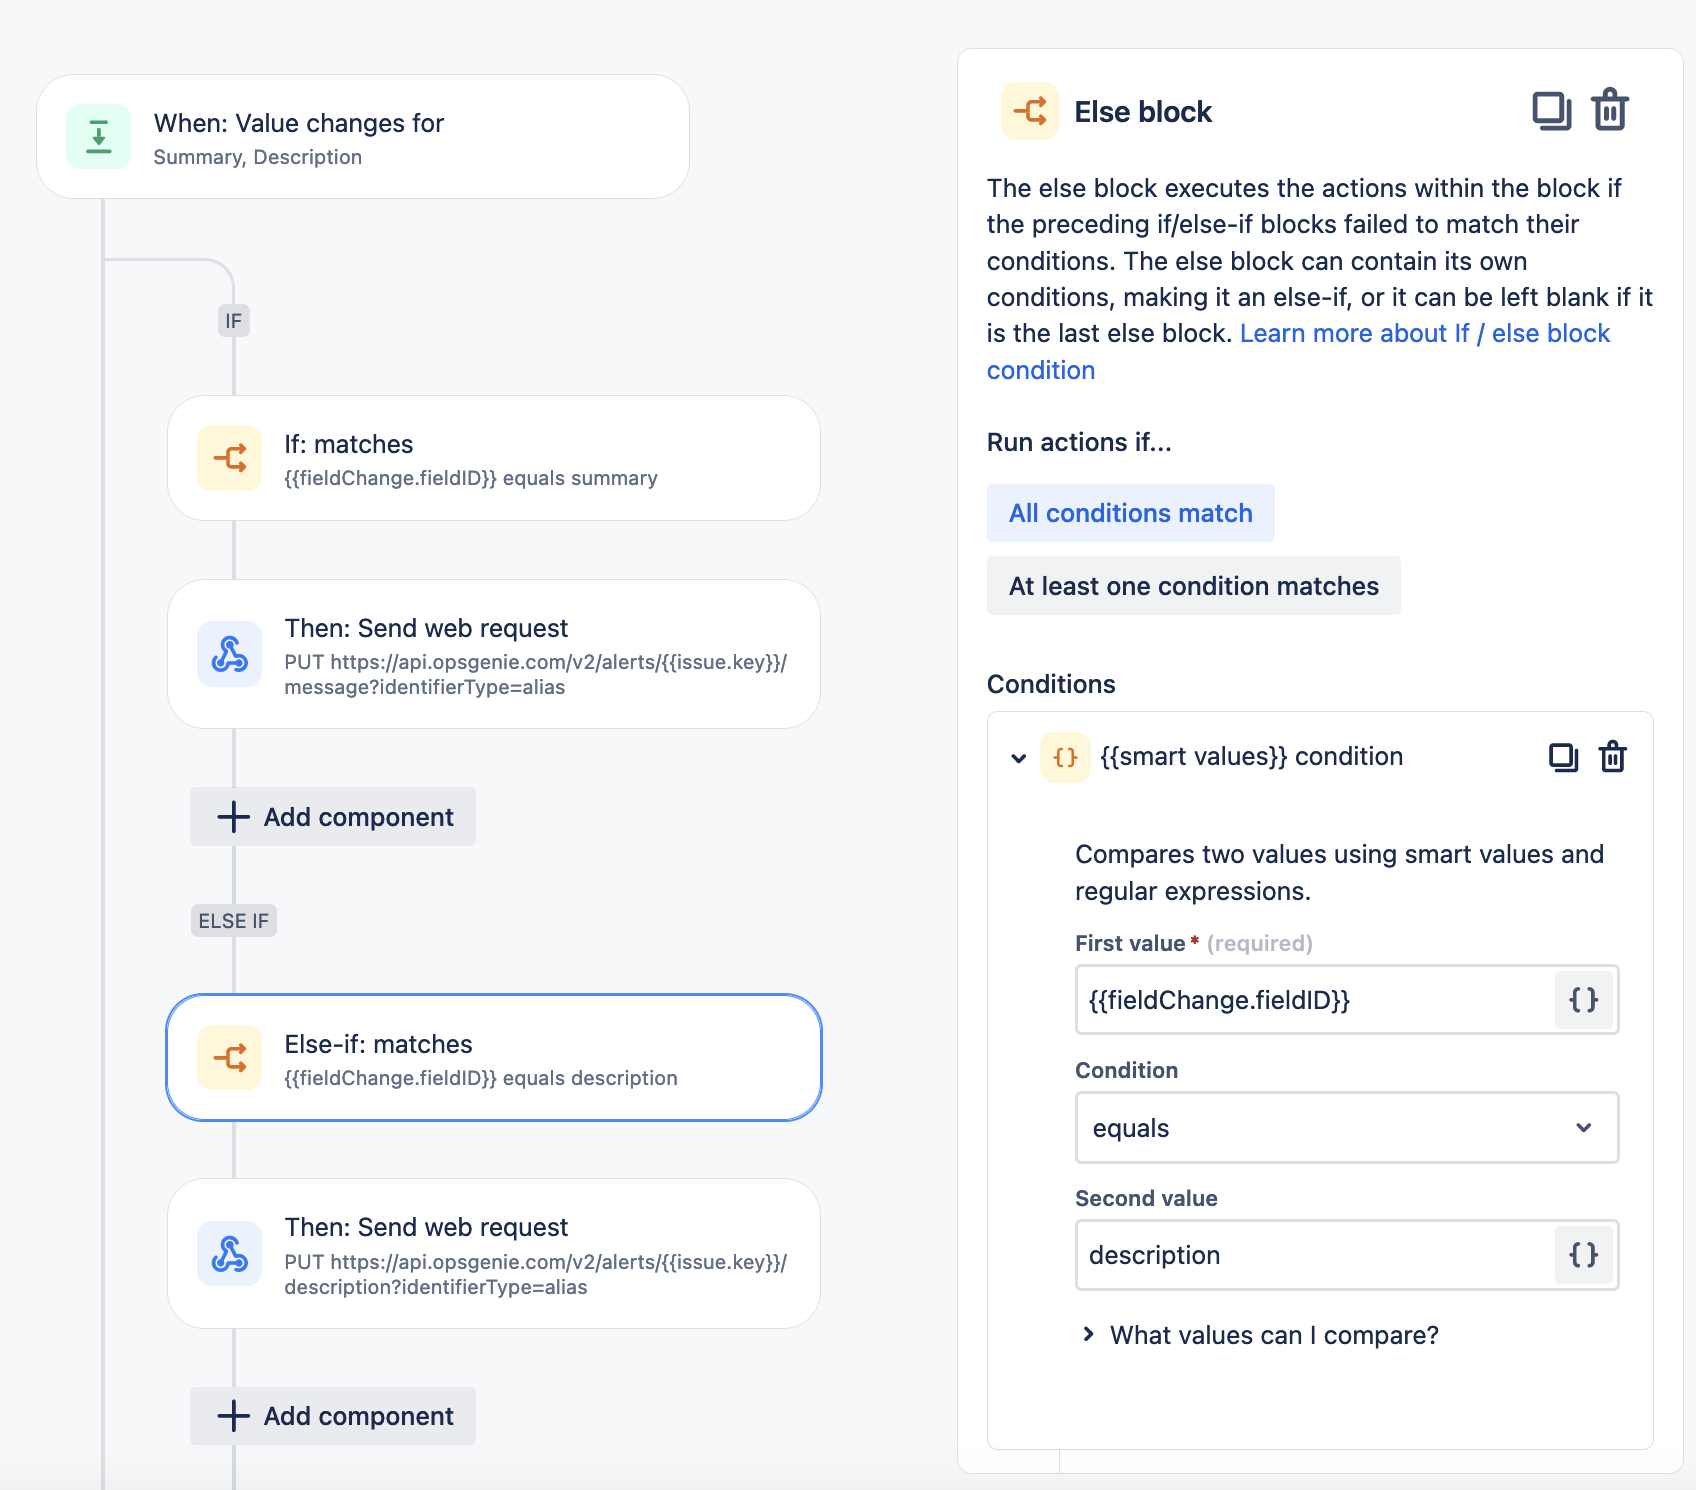
- New condition: IF/ELSE block - select smart value condition
- First value: {{fieldChange.fieldID}}
- 条件: イコール
- Second value: Summary
- New Action: search for Send web Request action
- Paste the below values accordingly:
Web Request URL: https://api.opsgenie.com/v2/alerts/{{issue.key}}/message?identifierType=alias
Headers:
Authorization: GenieKey <API Key from Step 1.d above>
Content-Type: application/json
HTTP method: PUT
Web request body: Custom data
Custom data:{
"message":"{{issue.summary}}"
} - Click Next.
- Paste the below values accordingly:
- Add Else- repeat steps (2 b.ii to 2 b.iii) for description field. The complete rule should look as follows
- Trigger: Select the Field Value Changed action
注意:
You can import this automation rule in your cloud site using the file mentioned below. Once the import is completed, please add your API key from step 1.d above and save it.
References:
If you encounter issues or require further clarification on the topic, please consider reaching out to Atlassian Support for further assistance.