How to add a screen with custom fields to a workflow transition in Jira Data Center
プラットフォームについて: Server および Data Center のみ。この記事は、Server および Data Center プラットフォームのアトラシアン製品にのみ適用されます。
サーバー*製品のサポートは 2024 年 2 月 15 日に終了しました。サーバー製品を利用している場合は、アトラシアンのサーバー製品のサポート終了のお知らせページにて移行オプションをご確認ください。
*Fisheye および Crucible は除く
Note that this knowledge article does not describe how to make any field from the transition screen mandatory. If you are looking for a way to make any field mandatory on the transition screen, please refer to the knowledge article Make custom fields required in a workflow transition in Jira server.
目的
This article walks you through the steps of how to add a screen to a workflow transition, and how to include custom fields to this screen.
シナリオ
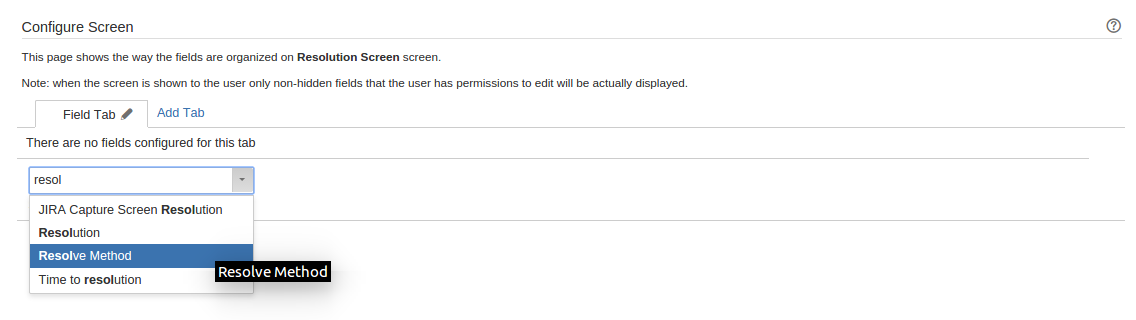
Resolve Method という名前のカスタム フィールドを作成しました。新しくResolution 画面 を作成し、Resolution 画面を Resolve Issue トランジションにマッピングします。
環境
Jira Data Center on any version from 8.0.0.
ソリューション
画面を作成し、画面にカスタム フィールドを追加
- JIRA Administrator 権限を持つユーザーとしてログインします。
- Click at the cog icon ⚙ > Select Issues > Find Screens under Screens category at the left.
- [画面の追加] をクリックします。
- 画面の [名前] と [説明] を入力して [追加] を選択します。
- 画面の構成ページにリダイレクトされます。このページには、画面一覧で [設定] リンクを使用することでもアクセスできます。
- Add the custom field created ( Resolve Method ) to the screen.
ワークフロー トランジションへの画面のマッピング
- Go to Workflows page : Cog Icon ⚙ > Issues > Find Workflows under Workflows category at the left.
- トランジション画面に追加したいワークフローで [編集] リンクをクリックします。
Click at the Resolve Issue Transition then select Edit at the pop up windows.
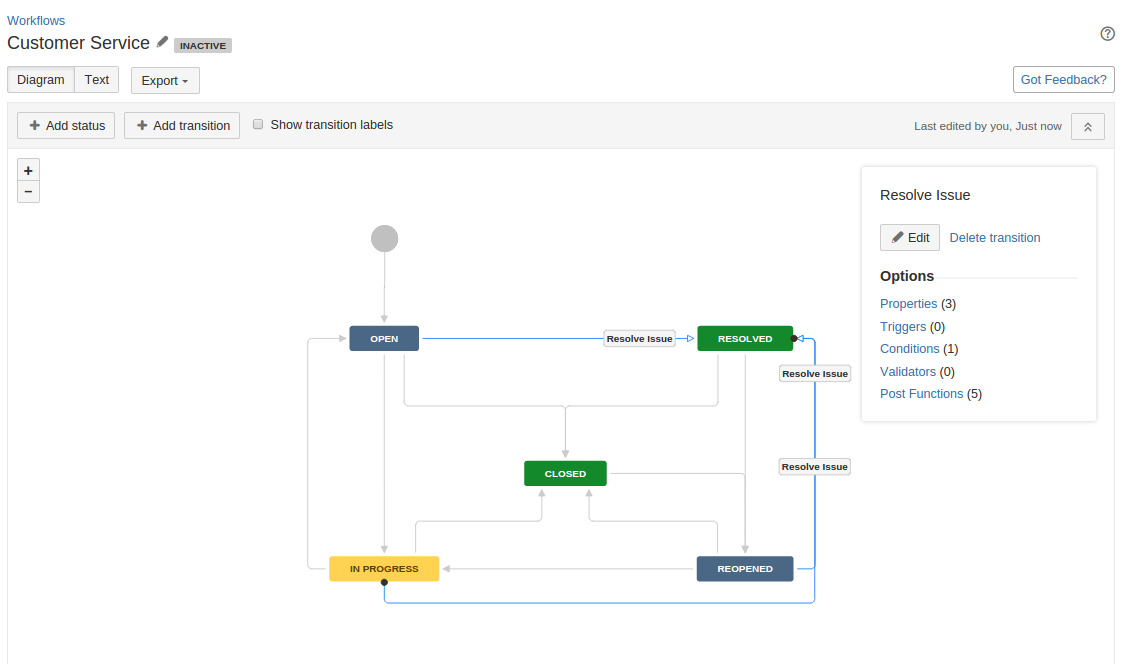
At the Edit Transition window select Resolution Screen for screen then Save.

- アクティブなワークフローの場合、編集の完了後に下書きを公開する必要があります。
それ以外の場合、ワークフローをワークフロー スキームにマッピングし、そのワークフロー スキームをプロジェクトに関連付けてワークフローを有効化する必要があります。 When you Resolve Issue, the Resolution Screen will prompt out. Then you can specify the Resolve Method on the transition screen.