Integrate Jira server and IIS with Application Request Routing
説明
Microsoft has a routing component for IIS7/7.5 called ARR (Application Request Routing). We have a page about integrating JIRA applications with IIS, which has a similar set of recommended configurations for use with the native-Microsoft routing.
Steps to configure the integration
The content on this page relates to platforms which are not supported for JIRA Applications. Consequently, Atlassian cannot guarantee providing any support for it. Please be aware that this material is provided for your information only and using it is done so at your own risk.
- Install Application Request Routing and URL Rewriting on your IIS server;
- Enable Proxying on ARR:
- From the IIS7 Console, click on Server_Name and open Application Request Routing:

- From the Actions panel on the right hand side, select "Server Proxy Settings"
Check "Enable Proxy" and set HTTP Version to "HTTP/1.1":

Make sure to disable "Reverse Rewrite Host in Response Headers" - this can cause problems with URLs being re-written incorrectly:
- Click on your Server in the sidebar
- Click "Application Request Routing Cache"
- Click "Server Proxy Settings"
- Untick "Reverse rewrite host in response headers"
- From the IIS7 Console, click on Server_Name and open Application Request Routing:
- Add a new site on IIS (i.e jira.example.com);
- Add a new URL Rewrite Rule for jira.example.com:
- From the IIS7 Console, click on jira.example.com and open URL Rewrite:

- From the Actions panel on the right hand side, select "Add Rules" and choose "Blank Rule";
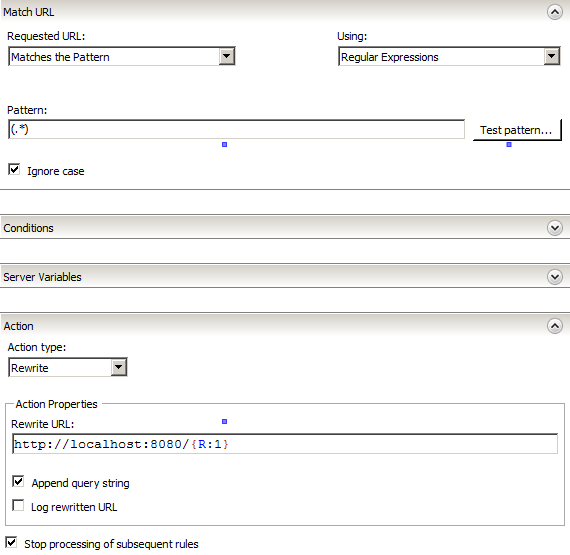
- Set Match URL to:
- Requested URL: Matches the Pattern
- Using: Regular Expressions
- Pattern: (.*)
- Ignore Case: Checked
- Set Action to:
- Action Type: Rewrite
- Rewrite URL: http://<JIRA_url:Port>/{R:1}
- Append query string: Checked
- Mark Stop processing of subsequent rules;
- From the IIS7 Console, click on jira.example.com and open URL Rewrite:
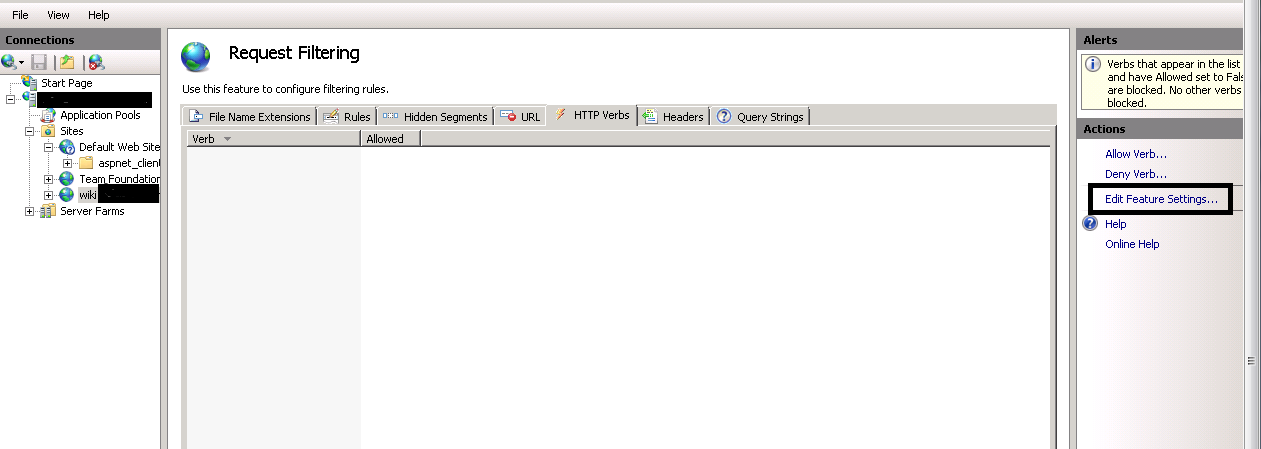
Click in Request Filtering.

- Then click in Edit Feature Settings:
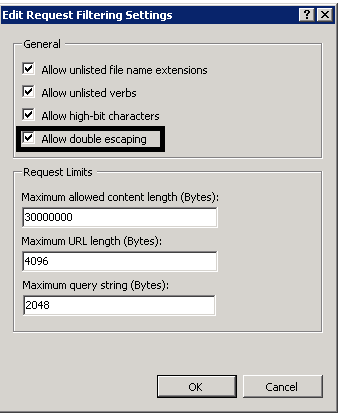
- Check Allow double escaping and hit OK:
Now comment the following section on your
<jira-install>/conf/server.xml:<Connector port="8080" connectionTimeout="20000" redirectPort="8443" maxThreads="200" minSpareThreads="10" enableLookups="false" acceptCount="10" debug="0" URIEncoding="UTF-8" />Add the parameters proxyName and proxyPort to your
<JIRA-install-directory>/conf/server.xmlfile in JIRA, as in this example;<Connector acceptCount="100" connectionTimeout="20000" disableUploadTimeout="true" enableLookups="false" maxHttpHeaderSize="8192" maxSpareThreads="75" maxThreads="150" minSpareThreads="25" port="8080" protocol="HTTP/1.1" redirectPort="8443" useBodyEncodingForURI="true" proxyName="jira.example.com" proxyPort="80"/>- Jira アプリケーションを再起動します。
任意
![]() In some cases more than one site will be hosted in the same IIS installation. In case you want to have a subdomain structure (i.e. jira.example.com, confluence.example.com), you may create different sites as follow:
In some cases more than one site will be hosted in the same IIS installation. In case you want to have a subdomain structure (i.e. jira.example.com, confluence.example.com), you may create different sites as follow:
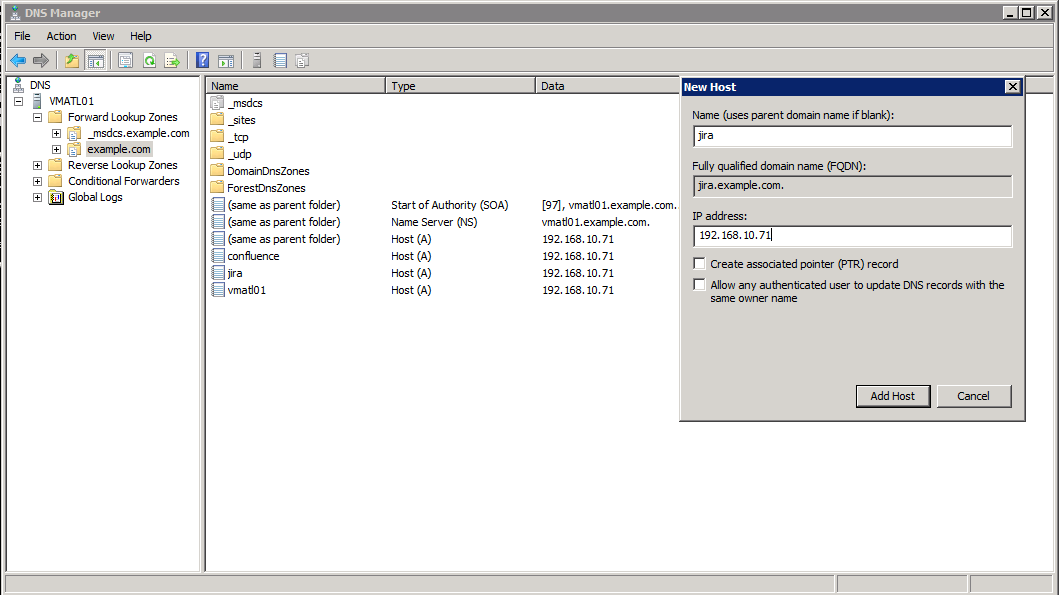
- Create an A Record in the DNS for your subdomain and point to the same IP:
- Create new sites (step 3 of the instructions above) for each one of your subdomains:
- Sites > Add Website
- Site Name: subdomain.example.com
- Physical Path: select the subdomain directory
- Binding: same ip as example.com
- Host name: subdomain.example.com
