外部システム インポートでカスタム フィールドにオプションを一括追加する方法
プラットフォームについて: Cloud、Server、および Data Center - この記事はすべてのプラットフォームに等しく適用されます。
Support for Server* products ended on February 15th 2024. If you are running a Server product, you can visit the Atlassian Server end of support announcement to review your migration options.
*Fisheye および Crucible は除く
要約
選択リスト カスタム フィールドなどのカスタムフィールドに、.csv 外部システム インポートを使って新しいオプションを追加できることはあまり知られていません。この記事は、管理者がこれらのフィールドを作成/更新する際に役立つこのプロセスに焦点を当てます。
CSV ファイルの準備
You'll need a .csv file with at least three columns: Issue Key, Summary and the Custom Field column. You can add multiple custom fields at once by increasing the columns on the .csv file.
その列に既存の課題キーを通知することで、不要な新しい課題を作成する代わりに、Jira がそのカスタム フィールドに追加した新しい値で更新するようにします。そのため、この更新をする目的のみでテスト課題を使用します。
issue key, summary, custom field
PKEY-1000,,Value 1
PKEY-1000,,Value 2
PKEY-1000,,Value 3
PKEY-1000,,Value 4
各行のカスタム フィールドには必ず新しい値を追加してください。また、不要な Jira 課題が作成されないように、インポートにはシステム内に既にある Jira 課題を使用してください。
This applies for all Custom Fields where you can select one or more options, such as Select List (single choice, multiple choices, and cascading).
インポート
To import the data, follow the steps outlined in this article, making sure to map our three columns to the appropriate fields:
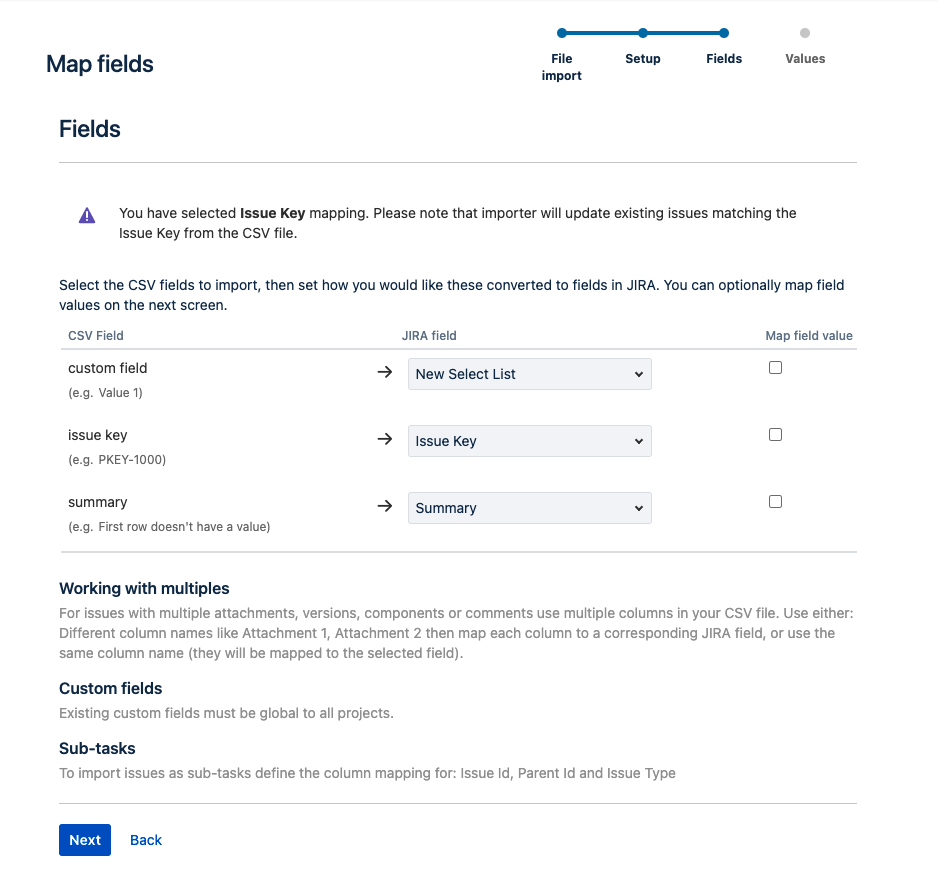
Jira が .csv ファイルを処理し、各オプションについて、カスタム フィールドの有効なオプションとしてまだ存在しないものをファイル上で見つけて、その値をオプションとして追加します。
インポート プロセスが完了すると、.csv で指定した値が、マップされたフィールドに追加された有効なオプションとして表示されたことが確認できるはずです。
上記の内容でうまくいかない場合
If you need help with the content above, raise a support request!
* Tip: If you are the Jira system administrator, you have a number of additional support tools available. See Raising support requests as an administrator for details.