Specifying an Application's Address or Hostname
To ensure that your Crowd server can be used by legitimate applications only, Crowd will allow applications to log in only from known addresses. This means that you need to specify the IP address(es) and/or hostname(s) of each application.
When you add a new application, you will specify the application's IP address. After adding the application, you can update the IP address if necessary, as described below. In some cases, you may need to add the applicable host name as well as the IP address.
IP address and/or host name?
You should always specify the application's IP address. In addition, you may need to give a host name as well as the IP address. Some application servers may pass the host name to Crowd, instead of the IP address. If this happens, Crowd will not grant the application's authorization request unless Crowd recognizes the host name.
To specify an application's IP address or hostname,
- Crowd Administration Console にログインします。
- Click the 'Applications' tab in the top navigation bar.
- The Application Browser will appear. Click the link on the name of the application you wish to update.
- The 'View Application' screen will appear. Click the 'Remote Addresses' tab.
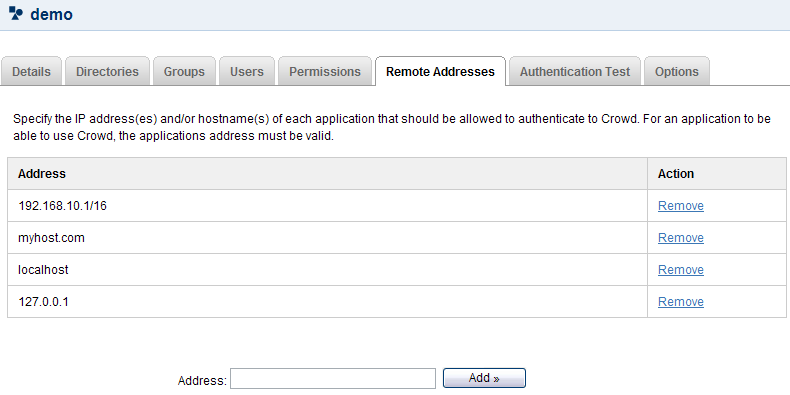
- You will see a list of IP addresses and hostnames that are currently mapped to the application. Type the new IP address or hostname into the 'Address' field and click the 'Add' button. Possible values are:
- 完全な IP アドレス、例:
192.168.10.12。 - ワイルドカードでの IP 範囲 (CIDR 表記を使用) 例:
192.168.10.1/16。詳細については、Wikipedia の CIDR 通知および RFC 4632 の概要を参照してください。 - A host name, e.g.
myhost.com.Note: If an application running on the same server needs to access Crowd, you may need to add 'localhost' as well as '127.0.0.1' to the list of IP addresses and hostnames.
- 完全な IP アドレス、例:
- The new address will be added to the bottom of the list.
Screenshot: Application addresses
注意
- A common problem: Application not connecting with Crowd. For an application to be able to use Crowd, the application's address must be valid and the application must be active. Ensure the 'Active' check box is ticked on the application 'Details' tab.
関連トピック
- Using the Application Browser
- アプリケーションの追加
- Integrating Crowd with Atlassian Bamboo
- Integrating Crowd with Atlassian Confluence
- Integrating Crowd with Atlassian CrowdID
- Integrating Crowd with Atlassian Crucible
- Integrating Crowd with Atlassian FishEye
- Integrating Crowd with Atlassian JIRA
- Integrating Crowd with Atlassian Bitbucket Server
- Integrating Crowd with Acegi Security
- Integrating Crowd with Apache
- Disabling Previous Versions of the Crowd Apache Connector
- Installing the Crowd Apache Connector on CentOS Linux
- Installing the Crowd Apache Connector on Red Hat Enterprise Linux
- Installing the Crowd Apache Connector on Ubuntu Linux
- Installing the Crowd Apache Connector on Debian
- Installing the Crowd Apache Connector on Other UNIX-Like Systems
- Installing the Crowd Apache Connector on Windows
- Integrating Crowd with Jive Forums
- Integrating Crowd with Spring Security
- Integrating Crowd with Subversion
- Integrating Crowd with a Custom Application
- Integrating Crowd with Atlassian HipChat
- Configuring the Google Apps Connector
- Mapping a Directory to an Application
- Effective memberships with multiple directories
- Specifying an Application's Address or Hostname
- Testing a User's Login to an Application
- Enforcing Lower-Case Usernames and Groups for an Application
- Managing an Application's Session
- Deleting or Deactivating an Application
- Configuring Caching for an Application
- Overview of SSO
- Configuring Options for an Application

