Clone your repository and manage files locally
- Set up Sourcetree
- Create a personal repository for the tutorial
- Clone your repository and manage files locally
- Commit and push changes
In this step you will clone your personal repository to your local computer. Cloning your repository locally creates a file directory on your computer that will kept in synch with your online repository.
- Clone your personal repository using Sourcetree (or the command line)
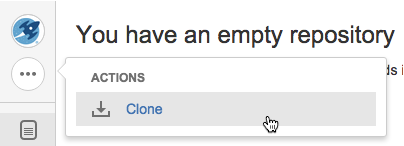
- On the side navigation, click Clone, then Clone in Sourcetree to create a local directory where you can store the website files.
This opens the Clone New dialog in Sourcetree. - Within Sourcetree, choose the appropriate destination for your personal repository, then click Clone.
You'll arrive at the empty directory in Sourcetree, and an empty directory named website was created on your local computer.
- On the side navigation, click Clone, then Clone in Sourcetree to create a local directory where you can store the website files.
- Download the source files and unzip them into the empty directory you just created.
- Add the files to your personal repository using Sourcetree (or the command line).
- Select the files you added in the previous step by checking the box named Unstaged files.
The files then appear in the Staged files pane. - Click Commit, add a message in the comment box, and check the box Push changes immediately to origin/master.
- Go to your personal repository and verify the files were added.
- Select the files you added in the previous step by checking the box named Unstaged files.
Do it from the command line
Clone your personal repository from the command line. You can also copy the command directly from your empty repository. Look under Working with your repository.
From a terminal window, run these commandscd ~ git clone http://<username>@<Bitbucket Data Center URL>/scm/<project key>/website.gitThis creates an empty Git repository named TISwebsite
Add the files to your personal repository from the command line.
From a terminal windowcd existing-project git init git add --all git commit -m "Initial Commit" git remote add origin http://<Bitbucket Data Center URL>/scm/tis/website.git git push -u origin master
最終更新日 2024 年 9 月 24 日
Powered by Confluence and Scroll Viewport.


