自動化機能を Microsoft Teams と使用する

このページの内容

お困りですか?

アトラシアン コミュニティをご利用ください。

コミュニティに質問

この手順では、自動化ルールを Microsoft (MS) Teams チャンネルに統合して Jira 課題に関する通知を表示する方法について説明します。

Jira から MS Teams チャンネルにメッセージを送信するには、まず Microsoft Teams と Jira 自動化を統合する必要があります。この統合により、自動化が MS Teams チャンネルにメッセージを送信するために使用する Webhook URL が提供されます。この統合はいつでも取り消せます。

このページの内容

MS Teams でワークフローを作成する

Microsoft Teams の統合をセットアップするには、Jira Webhook をリッスンするフロー チェーンを作成する必要があります。

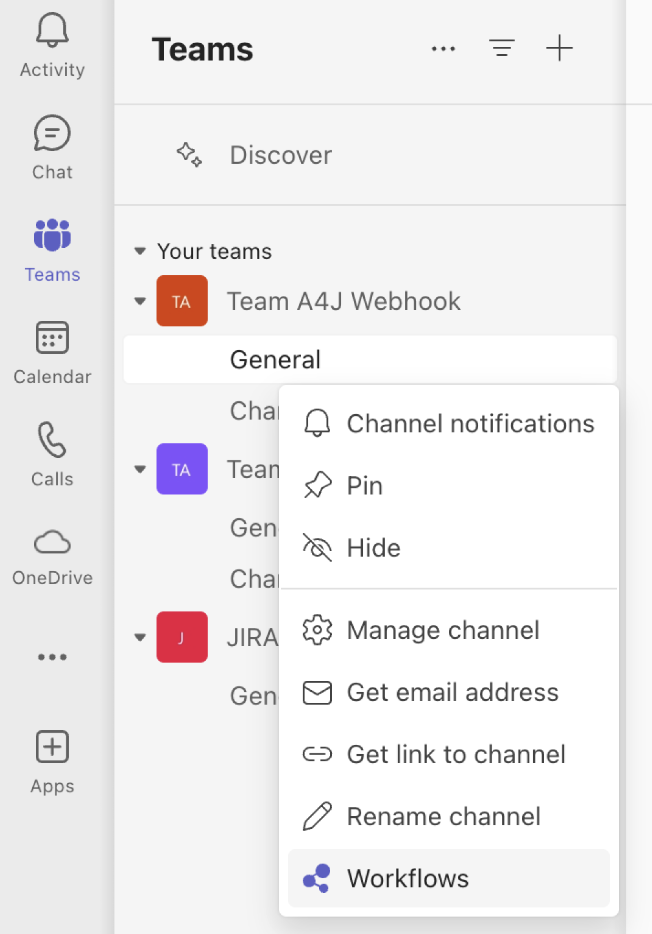
  1. Microsoft Teams にアクセスして 、Jira の通知を送信したいチャンネルを探します。チャンネル名の横にある [その他のオプション] (...) を選択し、次に [ワークフロー] を選択します。

  2. [その他のワークフロー] を選択し、次に [白紙から作成] を選択します。
  3. [Search connectors and triggers (コネクタとトリガーを検索)] フィールドに、「Webhook」と入力します。
  4. [トリガー] で、[When a Teams webhook request is received (Teams Webhook リクエストを受信したとき)] トリガーを選択します。
    1. [Who can trigger the flow (フローをトリガーできるユーザー)] ドロップダウンで [全員] を選択します。

  5. [新規ステップ (New Step)] を選択して、[JSON をパース] を検索し、[アクション] の下のこのオプションを選択します。

    1. [コンテンツ] フィールドに「@{triggerBody()}」と入力します。
    2. [スキーマ フィールド] に、次の JSON スキーマを追加します。
JSON スキーマを参照してください
{
    "type": "object",
    "properties": {
        "summary": {
            "type": "string"
        },
        "sections": {
            "type": "array",
            "items": {
                "type": "object",
                "properties": {
                    "activityTitle": {
                        "type": "string"
                    },
                    "activitySubtitle": {
                        "type": "string"
                    },
                    "activityImage": {
                        "type": "string"
                    },
                    "activityText": {
                        "type": "string"
                    },
                    "facts": {
                        "type": "array",
                        "items": {
                            "type": "object",
                            "properties": {
                                "name": {
                                    "type": "string"
                                },
                                "value": {
                                    "type": "string"
                                }
                            },
                            "required": [
                                "name",
                                "value"
                            ]
                        }
                    }
                },
                "required": [
                    "activityTitle"
                ]
            }
        },
        "potentialAction": {
            "type": "array",
            "items": {
                "type": "object",
                "properties": {
                    "name": {
                        "type": "string"
                    },
                    "targets": {
                        "type": "array",
                        "items": {
                            "type": "object",
                            "properties": {
                                "uri": {
                                    "type": "string"
                                },
                                "os": {
                                    "type": "string"
                                }
                            },
                            "required": [
                                "uri",
                                "os"
                            ]
                        }
                    },
                    "@@type": {
                        "type": "string"
                    }
                },
                "required": [
                    "name",
                    "targets",
                    "@@type"
                ]
            }
        },
        "themeColor": {
            "type": "string"
        },
        "@@context": {
            "type": "string"
        },
        "@@type": {
            "type": "string"
        }
    }
}

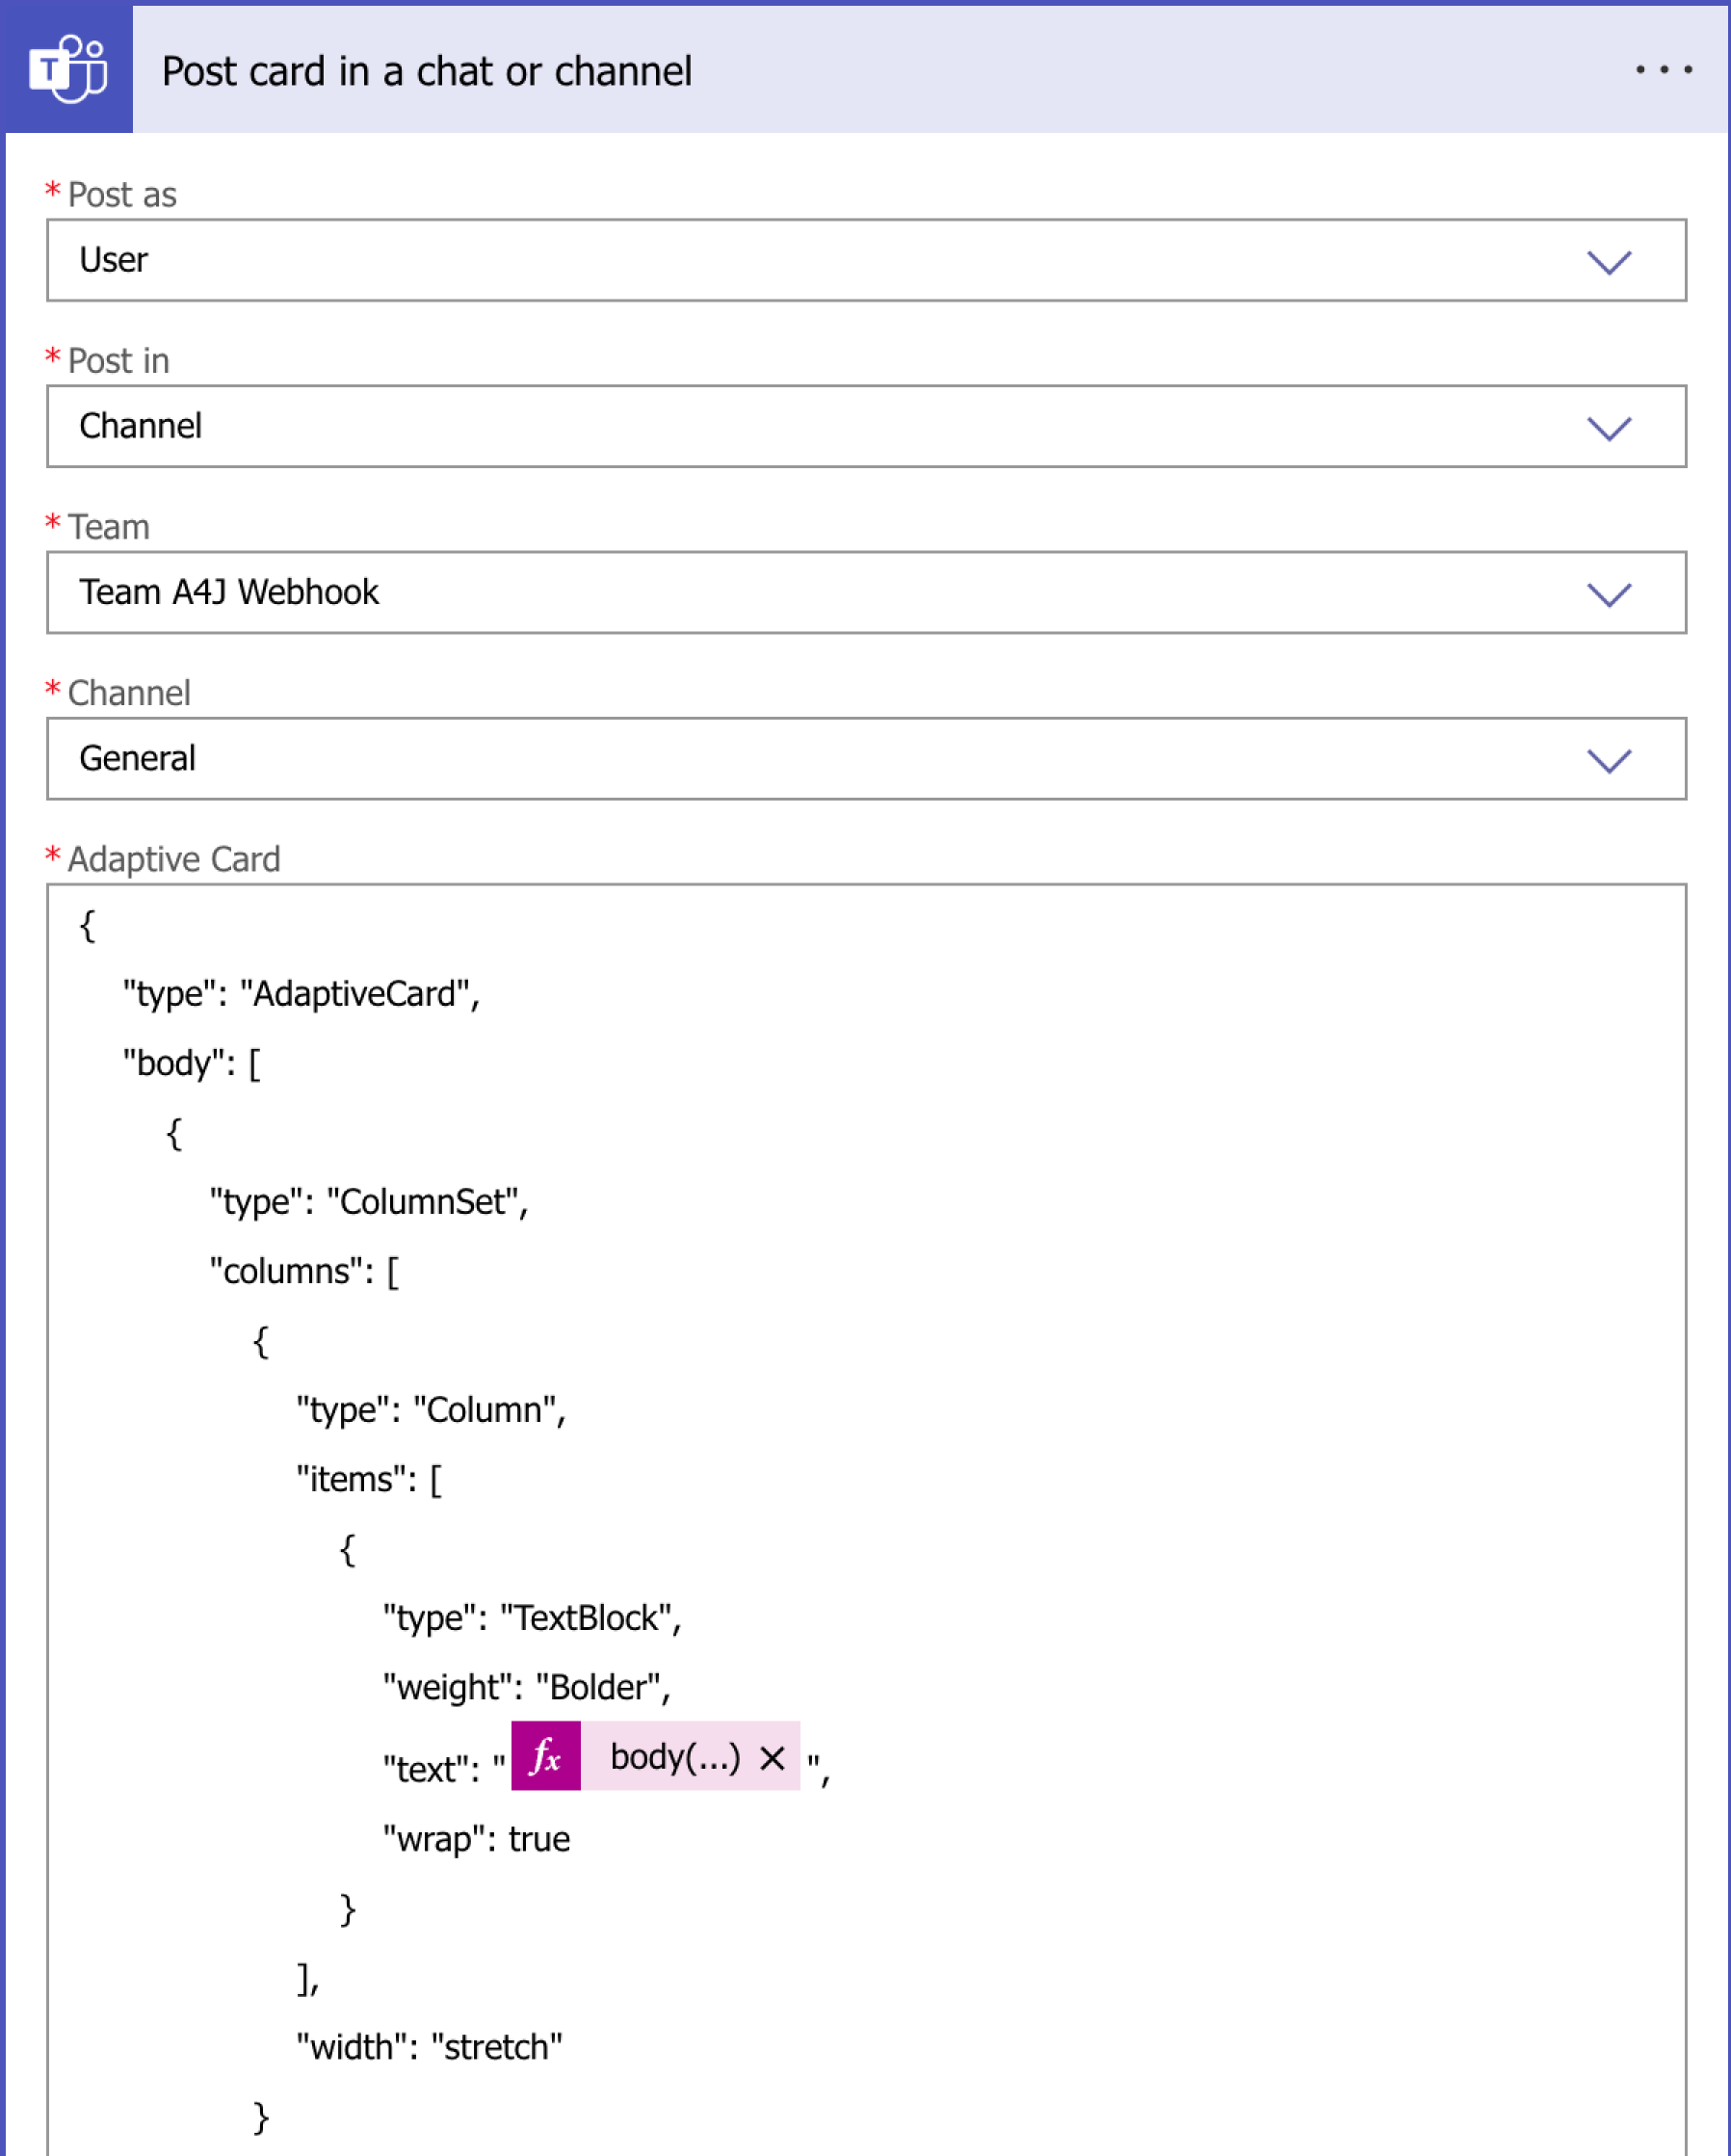
6. [新規ステップ (New Step)] を選択してカードを検索し、[アクション] の下の [メッセージをチャットまたはチャンネルに投稿 (Post message in a chat or channel)] を選択します。その後、次の手順に従います。

    1. [Post in (投稿の場所)] ドロップダウンで、[チャンネル] を選択します。
    2. [チーム] と [チャンネル] のドロップダウンで、通知を投稿するチームとチャンネルを選択します。

7. [アダプティブ カード] フィールドに次の JSON を追加します。

JSON スキーマを参照してください
{
    "type": "AdaptiveCard",
    "body": [
        {
            "type": "ColumnSet",
            "columns": [
                {
                    "type": "Column",
                    "items": [
                        {
                            "type": "TextBlock",
                            "weight": "Bolder",
                            "text": "@{body('Parse_JSON')['sections'][0]['activityTitle']}",
                            "wrap": true
                        }
                    ],
                    "width": "stretch"
                }
            ]
        },
        {
            "type": "TextBlock",
            "text": "@{body('Parse_JSON')['sections'][0]['activityText']}",
            "wrap": true
        },
        {
            "type": "TextBlock",
            "weight": "Bolder",
            "text": "@{body('Parse_JSON')['sections'][1]['activityTitle']}",
            "wrap": true
        },
        {
            "type": "ColumnSet",
            "columns": [
                {
                    "type": "Column",
                    "items": [
                        {
                            "type": "TextBlock",
                            "weight": "Bolder",
                            "text": "@{body('Parse_JSON')['sections'][1]['facts'][0]['name']}",
                            "wrap": true
                        }
                    ],
                    "width": "auto"
                },
                {
                    "type": "Column",
                    "width": "auto",
                    "items": [
                        {
                            "type": "RichTextBlock",
                            "horizontalAlignment": "Right",
                            "inlines": [
                                {
                                    "type": "TextRun",
                                    "text": "@{body('Parse_JSON')['sections'][1]['facts'][0]['value']}"
                                }
                            ]
                        }
                    ],
                    "verticalContentAlignment": "Center"
                }
            ]
        },
        {
            "type": "ColumnSet",
            "columns": [
                {
                    "type": "Column",
                    "items": [
                        {
                            "type": "TextBlock",
                            "weight": "Bolder",
                            "text": "@{body('Parse_JSON')['sections'][1]['facts'][1]['name']}",
                            "wrap": true
                        }
                    ],
                    "width": "auto"
                },
                {
                    "type": "Column",
                    "width": "auto",
                    "items": [
                        {
                            "type": "RichTextBlock",
                            "horizontalAlignment": "Right",
                            "inlines": [
                                {
                                    "type": "TextRun",
                                    "text": "@{body('Parse_JSON')['sections'][1]['facts'][1]['value']}"
                                }
                            ]
                        }
                    ],
                    "verticalContentAlignment": "Center"
                }
            ]
        },
        {
            "type": "ColumnSet",
            "columns": [
                {
                    "type": "Column",
                    "items": [
                        {
                            "type": "TextBlock",
                            "weight": "Bolder",
                            "text": "@{body('Parse_JSON')['sections'][1]['facts'][2]['name']}",
                            "wrap": true
                        }
                    ],
                    "width": "auto"
                },
                {
                    "type": "Column",
                    "width": "auto",
                    "items": [
                        {
                            "type": "RichTextBlock",
                            "horizontalAlignment": "Right",
                            "inlines": [
                                {
                                    "type": "TextRun",
                                    "text": "@{body('Parse_JSON')['sections'][1]['facts'][2]['value']}"
                                }
                            ]
                        }
                    ],
                    "verticalContentAlignment": "Center"
                }
            ]
        }
    ],
    "actions": [
        {
            "type": "Action.OpenUrl",
            "title": "@{body('Parse_JSON')['potentialAction'][0]['name']}",
            "url": "@{body('Parse_JSON')['potentialAction'][0]['targets'][0]['uri']}"
        }
    ],
    "$schema": "http://adaptivecards.io/schemas/adaptive-card.json",
    "version": "1.6"
}

8. ステップ チェーンがスクリーンショットのようになっていることを確認して、[保存] を選択します。

9. Webhook URL をクリップボードにコピーします。

データを送信できるように、Webhook ドメインを許可リストに追加します。そうしないと、Webhook がブロックされる可能性があります。


Webhook URL を Jira に貼り付ける

次のステップは、使用している Jira 自動化のバージョンによって異なります。

  • 9.0.0 より古い Jira 自動化バージョンの場合。

  1. 自動化ルールから [Send Microsoft Teams Notification (Microsoft Teams 通知を送信)] アクションに移動します。
  2. Webhook の URL を [Webhook URL] フィールドに貼り付けます。

  • 9.0.0 より新しい Jira 自動化バージョンの場合。

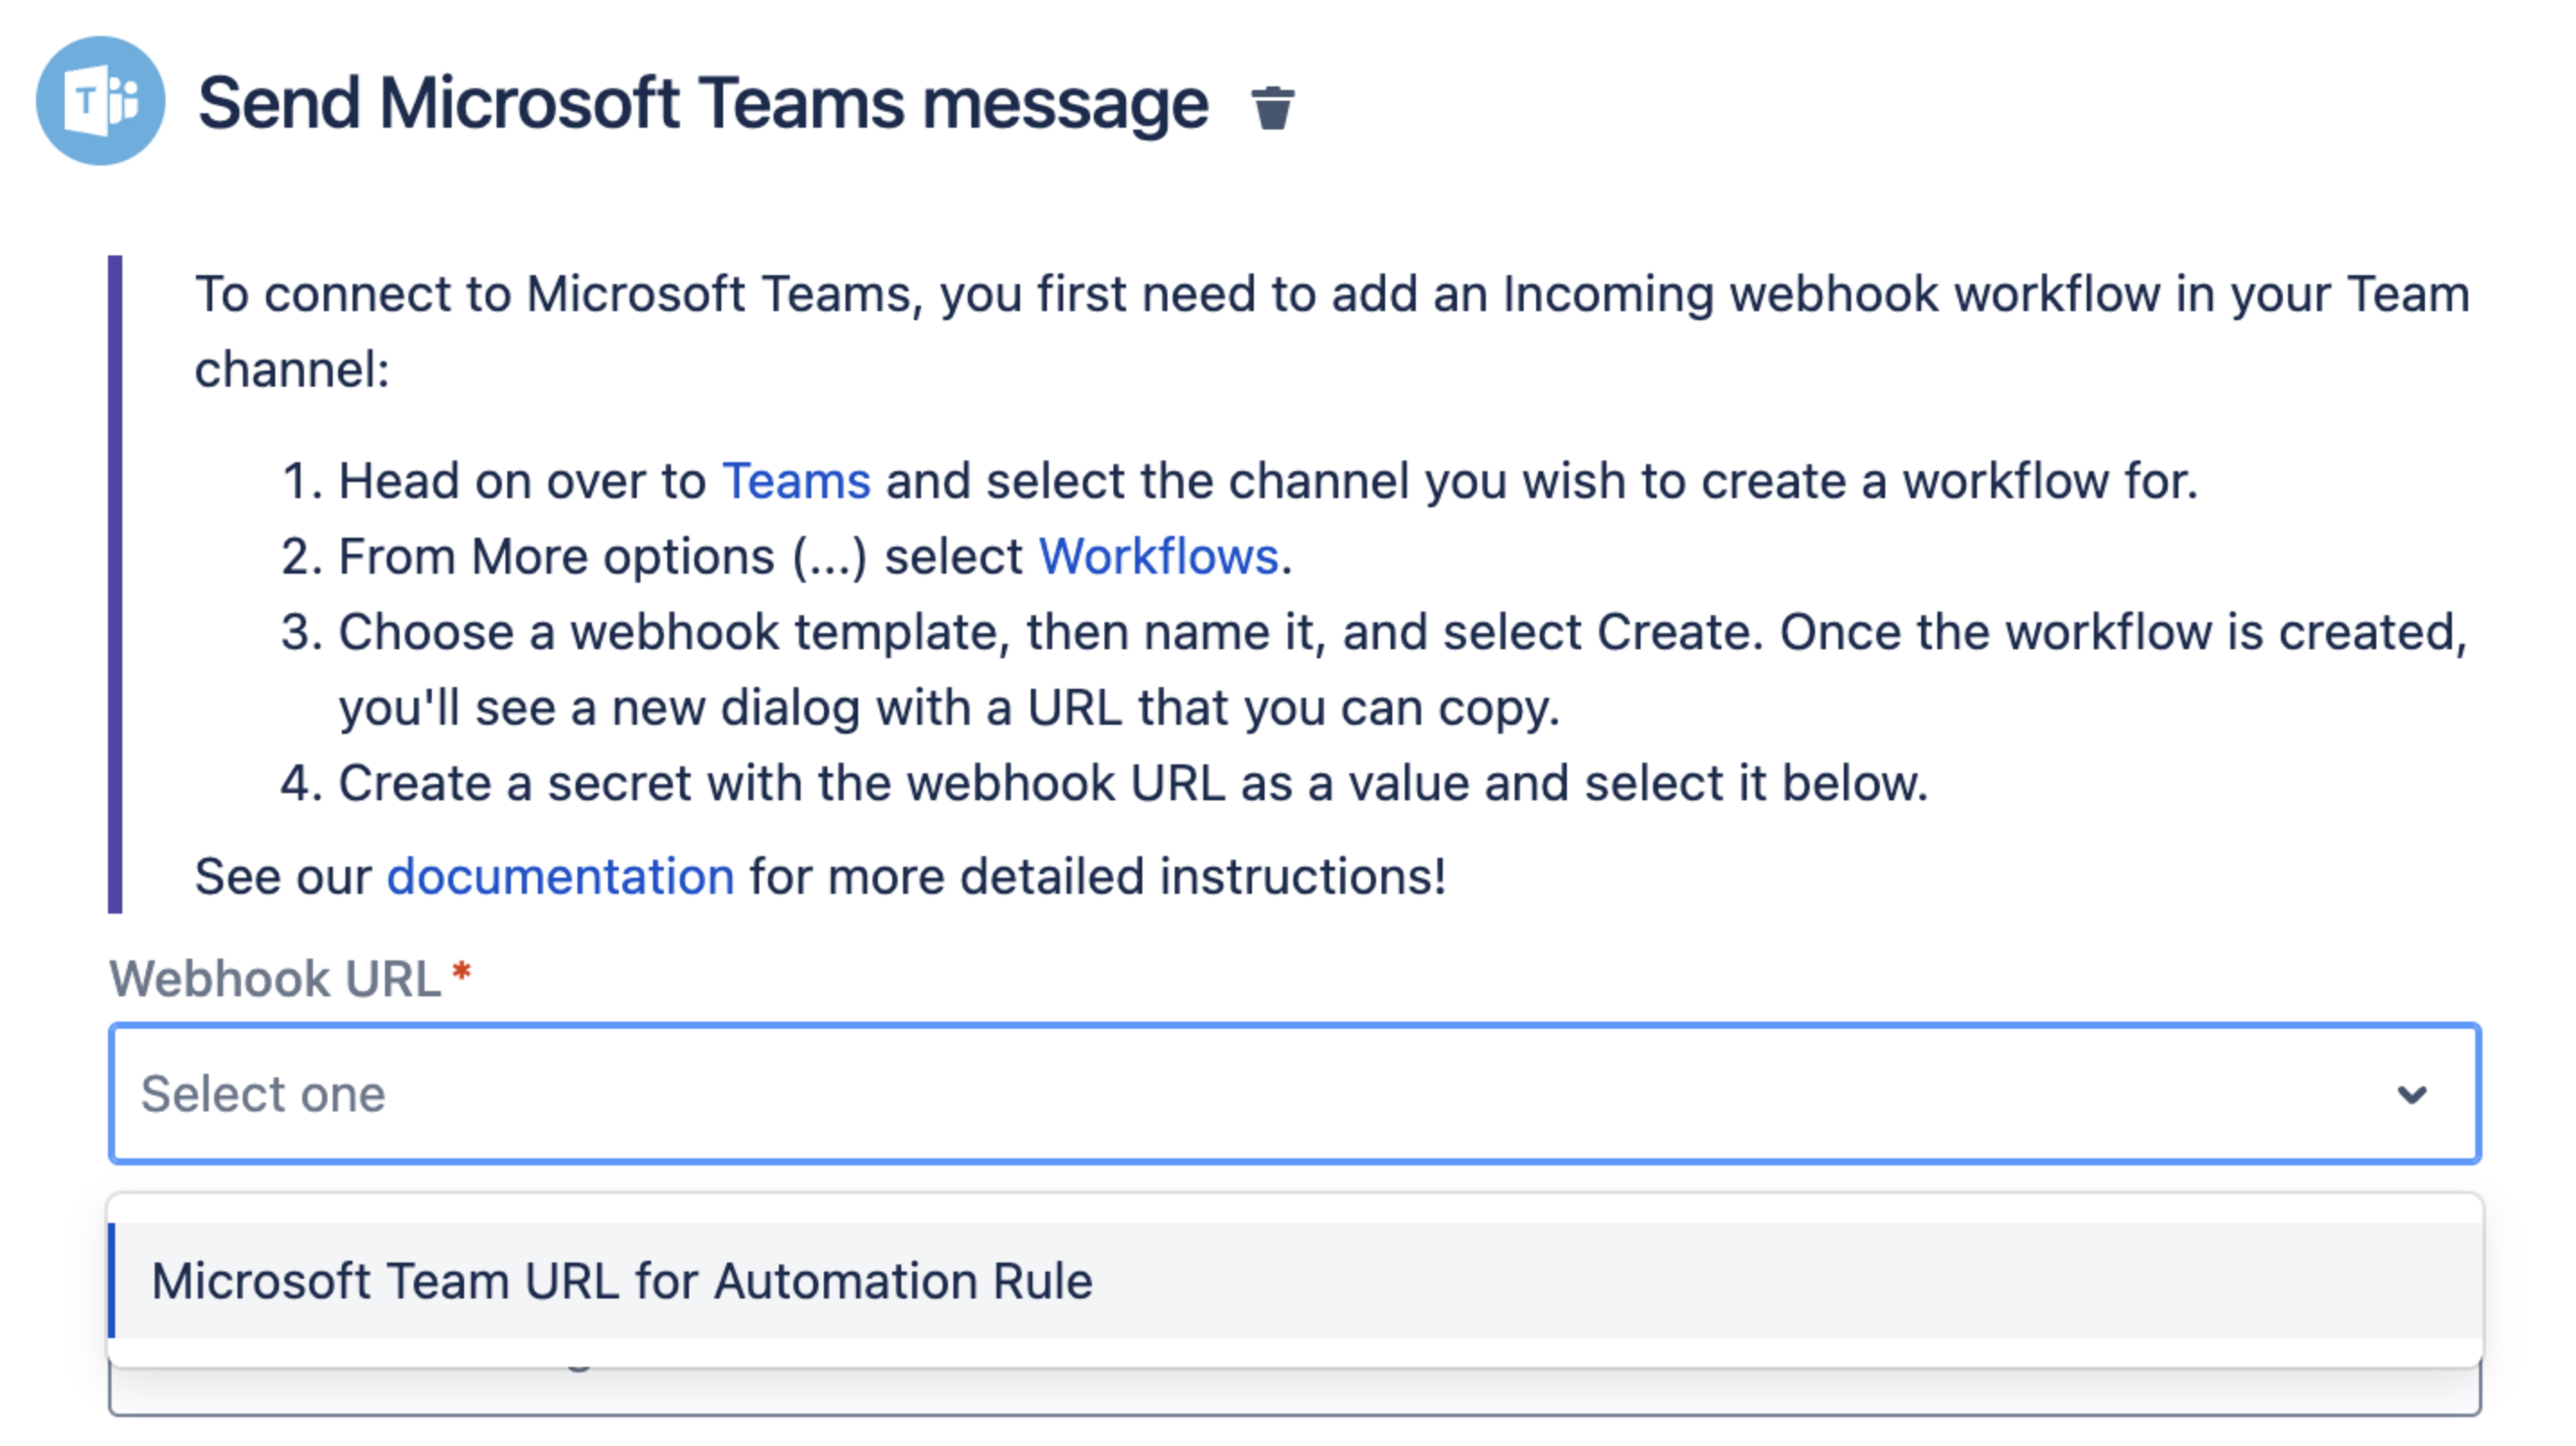
  1. 以下の手順に従い、Microsoft Teams インターフェイスから取得した Webhook URL を使用して、新しい秘密鍵を作成します。
  2. 自動化ルールから [Send Microsoft Teams Notification (Microsoft Teams 通知を送信)] アクションに移動します。
  3. [Webbook URL] ドロップダウンから、前に作成した秘密鍵を選択します。

設定完了です! Microsoft Teams チャンネルと統合されました。

マークダウンのサポート

Microsoft Teams メッセージでは、基本的なリッチ フォーマットのマークダウンをサポートしています。ただし、制限されるものは次のとおりです。

  • 画像
  • インライン HTML
  • HTML ブロック
  • カスタム ノード

* や # などの特殊文字を文字としてメッセージ中に表示する場合は、文字をエスケープする必要があります。エスケープされていない特殊文字は、マークダウン関数として扱われます。\#\ のように、バックスラッシュで囲むことで文字をエスケープできます。

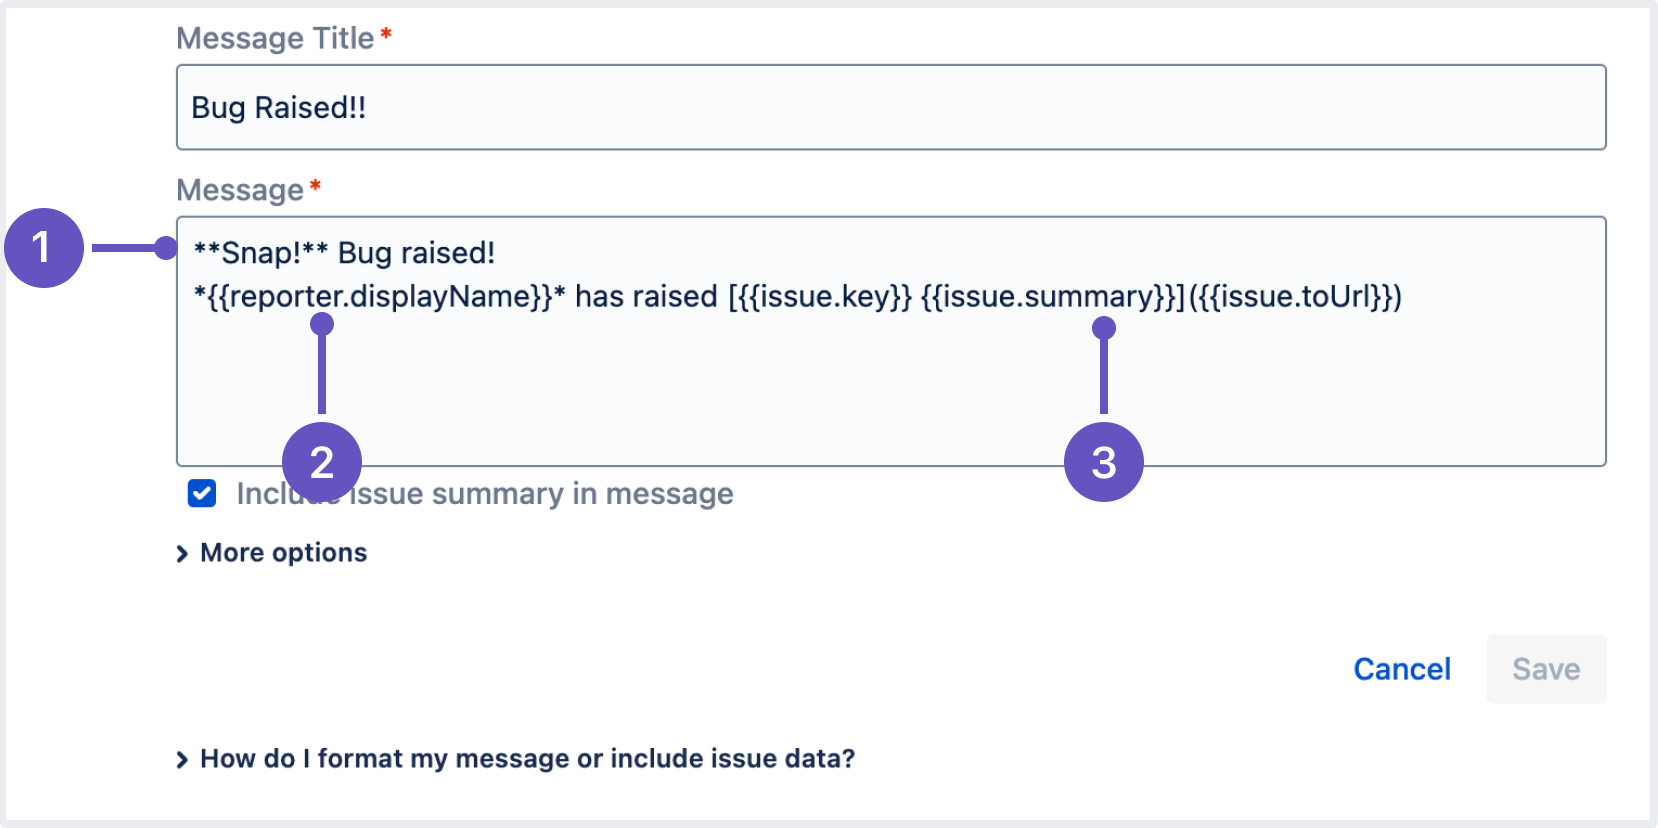
バグが発生したら、Microsoft Teams チャンネルにメッセージを送信します。メッセージ本文は、以下を使用してマークダウン言語でフォーマットされたスマート値を使用しています。

  1. Bold
  2. 斜体
  3. Link

このルールがトリガーされると、Microsoft Teams 内のメッセージは次のように表示されます。

これで完了です。これで、Microsoft Teams で Jira からのメッセージを受信できるようになりました。
最終更新日: 2024 年 10 月 17 日

この内容はお役に立ちましたか?

はい
いいえ
この記事についてのフィードバックを送信する
Powered by Confluence and Scroll Viewport.