Set up a mail server with the Microsoft Graph API protocol
You can now use the Microsoft Graph API protocol in Jira Software to configure an incoming mail server and have issues and comments created right from incoming emails. Microsoft Graph API ensures robust data security in your Jira instance, protecting it from unauthorized access, corruption, and breaches.
In Jira Software 9.9, Microsoft Graph API can only be used for incoming mail.
Since Microsoft Graph API is based on OAuth 2.0, before you start setting up the mail server, you should configure your Azure Active Directory integration and then, create an incoming mail server and a mail handler in Jira Software. Learn how to configure OAuth 2.0 integration with Microsoft Azure
始める前に
Before you set up an incoming mail server with Microsoft Graph API:
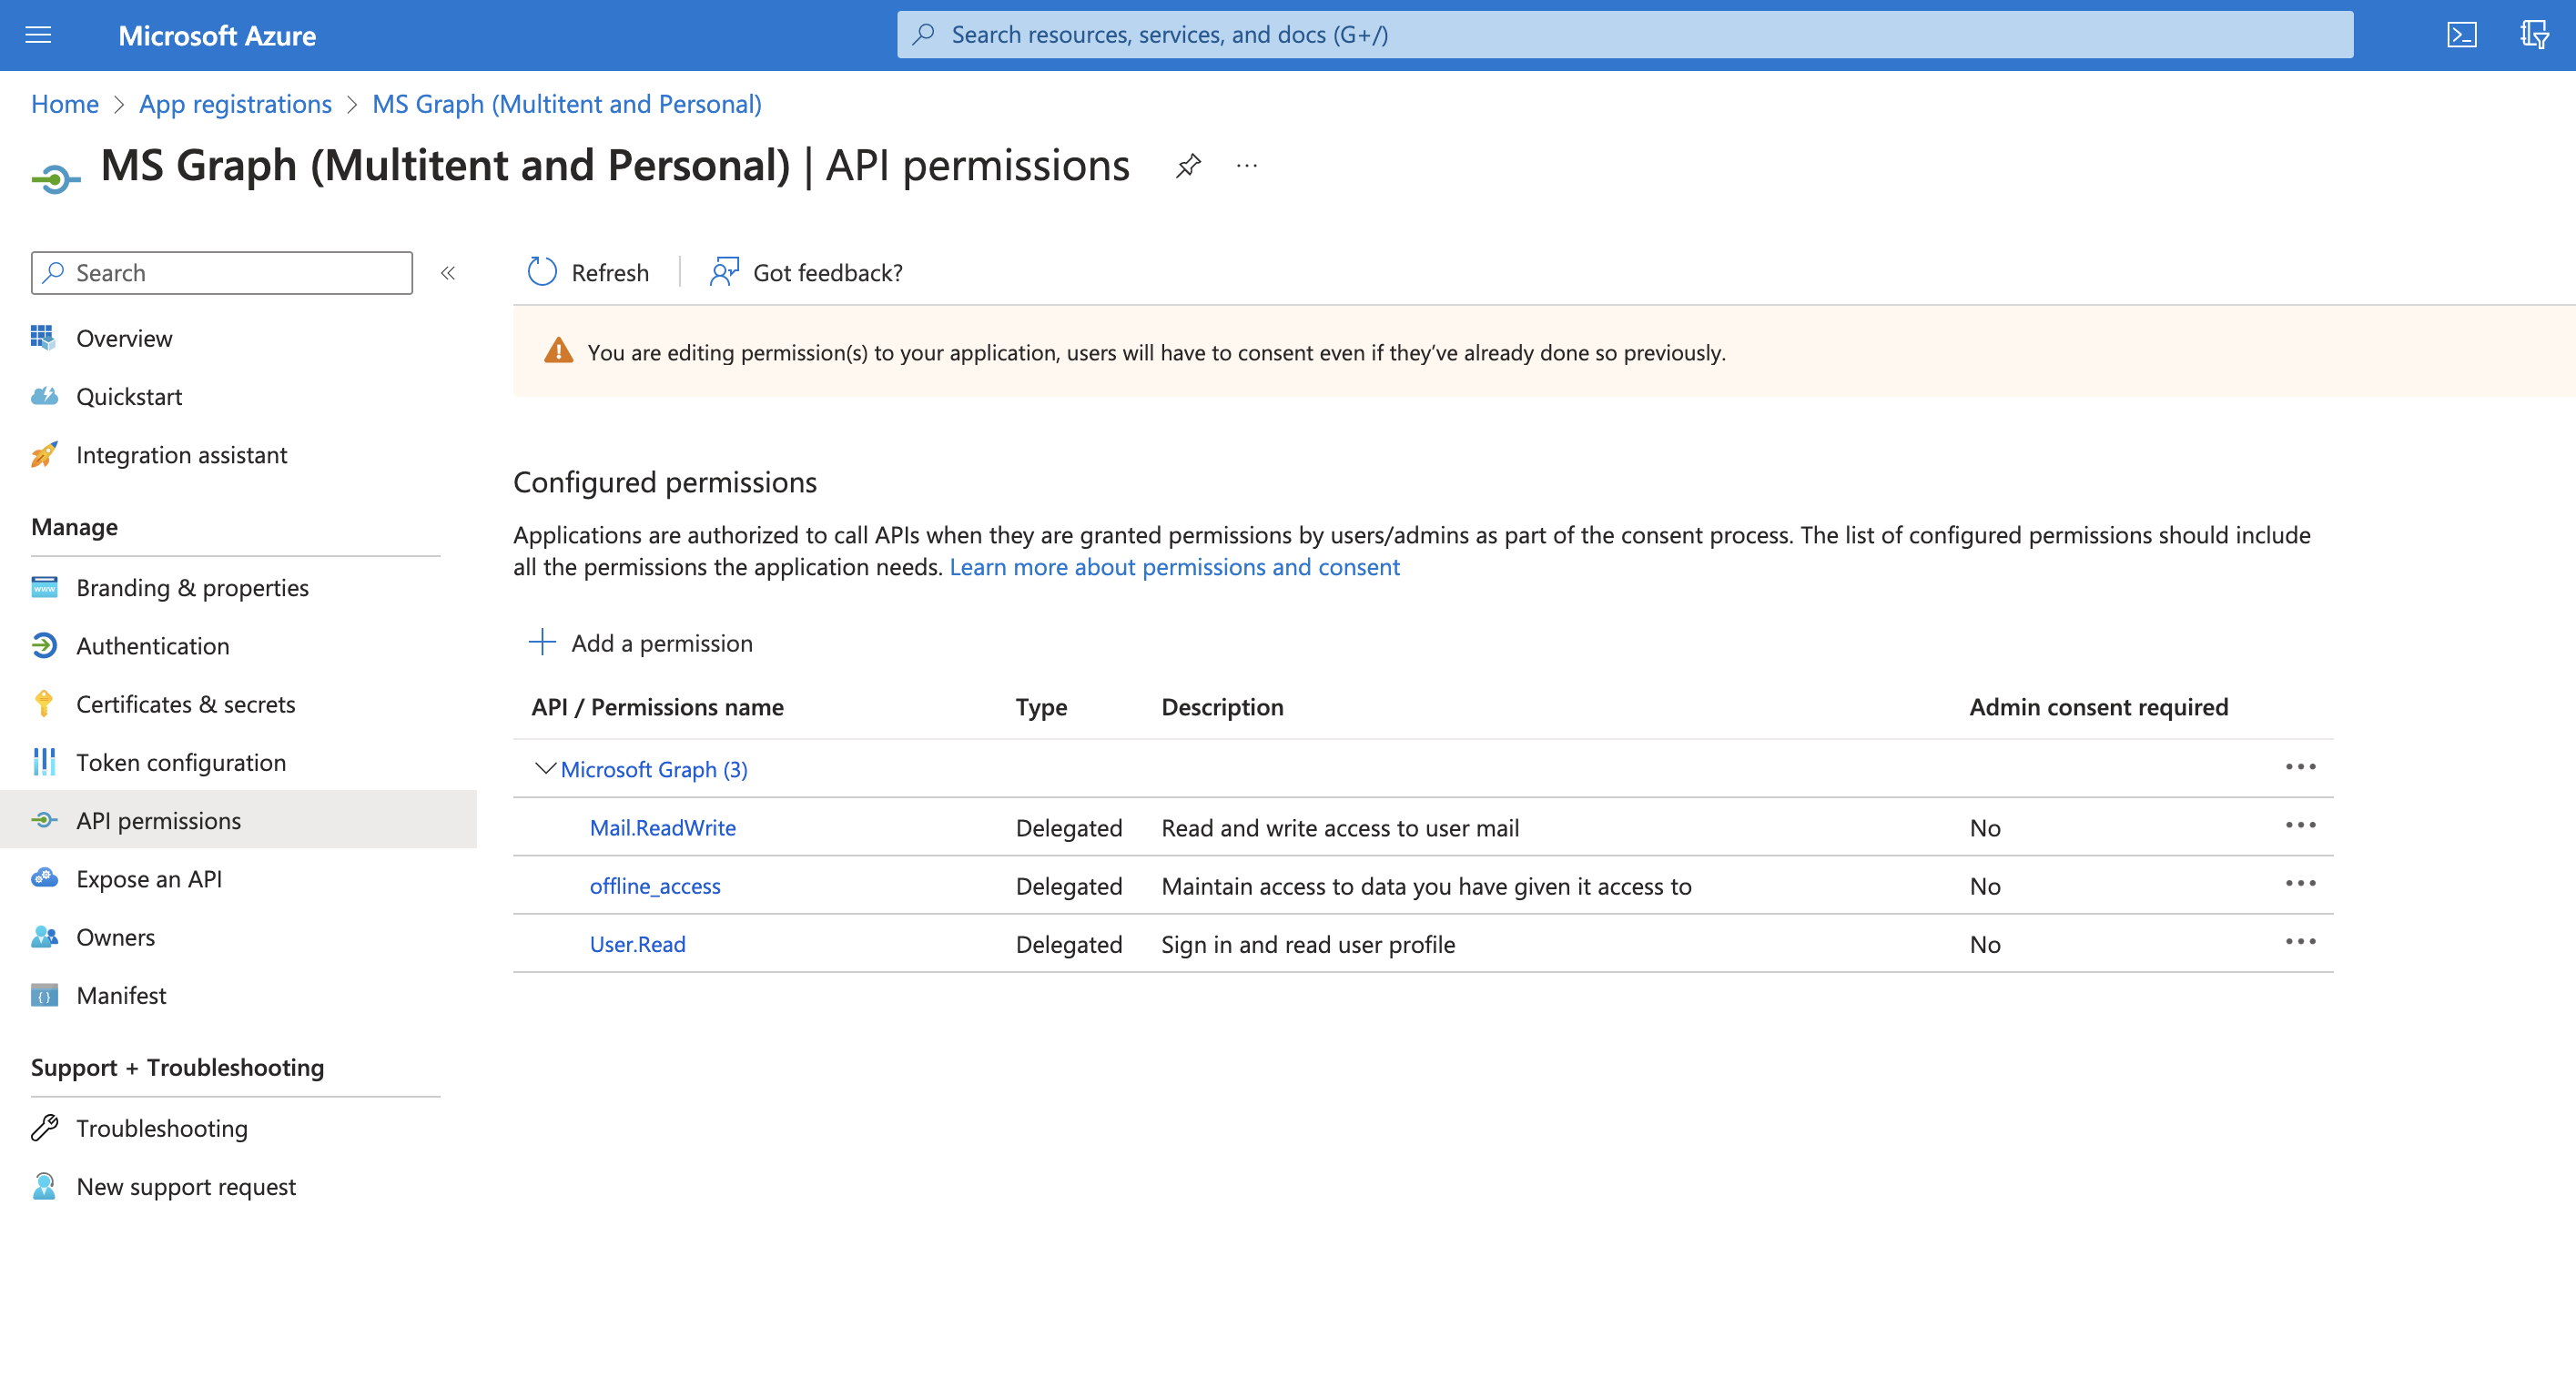
1. In the Azure Active Directory app registry, add the Mail.ReadWrite and offline_access permissions to your API permissions.
In the following screenshot, check what configuration you should have in your API permissions of the Azure Active Directory app registry.
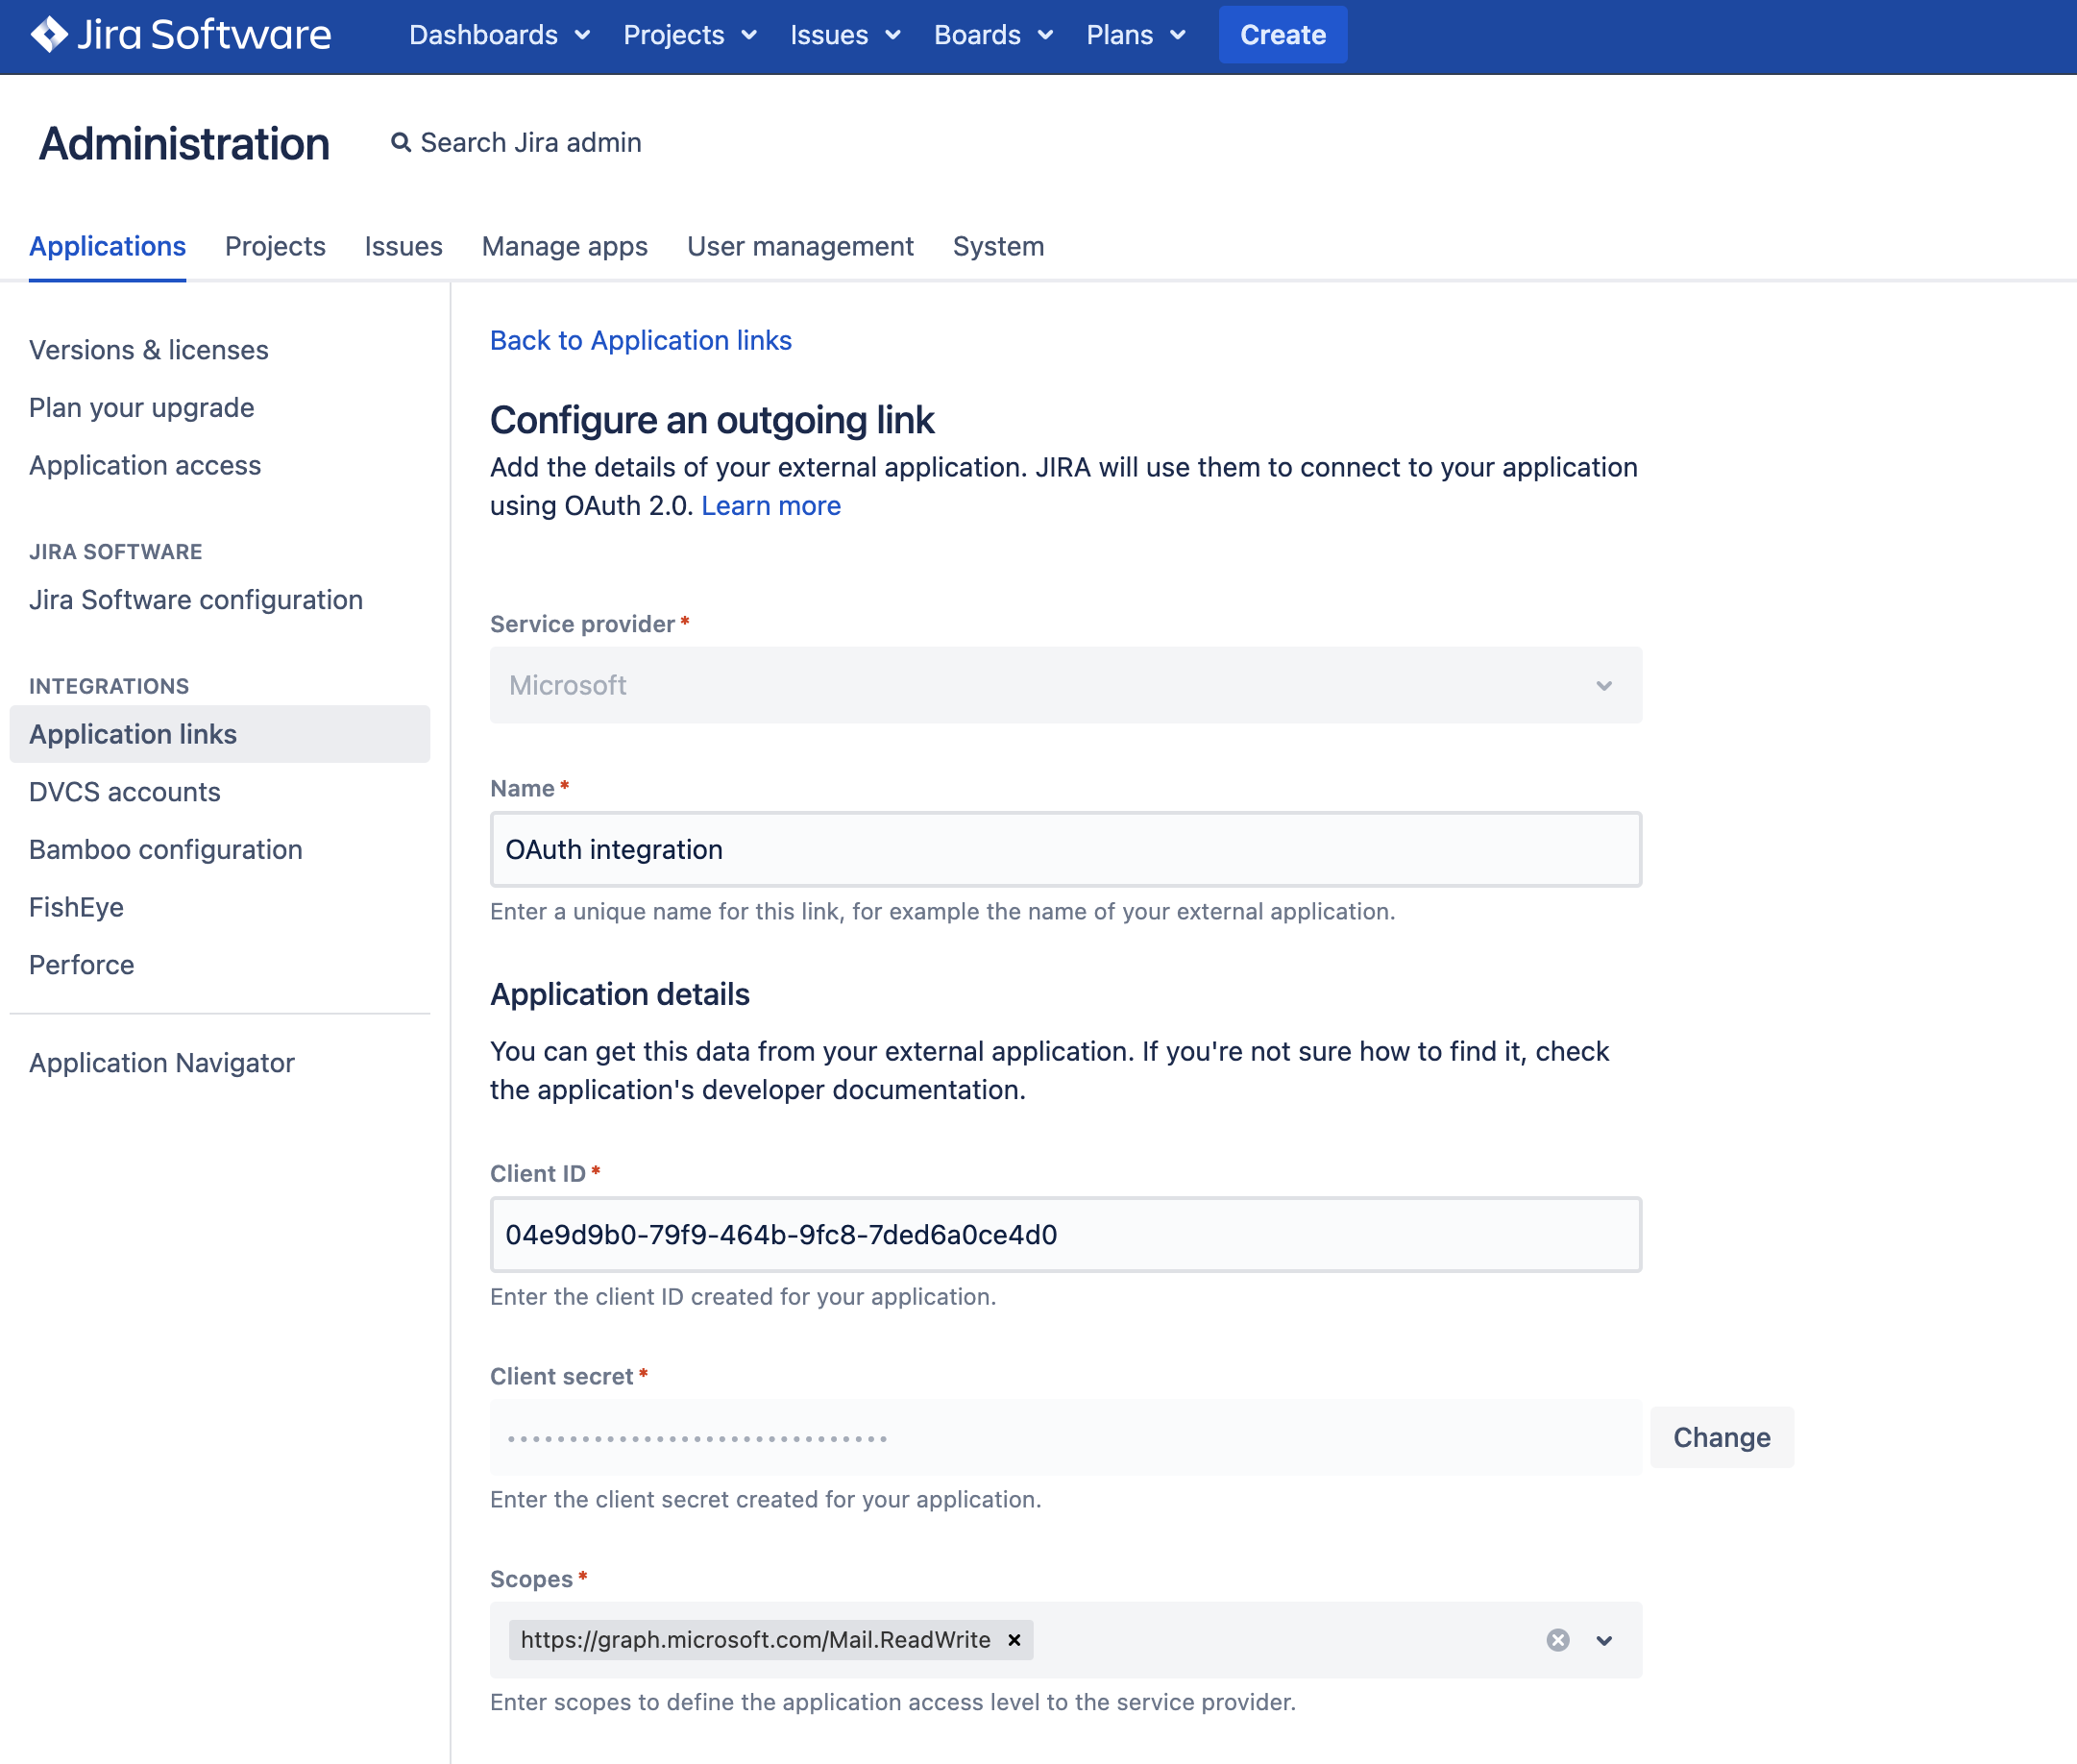
2. In Jira, add the following URLs to the Scopes section in the outgoing application link configuration:
https://graph.microsoft.com/Mail.ReadWritehttps://graph.microsoft.com/offline_access
If you're using a personal account, you don't need to add https://graph.microsoft.com/offline_access. It's added by default.
スコープの追加方法の詳細については、「送信リンクを設定する」を参照してください。
In the following screenshot, check what outgoing link configuration you should have in Jira. If you're using a personal account, you don't need the scope https://graph.microsoft.com/offline_access.
Jira では、設定された権限とスコープに基づいて、従来の HTTPS プロトコルを使用してメールがプルされます。
Microsoft Graph API を使用してメール サーバーを設定する
Jira で Microsoft Graph API を使用して受信メール サーバーをセットアップできるようになりました。
- 画面右上で [管理] > [システム] の順に選択します。
- 左側のパネルで、[メール] > [受信メール] の順に選択します。
- [メール サーバーの追加] を選択して、新しい受信メール サーバーの設定を開始します。
- In the Name field, enter the name of the mail server.
- In the Description field, enter a brief description of the mail server. For example, explain its purpose or specifics.
- [サービス プロバイダー] フィールドで、[Microsoft Graph API] を選択します。事前設定されたフィールドを使用してセットアップを簡単に行うことができます。
- [タイムアウト (ms)] フィールドでは、Jira からメール サーバーに送信する各リクエストのタイムアウトをミリ秒単位で設定します。
- [ユーザー名] フィールドに、Jira でメール サーバーへの接続時に適用するユーザーの名前を設定します。
- [認証方法] フィールドで、事前設定した送信リンクを選択します。
- [承認] を選択します。Microsoft の認証ページにリダイレクトされたら、認証を完了します。その後、Jira の [メール サーバーの追加] ページにリダイレクトされます。認証が成功すると、その旨の通知が届き、[接続のテスト] ボタンがアクティブになります。
- [接続のテスト] を選択します。接続が確立できたら、[保存] ボタンがアクティブになります。
- [保存] を選択します。[受信メール] ページにリダイレクトされ、設定済みの Microsoft Graph API メール サーバーが表示されます。
- メール サーバーを有効化するにはメール ハンドラーも必要です。メール ハンドラーの設定方法については、「メールから課題およびコメントを作成する」を参照してください。
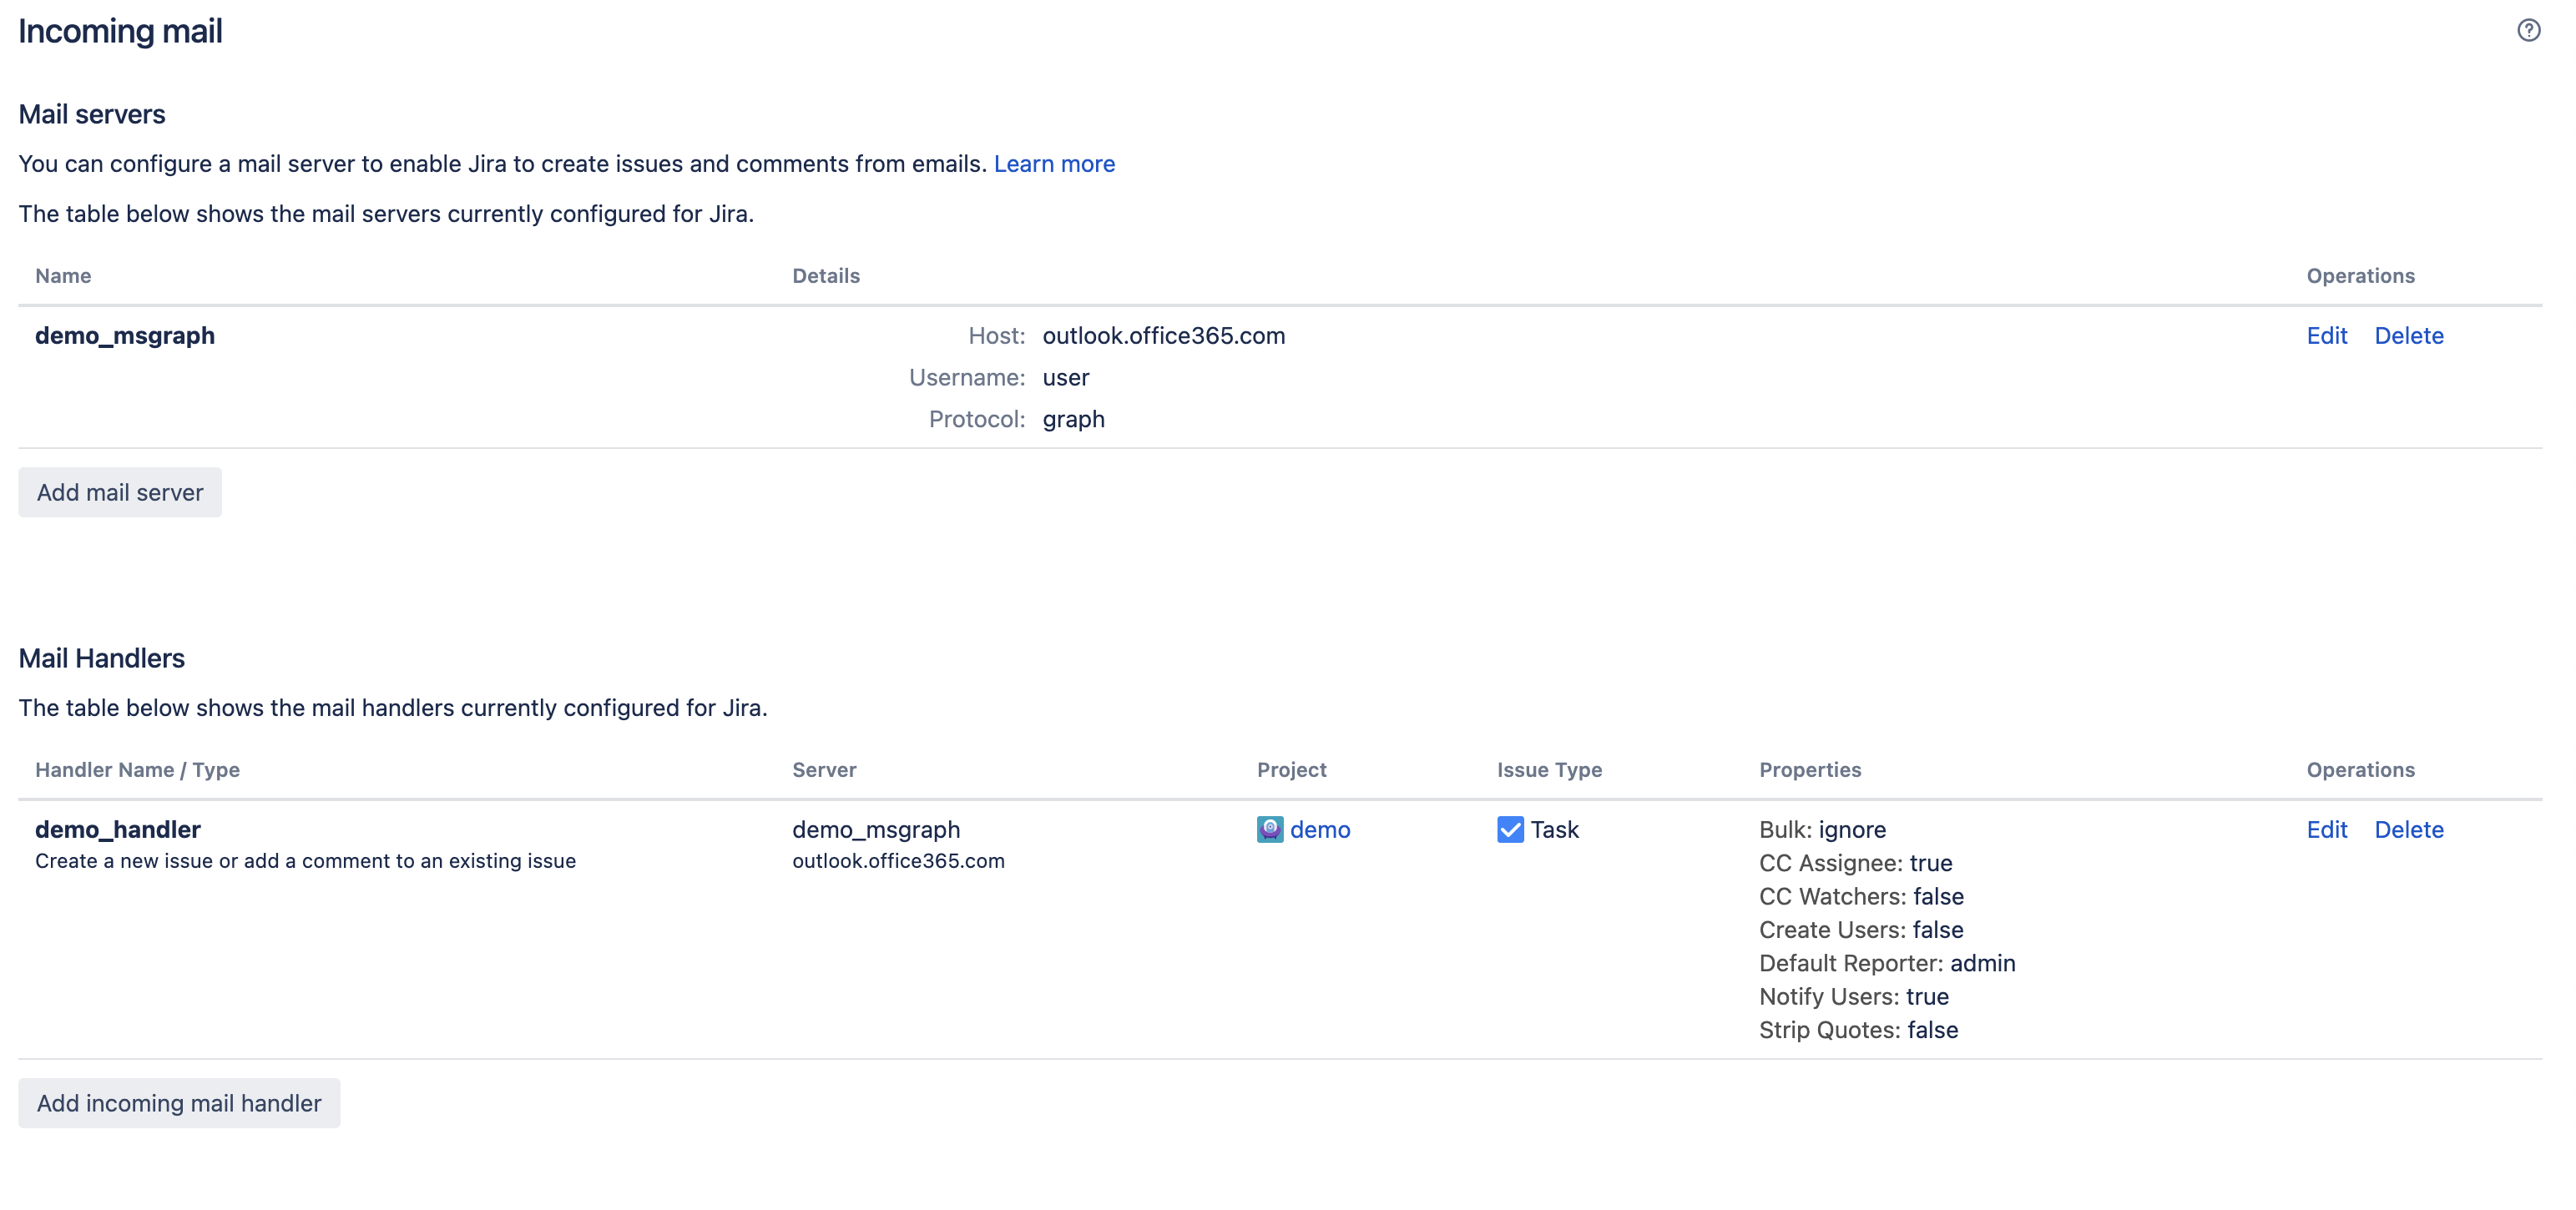
次のスクリーンショットは、設定が完了したメール サーバーとメール ハンドラーを示しています。


