Branch Management
目的
This article should help users to Create/Delete a branch, Checkout/Merge a branch, Track remote branch and use Git Flow.
ソリューション
このページでは次のような内容について説明します。
Create Branch
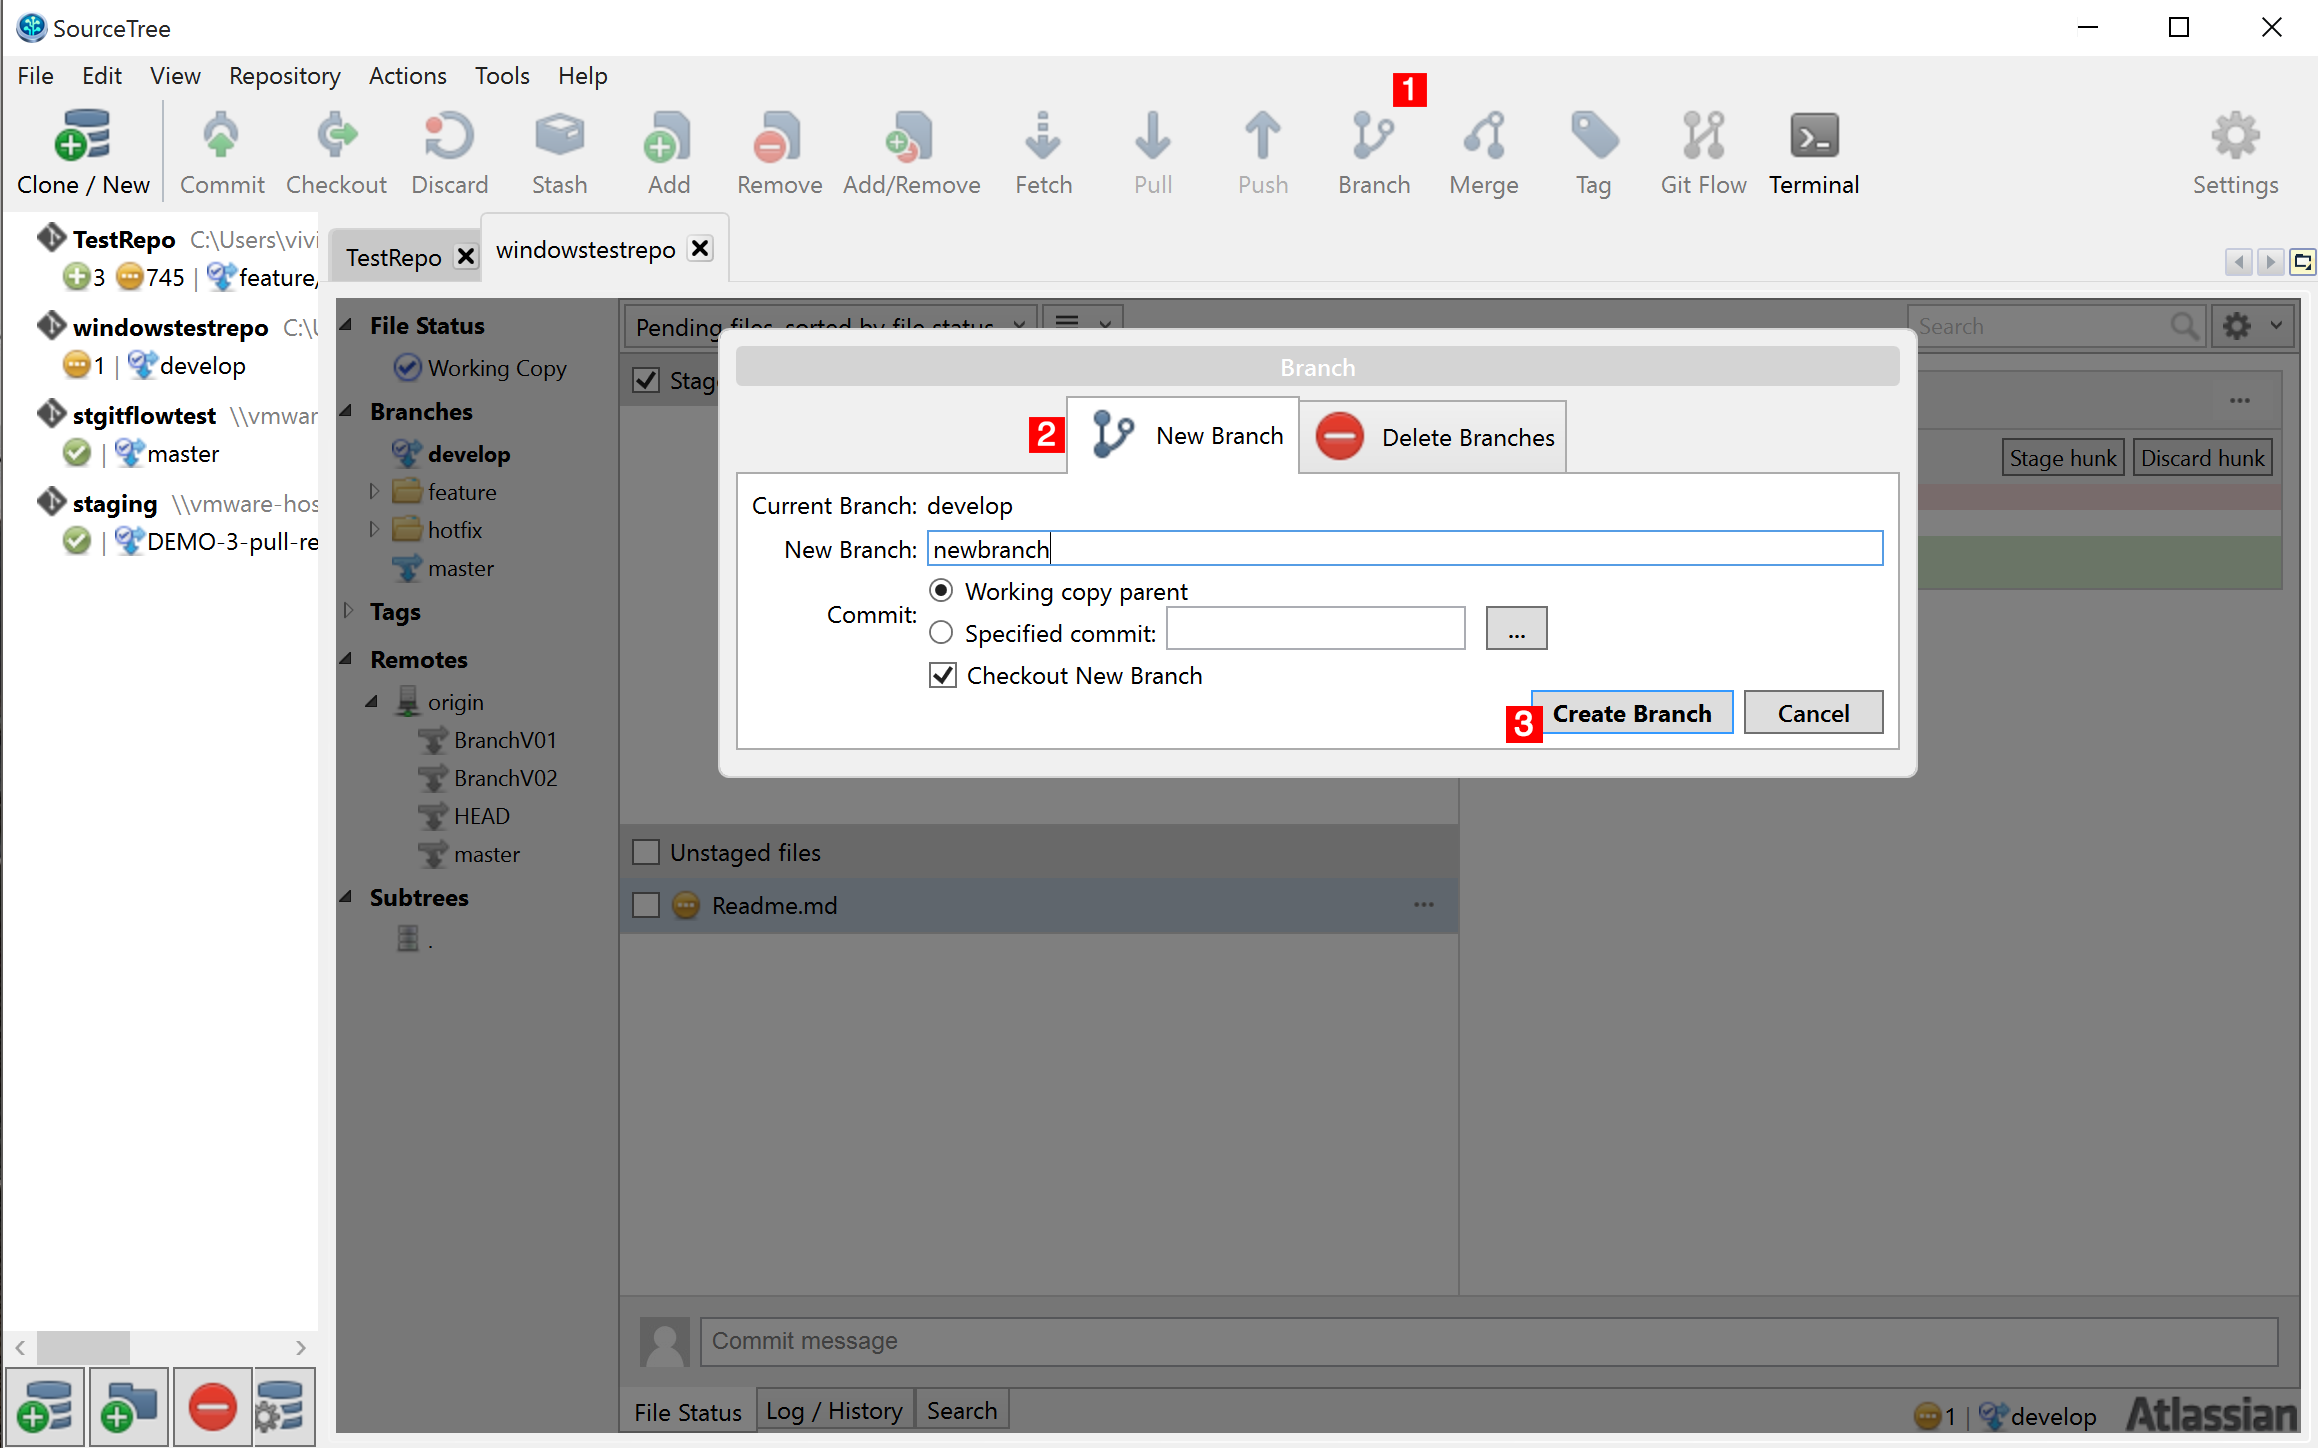
手順:
- Click on the "Branch" button.
- Under the "New Branch" tab, fill in the Branch name.
- Click on "Create Branch".
Delete Branch

手順:
- Click on the "Branch" button.
- Click on "Delete Branches" tab.
- Check the branch or branches you intend to delete.
- Click on "Delete Branches".
If the branch is merged, you may check "Force delete regardless of merge status" and then click on "Delete Branches".
Checkout a Branch
There are two methods to checkout a branch in SourceTree.
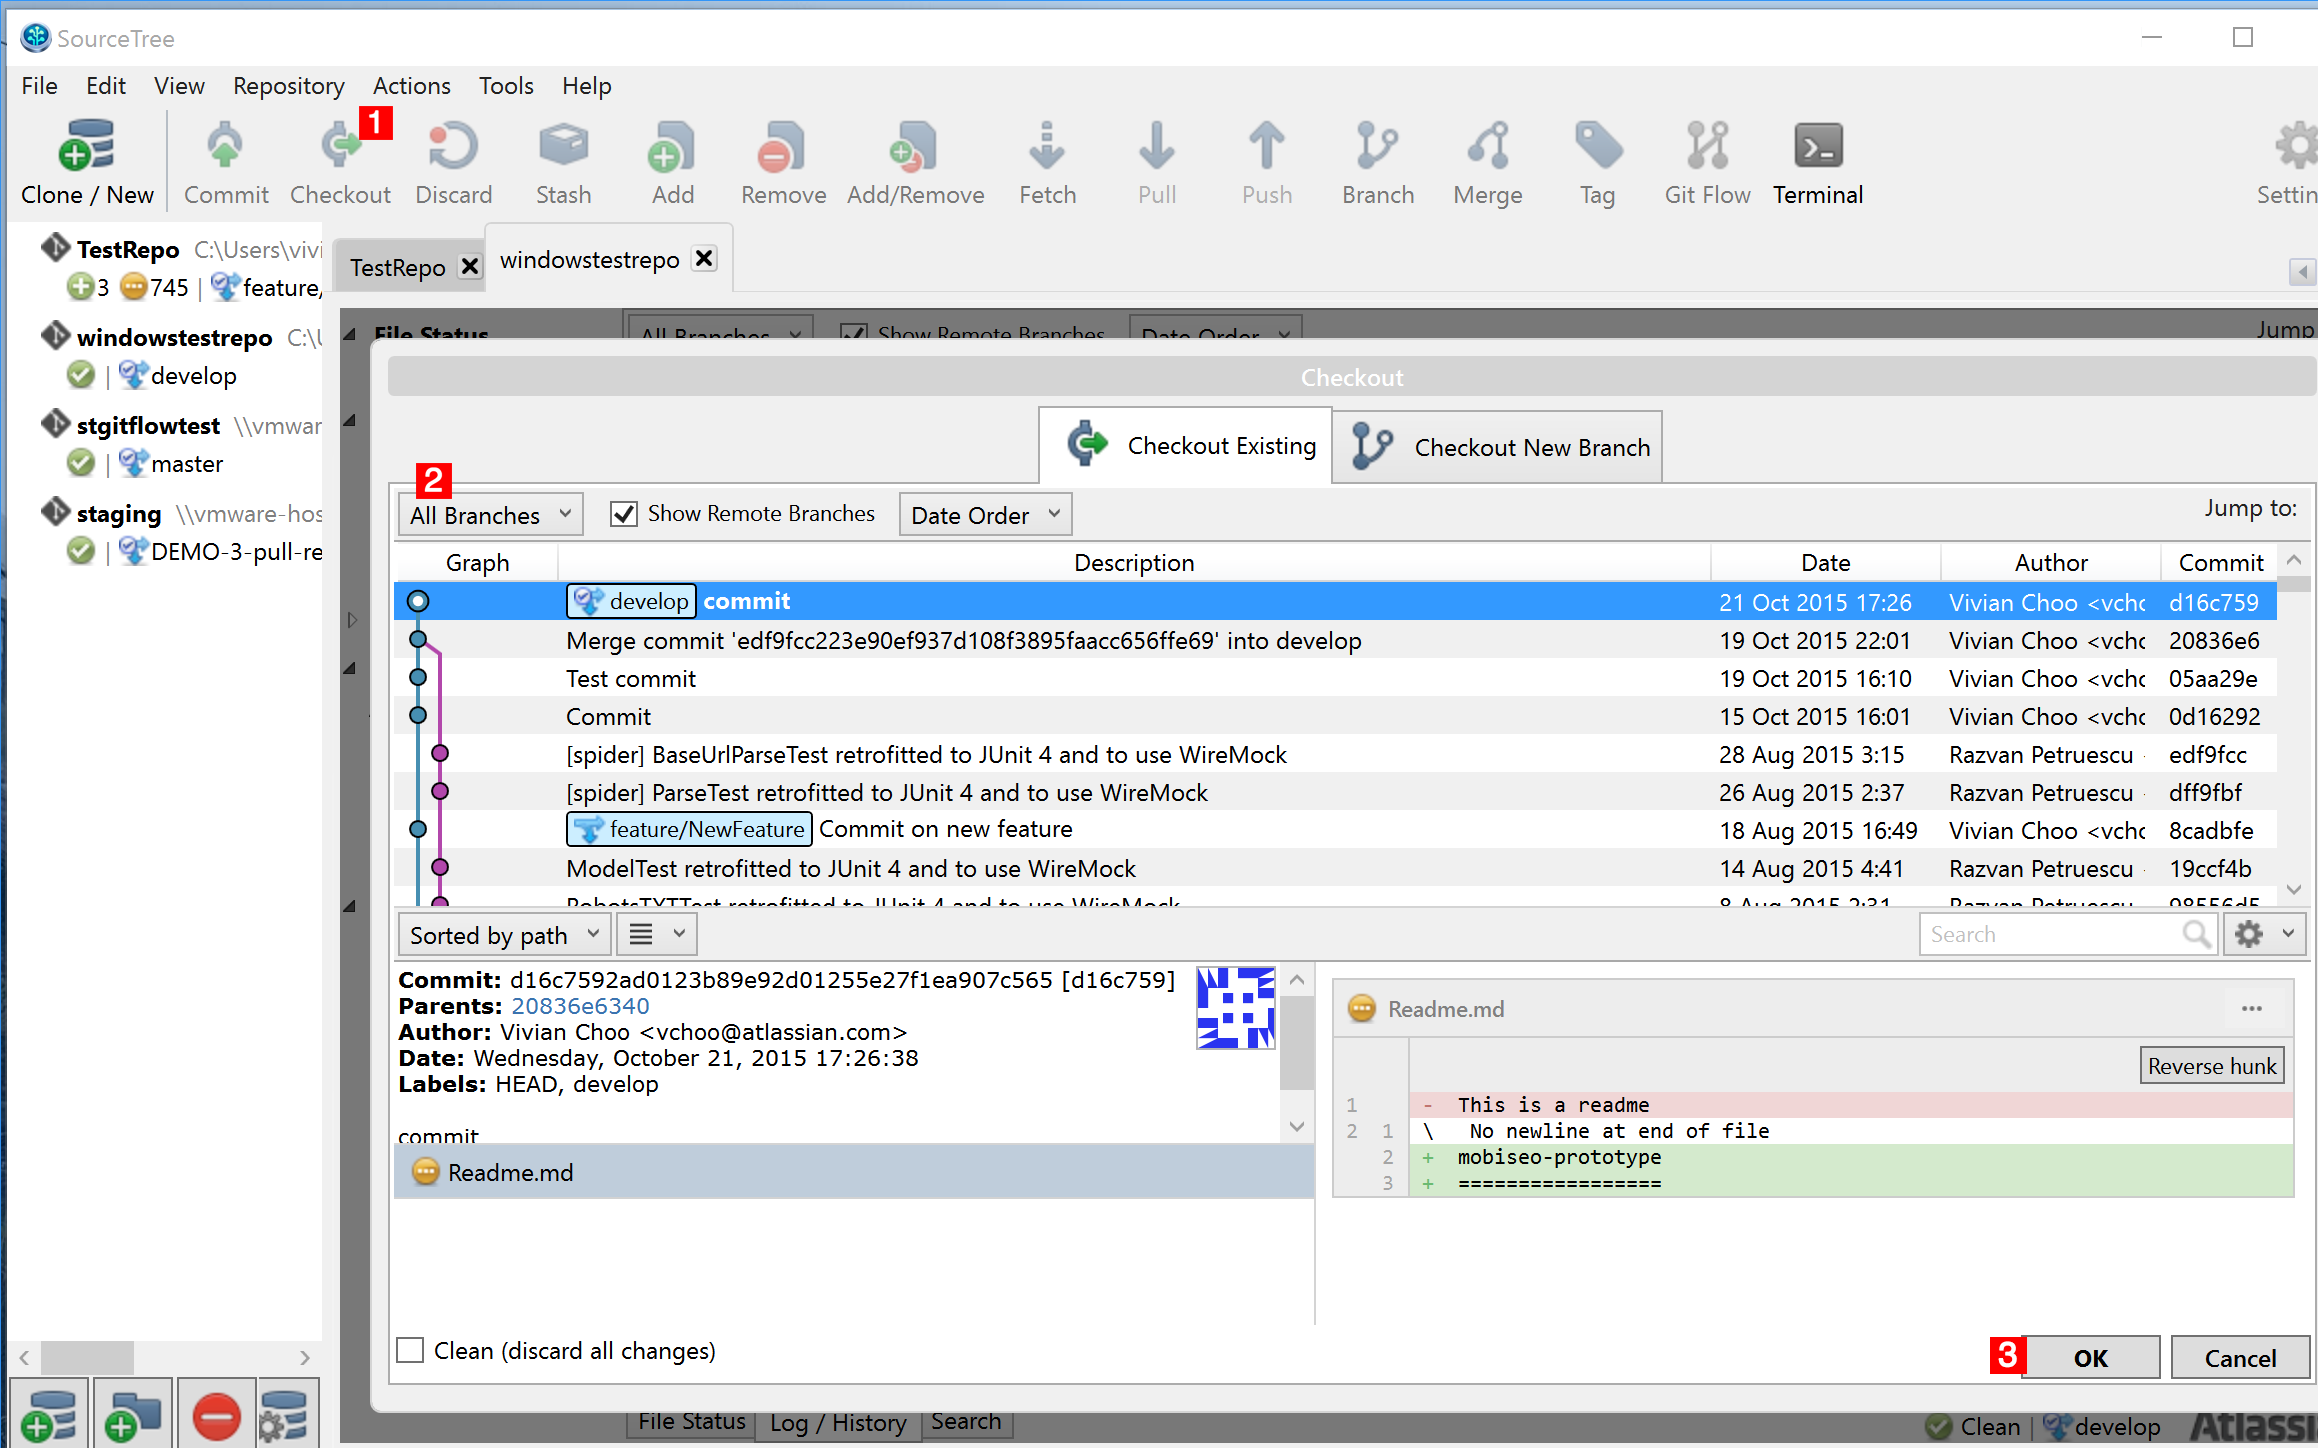
Method #1- Checking out a branch using the "Checkout" button.
手順:
- Click on the "Checkout" button.
- Select the branch from the drop down menu.
- Click on "OK".
Method #2- Checking out by double clicking on the Branch.
手順:
- Double click on the branch you want to checkout.
Merge a Branch

手順:
- Make sure you check the branch you intend to merge another branch to.
- Click on the "Merge" button.
- Select the branch from the drop down menu.
- Click on "OK".
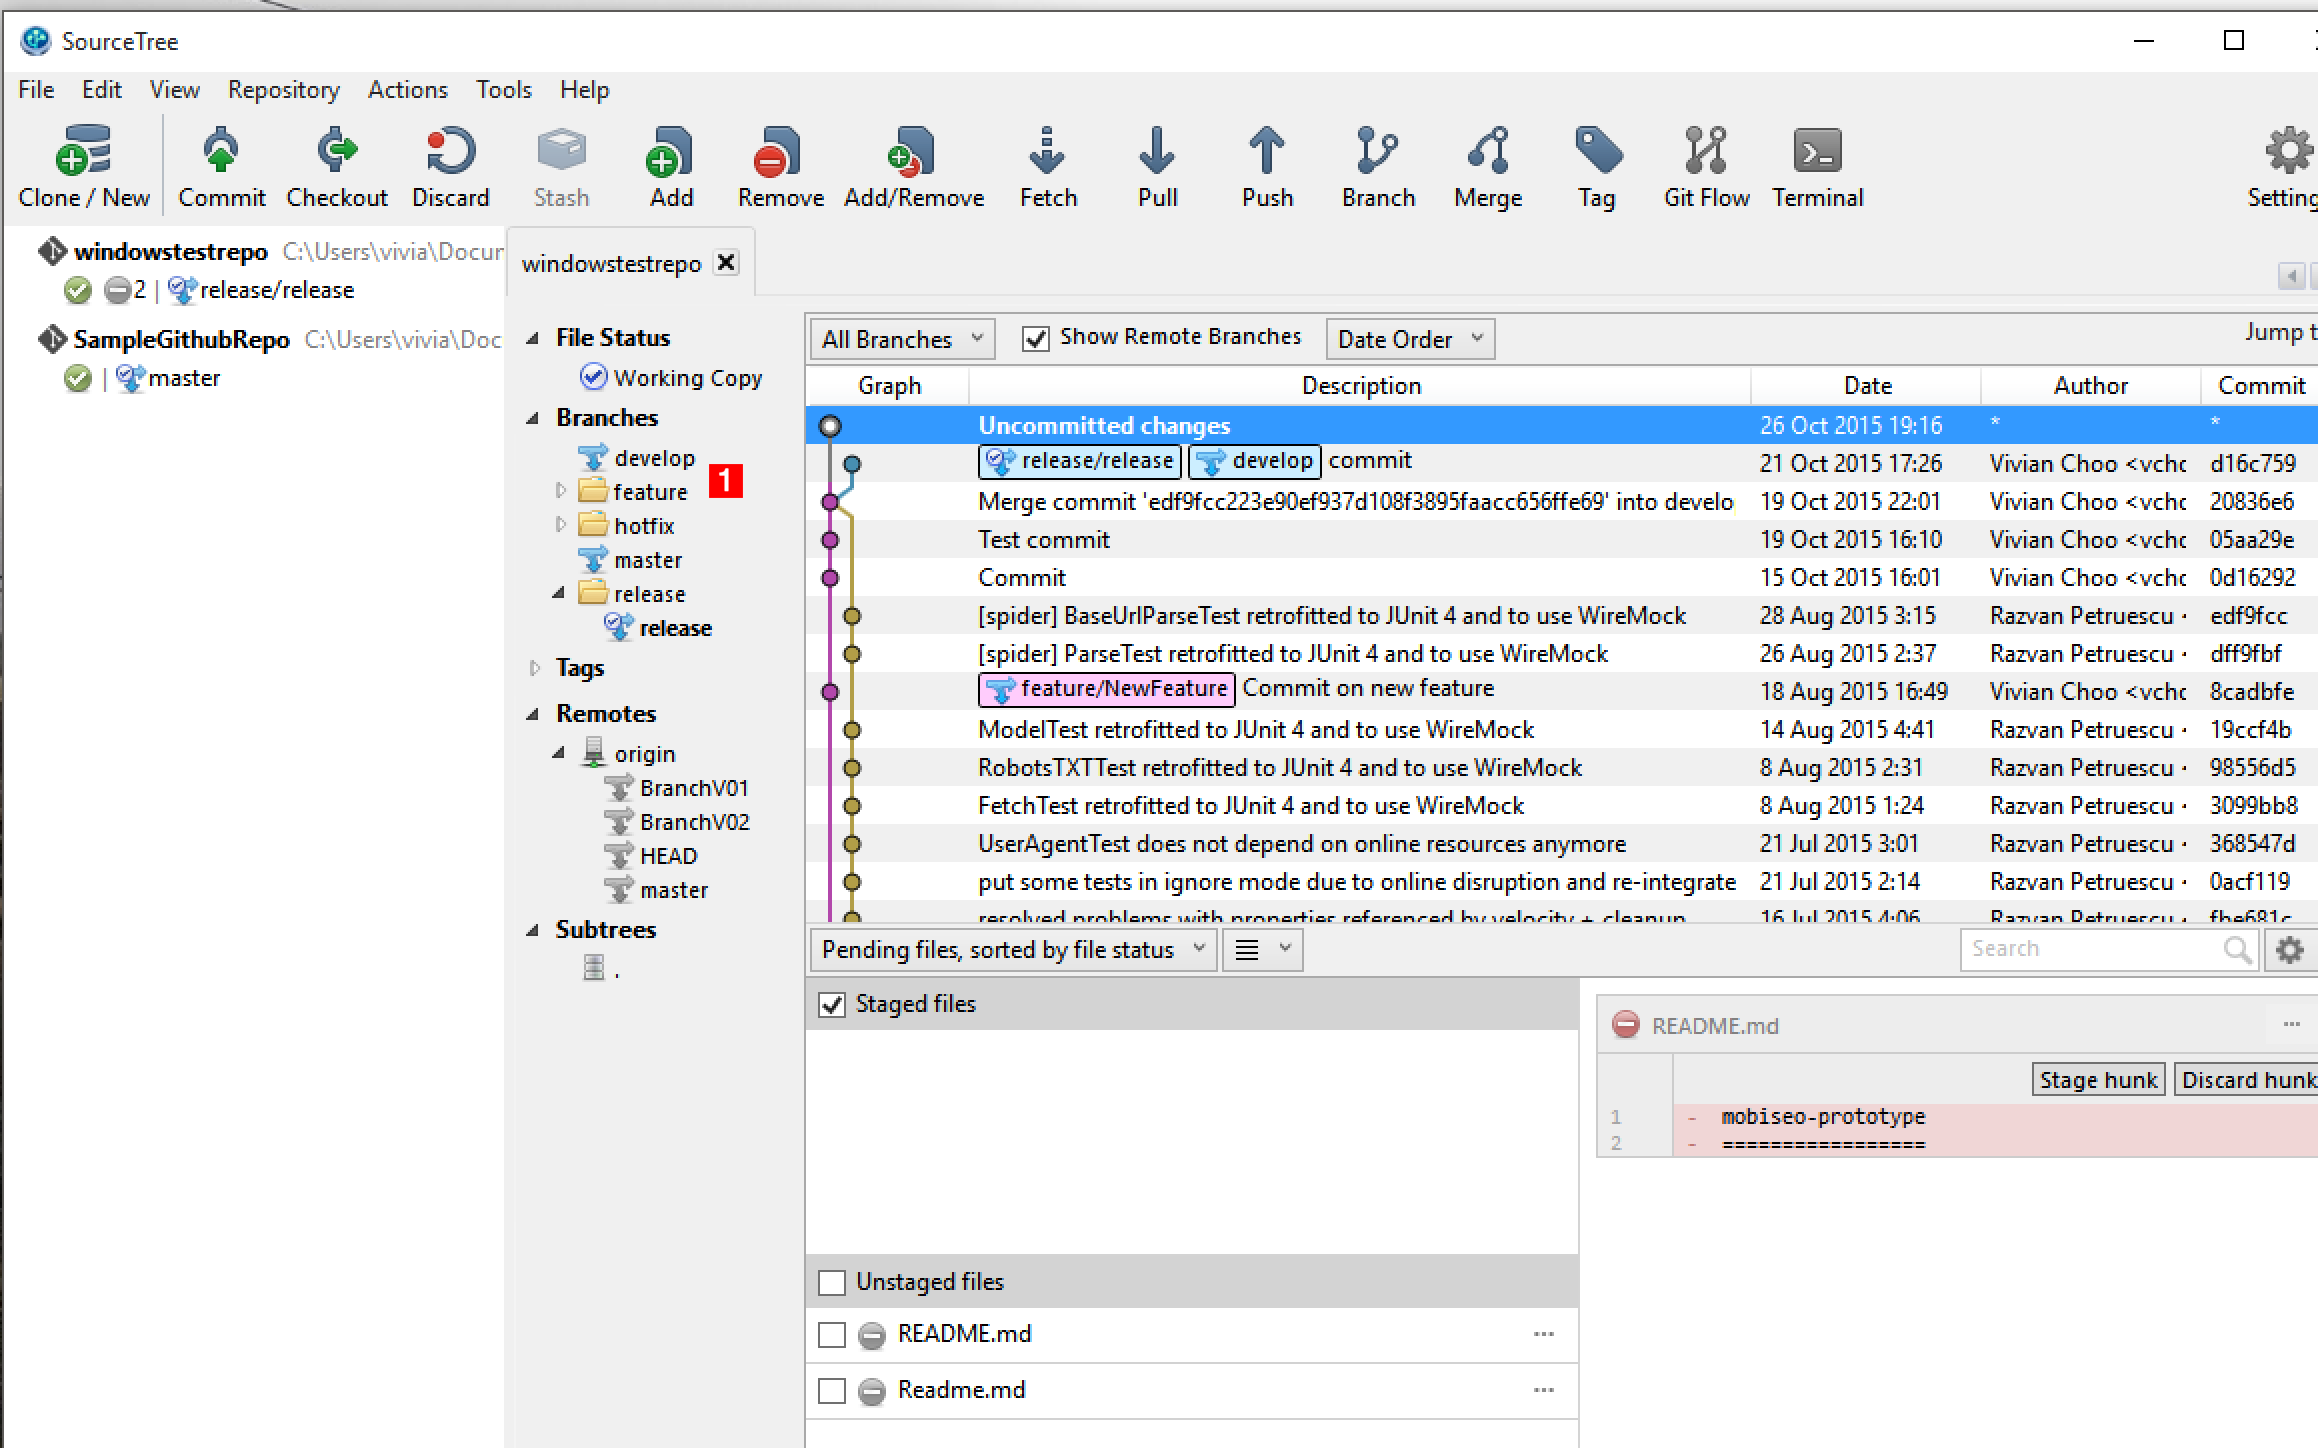
Tracking a remote Branch
![]()
手順:
- Right-click on a local branch.
- Click on "Track remote branch".
- Click on the branch you want to track.
Using Git Flow
Initialise Git Flow

手順:
- Click on the "Git Flow" button.
- Insert the name for the prefixes.
- Click on "OK".
Start new Feature
手順:
- Click on "Repository" tab.
- Click on "Git Flow".
- Click on "Start New Feature".
- Enter the feature name which you intend to see as the prefix.
- Click on "OK".
Finish Feature
手順:
- Click on "Repository" tab.
- Click on "Git Flow".
- Click on "Finish Feature"
- Choose the feature name from the drop down menu.
- Click on "OK".
Start New Release
手順:
- Click on "Repository" tab.
- Click on "Git Flow".
- Click on "Start New Release"
- Enter the release name which you intend to see as the prefix.
- Click on "OK".
Finish Release
手順:
- Click on "Repository" tab.
- Click on "Git Flow".
- Click on "Finish Release"
- Choose the release name from the drop down menu.
- Click on "OK".
Start New Hotfix
手順:
- Click on "Repository" tab.
- Click on "Git Flow".
- Click on "Start New Hotfix"
- Enter the hotfix name which you intend to see as the prefix.
- Click on "OK".
Finish Hotfix
手順:
- Click on "Repository" tab.
- Click on "Git Flow".
- Click on "Finish Hotfix"
- Choose the hotfix name from the drop down menu.
- Click on "OK".
最終更新日: 2016 年 2 月 26 日
Powered by Confluence and Scroll Viewport.