Post messages in MS Team Private channels using Jira Automation
Platform Notice: Cloud Only - This article only applies to Atlassian products on the cloud platform.
Summary
This article describes how to integrate Jira Cloud with MS Teams, allowing users to post messages in private MS Teams channels.
Diagnosis
The Jira Cloud integration with MS Teams does not allow posting messages to private MS Teams channels out-of-the-box.
Cause
Because MS Teams "Bot" users can't be recognized as members of the private team channel, it is not possible to use standard integration workflow to send messages to private channels.
Solution
To overcome this issue, we can create a custom workflow in MS Teams that iterates over the incoming webhook payload to create a custom message that is posted to a private channel.
The steps to do that are described below:
Create the Jira Automation Rule
Add the trigger that will begin the Automation Rule execution
Add the "Send Microsoft Teams message" block to the Automation Rule
Create MS Teams Workflow
From the channel options select Workflows and look for "Post to a channel when a webhook request is received" template
Copy the webhook URL from MS Teams workflow and use it in Jira Automation Rule "Send Microsoft Teams message" block as a Webhook URL.
In the automation rule configure the message title and details, check "Include issue summary in message" box.
Edit MS Teams Workflow.
The complete workflow will look as follows (we will go through the steps below):

The first step should be "When a Teams webhook request is received".
The "Who" field should be set to "Anyone".
The HTTP POST URL is the URL used in Jira Automation Rule (point 2.b).
Initialize the string variables "bodyText", "Newline" and "Urlvar".
bodyText – This variable will be appended by all the text fields Jira will send in its packet.
Newline – This is simply a <br> tag to break the text values into lines.
Urlvar – This will store the url that points back to the ticket in Jira.
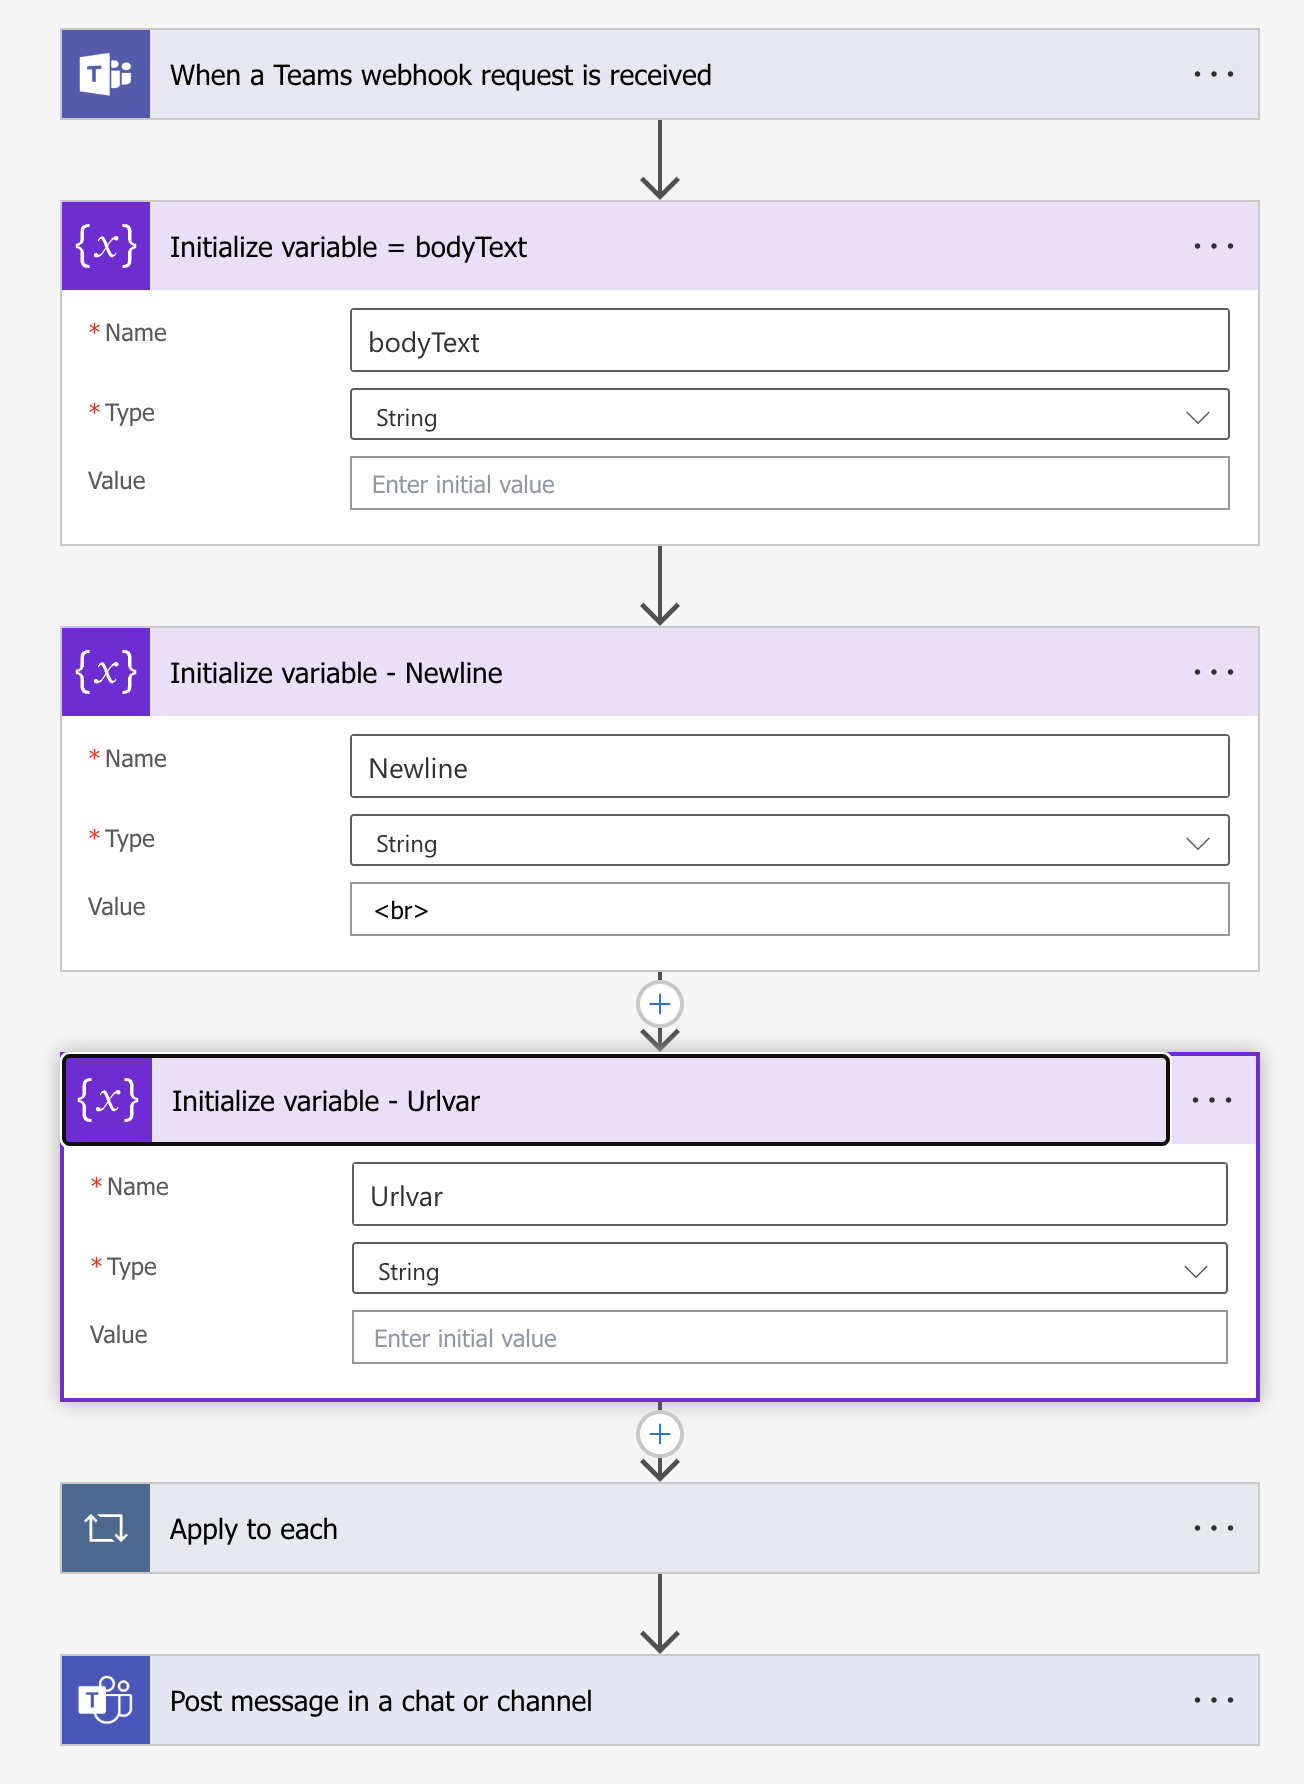
Create an ‘Apply to each’ action that will cycle through the data packets.
Use "attachments" output
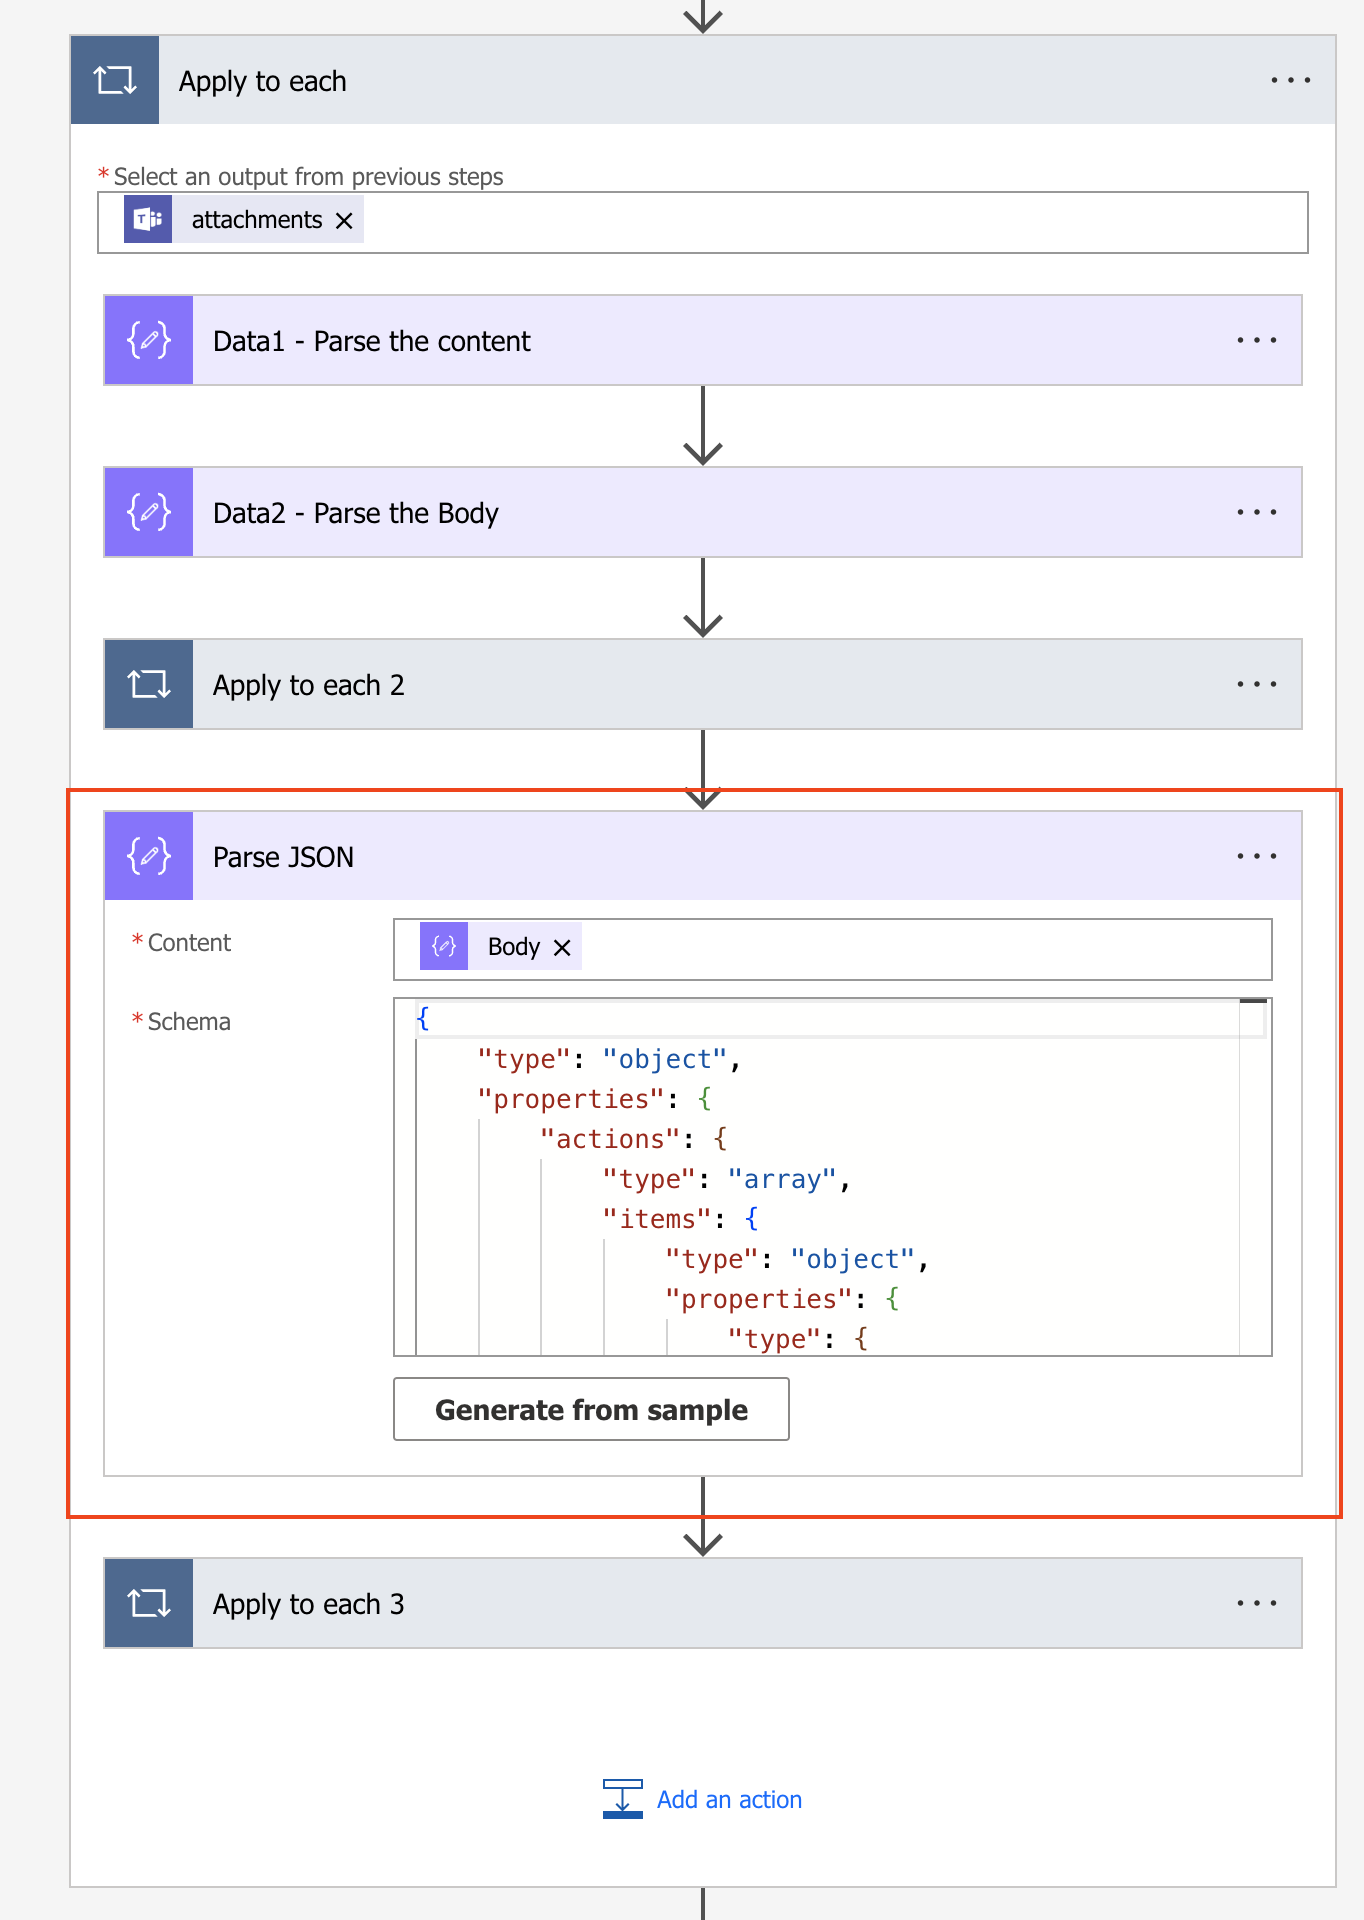
Next add Parse the JSON element using the following schema:
1
2
3
4
5
6
7
8
9
10
11
12
13
14
15
16
17
18
19
20
21
22
23
24
25
26
27
28
29
30
31
32
33
34
35
36
37
38
39
40
41
42
43
44
45
46
47
48
49
50
51
52
53
54
55
56
57
58
59
60
61
62
63
64
65
66
67
68
69
70
71
72
73
74
75
76
77
78
79
80
81
82
83
84
85
{ "type": "object", "items": { "type": "object", "properties": { "content": { "type": "object", "properties": { "schema": { "type": "string" }, "version": { "type": "string" }, "type": { "type": "string" }, "body": { "type": "array", "items": { "type": "object", "properties": { "type": { "type": "string" }, "text": { "type": "string" }, "style": { "type": "string" }, "weight": { "type": "string" }, "size": { "type": "string" }, "wrap": { "type": "boolean" } }, "required": [ "type", "text", "style", "weight", "size", "wrap" ] } }, "actions": { "type": "array", "items": { "type": "object", "properties": { "type": { "type": "string" }, "title": { "type": "string" }, "url": { "type": "string" } }, "required": [ "type", "title", "url" ] } } } }, "contentType": { "type": "string" } }, "required": [ "content", "contentType" ] } }Add a second Parse a JSON element using Body as a content and following schema:
1
2
3
4
5
6
7
8
9
10
11
12
13
14
15
16
17
18
19
20
21
22
23
24
25
26
27
28
29
30
31
32
33
34
35
36
37
38
39
{ "type": "object", "properties": { "body": { "type": "array", "items": { "type": "object", "properties": { "type": { "type": "string" }, "text": { "type": "string" }, "style": { "type": "string" }, "weight": { "type": "string" }, "size": { "type": "string" }, "wrap": { "type": "boolean" } }, "required": [ "type", "text", "style", "weight", "size", "wrap" ] } } } }After adding a second JSON parser, we need to add "Apply to each"
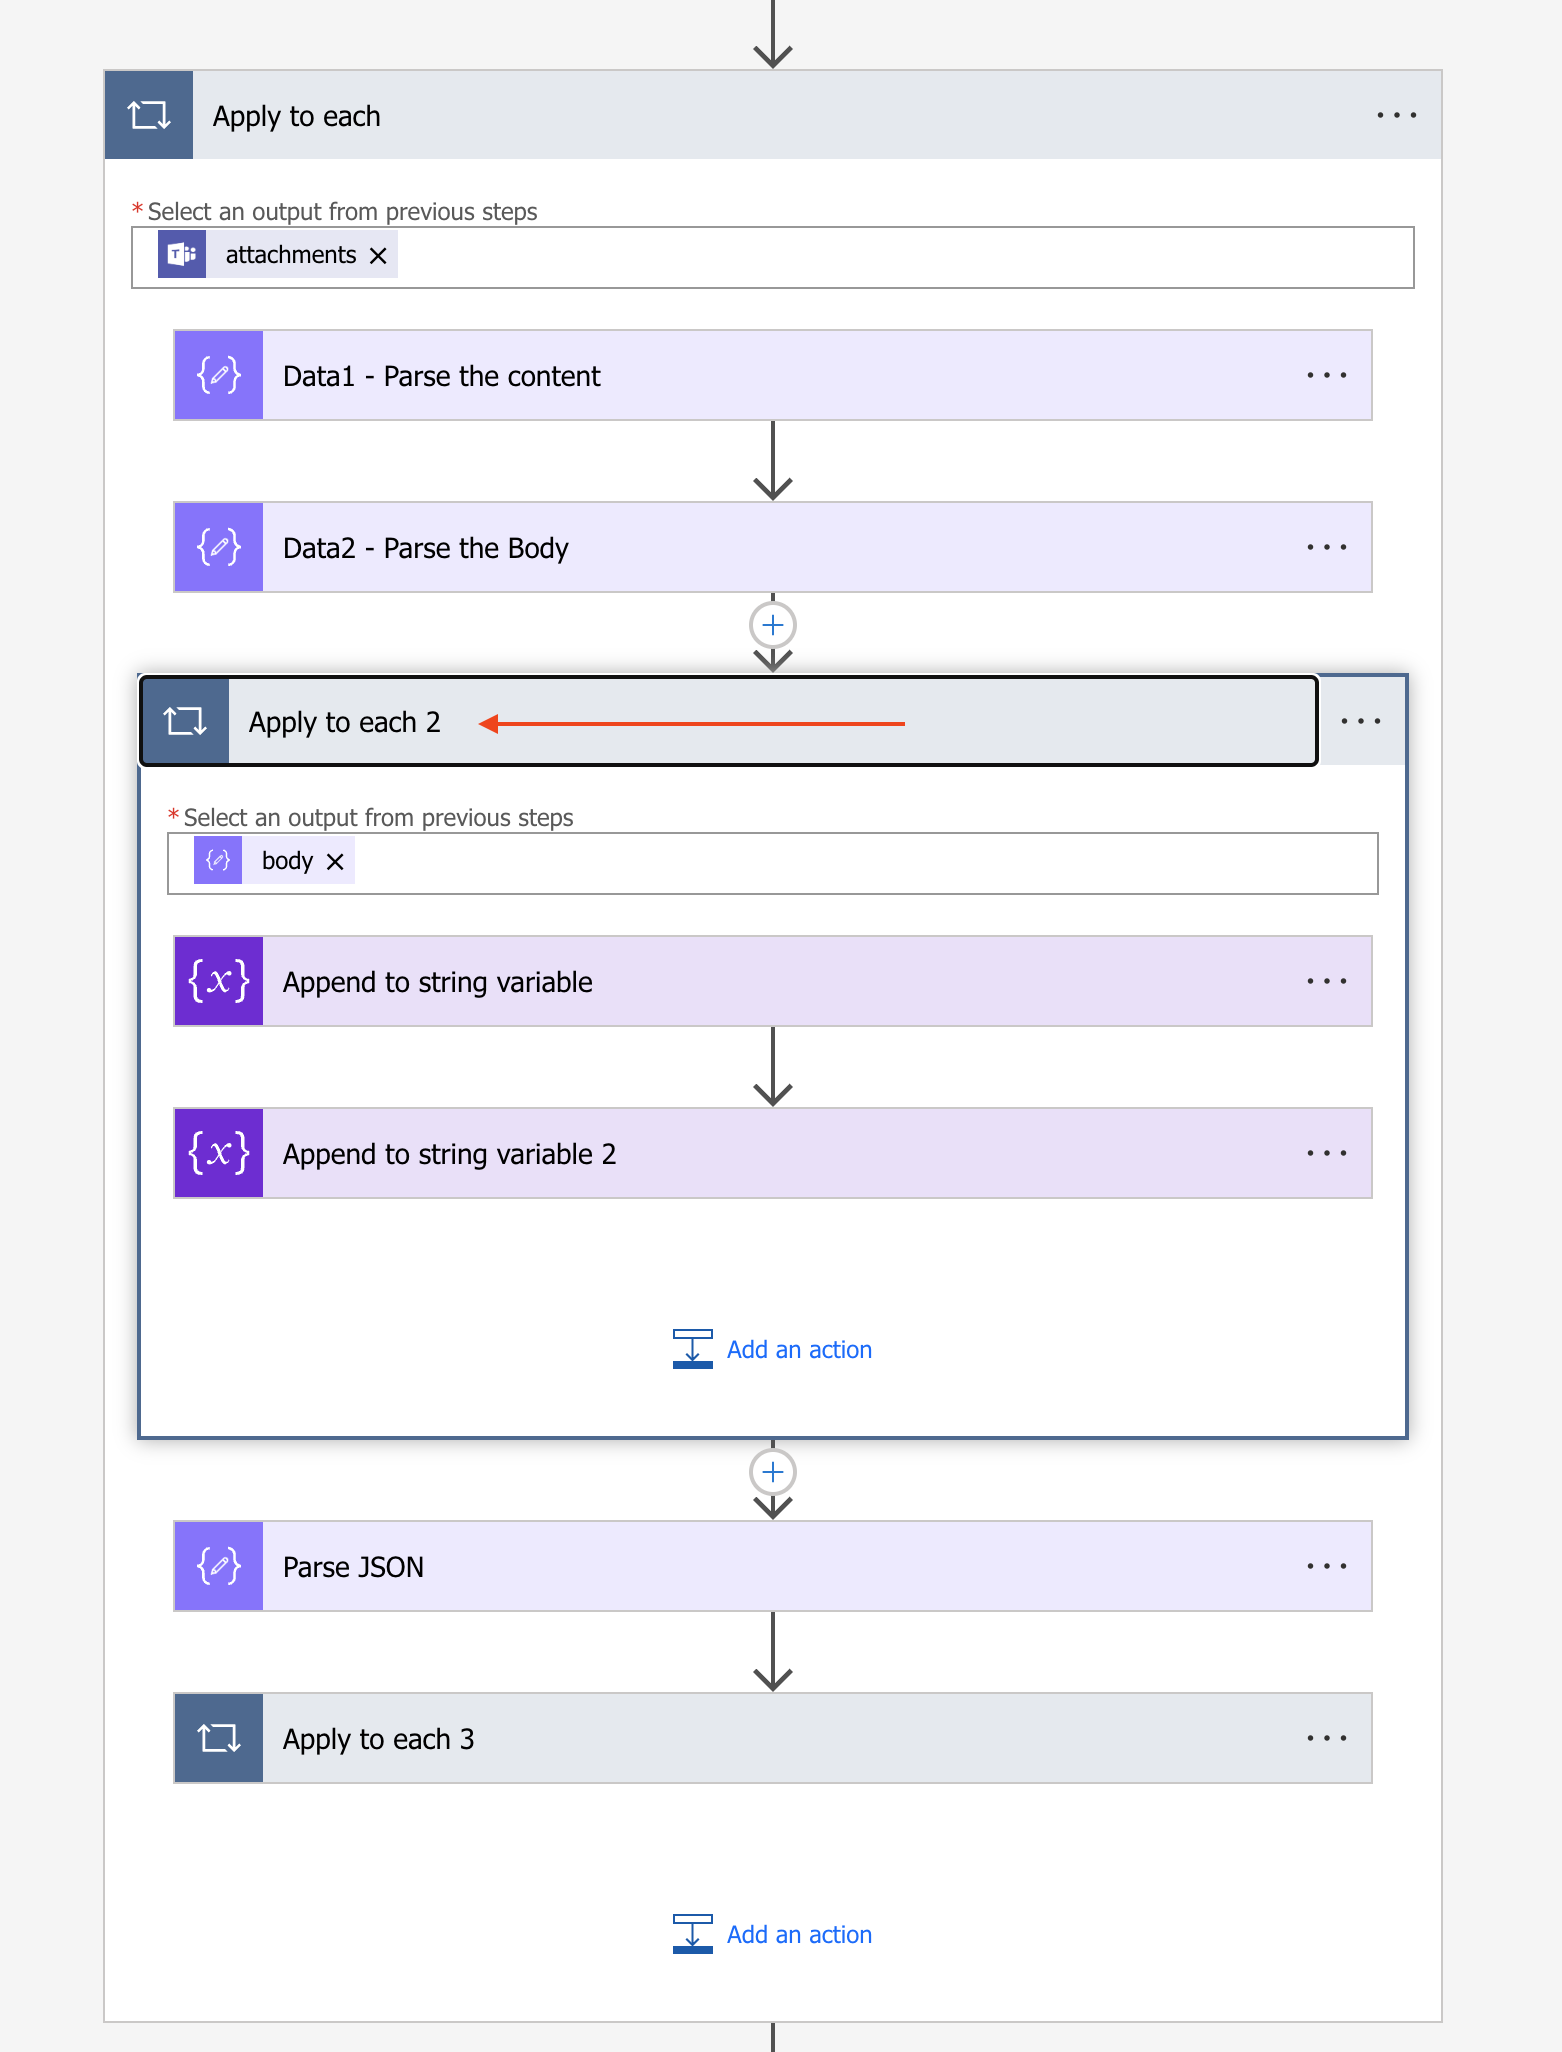
The "body" from a previous action should be selected as output from previous steps
Within this loop we will create a message by appending a variable "bodyText" with the "text" variable created previously in JSON parser action and "Newline" variable:
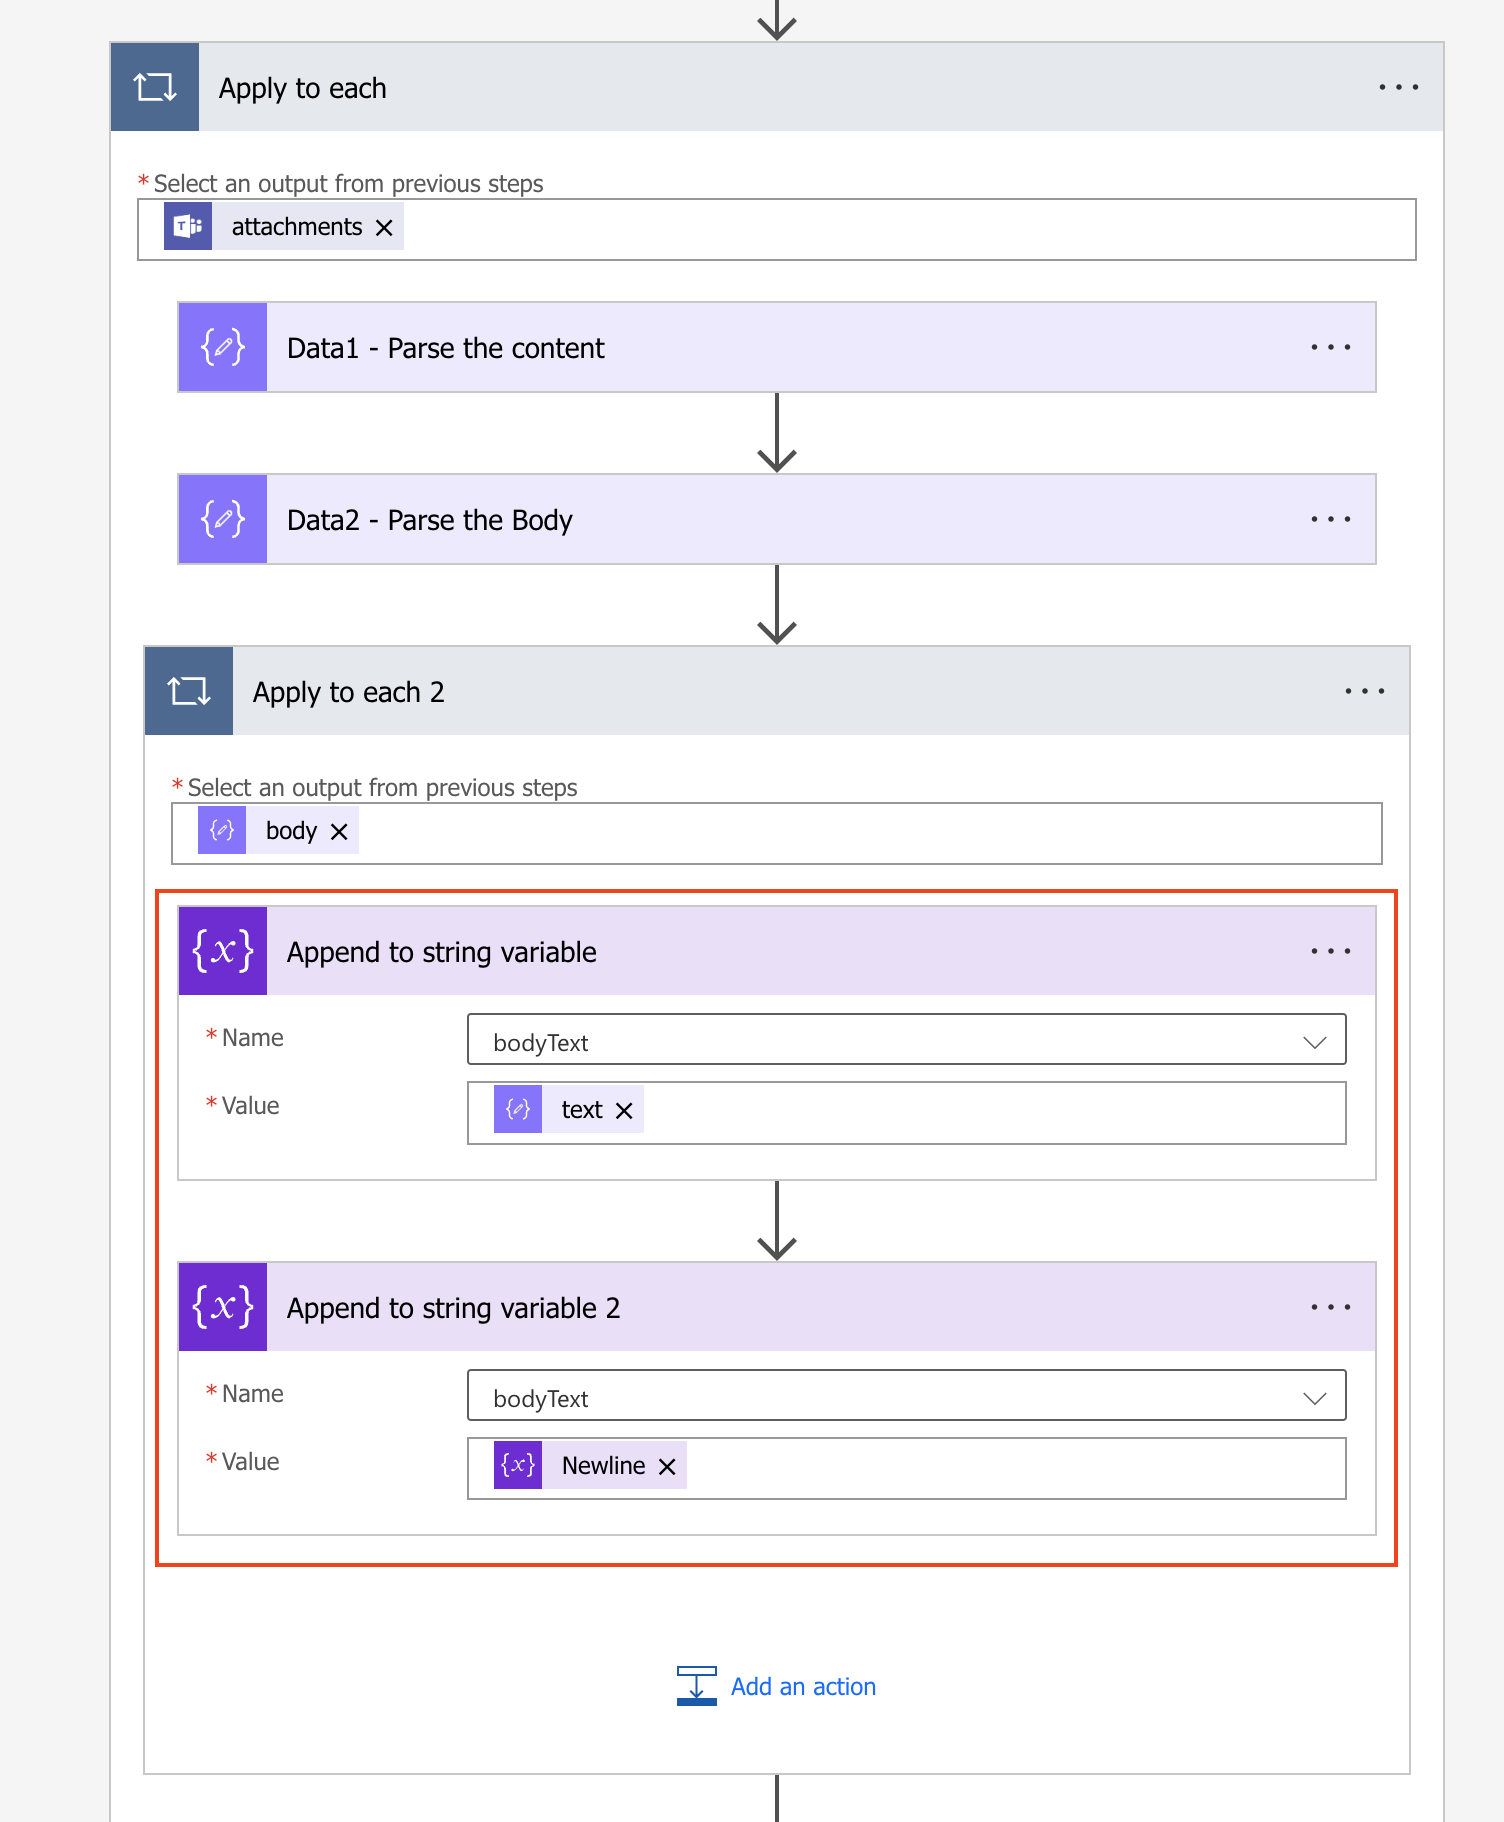
Next we will add another Parse JSON action, using "Body" as a content:
And the following schema:
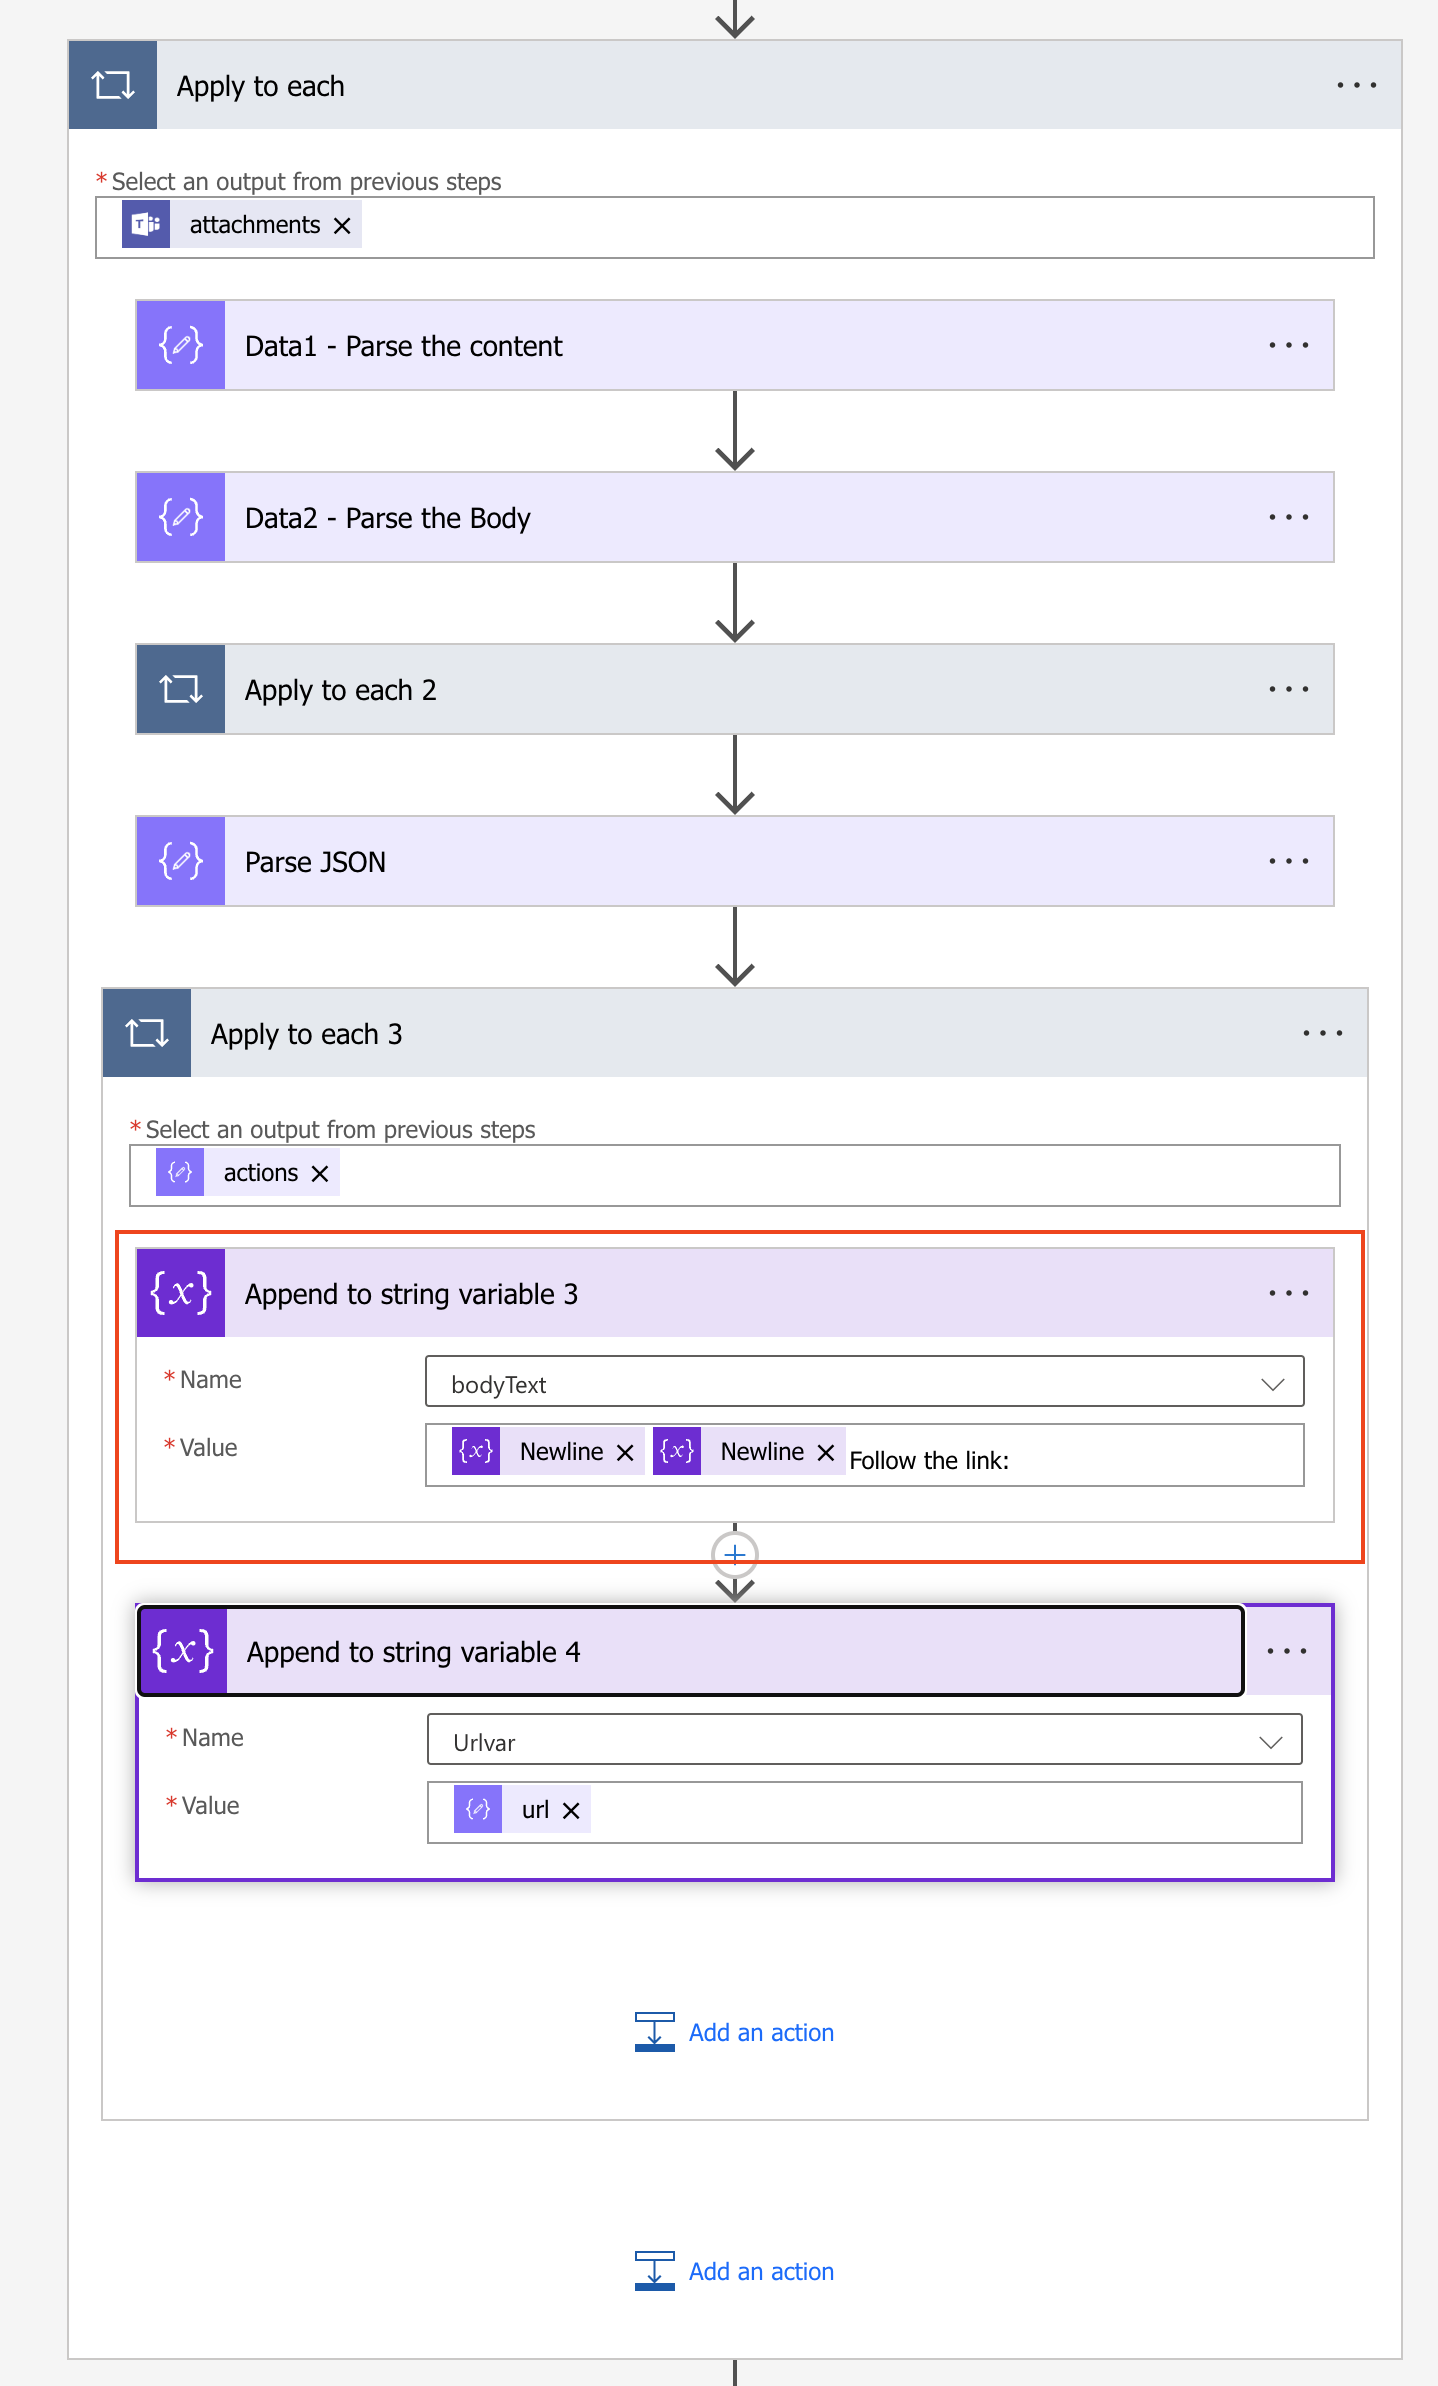
1
2
3
4
5
6
7
8
9
10
11
12
13
14
15
16
17
18
19
20
21
22
23
24
25
26
27
{ "type": "object", "properties": { "actions": { "type": "array", "items": { "type": "object", "properties": { "type": { "type": "string" }, "title": { "type": "string" }, "url": { "type": "string" } }, "required": [ "type", "title", "url" ] } } } }Add a new Apply to each element that will loop through "actions" and create link:
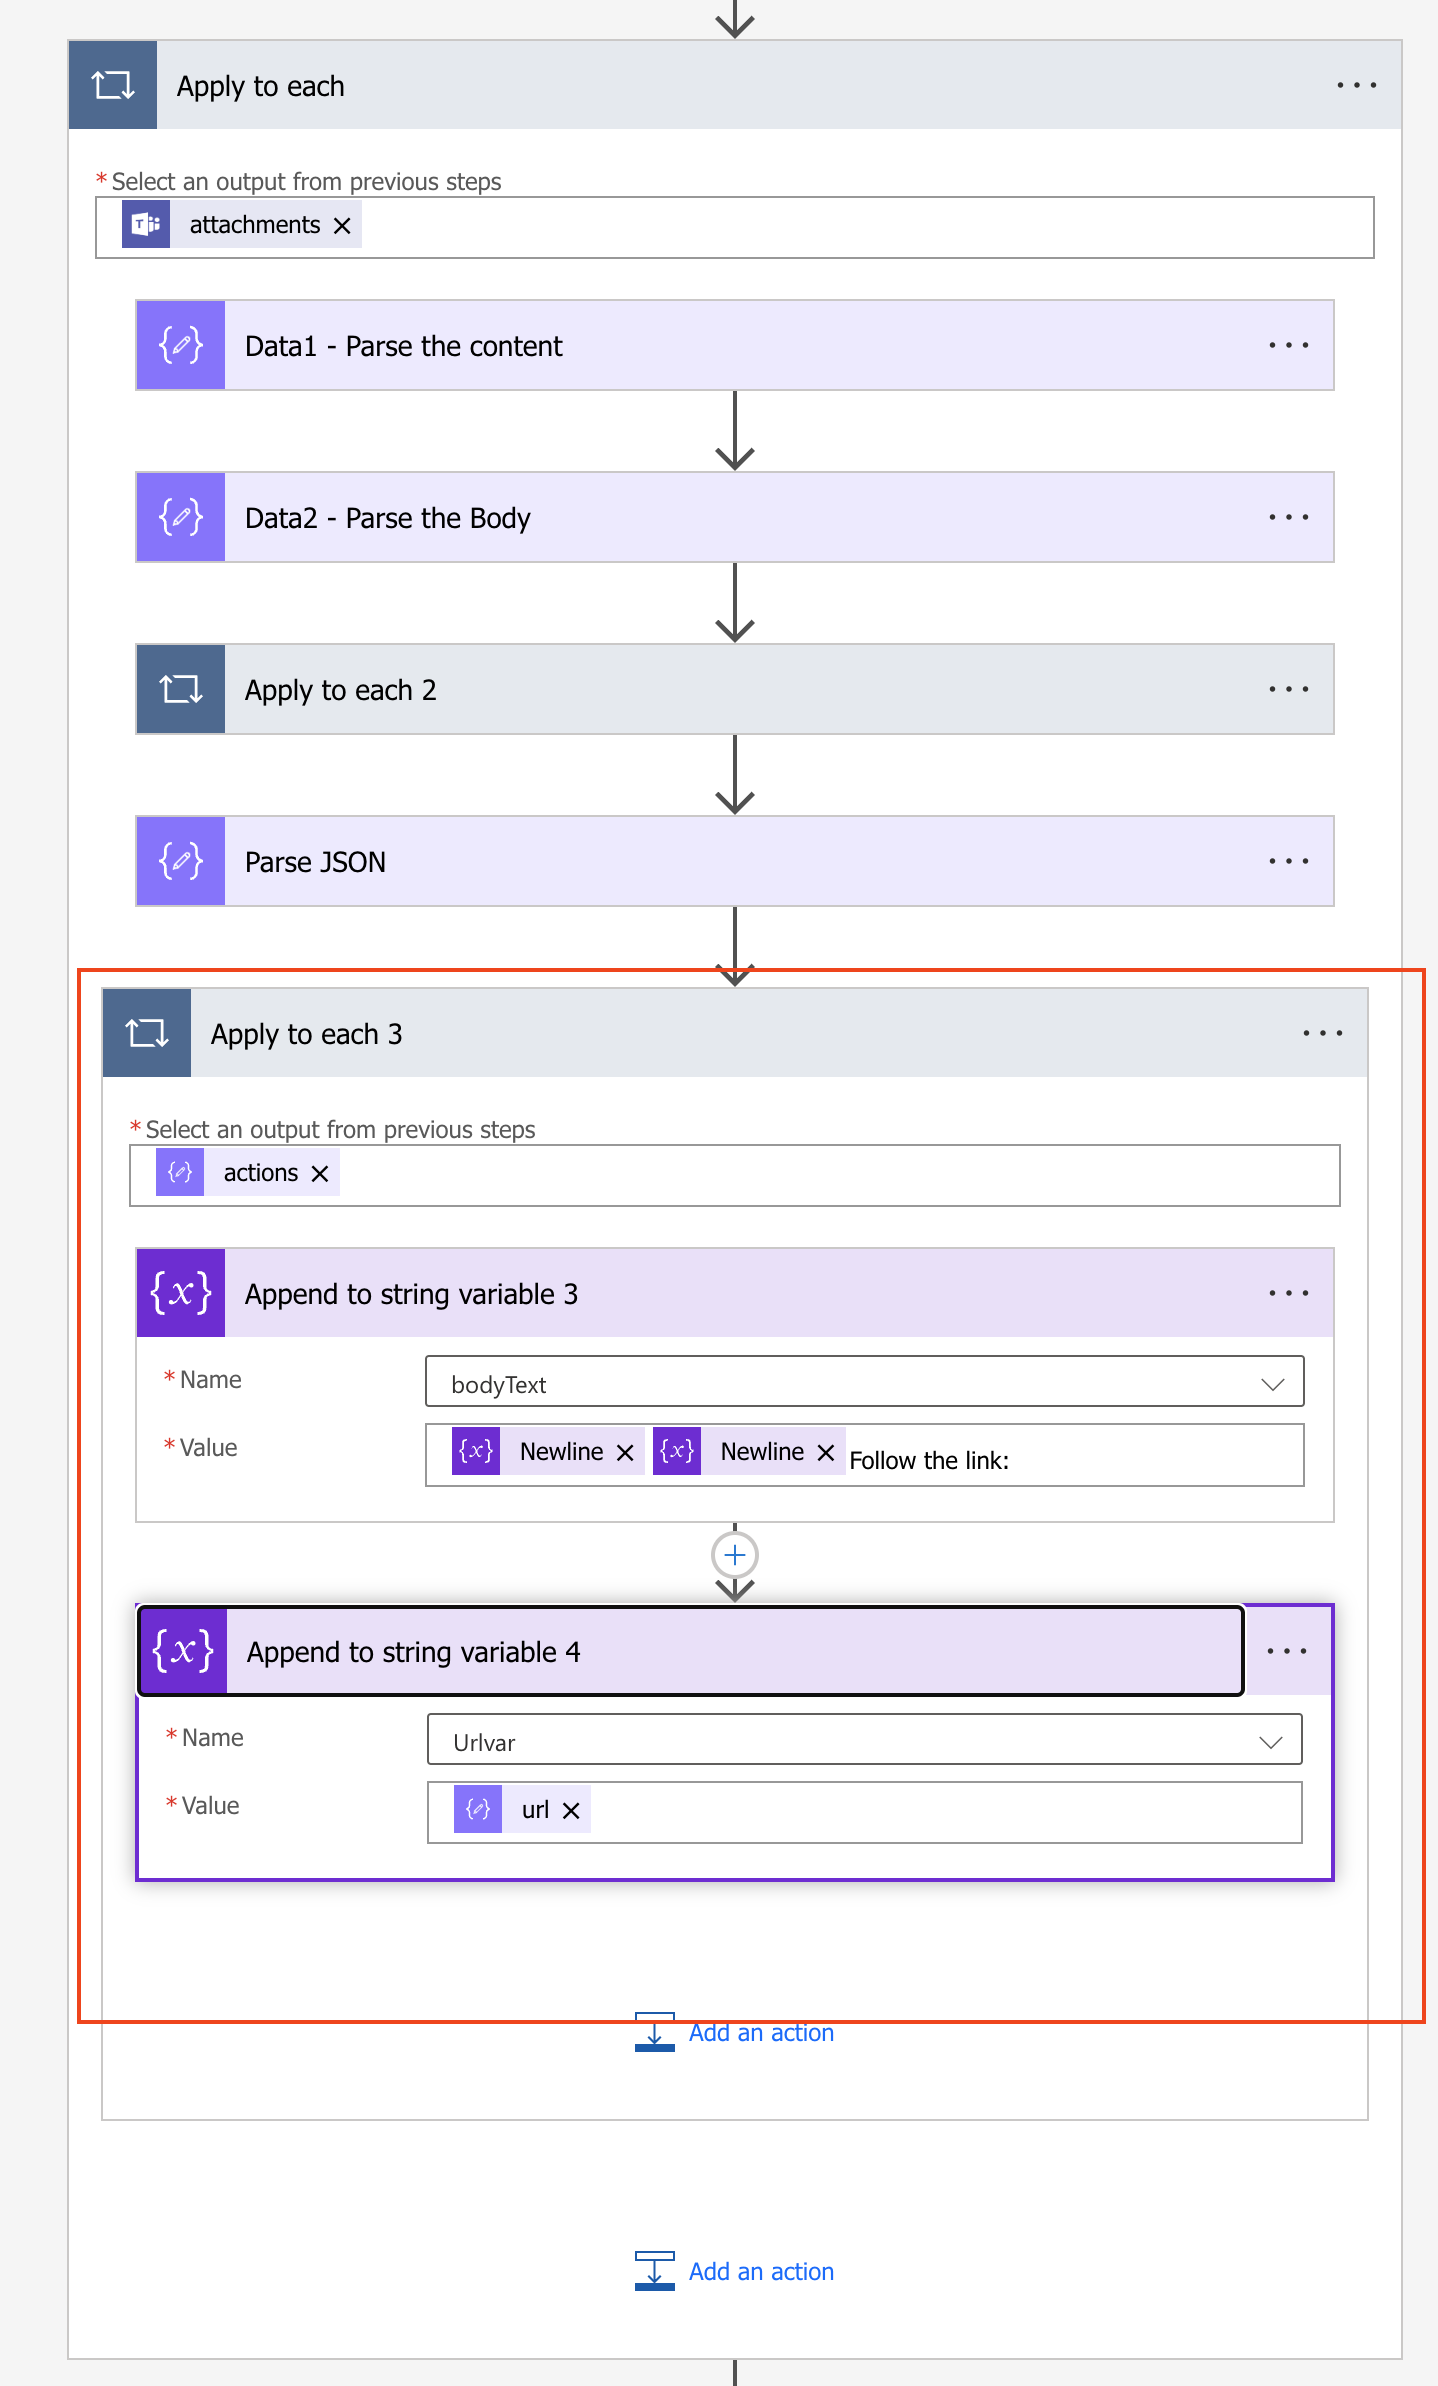
Append the "bodyText" variable:
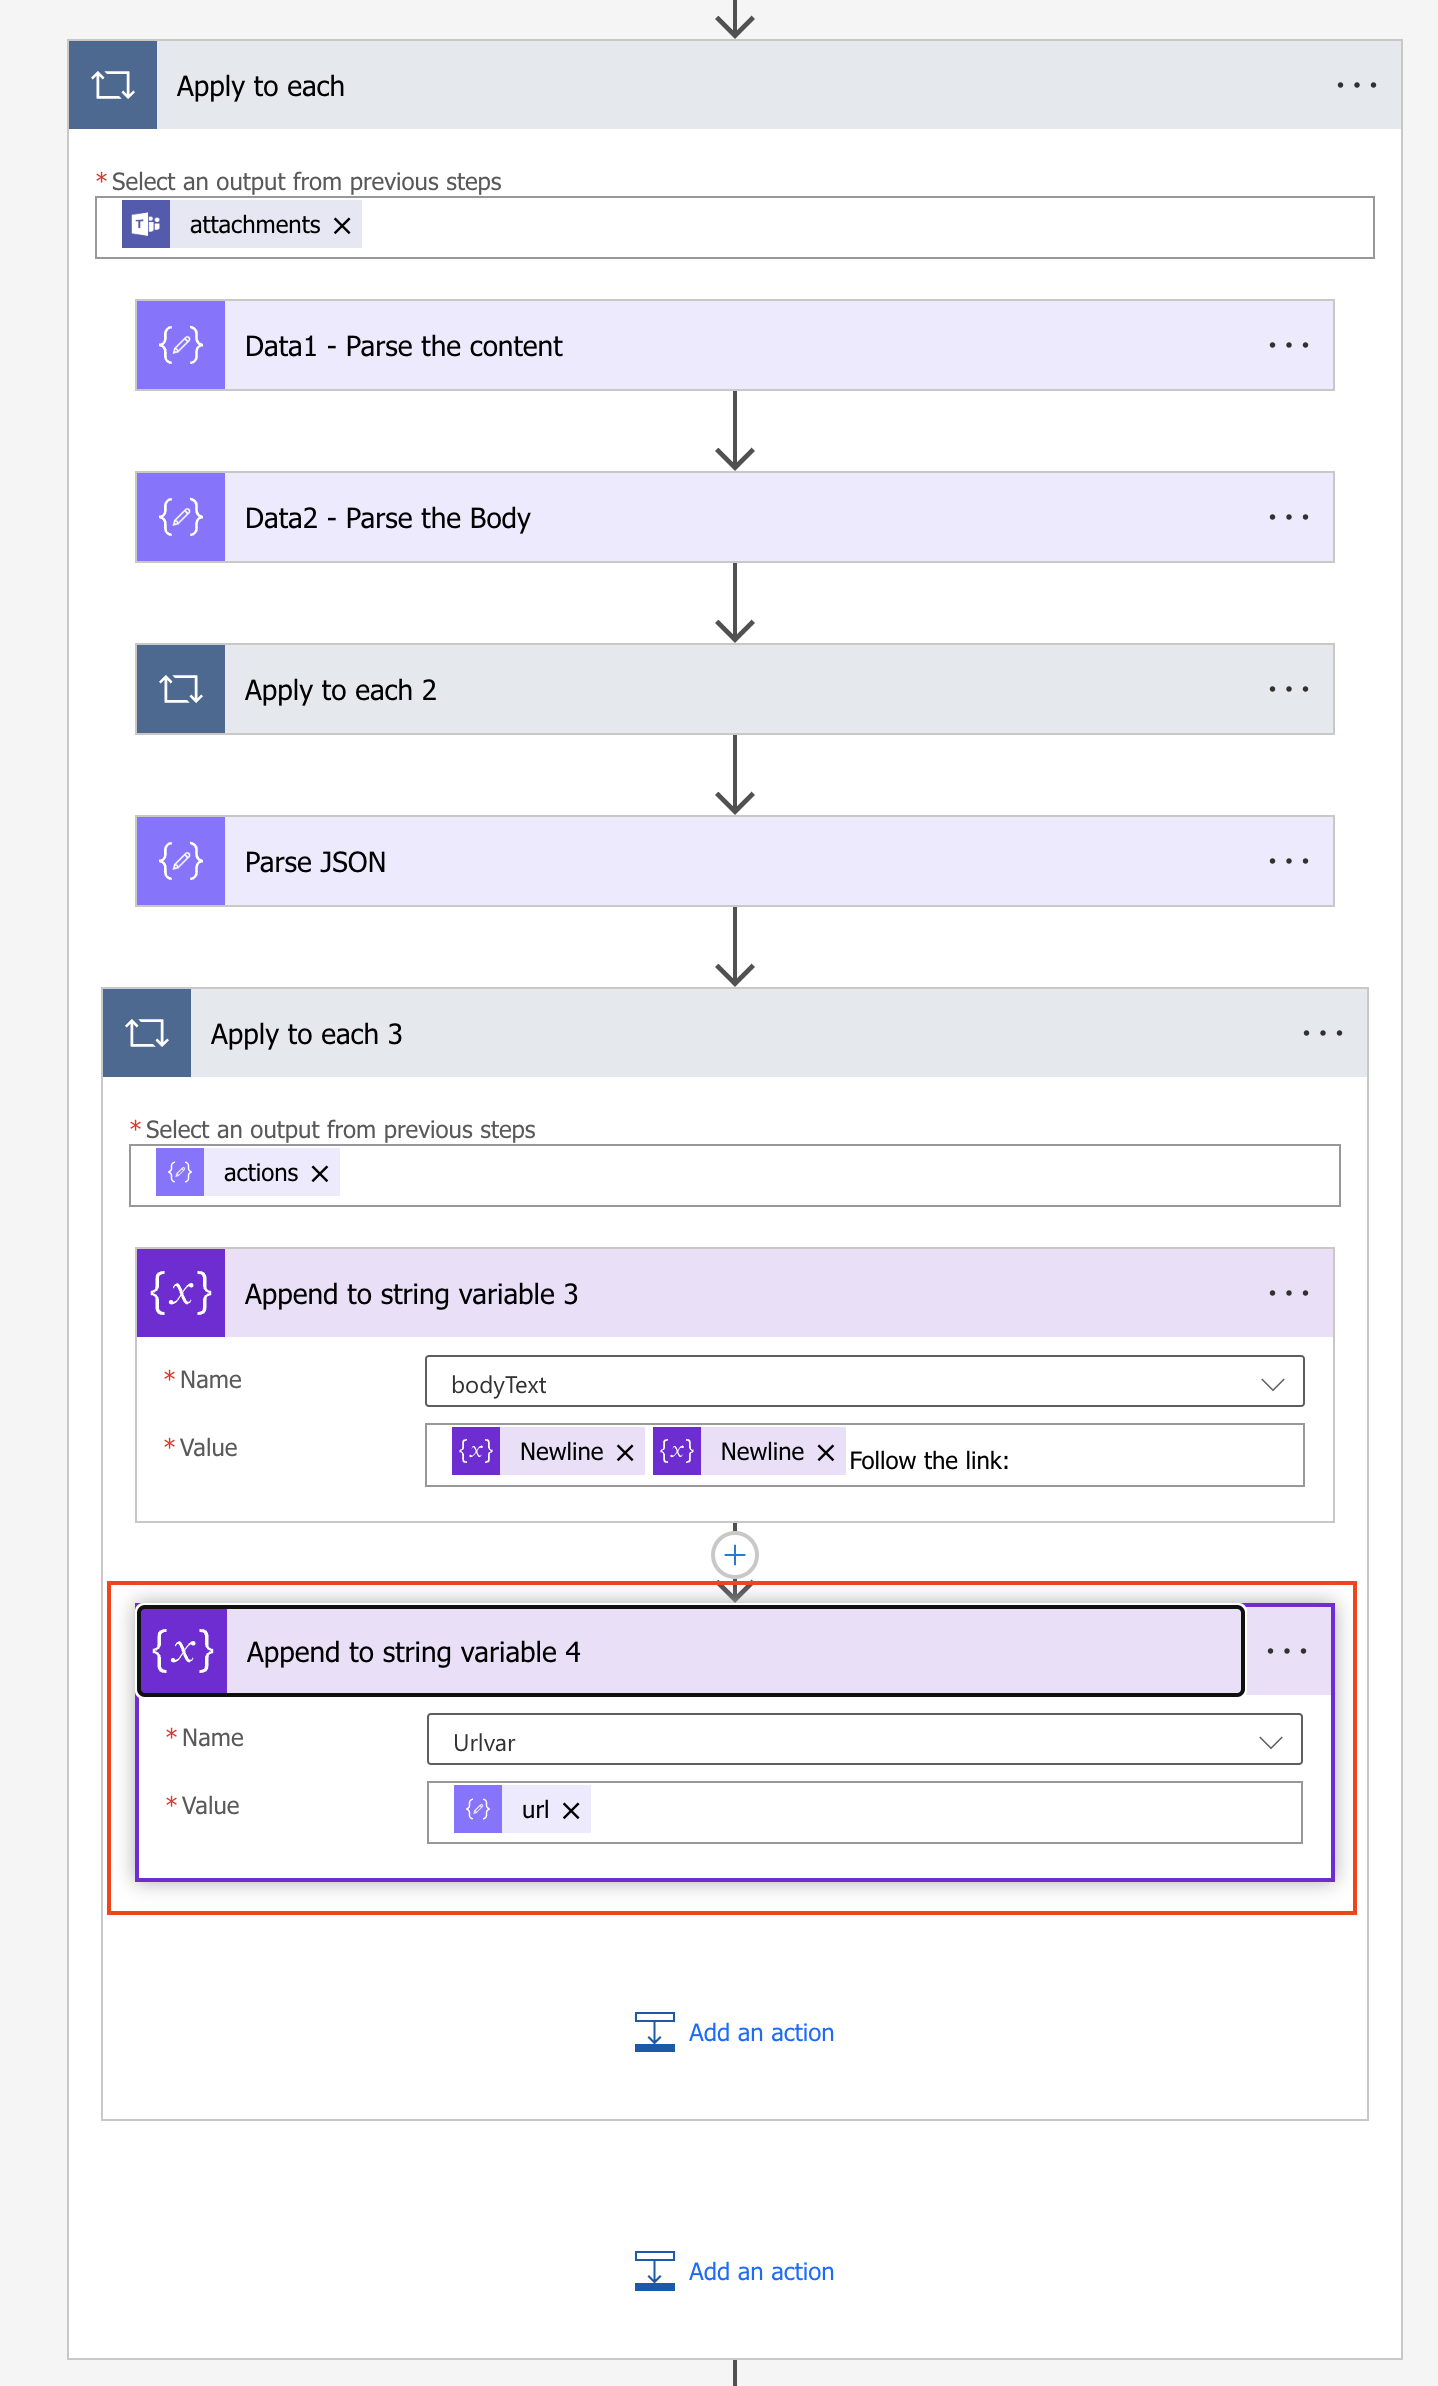
Append the "Urlvar" variable:
We have completed the main Apply to each loop. Now it is time to send the message to the private channel using "Post message in a chat or a channel:
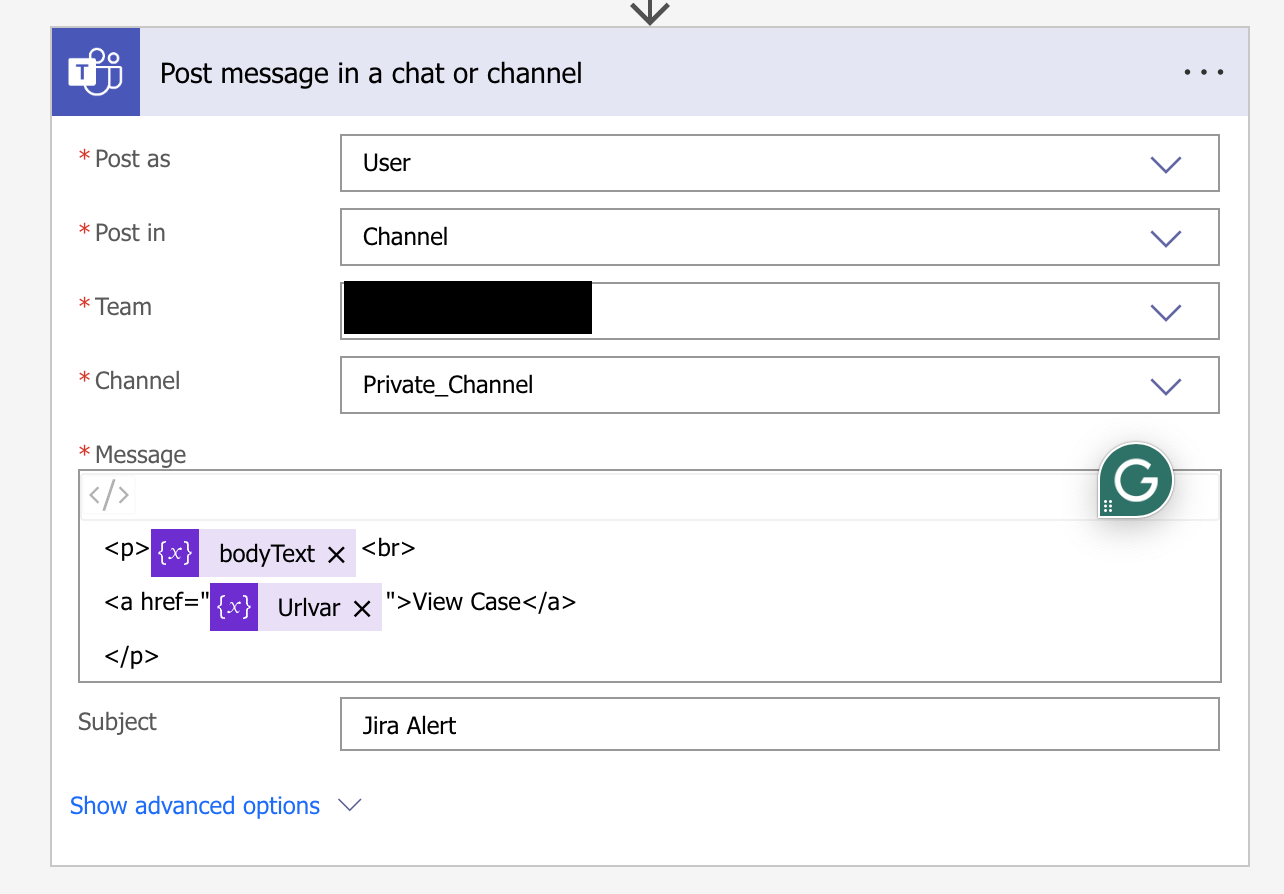
Note that the message will be posted as User who is the owner the MS Teams workflow.
Was this helpful?