Keep issue parent-child mapping during CSV import to Jira Cloud
Platform Notice: Cloud Only - This article only applies to Atlassian products on the cloud platform.
Summary
When a CSV import is performed in Jira, we usually lose Parent-child relationships between imported issues, but the links can be maintained.
Previous versions of this article made reference to the "Epic Link" field. This KB has been updated as of April 2024 to reflect the changes in regards to the Deprecation of the Epic Link and Epic Name fields. Going forward, the Parent field should be used in place of Epic Link in Jira Cloud.
Solution
Confirm proper formatting in the CSV file
Issue relationships are usually lost because of issue order in the CSV file and/or improper mapping of the parent and child during the import process.
First, make sure the exported CSV file contains at least the following columns for the parent-child mapping:
1
Issue type, Issue key, Issue ID, Summary, ParentNext, confirm the file has all issues listed in order of their hierarchy.
That is, the topmost rows of the CSV must list all the Highest hierarchy issue types, with subsequent rows including the Standard issue types, and finally the Sub-task types.
Demonstration of a properly ordered CSV file
<TOP OF FILE>
Initiatives and other higher levels
...
Epics
...
Standard issue types (Story, Bug, task, etc.)
...
Sub-tasks
...
</BOTTOM OF FILE>
Map issue IDs using the Parent field in the CSV file
For the parent→child relationship to work, copy the Issue ID of the parent issue and paste it in the Parent column of the the Child issue.
After making the above changes, the Issue Type mappings should look as per the below sample screenshot.
Example of Issue ID mapping
Example CSV With the following layout:
NOTE The ID's used are place holder numbers. They can be any number but each issue must have a unique ID.
issue type | issue key | status | summary | issue id | parent |
Theme | test-123 | To Do | Example theme summary | 1 | |
initiative | test-124 | To Do | Example initiative summary | 2 | 1 |
Epic | test-125 | To Do | Epic with parent and no child story but 1 sub-task and parent Initiative | 3 | 2 |
Epic | test-126 | To Do | This is an epic with 1 story and 1 bug as child issues mapped | 4 | |
Story | test-127 | To Do | Example story 1 Summary no child issue mapped | 5 | |
Story | test-128 | To Do | Example story with 1 child sub-task mapped, and a parent epic is mapped | 6 | 4 |
Bug | test-129 | To Do | bug with 1 child sub-task | 106589 | 4 |
sub-task | test-130 | To Do | subtask 1 | 7 | 6 |
sub-task | test-131 | To Do | subtask 2 | 8 | 106589 |
sub-task | test-132 | To Do | Subtask 3 | 9 | 3 |
As Raw text in CSV formatting:
1
2
3
4
5
6
7
8
9
10
11
issue type,issue key,status,summary,issue id,parent
Theme,test-123,To Do,Example theme summary,1,
initiative,test-124,To Do,Example initiative summary,2,1
Epic,test-125,To Do,Epic with parent and no child story but 1 sub-task and parent Inititive,3,2
Epic,test-126,To Do,This is an epic with 1 story and 1 bug as child issues mapped,4,
Story,test-127,To Do,Example story 1 Summary no child issue mapped,5,
Story,test-128,To Do,"Example story with 1 child sub-task mapped, and a parent epic is mapped",6,4
Bug,test-129,To Do,bug with 1 child sub-task ,106589,4
sub-task,test-130,To Do,subtask 1,7,6
sub-task,test-131,To Do,subtask 2,8,106589
sub-task,test-132,To Do,Subtask 3,9,3
In the above table, we have used the "Issue Key" column only for a better visual understanding of the table. When the issues are imported into the destination project, they will be assigned a new issue number (based on the issue counter on the destination project) and the destination project key. For example, if we import the above issues to a destination project which has the project key "CSV", and no pre existing issues,then these newly imported issues will have the issue key as CSV-1, CSV-2, ... etc.
The CSV file is now ready for import.
Import the CSV file to Jira
Select Settings (cog icon) > System
Navigate to External system import under the "Import and export" heading
Select Switch to the old experience
Select CSV
Select "Choose File" and navigate to the file via your machine's file explorer
Once uploaded, select Next
Select the destination project where you want the issues to be imported from the CSV file
Unless you made custom changes to any additional date and time fields or email address fields, leave formatting as default
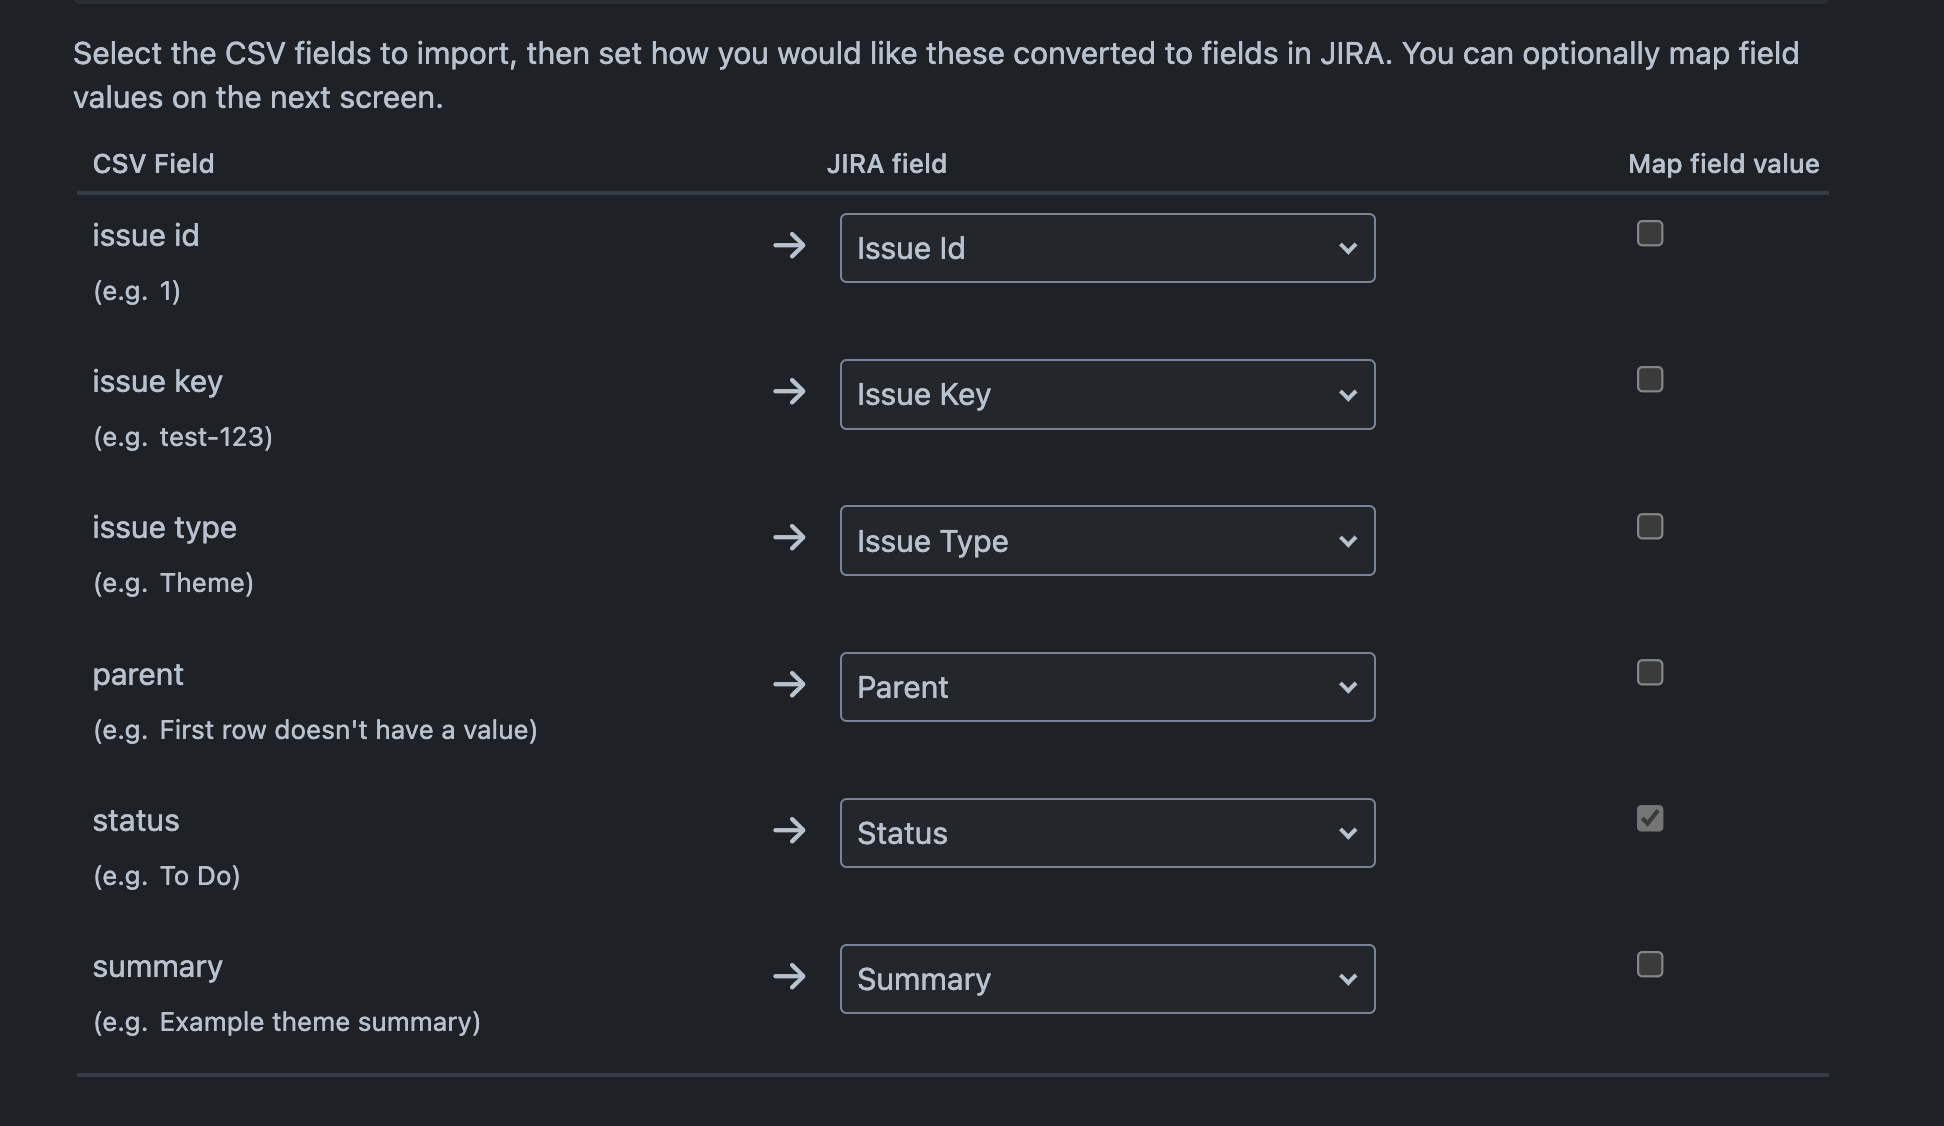
Map the CSV fields with the corresponding Jira fields as below:
Issue id → Issue id
Issue key → Issue Key
issue type → Issue Type
parent → Parent
status → Status
summary → Summary
You can also reference below sample screenshot
Select Next
Verify status values map to your desired statuses in Jira
For example, that the "To Do" status maps to the relevant status in your desired project
Select Begin import
During CSV import, you can also include any other custom fields you wish in the CSV file and import them along with the correct parent-child mapping.
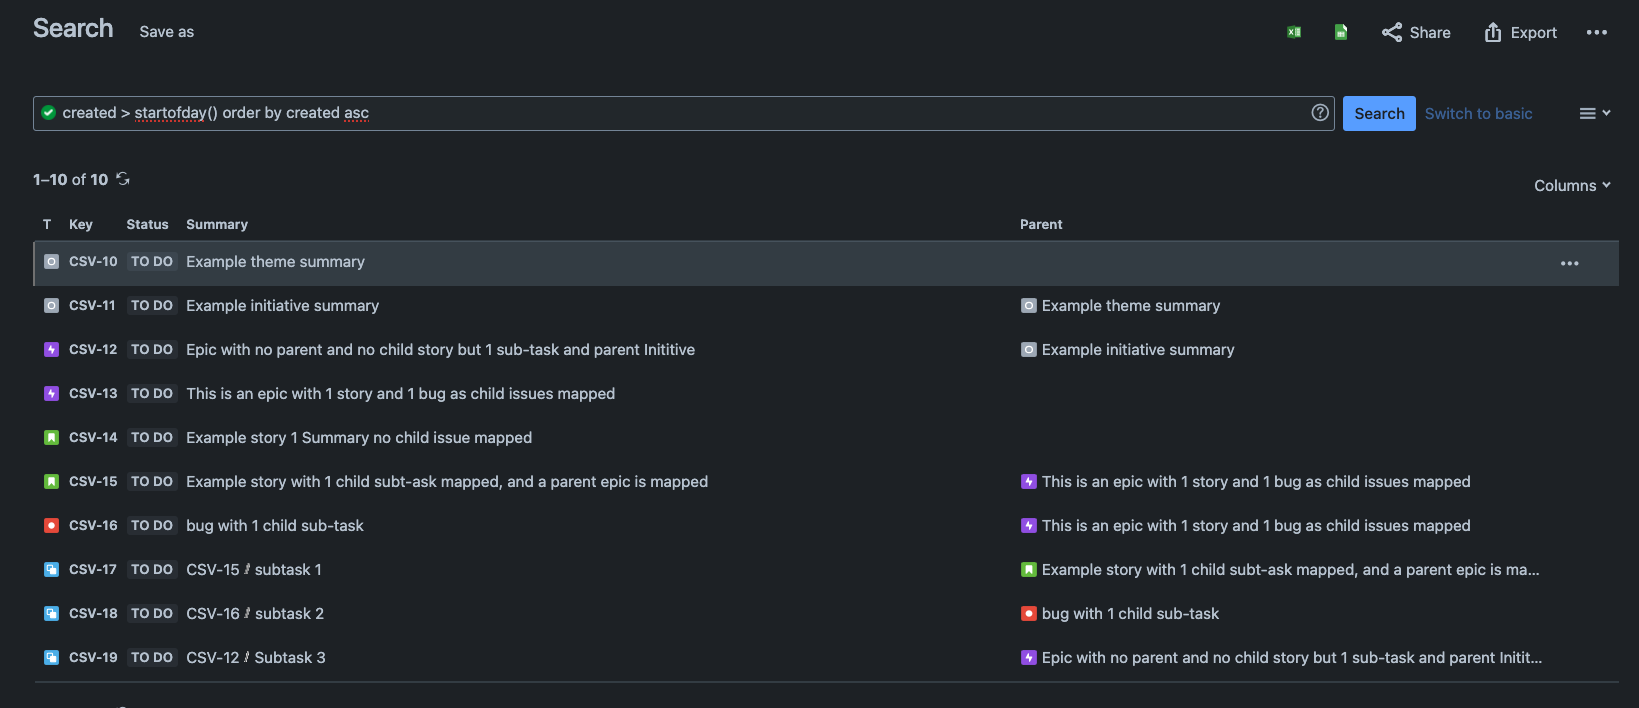
Demonstration of post-import results
If we imported our example issues as listed above, the end result would look like the below screenshot.
Was this helpful?