Jira で CSV ファイルから課題リンクをインポートする方法
プラットフォームについて: Server および Data Center のみ。この記事は、Server および Data Center プラットフォームのアトラシアン製品にのみ適用されます。
Support for Server* products ended on February 15th 2024. If you are running a Server product, you can visit the Atlassian Server end of support announcement to review your migration options.
*Fisheye および Crucible は除く
この記事では、CSV ファイルから Jira に課題リンクをインポートするのに役立つ手順をご案内します。
CSV を通じた課題リンクのインポート プロセスは、「CSV からデータをインポートする」にある、サブタスクのインポート方法と似ています。1 つの列が 1 つの課題に対応し、それが Jira にすでに存在するかどうかは問われません。もう片方が意図するリンク タイプ (例: "X blocks Y") になります。
When importing the issue link via CSV, Jira will consider the link you provide as the Outward link description. You can't choose between Inward or Outward links. This is currently being tracked in: JRASERVER-61571 - Getting issue details... STATUS
CSV ファイルで、リンクを作成したい外向き Link Description の列で、リンクの作成対象の課題の値を含める必要があります。次の例をご確認ください。
Summary,Issue Key,Blocks ,ClonesIssue1,TEST-1 ,TEST-2 , Issue2,TEST-2, ,TEST-3Issue3,TEST-3, , |
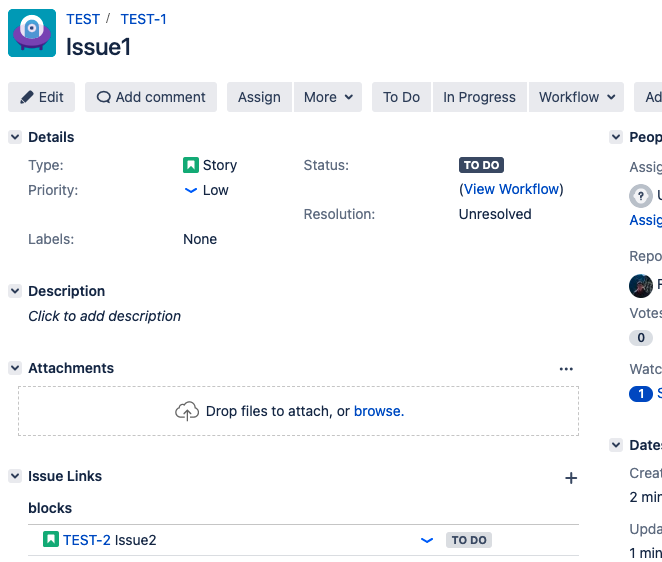
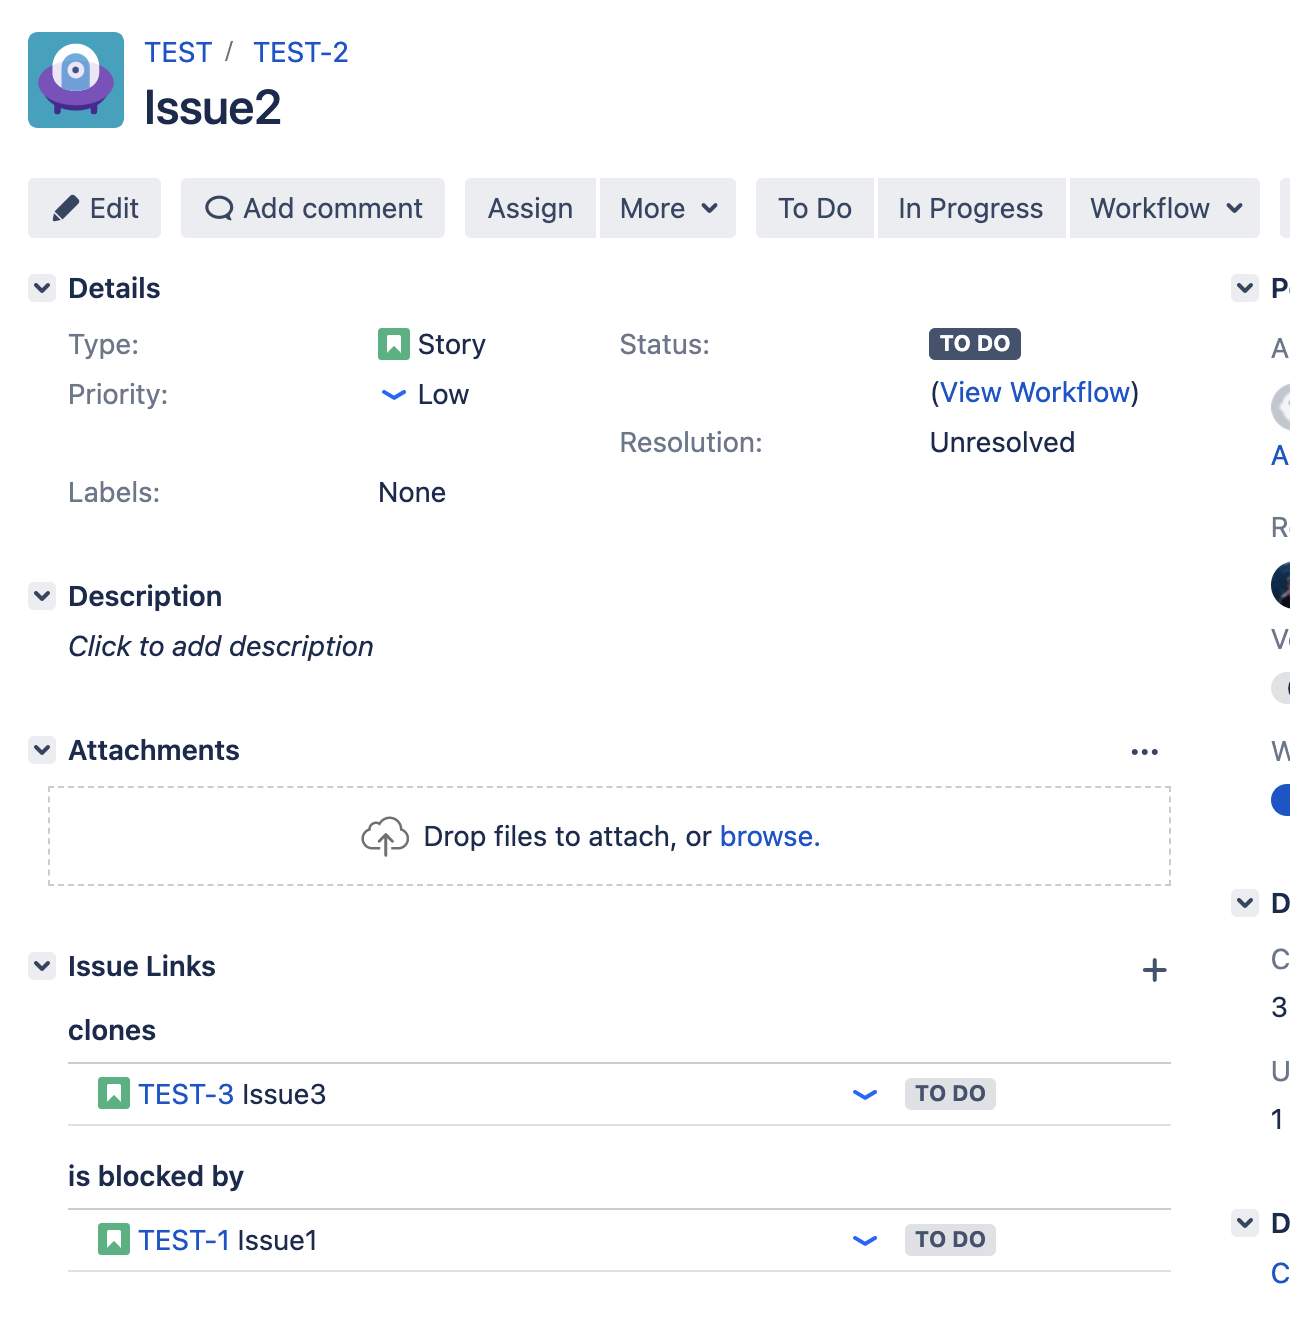
上記の例のように CSV ファイルを準備したら、「CSV からデータをインポートする」の手順を利用してインポートできます。インポートに成功すると、課題間で次のような関係性が確認できます。
- 課題 1 (TEST-1): blocks 課題 2 (TEST-2)
- 課題 2 (TEST-2): clones 課題 3 (TEST-3)
また、内向きリンクが自動的に作成されます。UI では次のようになります。

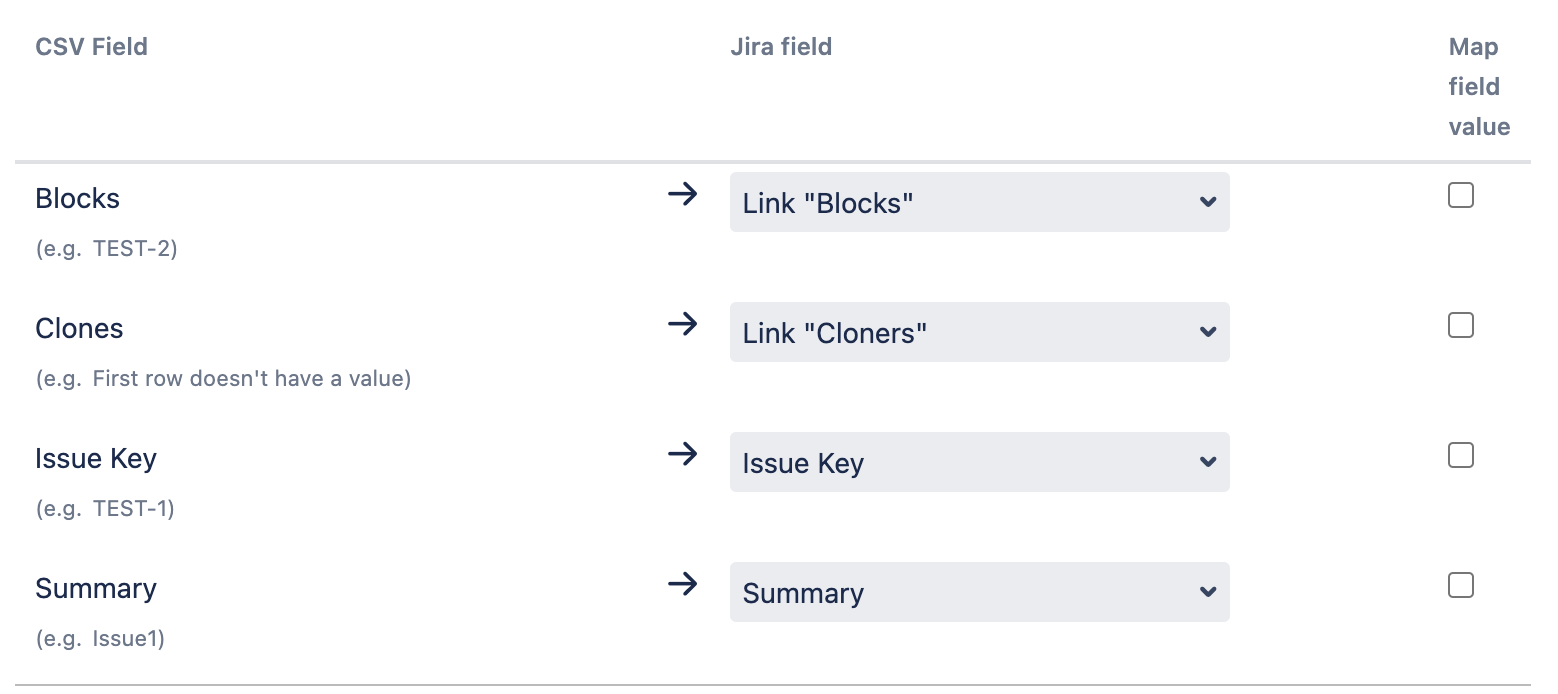
インポート時に作成したい、適切な課題リンク タイプを選択する必要がある点にご注意ください。列名を利用してこれを行うことはできませんが、インポート ツールでの特定に役立つ名前を利用することを推奨します。次の例のように、CSV インポートのフィールドのマッピング ステップで列をリンク タイプに紐付ける必要があります。
If you have multiple links from the same issue to different issues, you can add these in two ways
- 1: Add a new line for each link
Summary,Issue Key,Blocks ,ClonesIssue1,TEST-1,TEST-2,
Issue1,TEST-1 ,TEST-3 ,...
2: Add an extra column
|
Both the above options will create 2 links:
- 課題 1 (TEST-1): blocks 課題 2 (TEST-2)
- 課題 1 (TEST-1): blocks 課題 3 (TEST-3)
Optionally, you can also create new Jira issues with their respective issue links. However, for this you need to correctly specify the issue keys that Jira will create once those issues are imported, otherwise, the issue linking will happen to the wrong issue keys.
The easiest way to identify the next issue keys that will be used for the projects you are importing data against is by creating a new issue on them and checking the number in the issue key. For example, if you create a new issue in the project called TEST and the issue key is TEST-299; The next issue key should be TEST-300.
During this time, you need to ensure that users are not actively creating issues on those projects. We usually see that it's easier to follow a two-step approach in such scenarios:
- まず、1 つの CSV ファイルを利用して課題を作成します。
- 上記の手順で得られた課題キーを使い、別の CSV ファイルを利用して課題リンクをインポートします。
アトラシアンによる支援が必要な場合は https://support.atlassian.com/ja/contact/ からお知らせください。