Add a custom message to the Create Issue screen in Jira server
このページの情報は、Jira アプリケーションのカスタマイズに関連しています。アトラシアン サポートの提供内容にカスタマイズは含まれていないため、アトラシアン サポートでは、このページで記載されている手順に対するサポートを保証できません。この資料は情報提供のみを目的としており、記載内容は自己責任の下で行っていただく必要があります。
また、ファイルの直接変更によって行われるカスタマイズは、アップグレード プロセスには含まれない点にご注意ください。このような変更は、アップグレード後のインスタンスで手動で再適用する必要があります。
プラットフォームについて: Server および Data Center のみ。この記事は、Server および Data Center プラットフォームのアトラシアン製品にのみ適用されます。
Support for Server* products ended on February 15th 2024. If you are running a Server product, you can visit the Atlassian Server end of support announcement to review your migration options.
*Fisheye および Crucible は除く
目的
This article walks through the steps on how to add a Message or Field on the JIRA Create Issue Screen
This KB does not apply for Edit or Transition screens due to the Comment field being added automatically into the screens. See JRA-7323 - Getting issue details... STATUS for more information.
Default Scenario
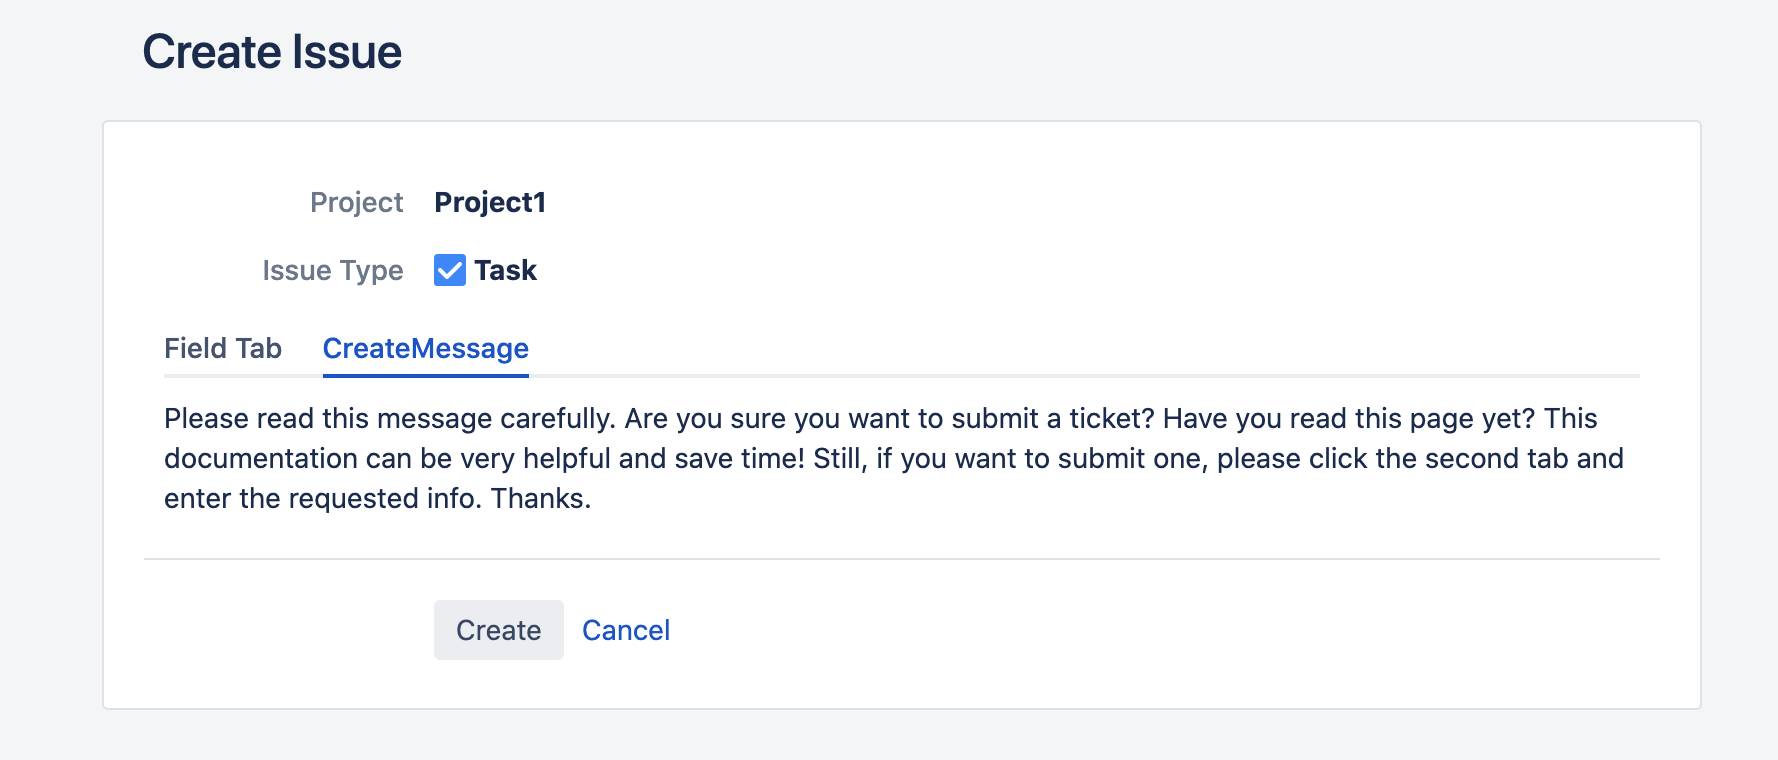
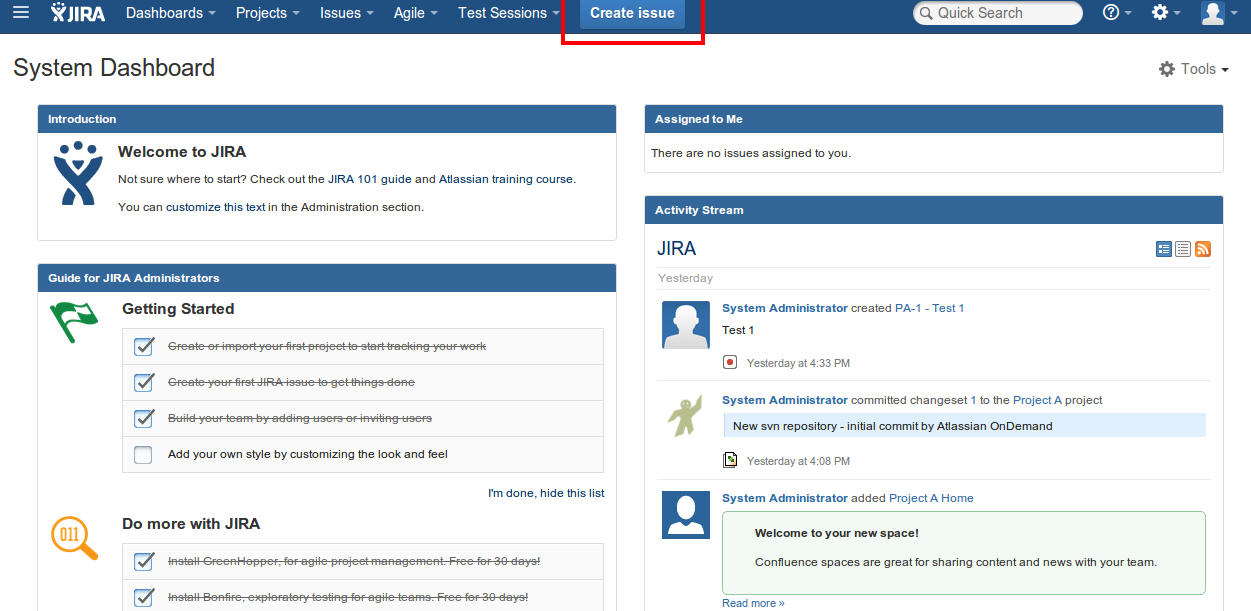
When you click on the "Create Issue" button, the system displays a pop-up window requesting data to submit a ticket.
ソリューション
Please, make sure you have the JIRA Toolkit Plugin installed and enabled in your instance.
In the example below, a user wants to add some important information that needs to be shown to users before they submit a ticket.
Within administrative access, proceed with the following:
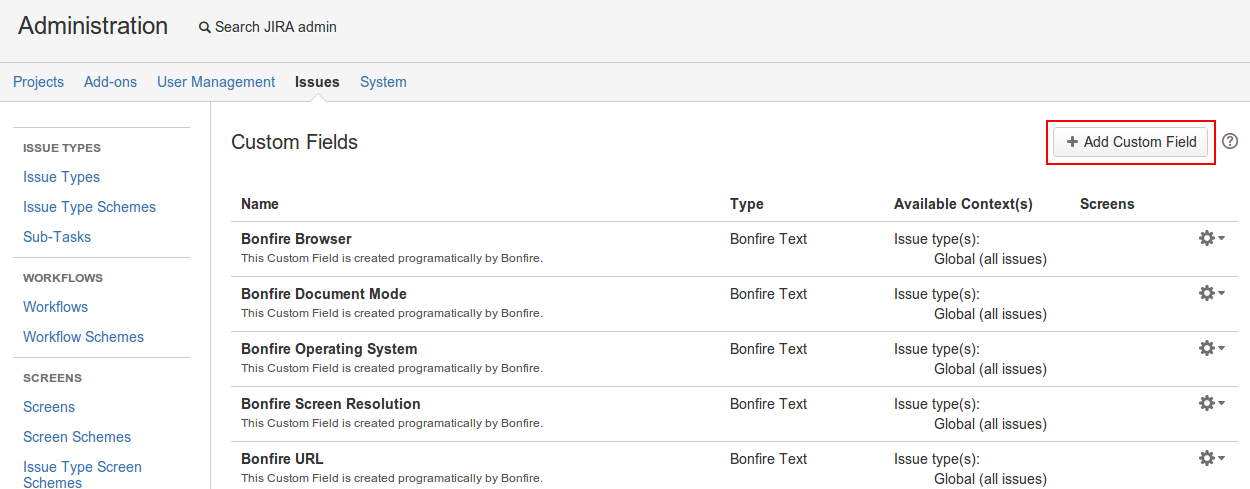
Go to the 'Custom Fields' page and click on the '+ Add Custom Field' button located in the top right corner of the screen:
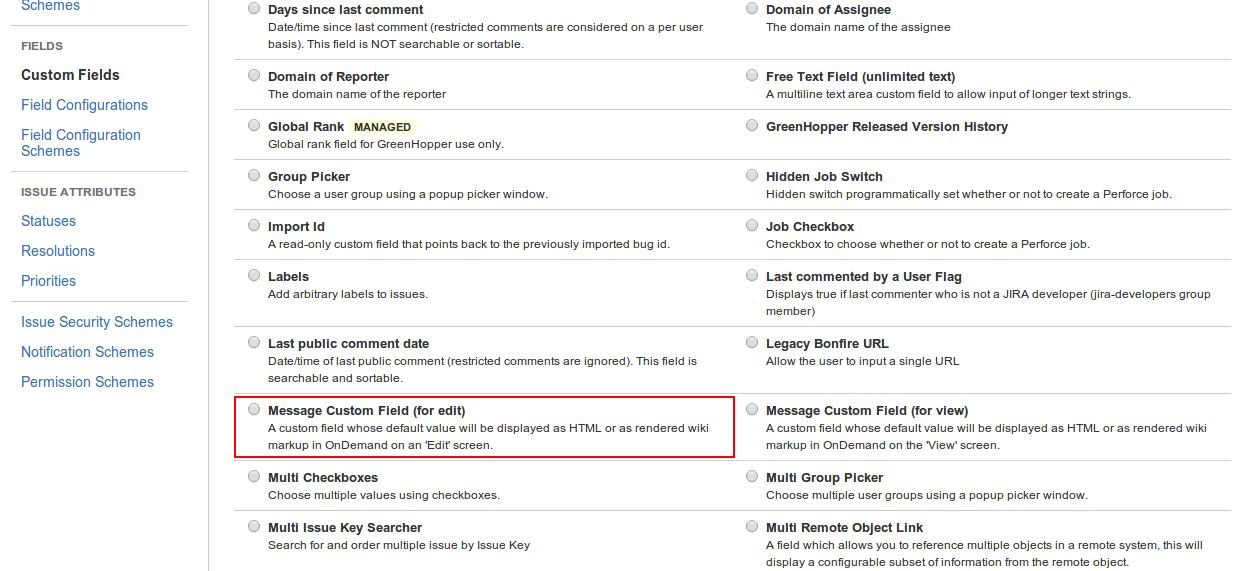
Select the option Message Custom Field (for edit) and click on the 'Next >>' button at the bottom of the page:
Fill in the requested information and click the 'Finish' button at the bottom of the page:
You can choose which 'Issue Types' and which 'Projects' you want this to be applied in.
For this feature to work you have to enable HTML in custom field descriptions which is disabled by default:
Jira Admin -> System -> Enable HTML in custom field descriptions and list item values
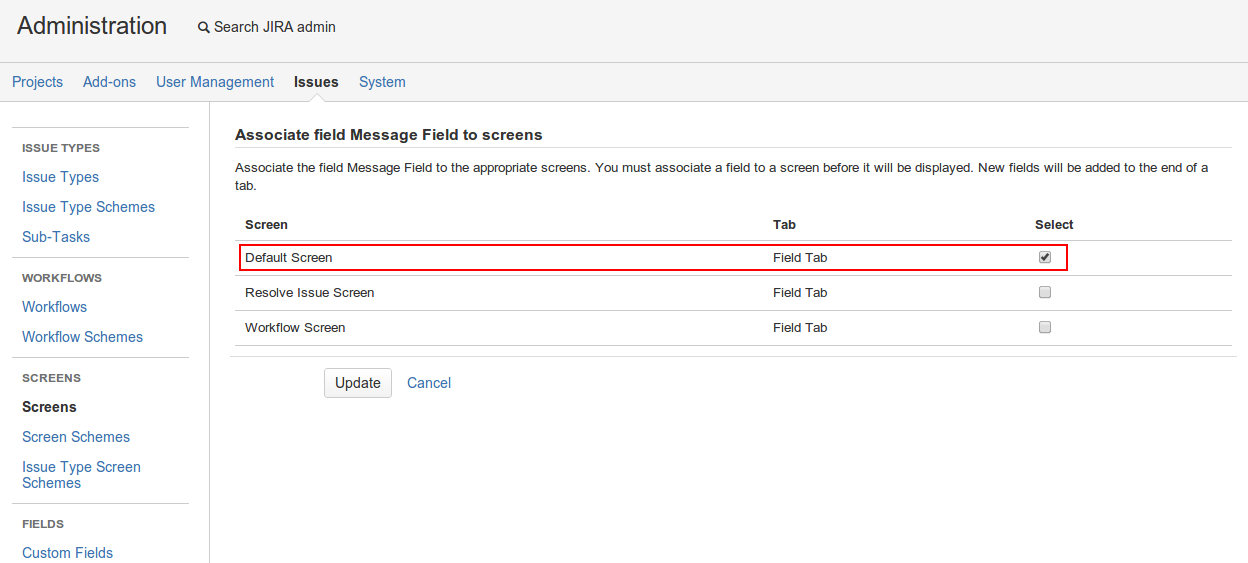
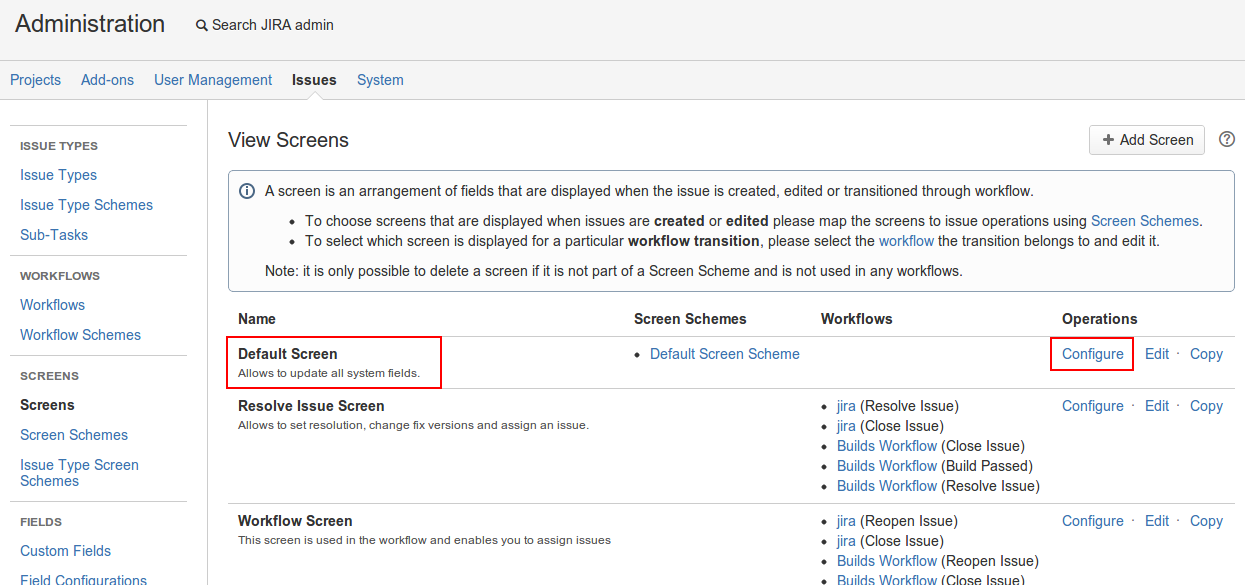
Select the 'Default Screen' and hit the 'Update' button:
You'll be redirected to the 'Custom Fields' page. Find your custom field and click on the 'cog' icon on the right corner of the screen and select 'Configure':
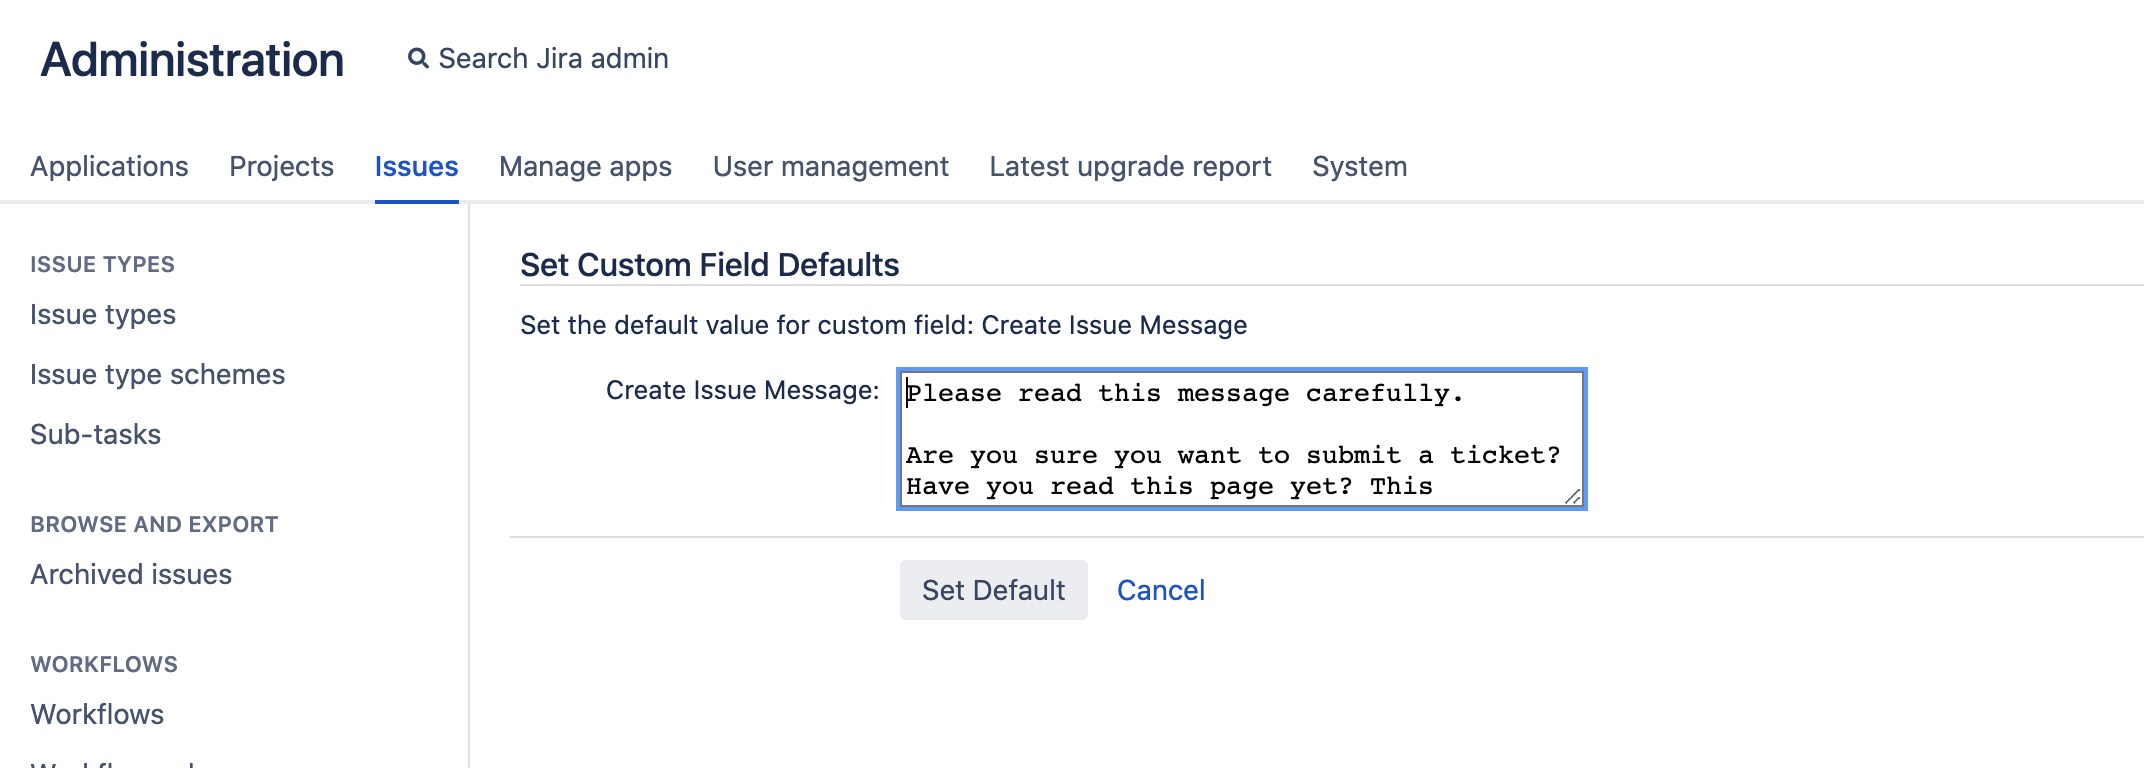
Click on the 'Edit Default Value' link:
Fill in the Message Field with the message of your choice:
Please read this message carefully.

Are you sure you want to submit a ticket? Have you read this page yet? This documentation can be very helpful and save time!
Still, if you want to submit one, please click the second tab and enter the requested info.

Thanks.
Go to the 'Screens' page and click on the 'Configure' option for the Default Screen:
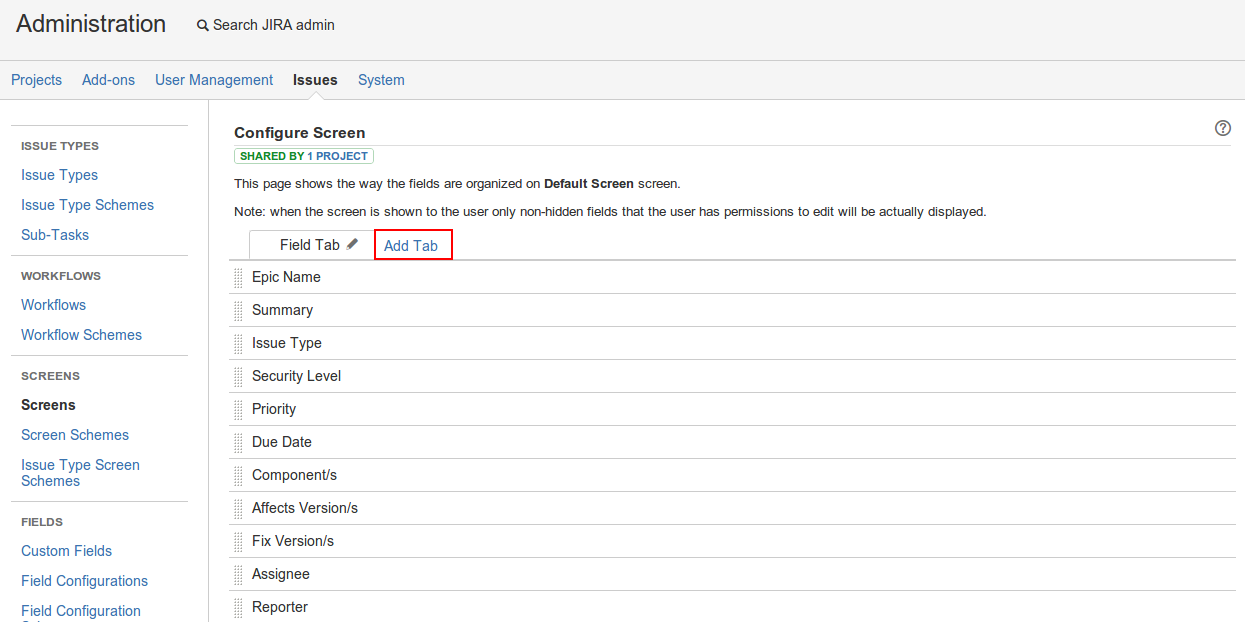
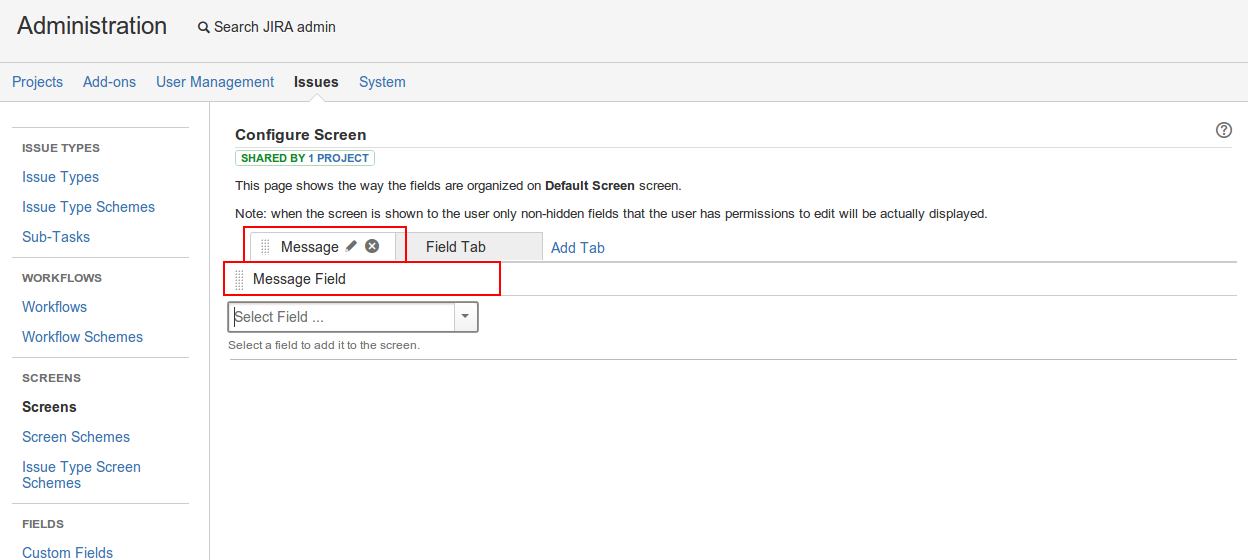
Click on the 'Add Tab' option and fill in the name of the new tab (e.g. Message):
Add the custom field created in Step 1 and drag-and-drop the new tab to the leftmost column:
Go back to your dashboard and click on the 'Create Issue' button at the top center of the page.
Voilá! From now on users will see the message when trying to create a new issue:
ここをクリックして展開...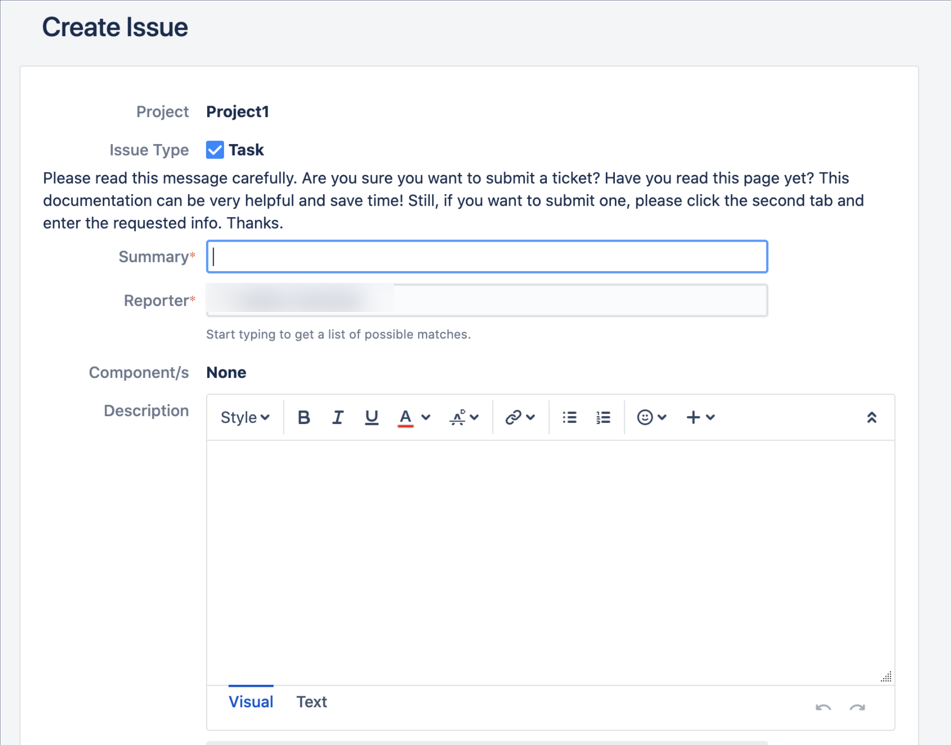
If the field is added in new tab, this is how it will look like: