An unofficial way to monitor a JSM mail handler for errors - Adapted to Jira Data Center
プラットフォームについて: Server および Data Center のみ。この記事は、Server および Data Center プラットフォームのアトラシアン製品にのみ適用されます。
Support for Server* products ended on February 15th 2024. If you are running a Server product, you can visit the Atlassian Server end of support announcement to review your migration options.
*Fisheye および Crucible は除く
要約
This article is based on the workaround An unofficial way to monitor a JSM mail handler for errors. It is intended to help people monitor their Service Management Projects for mail handler errors that may not be noticed until a manual check in the Service Desk mail log.
The original article was created for Jira Service Management Cloud, and this article is an adaption for Jira Service Management Data Center.
環境
Jira Service Management 5.1.0 and higher
![]() For previous versions as JSM 4.20, the attribute statuses is totally ignored and it returns all status type.
For previous versions as JSM 4.20, the attribute statuses is totally ignored and it returns all status type.
Related Suggestions
JSDSERVER-2517 - 課題情報を取得中... ステータス
JSDSERVER-4427 - 課題情報を取得中... ステータス
How does this work?
Jira Service Management has an internal endpoint that programmatically returns the same information we see on the Processing log page. The idea here will be to create a scheduled automation rule that will check this endpoint for error logs, format them and forward this to the email address you specify.
But before we proceed, there are a few things that are important to mention:
It will be necessary to have an Atlassian account with a Jira Service Management license and Project Administrator permission in the Service Projects you want to monitor the mail handlers;
It is highly recommended for this account be a service account because its API Key will be exposed in one of the rule’s components;
- The information returned from the Processing log will be filtered by the Statuses, however, the ability to filter by this attribute was only introduced on Jira Service Management 5.1.0 and higher. For previous versions, check the Additional notes at the bottom of this document.
How can we build this rule?
To ease this guide, we will split it into four parts.
Step 1 - Discovering the endpoint
Each Jira Service Management mail handler has its unique Channel Identifier:
Go to your Jira Admin > Applications
Under "JIRA SERVICE MANAGEMENT" > Email requests
Open your Browser’s Developer Tools and switch to the Network Tab
Click on View logs for the mail handler you want to get the channel identifier
This should record a few endpoint requests, but we need to find one similar to:
/CHANNELXXXXXXXXXXXX?limit=50&page-1When you find it, copy the
CHANNELXXXXXXXXXXXXto somewhere you can easily get it later like a text editor: http://<JIRABASEURL>/rest/jira-email-processor-plugin/1.0/mail/audit/process/CHANNEL5d9ea9146446?limit=50&page=1&_=1686930503792

Step 2 - Generating an API Key / Encoding credentials
Create a Personal Token from a user account with Project Administrator permission and a Jira Service Management license:
- Sign in on Jira using the account that will be used for the automation. Select the profile picture at the top right of the screen, then choose Profile > Personal Access Tokens in the left-hand menu.
- [トークンの作成] を選択します。
- Give a name to the new token.
Optionally, for security reasons, you can set it to automatically expire the token after a set number of days.
The EXPIRES SOON status appears 5 days before the actual expiration date. Once the token expires, you can't reactivate it. You must create a new token.
[作成] をクリックします。


Step 3 - Test the endpoint and the Personal Access Token
Based on the Endpoint from Step 1 and the Personal Access Token, submit a GET request just to test the API. It should return a JSON similar to the image below, listing the entries with status FAILED:
curl -vvvv \
-H "Authorization: Bearer MTc0Njc1NzY5MjU5OrV8hb09qvJZkGavTN1wBCdGMWak" \
-X GET \
"http://<jira base url>/rest/jira-email-processor-plugin/1.0/mail/audit/process/CHANNEL5d9ea9146446?limit=50&page=1&to=&statuses=FAILED"
Step 4 - Build the automation rule
1) Go to Jira Admin > System > Automation and create a new rule for the Jira Service Management project.
2) Scheduled Trigger: The frequency will be up to you, but for the sake of the example, let’s set it to run every hour.

3) New Action: Select the option "Send web request".

- Jira URL will be the target of the Webhook;
- The original article does use Automation for Jira variables to prepare the WebHook URL. The Automation for Jira Data Center does not have variables, so we will need to add the content of the variables directly in the URL (the status that should be selected and the "from" argument, to list the events starting from the last hour);
Web request URL:
http://<jira base url>/rest/jira-email-processor-plugin/1.0/mail/audit/process/CHANNELXXXXXXXXXXX ?limit=50&page=1&to=&statuses=FAILED&statuses=FAILURE&statuses=SKIPPED&statuses=REJECTED&statuses=FAILED_DECODING&from={{#now}}func=minusHours(1), format="toMillis"{{/}}Replace
CHANNELXXXXXXXXXXXwith Channel Identifier we got at the end of Step 1 (from our previous sample, CHANNEL5d9ea9146446)&from={{#now}}func=minusHours(1), format="toMillis"{{/}} is being used as a time window to avoid retrieving old errors (from our sample, we are getting the events from the last hour)
&statuses=FAILED&statuses=FAILURE&statuses=SKIPPED&statuses=REJECTED&statuses=FAILED_DECODING was added so we only retrieve email logs with the mentioned alert statuses.
Headers:
Key: Authorization
Value: Bearer MTc0Njc1NzY5MjU5OrV8hb09qvJZkGavTN1wBCdGMWak (Same credentials saved at the end of Step 2)
HTTP Method: GET
Wait for response: Flagged
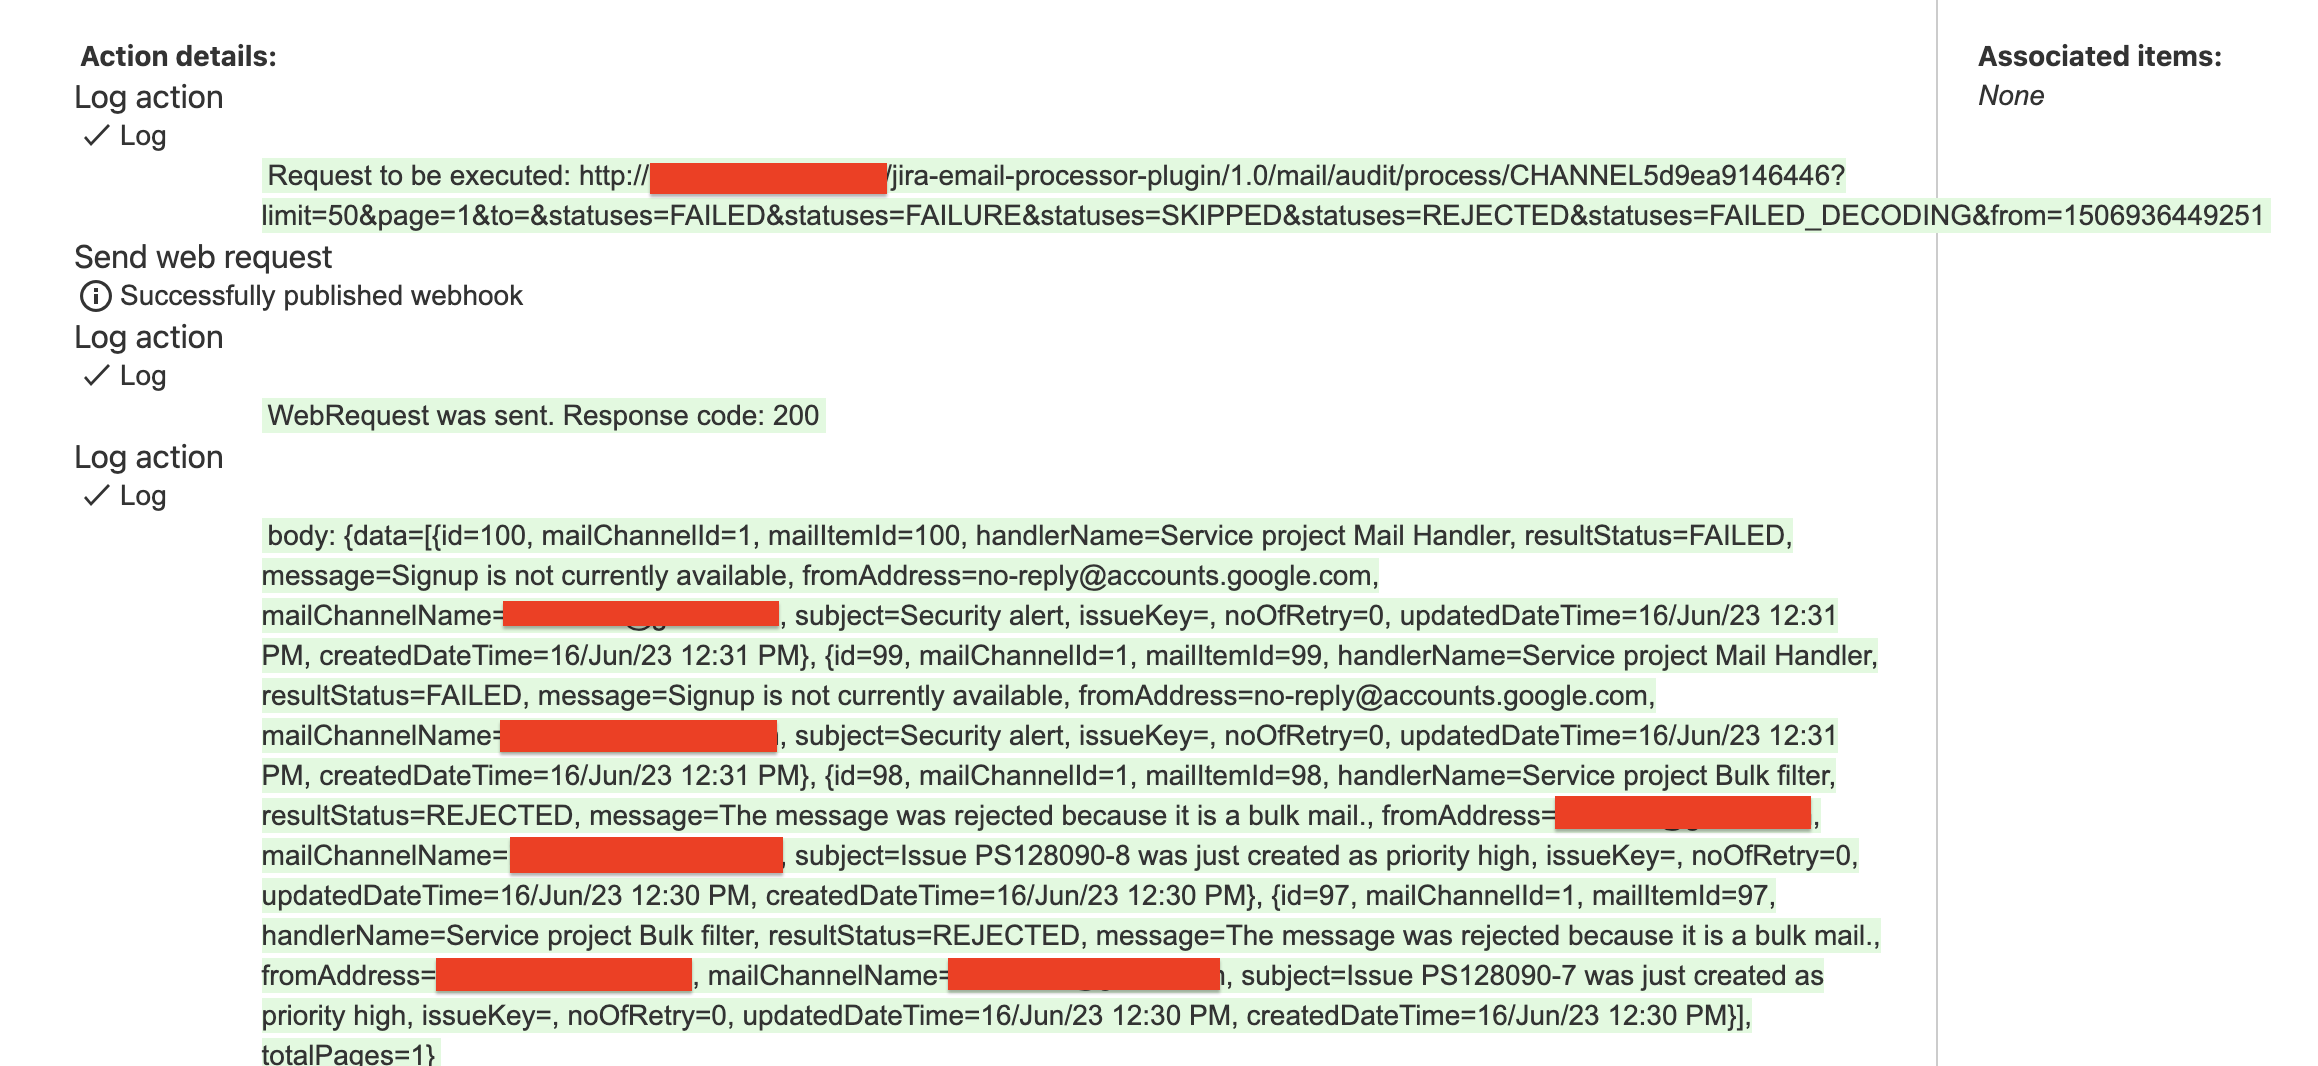
Before the action to send the webhook, you can add another Action to show which will be the request executed, to better audit the execution of the rule:


4) Advanced Compare Condition: A simple verification to avoid sending notifications for webhooks that had not returned content.

First value: {{exists(webhookResponse.body.data.first)}}
The smartvalue function
exists()returns true if any content is returned for thewebhookResponse.body.data.firstsmartvalue
Condition: equals
Second value: true
Use the Action "Log Action" to improve the content of the audit log, when the rule is running:
WebRequest was sent. Response code: {{webhookResponse.status}}
Response received: {{webhookResponse.body}}
5) Send Email: The last component of our rule, responsible to notify the administrators about the errors in your Jira Service Management mail handlers.

To: Here you can select Jira groups or add email addresses manually
Subject: {{webhookResponse.body.data.first.mailChannelName}} - Mail logs (suggestion)
The smartvalue is getting the mail handler address retrieved in the Send Web Request action and appending it to the subject of our notification
- Sample Content:
{{#webhookResponse.body.data}}
<b>Error Message</b>: {{message}}
<b>Sender</b>: {{fromAddress}}
<b>Subject</b>: {{subject}}
<b>Event Time</b>: {{createdDateTime}}
---

{{/}}
Note: If you want to learn more about it, you can check Smart Values - Example with lists.
The email received:

6) Finish your rule by giving it a name, and be sure you leave it enabled.
その他の注意事項
When using Jira Service Management version up to 4.20.x, it is not possible to send the web request using the Statuses filter. Thus, the Web Request will return all the results (SUCCESS, FAILED, etc).
3) New Action: Select the option "Send web request" - without the statuses filter
http://<jira base url>/rest/jira-email-processor-plugin/1.0/mail/audit/process/CHANNELXXXXXXXXXXX?limit=50&page=1&to=&from={{#now}}func=minusHours(1), format="toMillis"{{/}}We will need to validate if at least one result contains "FAILED" before sending the email:

5) Then Send Email: The last component of our rule, responsible to notify the administrators about the errors in your Jira Service Management mail handlers.
