プロジェクトにユーザーを追加する
As a project admin, you can add groups or individuals to various roles in your project. Roles are project-specific, so adding a group or individual user will only affect your project. You can also use the same process to remove access from groups or users. It's important to note that you can only add existing groups and users, and you need to be a Jira Work Management admin to create the groups or users.
プロジェクトにユーザーを追加する
ここでは、ユーザーの一人 (例: Emma) を管理者ロールに追加します。これにより、彼女がプロジェクト管理を手伝えるようになります。これらの手順を実行するには、プロジェクト管理者である必要があります。
This describes the process of adding users to classic projects. If you're in a next-gen project and don't see the People option in project settings, check out Add people to next-gen projects.
まだプロジェクトに移動していない場合、[プロジェクト] メニューを選択し、プロジェクトを見つけます。
- プロジェクトのサイドバーから [プロジェクト設定] > [ユーザー] を選択します。
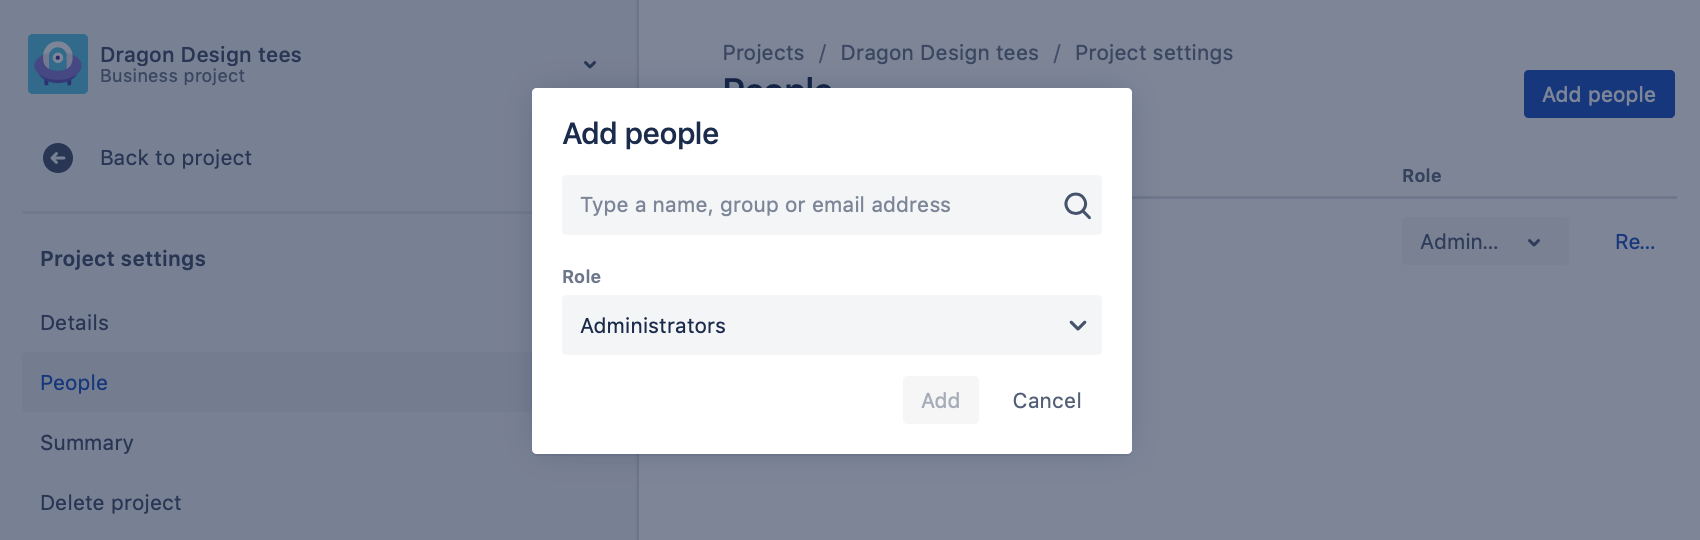
- [ユーザーを追加 ] を選択します。
- Emma を検索します。
ユーザー追加ダイアログには複数のユーザーやグループを追加できます。誤って追加した場合は削除できます。 - Administrators ロールを選択し、[追加] を選択します。
Emma にプロジェクトへの管理者アクセス権が付与されます。同じ方法でユーザーやグループを Administrators ロールに追加できます。ユーザーにプロジェクトへの制限付きアクセス権を付与したい場合 (例: 自身に割り当てられた課題のみを閲覧可能)、管理者に新しいプロジェクト ロールの作成を依頼できます。
よくできました! Emma をプロジェクトの管理者として追加しました。
You've now completed the tutorial for project administrators. We suggest that you continue on to the tutorial for Jira Core users guide, so you have a better understanding of how your team can use Jira Work Management.