Getting started with PHP and Bamboo
This page describes how to use Bamboo to get rapid feedback on your PHP project. The worked example builds a Bamboo plan where a developer commits code and Bamboo responds by:
- Connecting to the code repository
- Checking out the source code
- Compiling the code
- Running unit and integration tests
- Reporting back test results
このページの内容
関連ページ
はじめる前に知っておくべき情報
This introduction assumes you are using Bamboo Server installed on your local network. You need to make sure you or your company administrator have properly installed and configured Bamboo for running plans.
You will also need to install:
- The PHP framework
- PHPUnit testing framework
Step 1: Install the PHP base code framework
In order to get full functionality from Bamboo and PHP, you will need to install the PHP base code framework. If you are using Ubuntu, then use the following command to install PHP.
$ sudo apt-get install php5-cli参考資料
Step 2: Install PHPUnit
PHPUnit.de provides an excellent PHP archive resource called PHAR.
$ wget https://phar.phpunit.de/phpunit.phar  // download the PHPUnit packages
$ chmod +x phpunit.phar  // make PHPUnit executable
$ mv phpunit.phar /usr/local/bin/phpunit  // copy PHPUnit into your path
$ phpunit --version  // double check it's installed completely
If you prefer, you may use Composer or PEAR to download and install PHPUnit along with its dependencies, however these approaches are beyond the scope of this introduction.
Step 3. Create a project and plan
1. Create a new project
A Bamboo plan defines the details of your continuous integration workflow. You use a plan to identify the source code repository, specify the tasks to run in your build, and when to trigger a build. Each plan belongs to a project. You can add a plan to an existing project or create a new project. In this example, you create both a new project and a new plan in that project.
- プランを作成できる権限を持つユーザーとして Bamboo インスタンスにログインします。
- Select Create > Create plan from the menu bar.
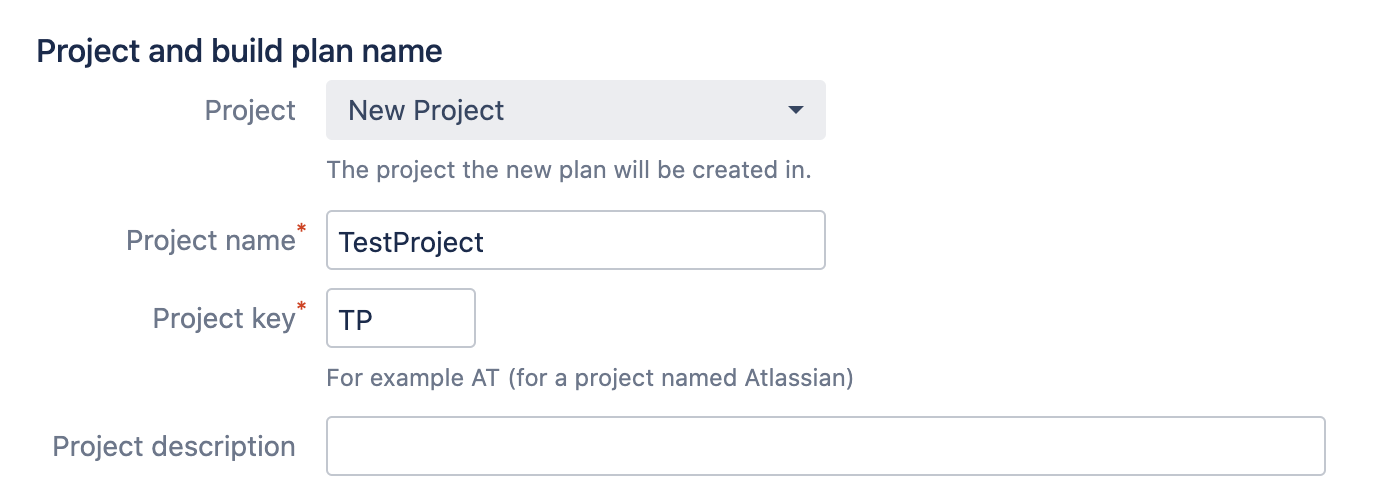
Every plan belongs to a project. We don't have a project yet, so select Project > New Project, and enter details for both the project and plan.
プロジェクト
New Project
プロジェクト名
TestProject
プロジェクト キー
TP
2. Configure the plan details
Bamboo needs to know the Plan name, Plan key and a brief description of what the plan is for. See Configuring plans for more details.
プラン名
チュートリアル
プラン キー
TUT
説明
Build Atlassian tutorials
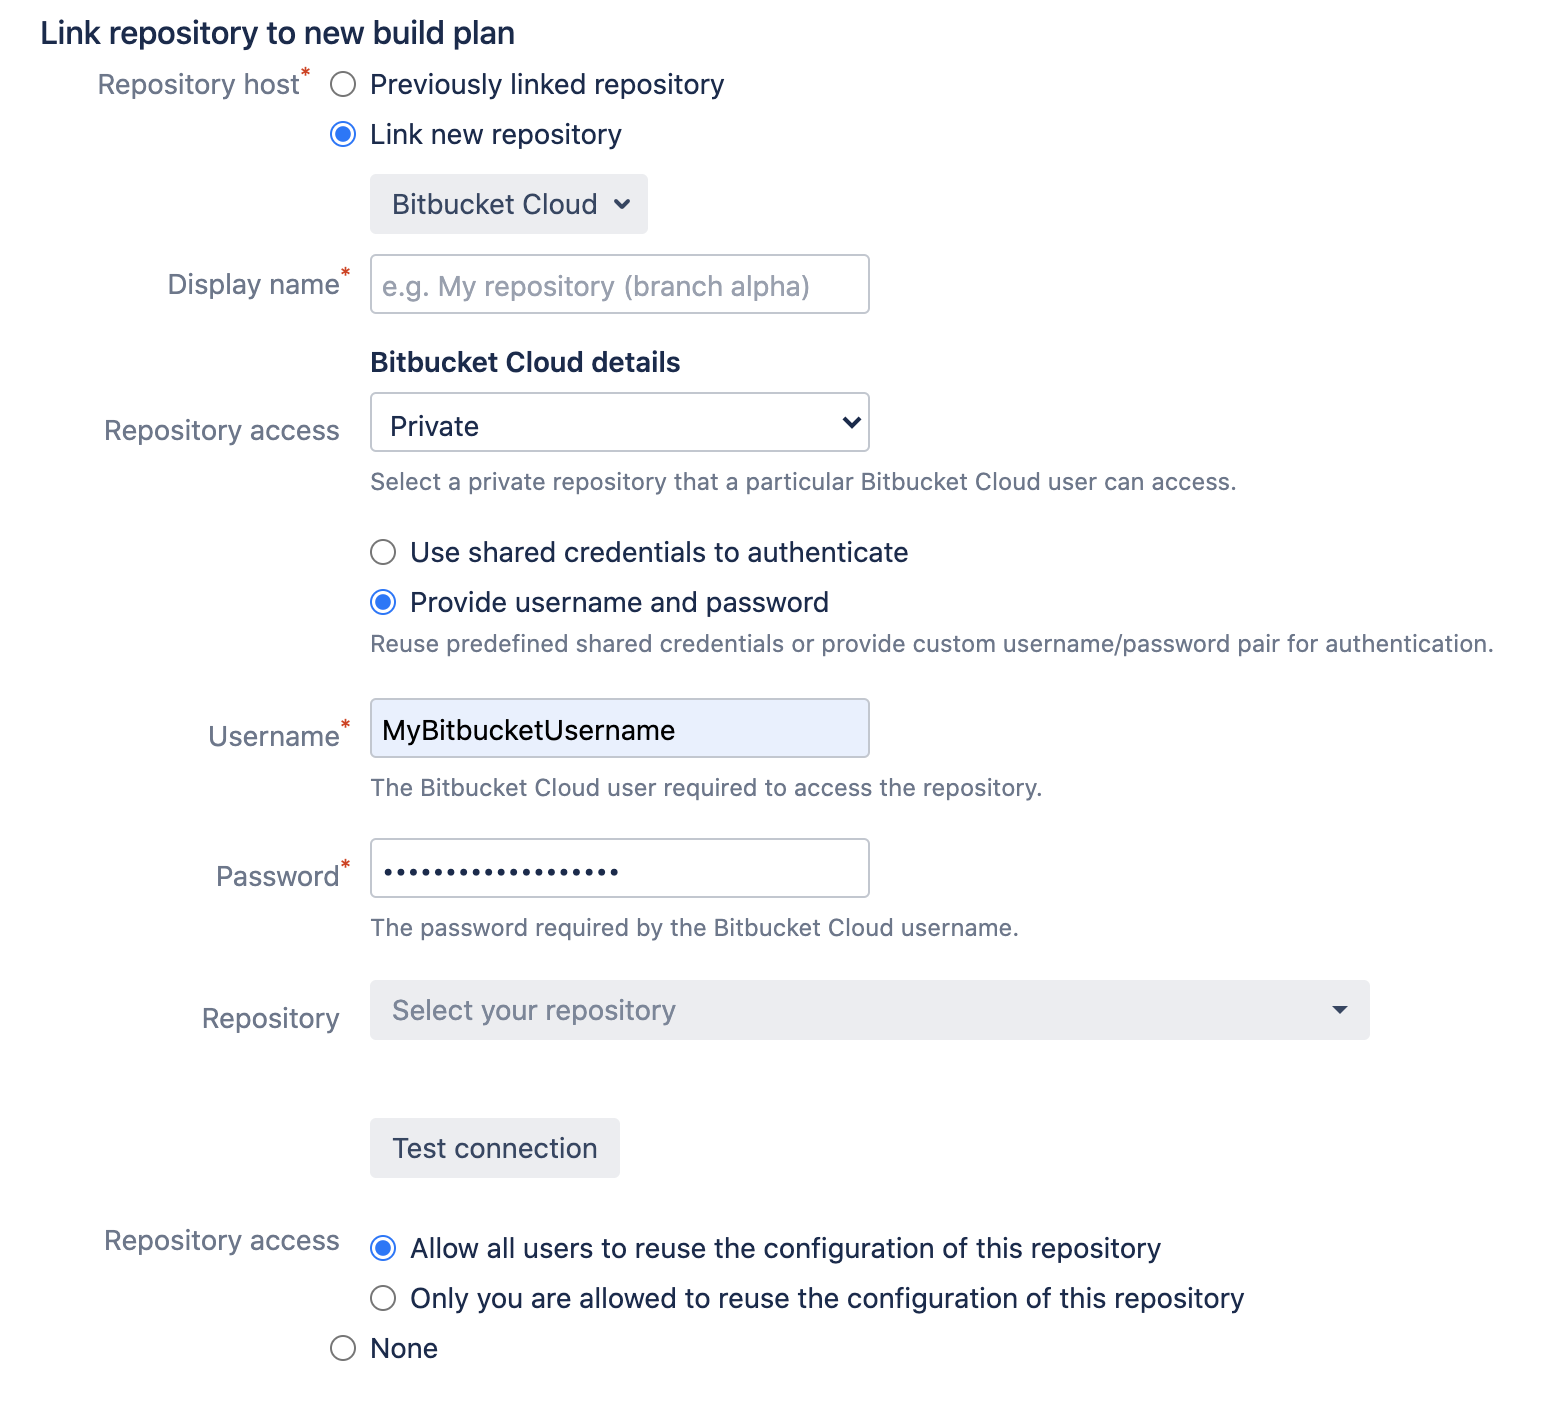
3. ソース リポジトリを選択する
Bamboo needs to know where the source code repository is located, and needs access to the repo so that it can check out the code when it runs a build. See Linking to source code repositories for more details.
ソース リポジトリ
Bitbucket
ユーザ名
Your Bitbucket username
パスワード
Your Bitbucket password
リポジトリ
atlassian_tutorial/hellworld (git)
ブランチ
master
Step 4. Configure tasks
プランごとに 1 つ以上のタスクを指定する必要があります。タスクによってプランの実際の作業が実行されます。
ソース コード チェックアウト タスク
新しく作成された計画には、先ほど指定したソース リポジトリからソース コードを取得する既定のソース コード チェックアウト タスクがあります。
詳細は「コードのチェックアウト」をご確認ください。
Unit testing
Unit testing for PHP is completed using the PHPUnit testing framework. This is a port of the popular Java JUnit testing framework to PHP. PHPUnit provides also produces test results in the JUnit XML format required by Bamboo.
You will need to add a server executable capability to run PHPUnit:
- In the upper-right corner of the screen, selectAdministration> Overview.
- From the sidebar, under Build resources, select Server capabilities.
On the Server capabilities page, select Add capability and complete the configuration as follows:
機能タイプ 実行可能ファイル タイプ PHPUnit パス Path to the PHPUnit executable. 例:
/usr/bin/phpunit-x.x- Select Add to add the PHPUnit capability.
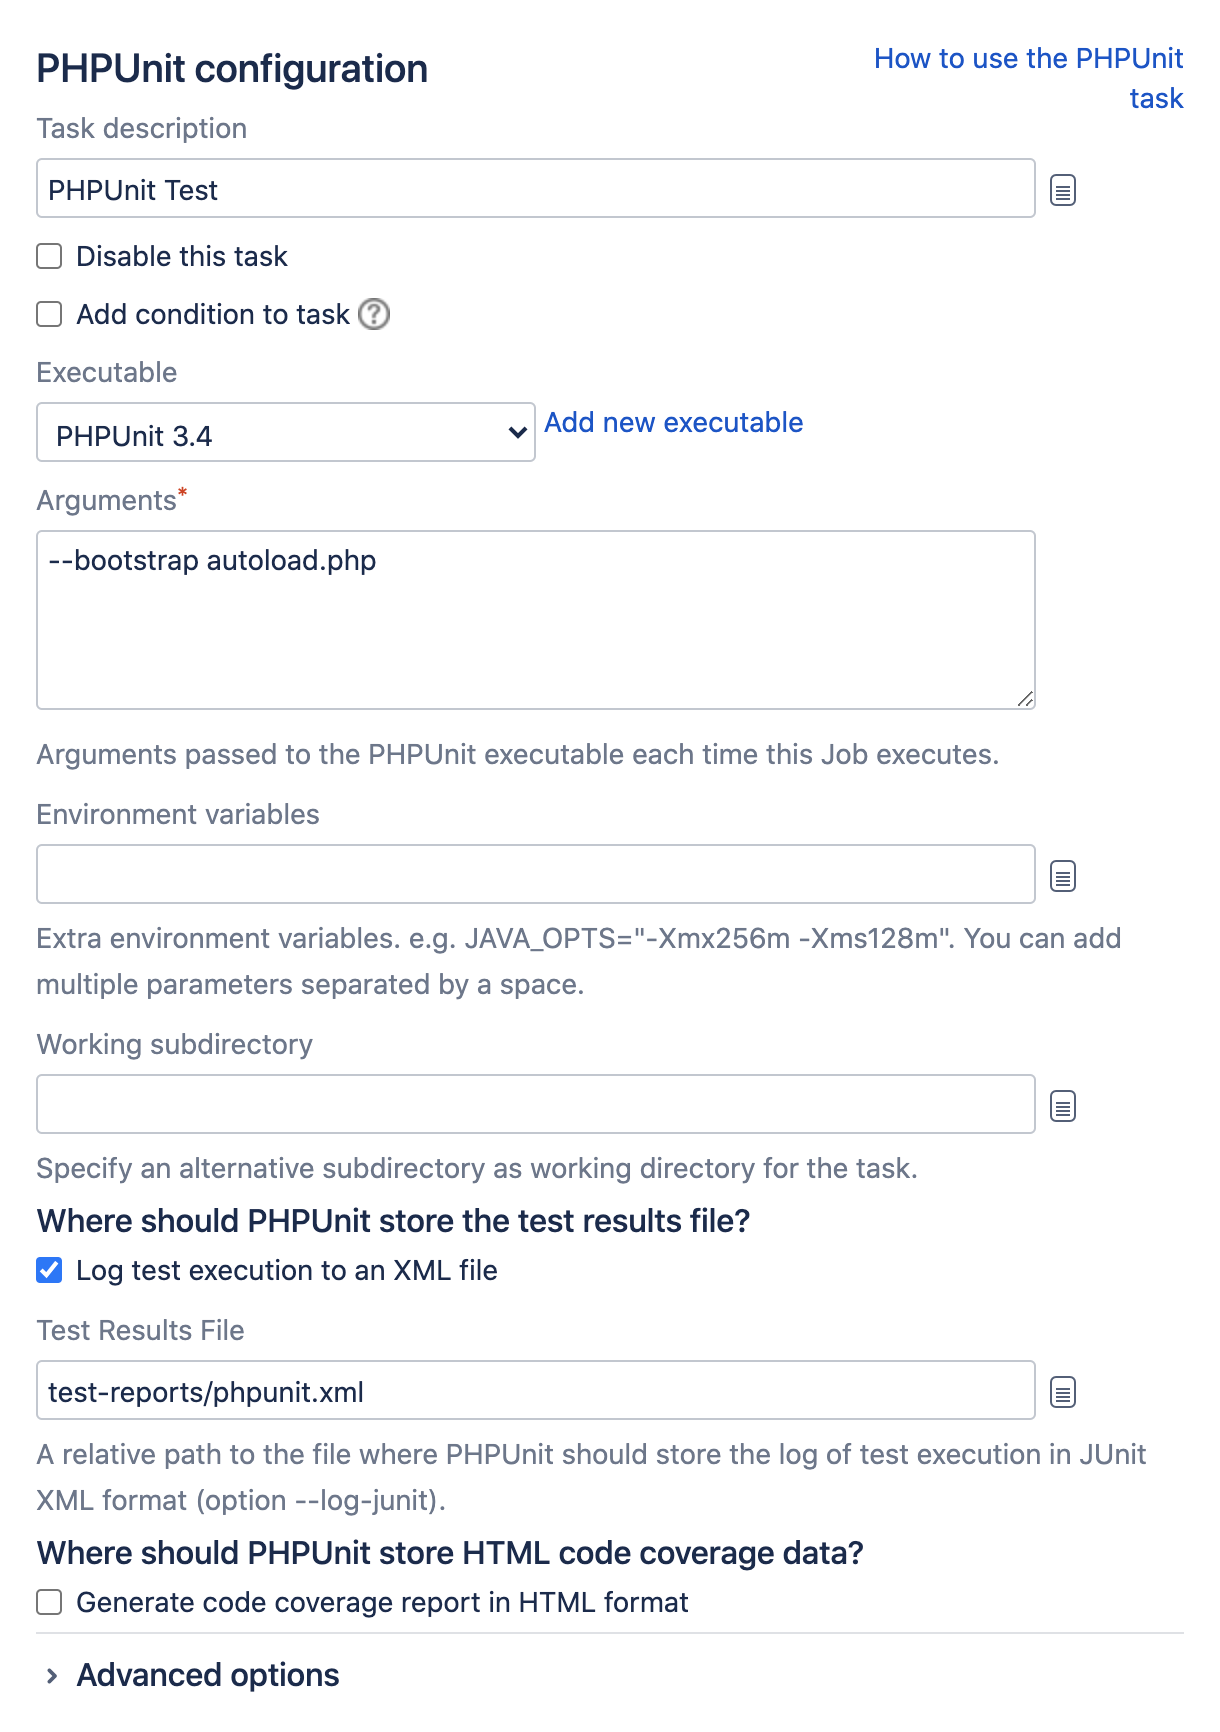
Now you can create a PHPUnit testing task:
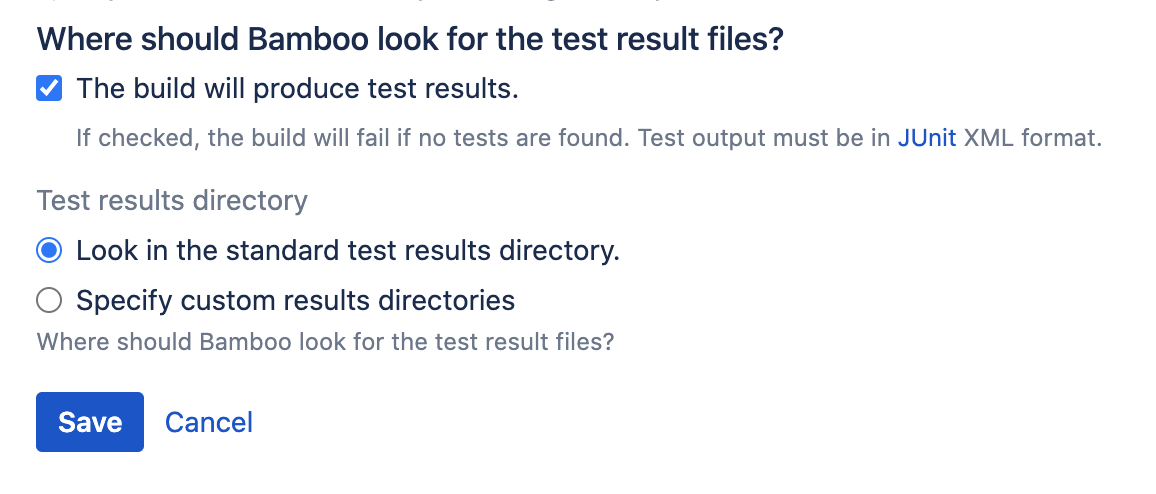
テスト結果を取得する
ビルダー タスクによってコードがコンパイルされるとテストが実行されます。上記の各ビルダー タスクには、テスト結果が生成されること、およびテスト結果の保存場所を Bamboo に通知するセクションがあります。プロジェクト ディレクトリで従来の構造を使用していない場合は、結果が保存される場所を指定できます。
See Jobs and tasks for details.
Step 5: Go!
Enable the plan, and select Create.
You should see the plan run. The 'Plan summary' tab will report whether the build succeeded or not.
ソース コード リポジトリの適切なディレクトリでのテストは、ビルドの一部として自動的に実行され、そのテスト結果は Bamboo に表示されます。
これで、リポジトリに変更をコミットするたびに、Bamboo がソース コードをビルドしてテスト結果をレポートします。
フィードバックを取得する
Bamboo のダッシュボードにビルド結果の要約が表示されます。
ビルドに関する詳細情報は、次の方法で入手できます。
- 1 つ以上の計画のビルド結果をウォールボードで確認できます。
- ビルド結果に関する通知をメール、インスタント メッセージ (IM)、RSS フィードで受信できます。
- 計画に関するビルド統計や、ビルドにコードを提供している開発者に関するビルド統計を取得できます。
- 結果を掘り下げて、ビルドをトリガーしたコードの変更内容と、そのビルドに対して実行されたテストを確認できます。
See Getting feedback for details.


