How-To change the Confluence Dashboard through JIRA
Using this How-To will enable you to change the Dashboard that shows up when you access Confluence through JIRA.
In order to do so, you need to make some changes in both JIRA and Confluence.
JIRA Changes:
First of all, you need to create a group in JIRA called "confluence-users".
Tap "g+g" top open up the Administration search window, and search for "Groups"
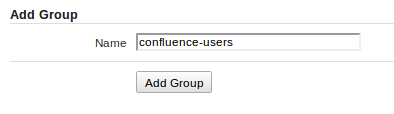
In the following window, look up the "Add Group" text box, and create the group.
After you have created the group, you will need to add all current users of your JIRA instance (and which have application access to Confluence) to this group.
Near the top of the "Groups" page follow the "Bulk Edit Group Members" link.
In the next screen you will be presented with the following section:

Select the group you want to add members to in the left box.
Under the right column, click the User Picker icon to pull up the User Picker

Assuming you want to add all your users to the group, select "Any" from the drop down menu under "In Group".
Check the box next to the grayed out "Usernames" to select all users meeting the Any group requirement.
To finish up your selection, press the "Select" button in the bottom section of the User Picker.

Your selection will show up in the right column, clicking the "<< Join" button will add the selection to the group(s) you have selected to the left

In order to make sure newly created users will get added to this group automatically, tap "g+g" and search for "Global Permissions".
In the bottom section of the next screen, select "JIRA Users" from the Permission drop down menu, and "confluence-users from the Group drop down menu and press "Add".

Confluence Changes:
For the next step you have to go to your Confluence instance.
Create a new space, and model the home page of that space to be your start page for Confluence.
Once you have completed the home page, go to the top of the window, click on the "Browse" drop down and select "Space Admin". In the left section of the window you will see several configuration options. Under the "Security" section, select "Permissions" which gets you to the space permission page.


Here you will see which users and/or groups groups have been configured to which permissions. Click any of the "Edit Permissions" buttons, and add "confluence-users" to the "Groups" section, and press "Add"
After you added the group, in the same screen, adjust the permissions to your liking, and finalize it by pressing the "Save All" button.

Now, for the last step, select "Confluence Admin" from the drop down that appears when you click the cogwheel in the top right corner of the window. In the next screen, select "Configuration, followed by "General Configuration".


In the far right of the screen you will see a little link "Edit", click it to change the general configuration. After doing so, you will see a header saying "Site Homepage" with a drop down next to it.
From the drop down, select the space key of the space you created earlier as your new Confluence Dashboard, scroll all the way down on the page, and press the "Save" button.

And your Confluence Dashboard has been changed!