クラウド移行アシスタント アプリ (CCMA/JCMA) の認証トークンを更新する方法
プラットフォームについて: Server および Data Center のみ。この記事は、Server および Data Center プラットフォームのアトラシアン製品にのみ適用されます。
Support for Server* products ended on February 15th 2024. If you are running a Server product, you can visit the Atlassian Server end of support announcement to review your migration options.
*Fisheye および Crucible は除く
要約
サーバーからクラウドに移行するために Jira Cloud Migration Assistant (JCMA) または Confluence Cloud Migration Assistant (CCMA) を再実行しようとしたときに移行計画が失敗し、サーバーがクラウド サイトに接続できるよう認証トークンの更新が必要になる。
概要
Atlassian Security has recently updated the guidelines for reducing the container token expiry, a change that has been embraced by all platform teams. To mitigate any potential Migration failures resulting from this shortened expiry period, a TTL check has been implemented to verify the token longevity of 19 days. For both JCMA and CCMA, authentication tokens are set to expire in 21 days.
Let's consider a scenario where the token is refreshed today. After 16 days, the Migration Assistant will show a warning message about the container token expiring in 5 days, and on the 21st day, the preflight check will block, saying the container token has expired.
In order to avoid any precheck blockers associated with token expiration, it is advisable to renew the token prior to its expiry by following the steps below:
環境
このメッセージはクラウド移行アシスタント アプリ (JCMA と CCMA) に適用されます。
If the steps below don't work, make sure to use a private tab on your browser to avoid local caching issues.
Renew Token in Jira Cloud Migration Assistant(JCMA)
In Jira Server or Data Center, go to Settings > System.
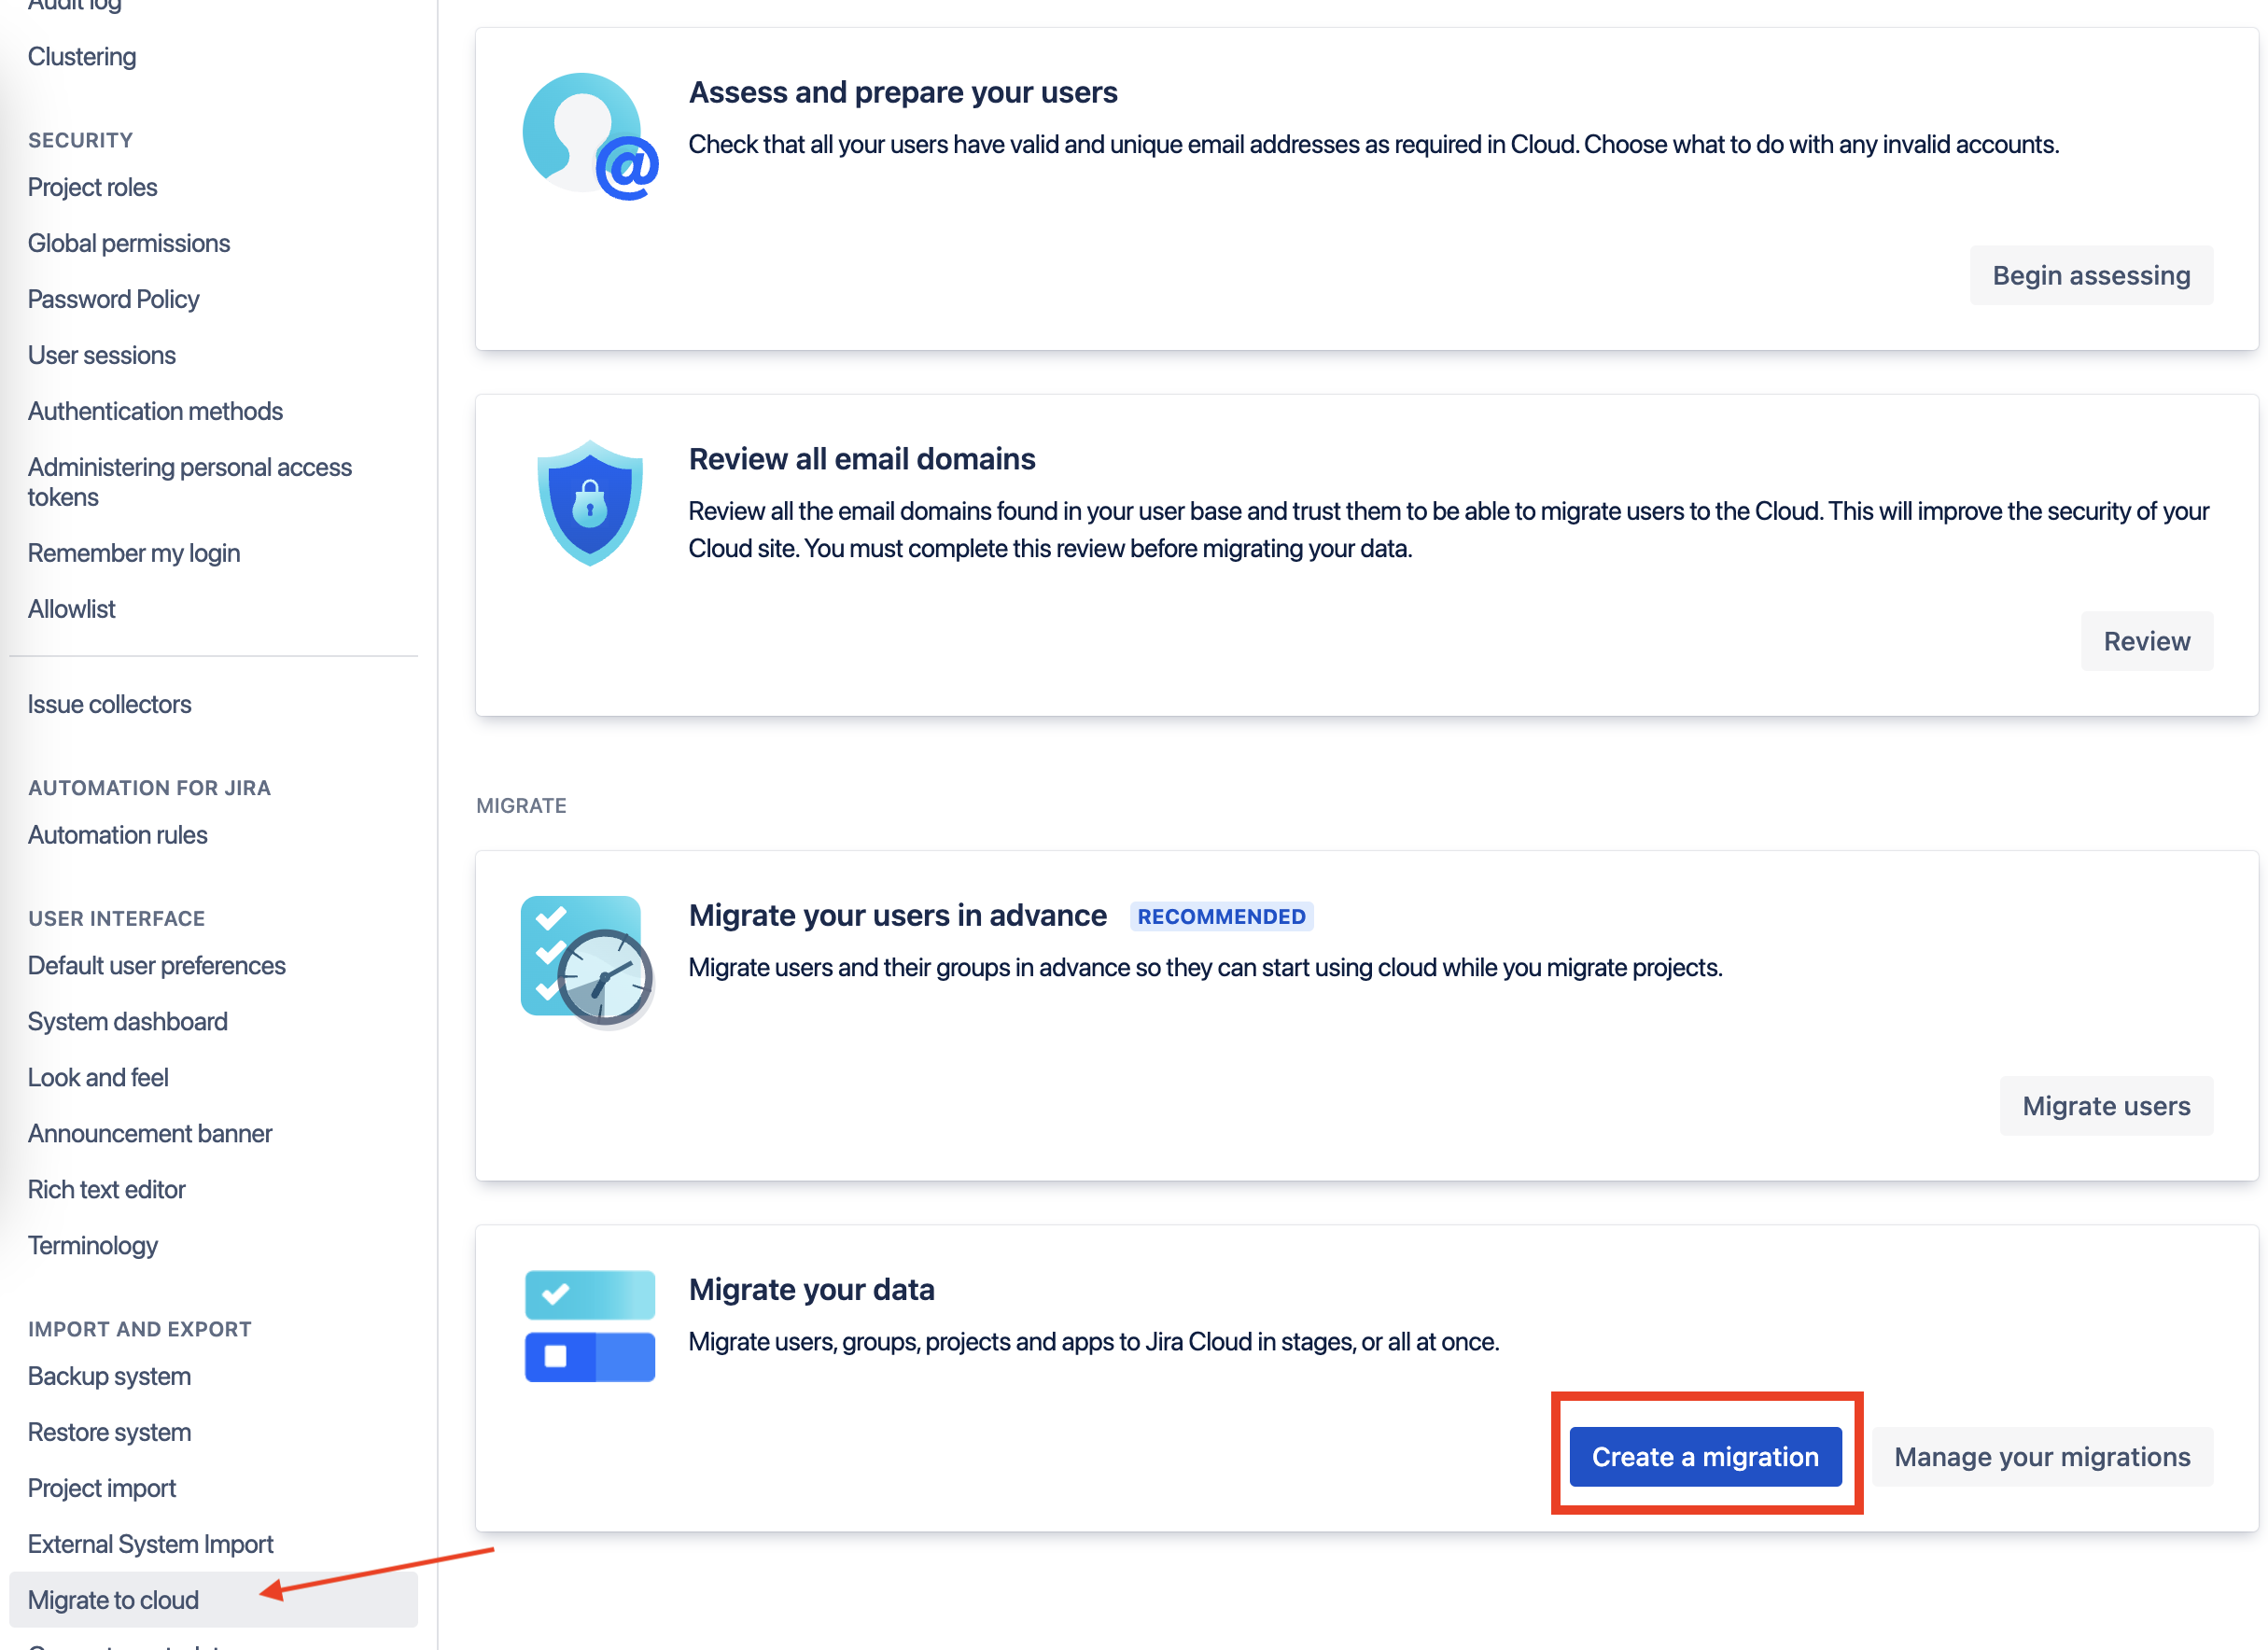
左側のパネルで [インポートとエクスポート] カテゴリを探して、[クラウドに移行] を選択します。Migration Assistant ホーム画面が表示されます。
Click on the Create a Migration button located in the Migrate your data section of the Migration Assistant home screen.
Create a Migration Screen- If this is the first Migration Plan, the Screen looks below
- If there are previously created migration plans, then the screen looks below

- If this is the first Migration Plan, the Screen looks below
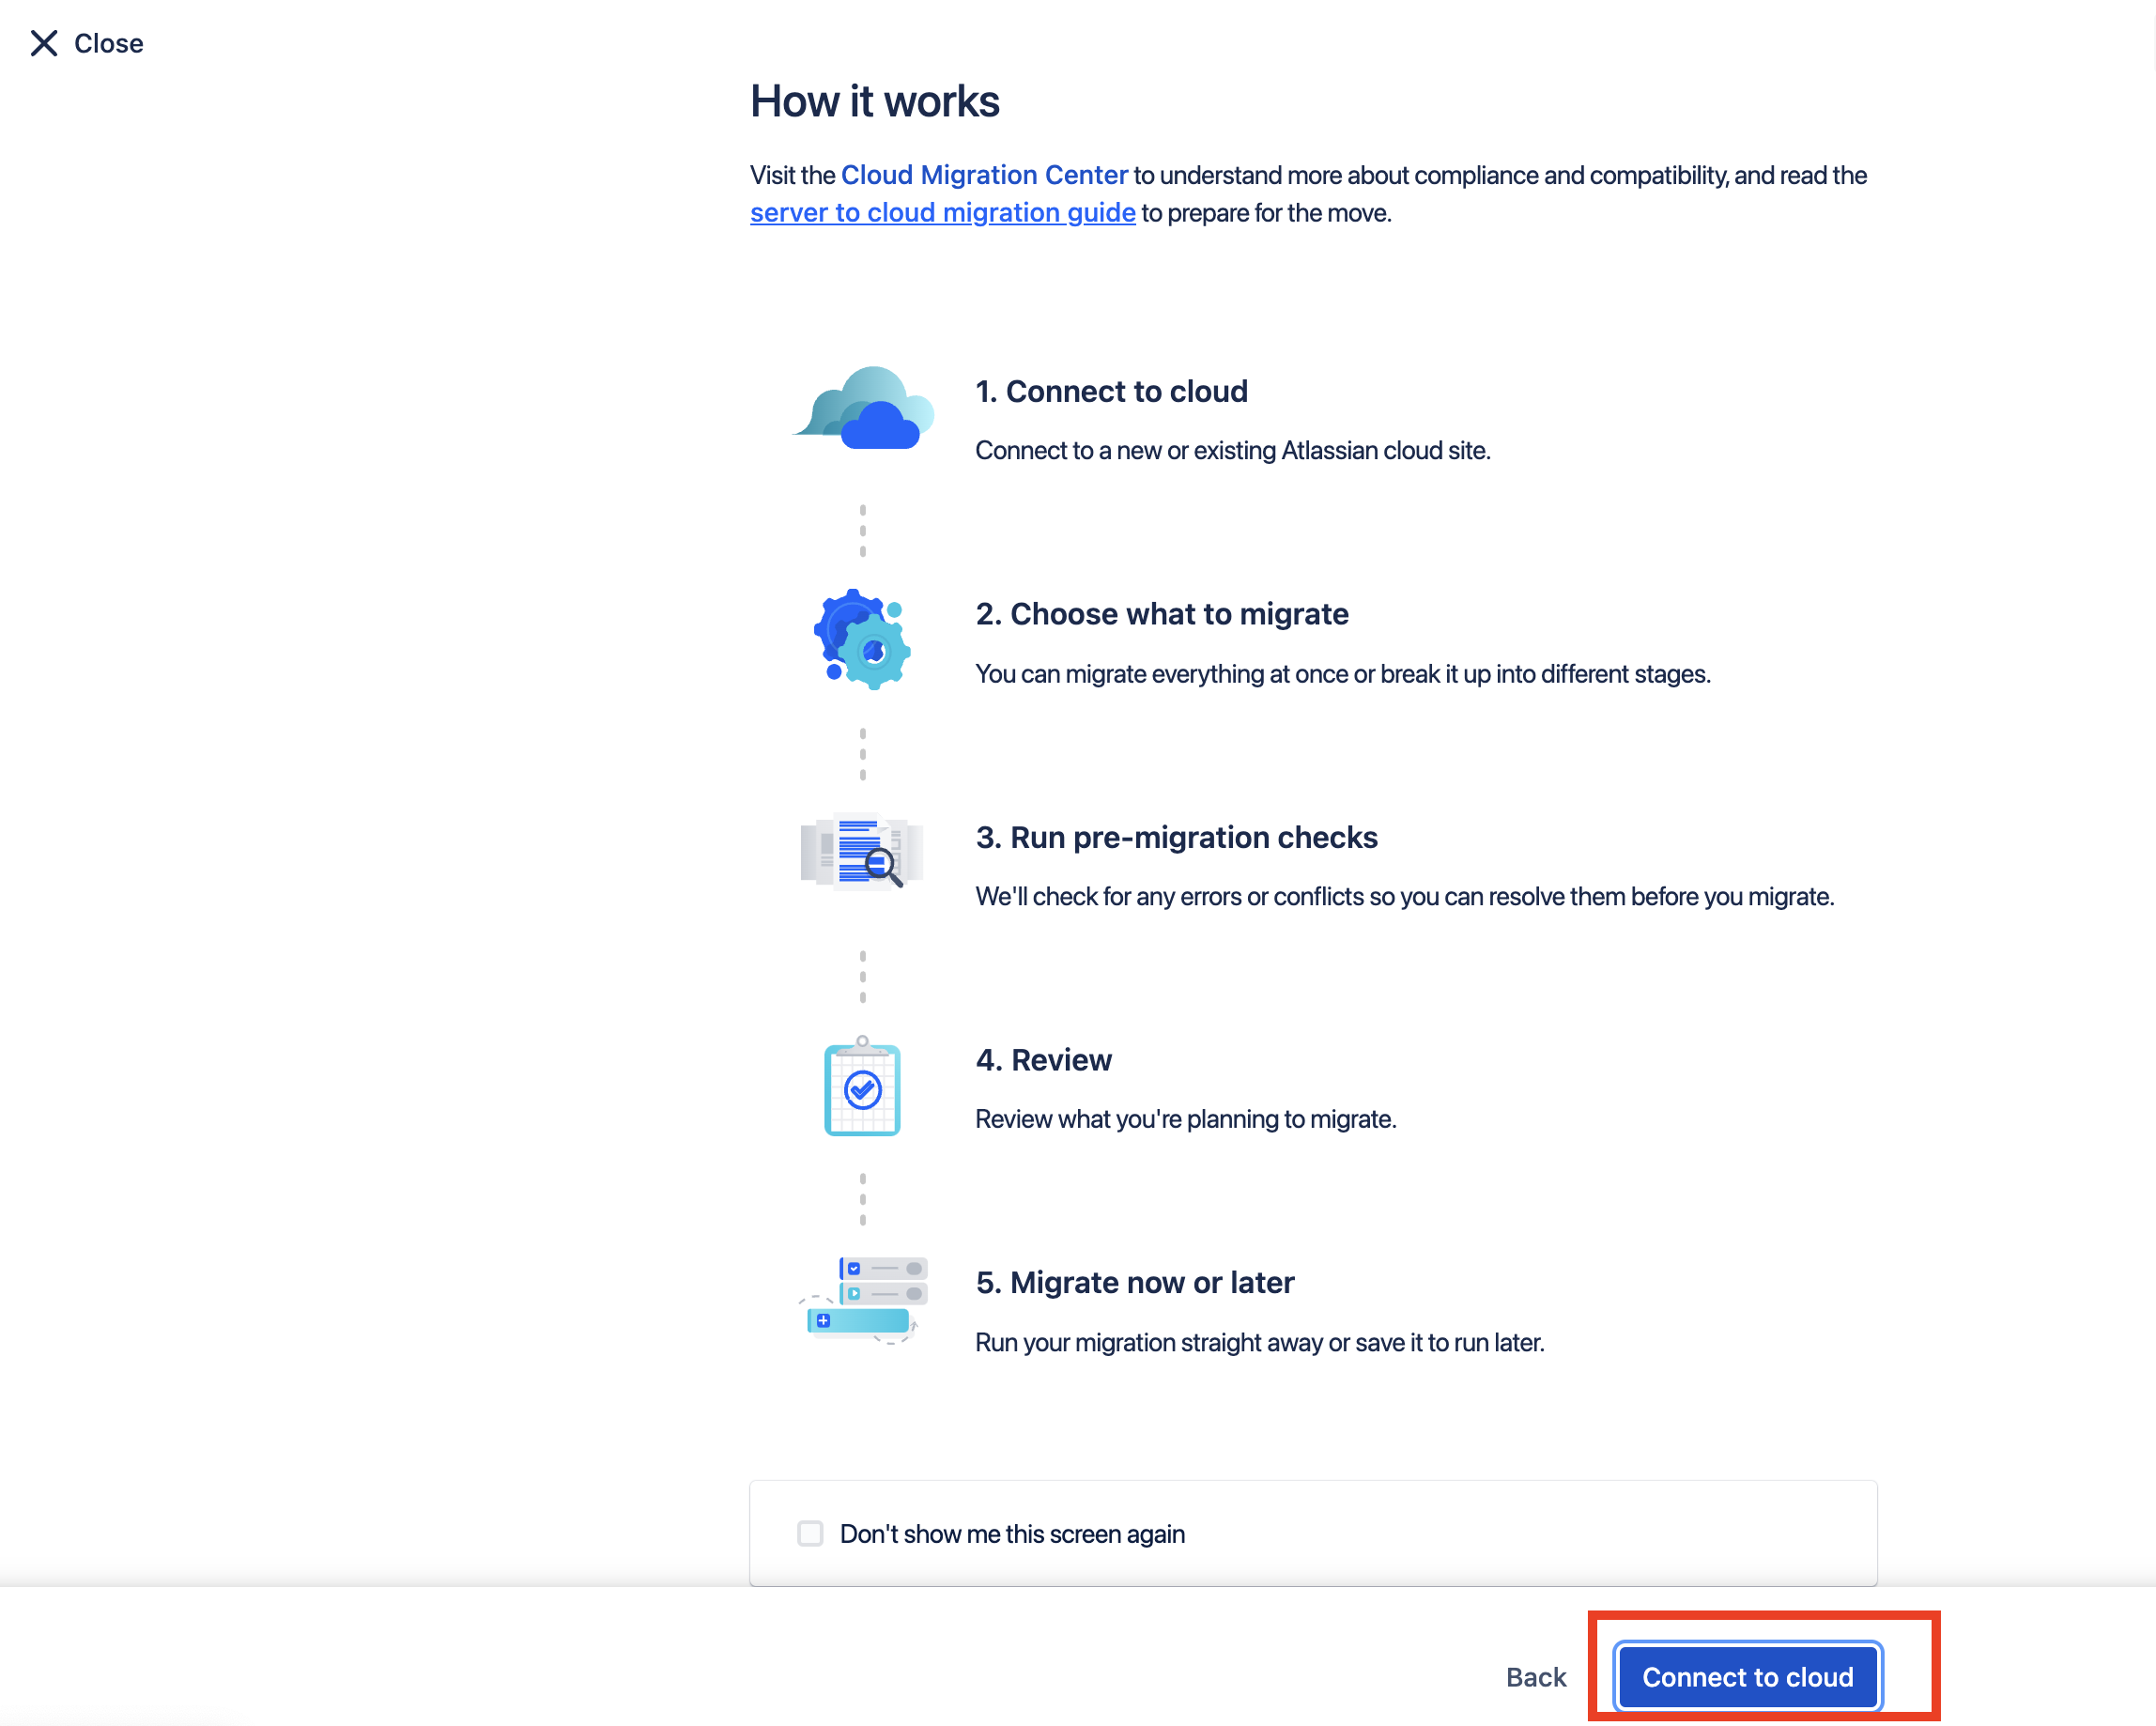
The next screen presented will read "How It Works". Click Connect to cloud in the action bar at the bottom.
Click Choose cloud site located below the Choose your destination cloud site* dropdown menu
On the Choose your Cloud Destination pop-up, click Continue.
異なるサイト/組織管理権限を持つユーザーなどの別のユーザーでログインしたい場合は次のようにします。
[Change account] をクリック
ログイン資格情報を再入力し、クラウド サイトの選択に進む
同じユーザーとして認証トークンを更新したい場合は次のようにします。
Choose a cloud site ([Migrate to dropdown menu] のすぐ下)
Check the Allow Atlassian to access migrations data* box
[Confirm] ボタンをクリックします。


Renew Token in Confluence Cloud Migration Assistant(CCMA)
- In Confluence Server or Data Center, go to Confluence Administration > General Configuration
- Look for the Atlassian Cloud category > select Migration Assistant
- Click on the Migrate your data section of the Migration Assistant home screen.
Click on the Create New Migration button from the next screen.
The next screen presented will read "How It Works". Click Connect to cloud in the action bar at the bottom.
Click Choose cloud site located below the Choose your destination cloud site* dropdown menu
[Choose your cloud destination] ポップアップで [Continue] をクリックします。
異なるサイト/組織管理権限を持つユーザーなどの別のユーザーでログインしたい場合は次のようにします。
[Change account] をクリック
Re-enter the login credentials and proceed to select the cloud site
同じユーザーとして認証トークンを更新したい場合は次のようにします。
Choose a cloud site ([Migrate to dropdown menu] のすぐ下)
Check the Allow Atlassian to access migrations data* box
[Confirm] ボタンをクリックします。

